Cornerstone Forms Overview
Learn how to build incredible forms and web apps including advanced filtering and powerful Actions.
Product
Cornerstone Forms is a powerful form and application framework built directly into the Cornerstone Builder. It allows you to design forms visually, apply advanced logic through its powerful Action Framework, and connect form submissions to dynamic systems across your site. Beyond traditional forms, Cornerstone Forms can power full web applications, filtered archives, faceted search experiences, and dynamic user interfaces — all while remaining completely native to the builder you already know.
Access
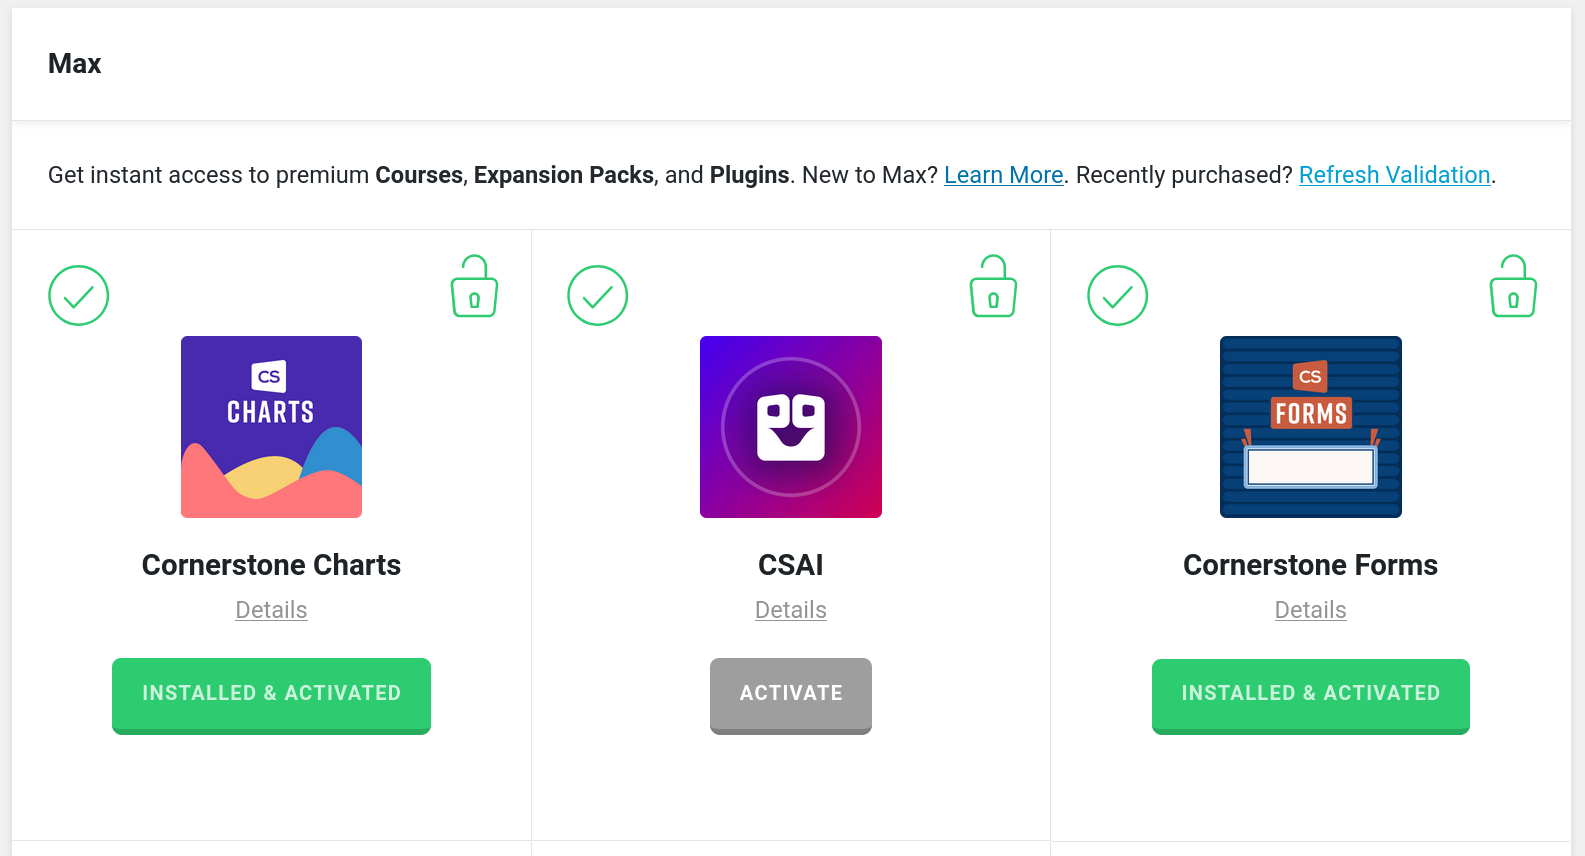
Once purchased, go to the Max section of the validation page and follow the prompts to install and activate. Note, you must be on Pro 6.8+, X 10.8+, and Cornerstone 7.8+.
Cornerstone Forms requires PHP 8.1+.
Creating your First Form
Start by inserting a Form Element onto your page. When added, it will automatically include a sample Input and an Email Action action to give you a working starting point. From there, you can build out your Form Fields. For a basic Contact Form you might add:
- A
Textinput for the user's name - An
Emailinput for their email address - A
Textareafor their message
Each Input has a Name Control — this is the key used to reference the submitted value in Actions and Dynamic Content (e.g. a name of email lets you use {{dc:form:data key="email"}} in an Email Notification Action).
Once your Inputs are in place, add a Submit Button. The Input Element or Button Element set to type Submit works well.
Finally, configure your Actions. Actions are what run when a form is successfully submitted. For example, the Email Action is perhaps the most common starting point as it lets you send the form data to any email address like a conventional contact form. Actions are added as Child Elements in the Actions Tab of the Form Element. See our Actions Guide to learn more.
Once the Actions have been set up, save the page and test your form. If something doesn't submit as expected, check that each Input has a unique Name and that your Action is configured correctly.
Learn how to build forms for your website.
Inputs
Inputs in Cornerstone Forms are the individual fields where users enter or select information when submitting a form. They are the points of interaction between the user and your form — the Elements that collect the data your form will process. This could be simple things like a name or email address, or more complex data used to power filtering systems, calculations, or full web applications.
See a list of our Inputs in our Form Elements doc.
Security
Your form security is going to be based on what your form is doing. For basic Contact Forms, you might want anybody included or to allow non logged-in users to submit a request. For administrative based forms, you will likely want to restrict this.
Captchas
The quickest way to deal with spam is to setup a Captcha. We offer Cloudflare Turnstile, Google reCAPTCHA, and HCaptcha as possible solutions. See our Captcha Guide.
Validating
Validating data is the quickest way to make sure you aren't sifting through bad entries. Validating can happen on the frontend to limit requests to your server, and validations will always happen on your server to prevent bad actors. See our Validation Guide.
Limiting Forms to Certain Users
Conrnerstone's Conditions offer the easiest way to limit forms to specific users. You can limit to specific users or even an entire role.
Conditions offer a wide variety of additional options as well. You could limit a Form to a specific time frame or even to a certain number of entries.
When you place any Condition on the Form Element, that Form will not show up, and it will not process unless the requirements are met.
Filters & Facets
Cornerstone Forms isn’t limited to traditional form processing — it also supports powerful filtering systems and faceted search. You can filter content in two primary ways:
- Filter the default WordPress Query using an Archive Layout.
- Filter any custom Query by connecting your Form Inputs to a Looper.
Both approaches allow you to build dynamic filtering interfaces directly inside the Cornerstone Builder. For most filtering scenarios, it is recommended to set your Form Action to GET. This allows filter values to be passed through the URL so they can be bookmarked, shared, and reloaded easily. You can also enable AJAX to update results instantly without refreshing the page, creating a faster and smoother user experience.
Below is an example of a WooCommerce Filtered Archive Template.

Filtering an Archive
Before setting up archive filters, make sure you understand how to create an Archive Layout. When using a Looper Consumer within an Archive Layout, the content being displayed is powered by the default WordPress Query. This approach is convenient because no additional Looper Providers are required however it does mean that your filters must follow the Query Parameters expected by WordPress.
Filtering by Post Category
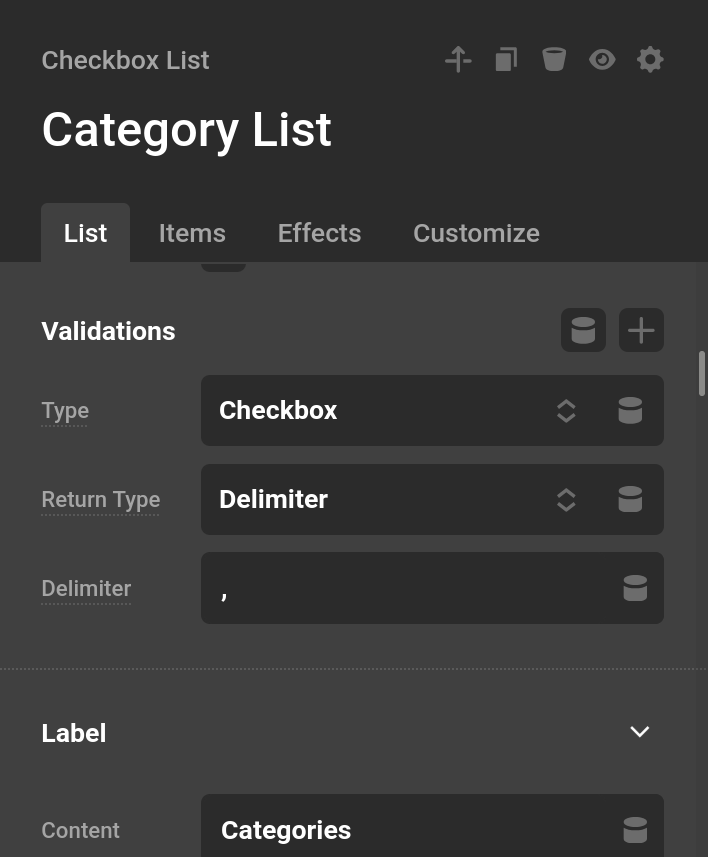
In this example, we will filter posts by category using a Checkbox List Input. Because we want users to select multiple categories, the Element will be configured in checkbox mode. The WordPress Query Parameter for filtering categories is: category_name
WordPress expects multiple category values to be separated by a comma (,). To match this behavior, set the Return Type of the Checkbox List Element to Delimiter. Below is an example of the configured Checkbox List Element.
Populating the Category Options
Next, we need to generate the list of categories dynamically.
Inside the Checkbox List, add an Option Child Element and configure it with a Looper Provider using All Terms. We can limit the Taxonomy to Categories then enable the Looper Consumer on the same Element so each Term becomes a selectable option.
Within the Option Element:
- Set the Value Control to slug
- Set the Label Control to title
This will automatically generate a checkbox list of all available categories, allowing users to filter the archive.
Filtering a Custom Looper
Filtering a custom Looper requires a slightly more manual setup, but it provides much greater flexibility. The Form and Input configuration remains the same, however you will need to reference your Form Inputs inside the Looper Provider using Dynamic Content.
Under Dynamic Content → Form → Data, you can insert the values from your Form Inputs directly into the Query used by your Looper.
Learn how to add filtering and faceting to your website.
Managed Parameters
You can utilize a number of managed parameter types.
Input Types
form-input-type will give you a list of Input types to be used by the Input Element.
{
  "type": {
    "type": "form-input-type"
  }
}
Autocomplete Types
form-autocomplete can get you a list of Autocomplete types to be utilized by a number of different Input types.
{
  "autocomplete": {
    "type": "form-autocomplete",
    "initial": "email"
  }
}
Show Conditions
form-input-conditions gives you a condition builder pre-wired to read from other inputs in the same form. Use it to show or hide an element based on live input values. See Frontend Conditions for details on how the logic is evaluated.
{
  "inputConditions": {
    "type": "form-input-conditions"
  }
}
Calculations with Twig
Form data pairs naturally with Twig when you need to perform math on user-submitted values. While Dynamic Content tokens like {{dc:form:data key="price"}} are great for displaying raw values, they can't do arithmetic — that's where Twig comes in.
In Twig, form data is accessed using dot syntax instead of the colon-separated DC syntax:
{# Dynamic Content — display only, no math #}
{{dc:form:data key="quantity"}}

{# Twig — dot syntax, supports calculations #}
{{ form.data.quantity }}
Because a user may leave a field blank, always apply the | default(0) filter before using a value in a calculation. Without it, an empty field will produce an error instead of treating the value as zero:
{# Multiply quantity × price, defaulting empty fields to 0 #}
{{ (form.data.quantity | default(0)) * (form.data.price | default(0)) }}

{# Running total with a fixed tax rate #}
{{ (form.data.subtotal | default(0)) * 1.08 }}

{# Sum two number inputs #}
{{ (form.data.width | default(0)) + (form.data.height | default(0)) }}
These expressions can be used anywhere Twig is active on the page — inside Text Elements, Action fields, or conditional logic. See the Twig doc for the full range of filters, functions, and operators available.
Summary
Cornerstone Forms brings form building, automation, and dynamic interaction together inside the Cornerstone Builder. Whether you're collecting submissions, powering filters and facets, or building complete web applications with the Action Framework, everything works together as part of one cohesive system.
- Form Actions — Manage what happens after submission
- Forms Elements — Learn about the library of Form Elements
- Form Validations — Discover how you can validate submitted data
- Form Conditions — See how to use conditions when designing forms
- Dynamic Content — Leverage the power of dynamic content in forms
- Developer Guide — Extend Cornerstone Forms with our advanced API
See something inaccurate? Let us know