Conditions and Assignments
In this article, we're going to discuss how to leverage conditional logic and assignments in Cornerstone to build personalized experiences.
The Conditions Control allows users to output content based on certain criteria being met. For example:
- Displaying different content for logged in vs logged out users.
- Displaying content only if it exists. For instance, if a post has a featured image then output that asset; otherwise, do not output anything. This allows us to avoid outputting empty Elements that appear “broken.”
- Displaying content within a certain timeframe. This can be useful if you have things you need to show leading up to an event, which you then want to have swapped out with something else once that event has arrived.
- Having a global header with an Element inside it that only shows on certain pages (for instance, maybe a Post Navigation Element on individual blog posts). Using this method, you would not have to design two nearly identical headers and assign them to different contexts. Instead, you could simply build the one header and include the conditional content inside it and have that header work everywhere.
These are just a handful of ideas to explore, but there are many more possibilities and permutations available.
Getting Started
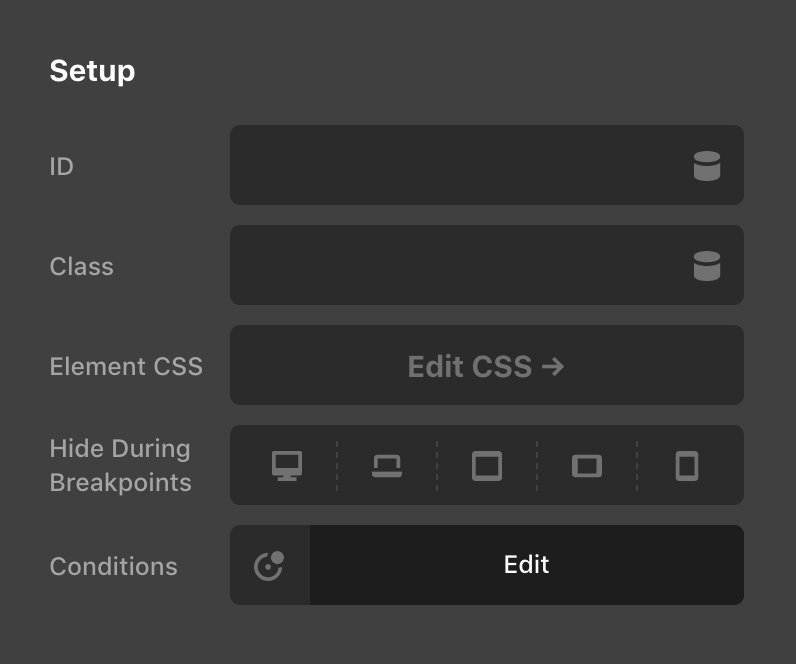
The Conditions Control for an individual Element can be found under the Customize control section in the Inspector. Once there, you will find it at the end of the Setup control group:
Setting a Basic Condition
To begin working on your assignment conditions, click on the Conditions control to reveal the following popup:

Click on Add Condition Group to introduce your first conditional statement. The default value when adding your first statement might be different depending on the Element you are inspecting or the Builder you are in. Let's say you're working on some content for your site and you only want it to show up on your blog posts. One way to accomplish this would be selecting the dropdown and choosing “Post Type” from it. Doing so will reveal two more inputs to the right:
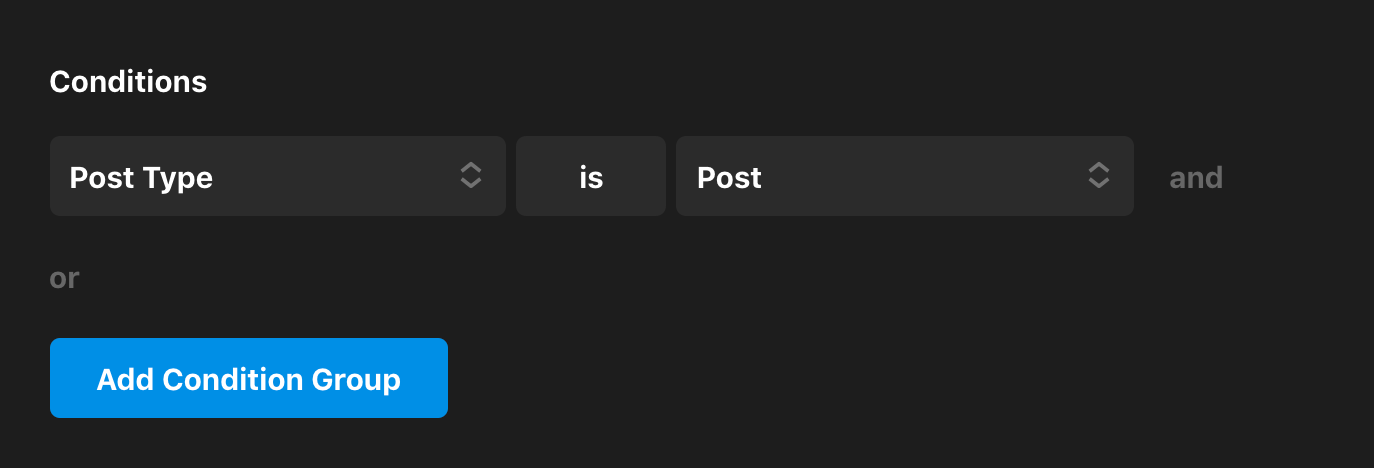
The control immediately proceeding the first dropdown is a toggle that allows you to switch your statement between “is” / “is not.” The last dropdown is contextual based on your first dropdown selection. Since we have selected “Post Type” for that input, this dropdown will be populated with all relevant post types in your installation (e.g. Post, Page, Product, Portfolio Item, et cetera). Since we want this to show up for our blog posts, you would select “Post” to get the final conditional statement seen above.
Using “and” Statements
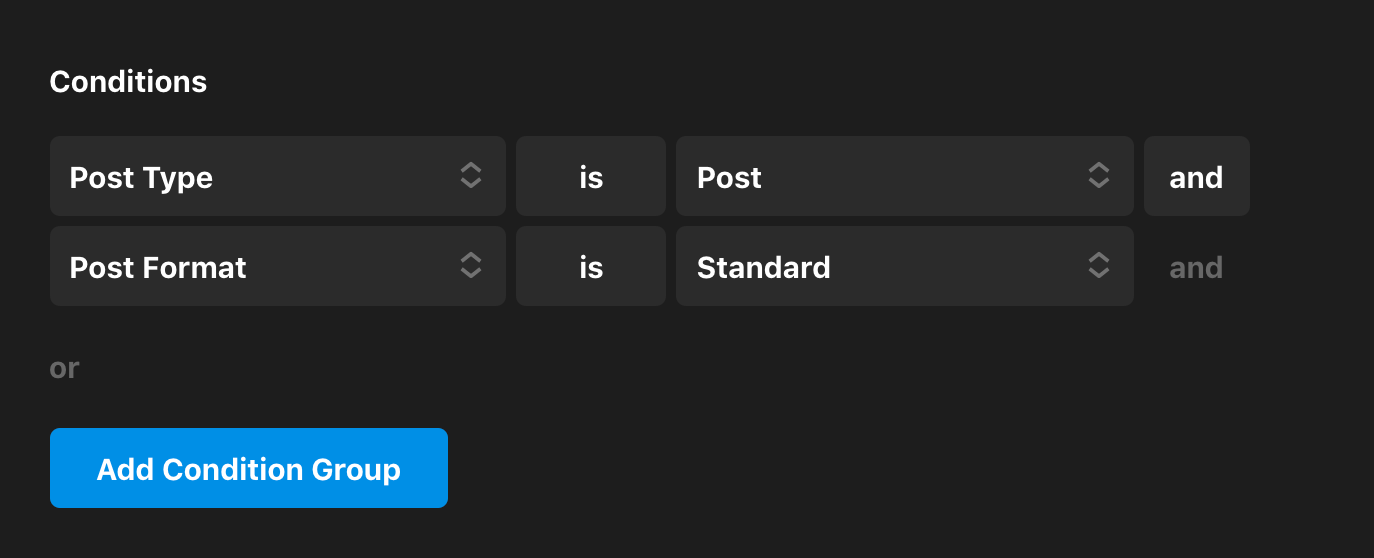
Now let's say that you want this content to show up on only blog posts that are part of the Standard Post Format. We could accomplish this by adding an “and” statement to our current condition. To do this you would click on the “and” button, which will reveal a new line for you to add your new statement:
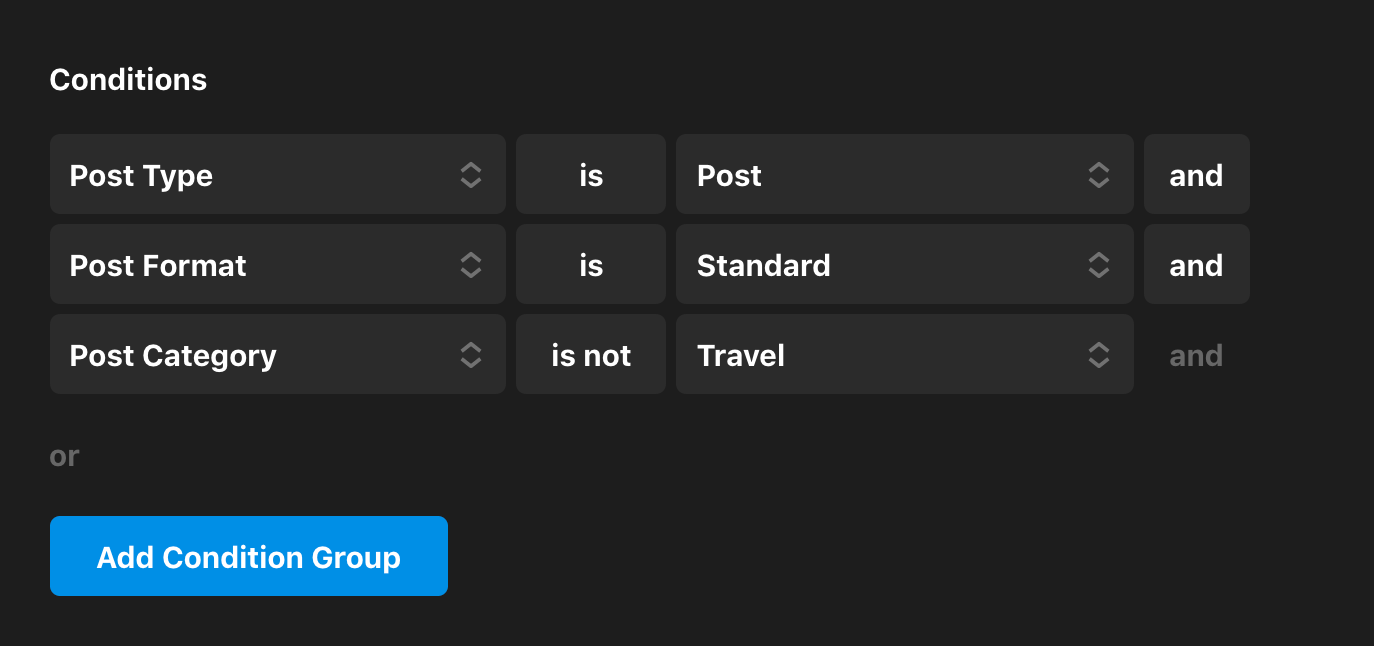
You can take this as far as is necessary depending on your needs. For example, say that you wanted to exclude this content from showing in a Standard Post that has a Category of “Travel.” You could accomplish this by adding another “and” statement like so:
Removing Statements
To remove a particular statement from your condition, hover over that line to reveal an ✕ to the right:

Clicking on the ✕ will remove the statement from your condition. Keep in mind that there is no confirmation while doing this, so your statement will be removed immediately.
Using “or” Statements
There may be times where you discover that what you need to accomplish your desired output is an “or” statement. To introduce an “or” statement into your condition, simply click the Add Condition Group button again at the bottom of the popup.
For instance, you might have a situation where you want your content to show up on blog posts, but only if the currently logged in user is a “Subscriber” or a “Customer.” To accomplish that you could do something like the following:
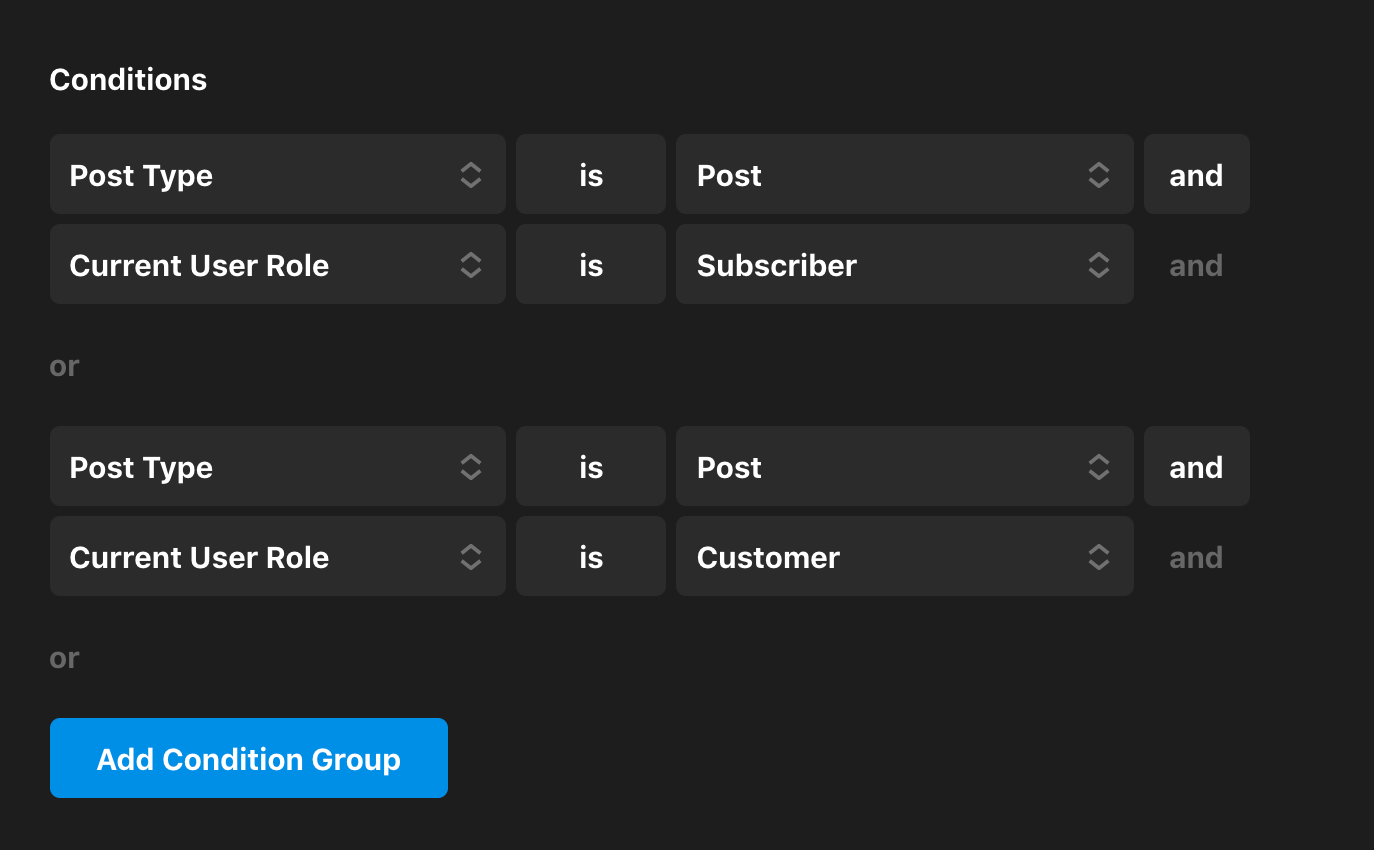
Just like “and” statements, you can add as many “or” statements as are necessary. That being said, it is highly encouraged that you keep your conditions as simple as possible due the fact that stacking complex statements together might make it difficult to debug things if a problem should arise.
Using Expressions
As of Pro v4.1.0, X v8.1.0, and Cornerstone v5.1.0, Element Conditions now feature Expressions, which are centered around performing basic operations on WordPress meta values, allowing users to craft completely custom statements to fit your build's unique requirements. Check out this video on Element Condition Expressions.
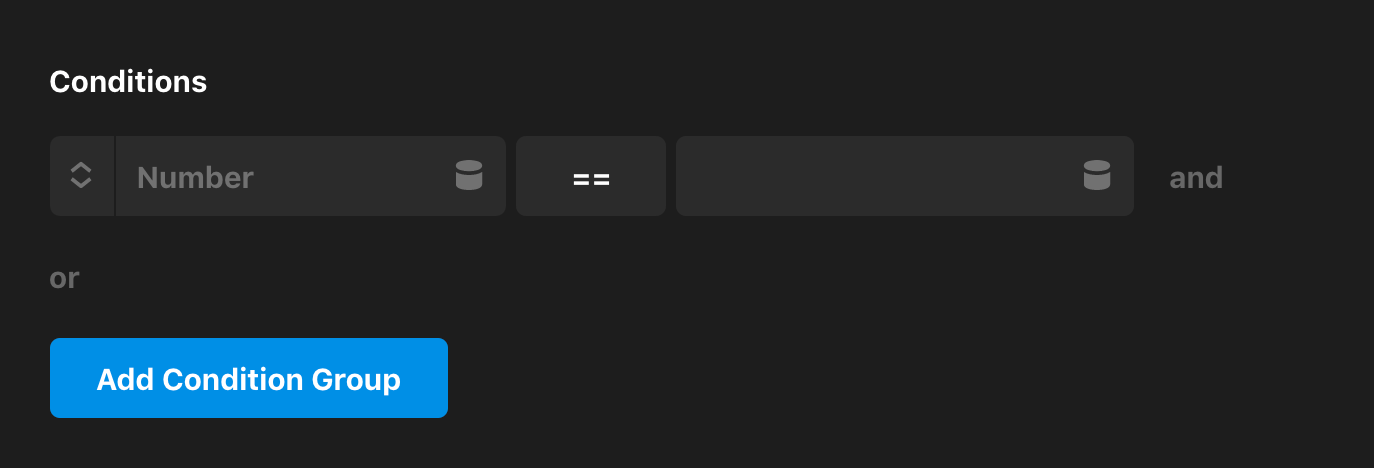
For example, imagine that you wanted to apply a condition to an Element so that it was only output if the Comment Count on your Post was greater than 10. To do this, you would select the Element you wish to apply the condition to and go to Customize → Conditions → Number, which would reveal the following inputs:
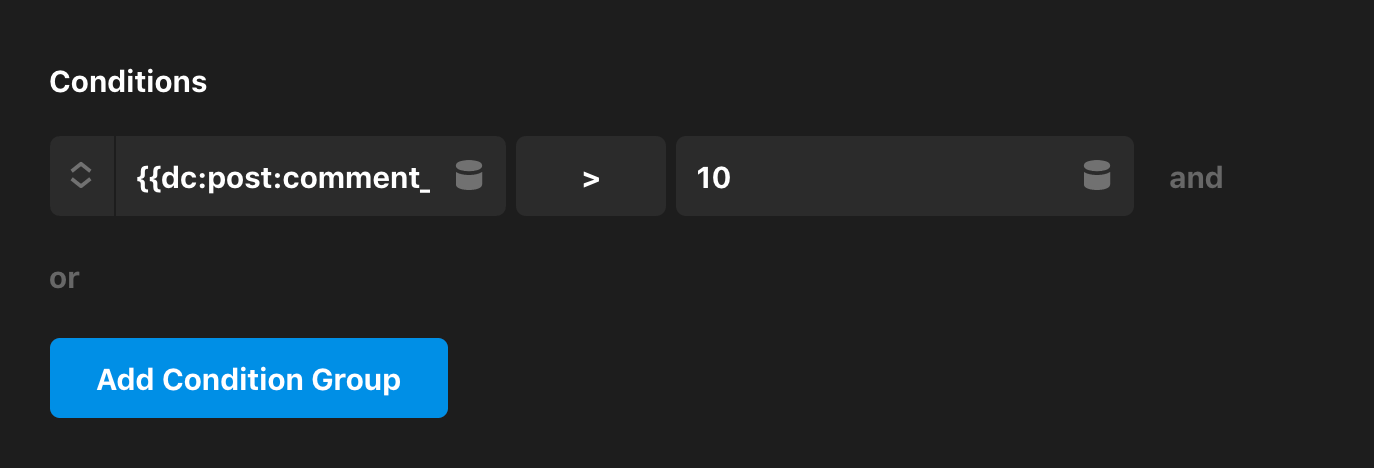
You see that we have two inputs on either side of an operator in the middle, which can be cycled through by clicking on it just like our other more simple expressions. Either input can house Dynamic Content or static input, so to achieve the example we're going after, you might do something like the following with {{dc:post:comment_count}} in the first input, the > operator in the middle, and 10 for the final input:
As mentioned previously, there are three types of data that conditional expressions can work on, each with their own unique operators:
- String
is: returnstrueif a strict match is detected between the two values (e.g. “This matches.” / “This matches.”)is not: returnstrueif a strict match is not detected between the two values (e.g. “Apples” / “Oranges”)in: returnstrueif the value of the first input appears as a substring of the second (e.g. “howdy” / “Well howdy, folks!”)not in: returnstrueif the value of the first input does not appear as a substring of the second (e.g. “running” / “biking, hiking, swimming”)
- Number
==: returnstrueif the numeric value of both inputs is exactly the same.!=: returnstrueif the numeric value of both inputs is not the same.>: returnstrueif the numeric value of the first input is greater than the second.>=: returnstrueif the numeric value of the first input is greater than or equal to the second.<: returnstrueif the numeric value of the first input is lesser than the second.<=: returnstrueif the numeric value of the first input is lesser than or equal to the second.
- Before
before: returnstrueif the datetime of the first input is before the datetime of the second input.after: returnstrueif the datetime of the first input is after the datetime of the second input.
Assigning Headers, Footers, and Layouts
There are certain parts of the site building process—namely the Header, Footer, and Layout Builders—that will require you to assign a context, indicating where they should be output on your site. To do this you will need to use the Assignment Control, which leverages the Conditions Control we have been talking about throughout this article in conjunction with a Priority input.
The Assignment Control can be found under the relevant contextual Settings tab for any particular builder. Below is a screenshot taken from the Layout Builder:
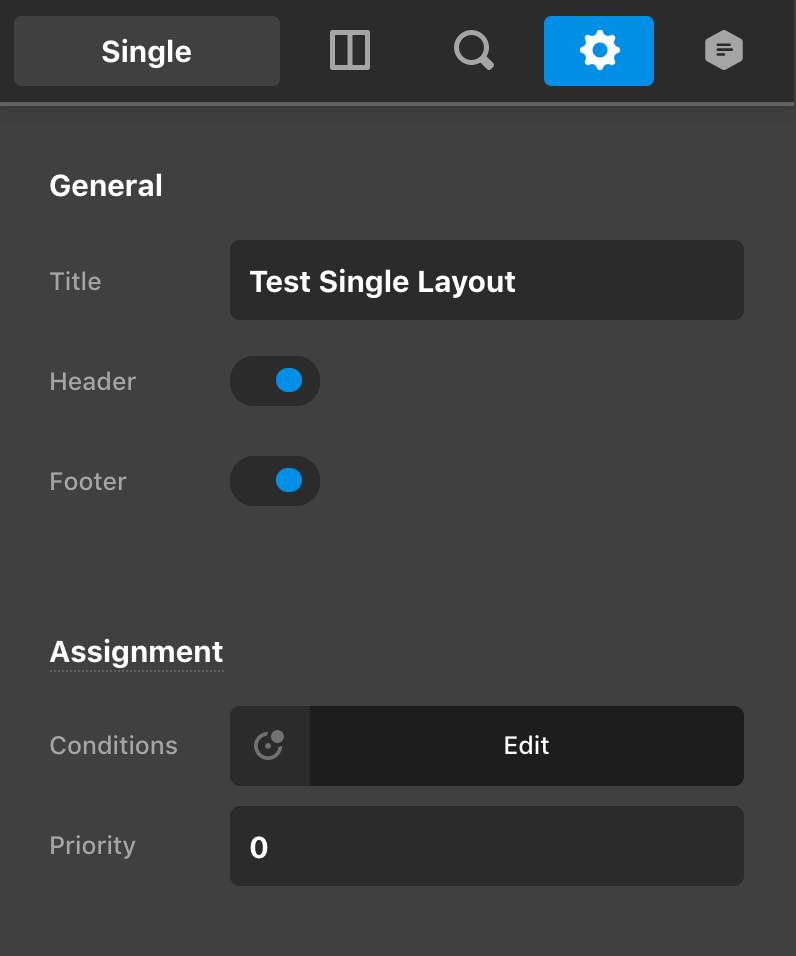
There are two parts to be aware of when assigning anything: the Conditions and Priority. As we have discussed in this article so far, the Condition Control is where you will specify the logic for how something should be output. The Priority comes into play if you have two assets that might potentially overlap in some instances, allowing you to specify which should take precedent over the other. In these cases, the layout with the lowest priority will be used.
Example : Changing Layouts Based on URL Path
@since Pro 6.3.0
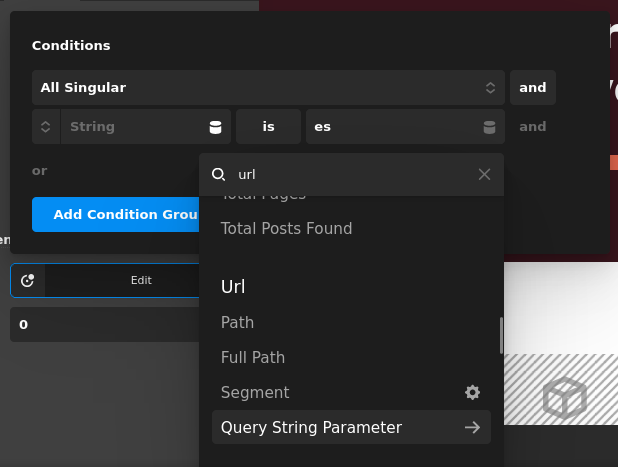
Using what we know now, let's start creating some more advanced layouts. Using Layout Expressions and Dynamic Content, let's change which layout we will use based on a GET argument in the URL. In the Dynamic Content UI you can select a number of different URL based values. We will use {{dc:url:param key="lang"}} which means whatever the parameter key is for lang it will use that for a value. EX ?lang=es, the return value would be es. In the UI this would look something similar to this. Notice the use of and because you might want to use different layout for different post types.
If you had multiple layouts assigned and are not seeing this layout on the frontend, simply lower the priority for this layout and it will take precedent over the other layout. Then when the URL path does not meet the criteria (EX ?lang=jp) then another layout will take over. We are using GET parameters here, but using {{dc:url:path}} and even {{dc:url:full_path}} you could filter based on a directory or existence of a word. What you can't do is use # URL values. This is only sent through the browsers and servers do not see this data in a URL.
Further Reading
Learn more about how to use Element Conditions and Assignments in creative ways with these additional resources:
- How to use Element Conditions on taxable Products in WooCommerce / Forum ↗
See something inaccurate? Let us know