WPML
In this article, we're going to explain how to translate your content using WPML.
WPML is the most popular multilingual plugin for WordPress, and is compatible with Cornerstone, Pro, and X. The following guide covers how to install WPML on your website and translate content into new languages.
How to Install WPML Plugin
To install the WPML plugin, you first need to buy a WPML plan. Once purchased, you can install WPML by downloading its installer file from your WPML account and uploading it to your WordPress website.
Once the installation is complete, go to WPML → Setup to configure WPML on your website. This includes choosing which languages to translate into, selecting a URL format for your secondary languages, and providing context about your website.
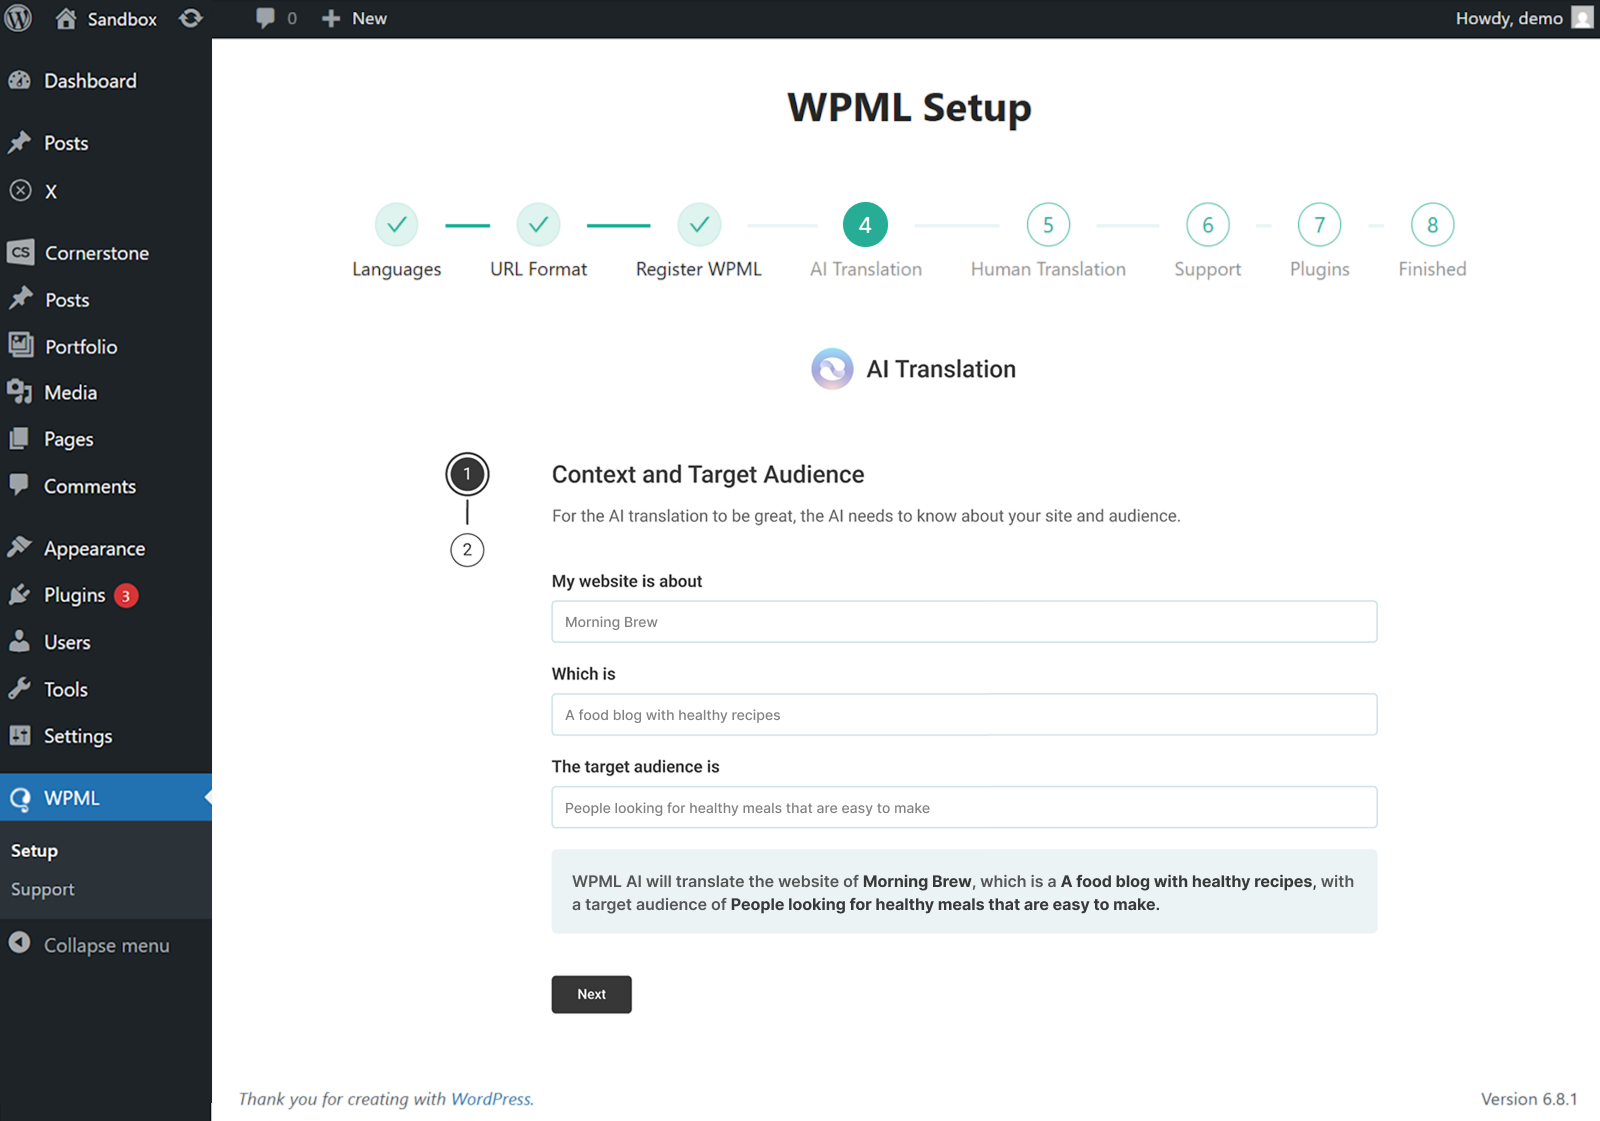
Using the context that you provide, WPML's most accurate AI translator – Private Translation Cloud (PTC) will create translations that perfectly fit your target audience and industry.
PTC is like your own team of expert translators with a deep understanding of your content and niche. It’s WPML’s proprietary AI technology, and even includes a translation quality guarantee: If you’re not satisfied with PTC’s translations, you’ll get a full refund.
Once you complete the setup wizard, you’re ready to start translating your website.
Translating Content With WPML
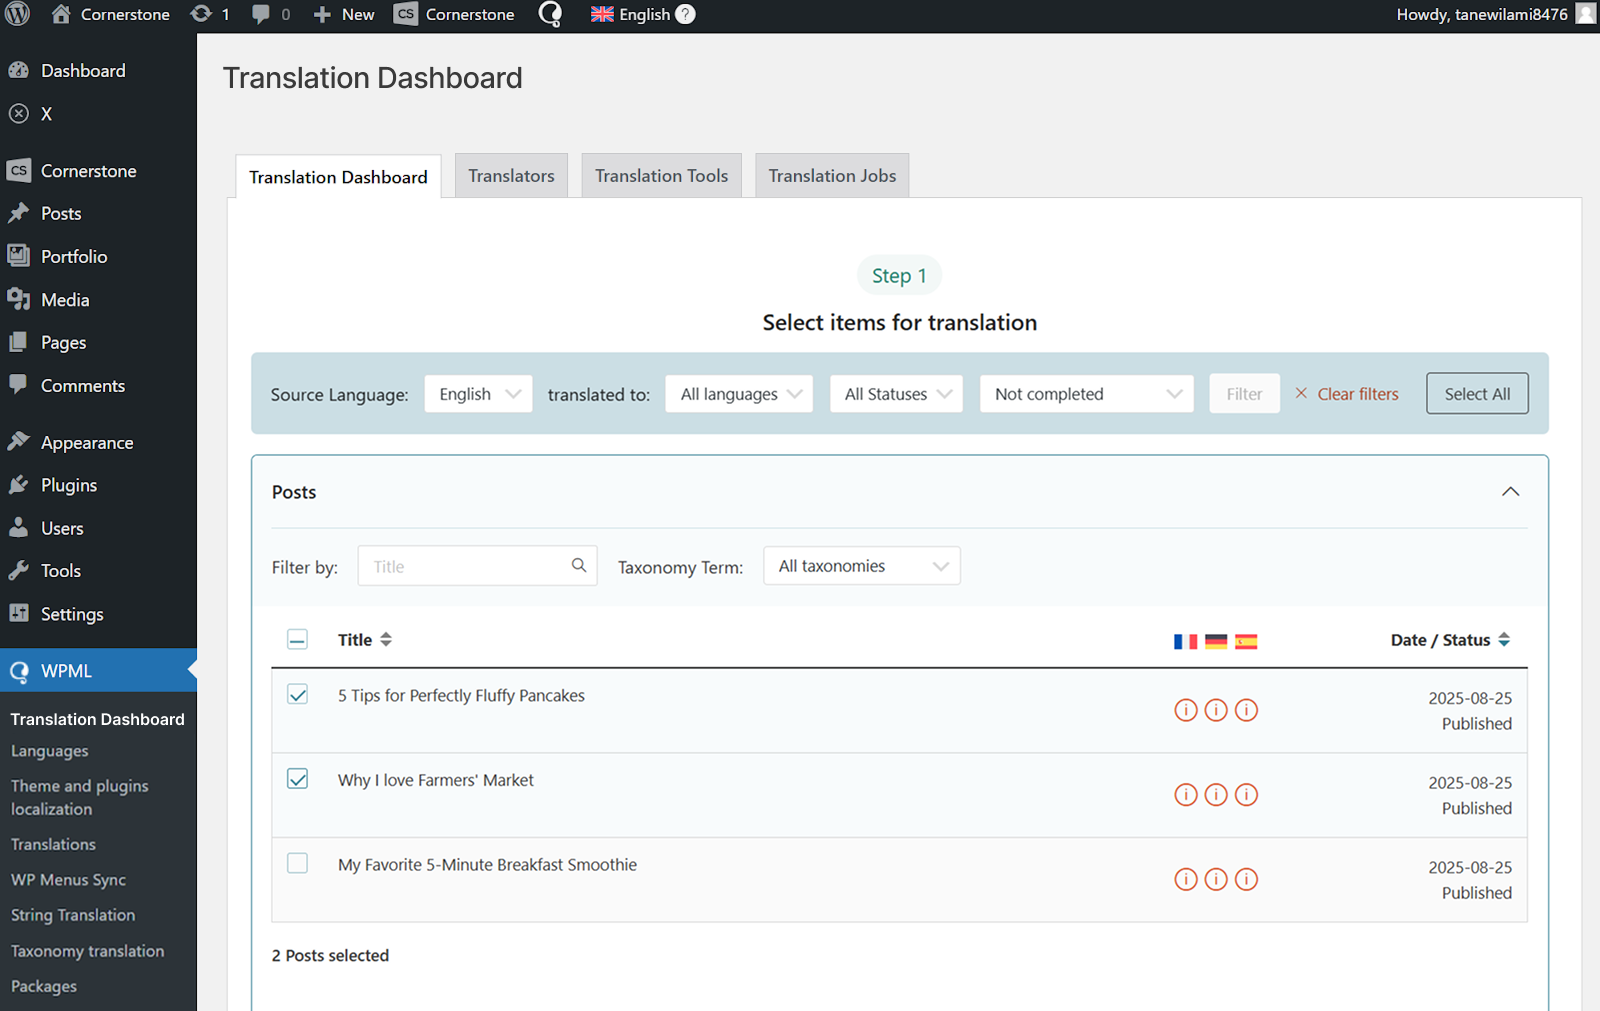
To translate content with WPML, start by going to WPML → Translation Dashboard and selecting the content you want to translate.
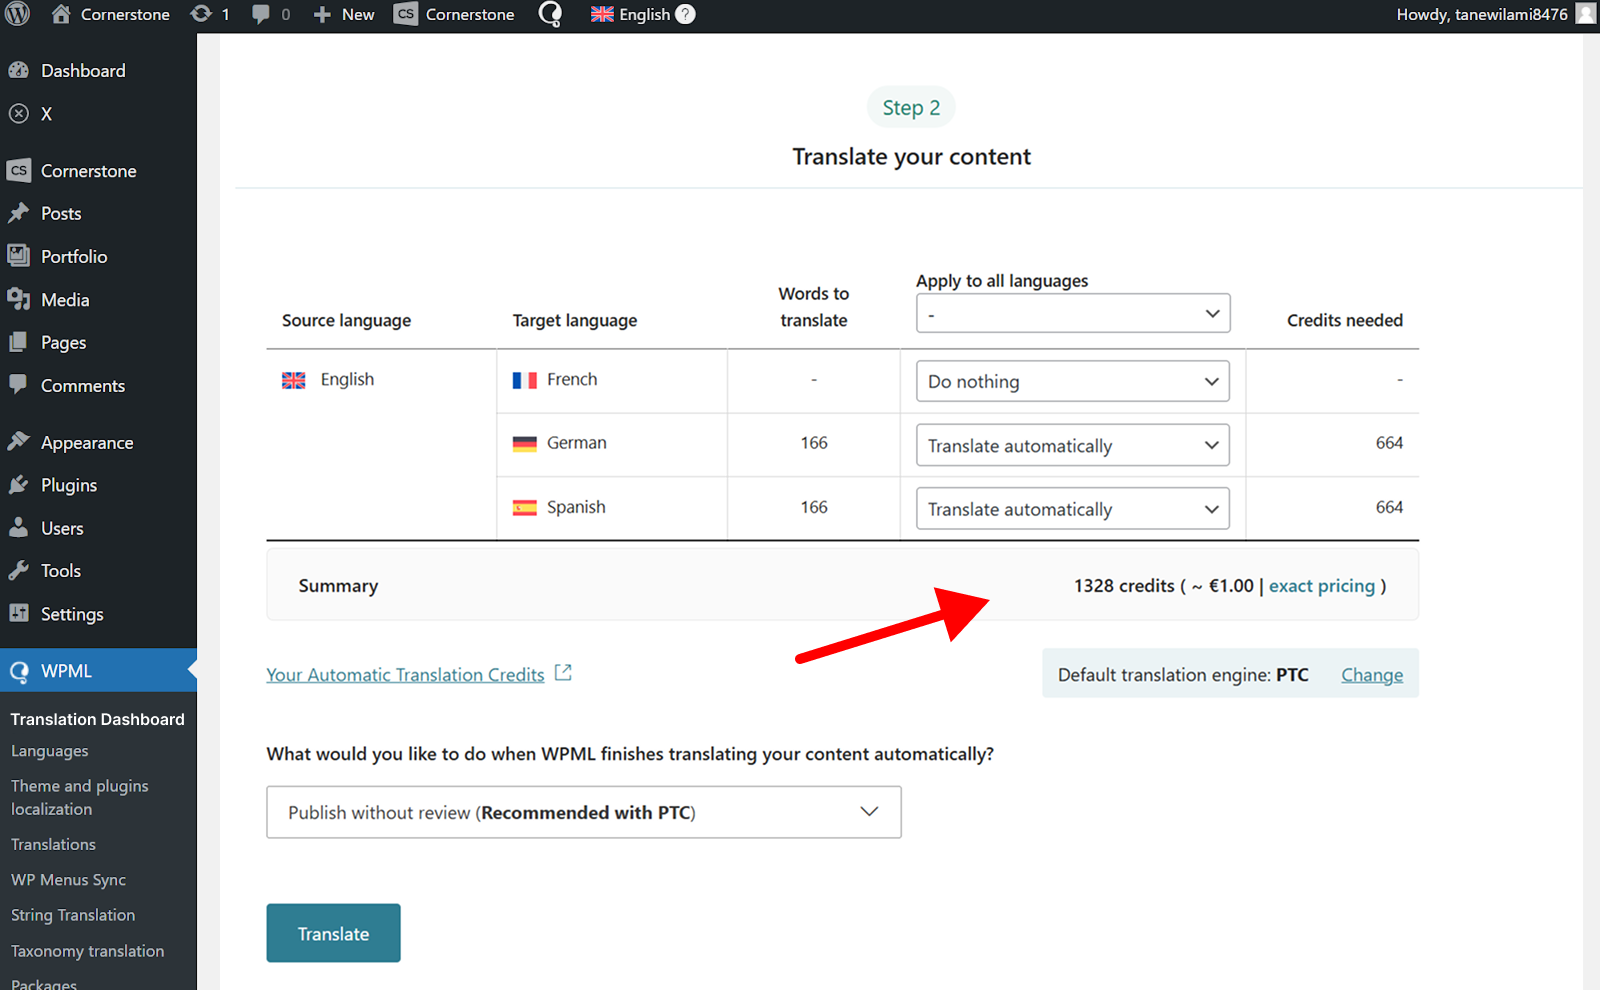
Next, choose Translate automatically as your translation method, and click Translate. If you look under the table, WPML also shows you how much translating your content costs.
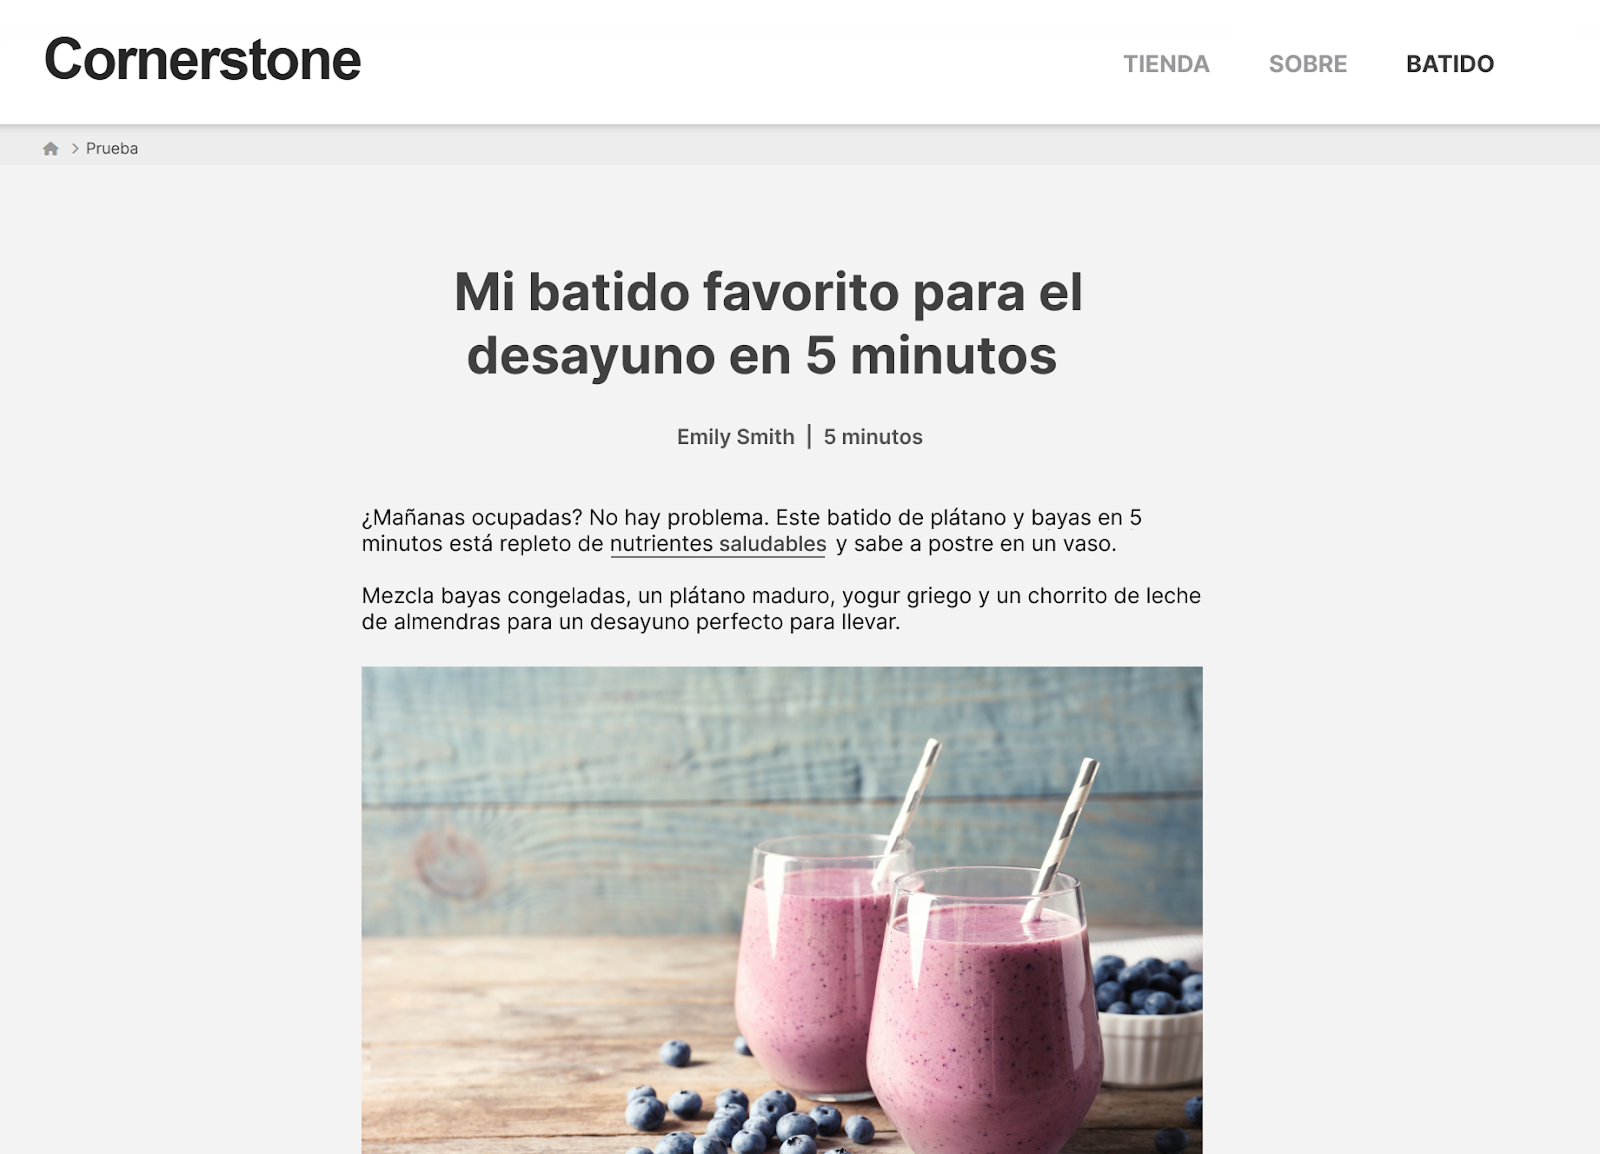
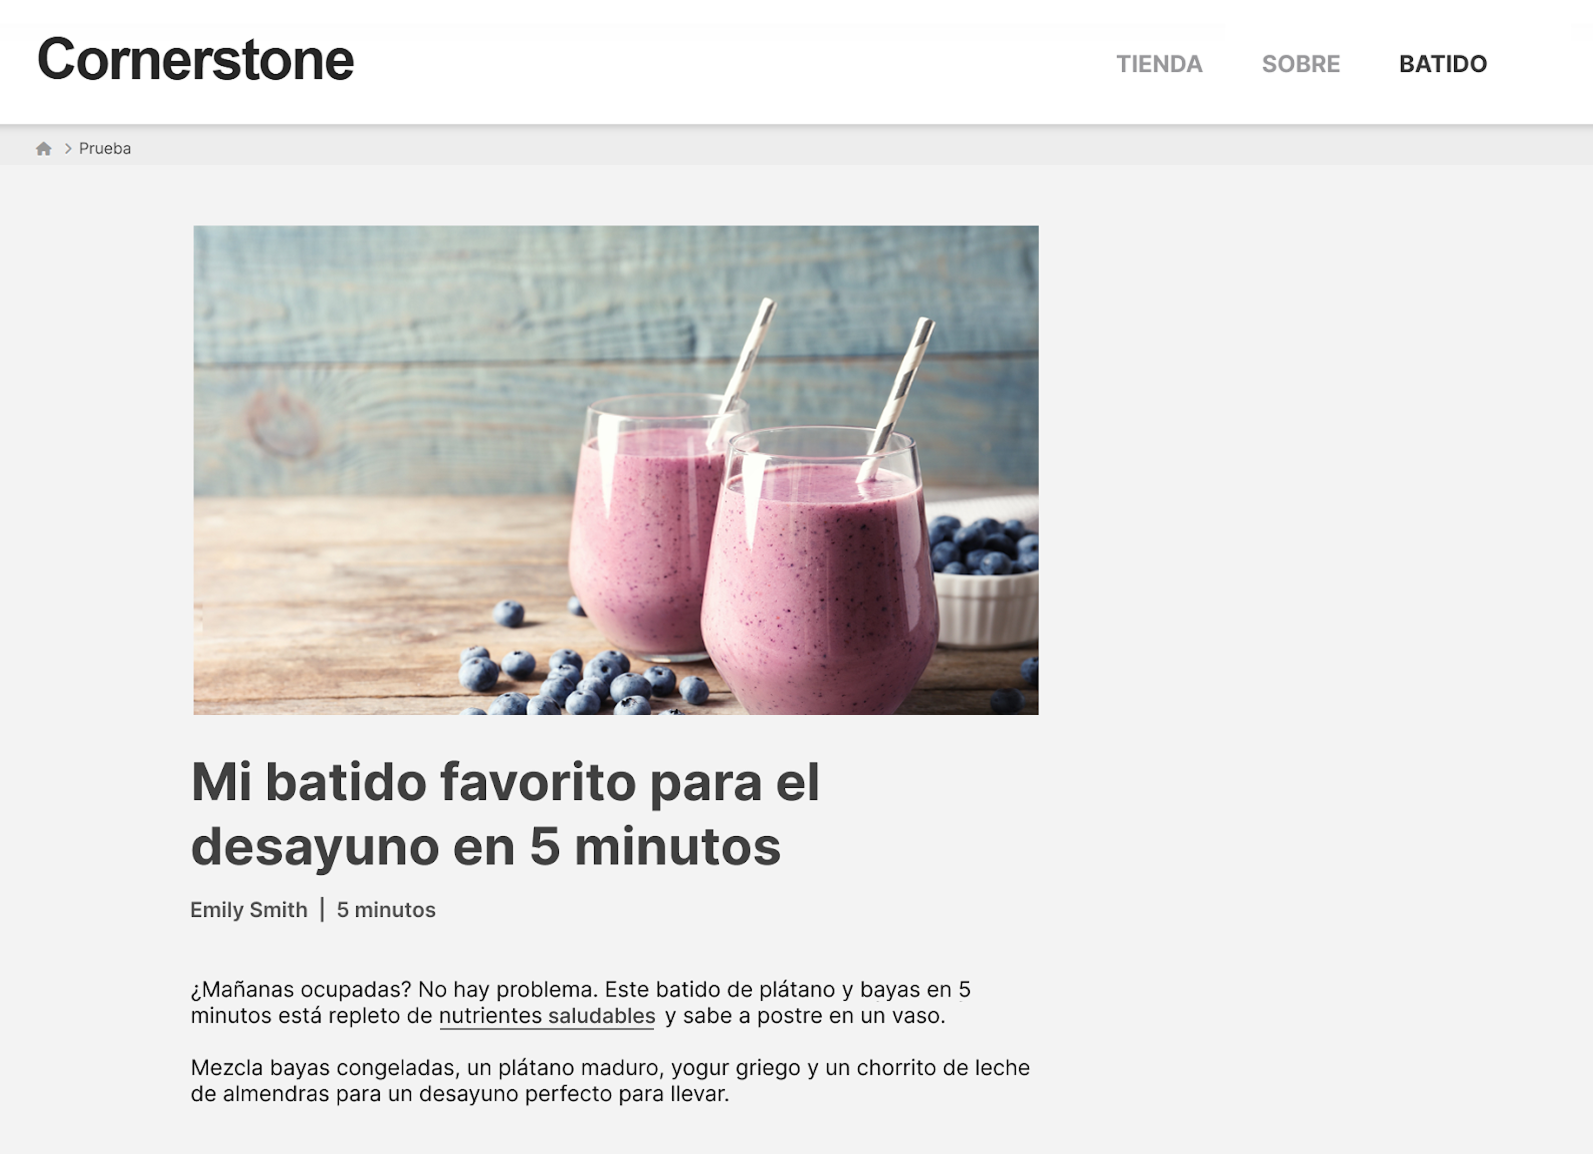
When done, translations will appear on your website when switching languages.
If at any moment you want to edit your AI translations, you can always make changes using the Advanced Translation Editor.
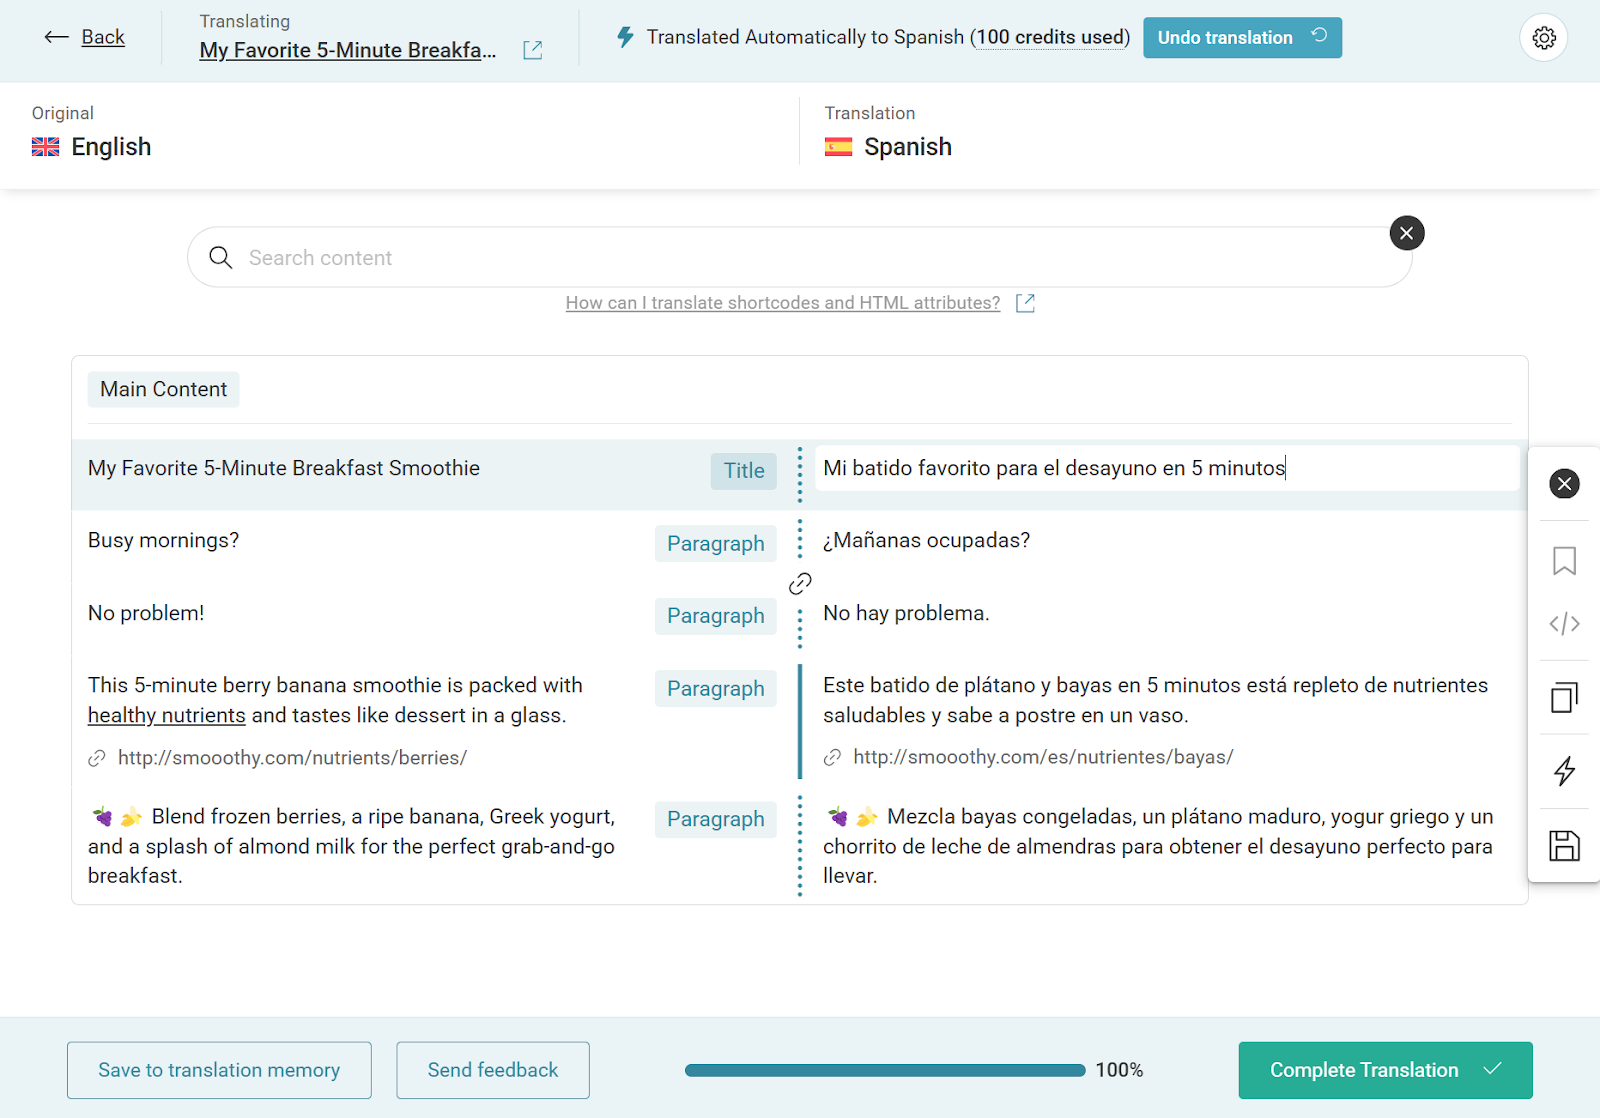
Just visit the translated page you want to edit on the front-end, and click Edit translation in the top admin bar. This will open the editor, where you can make any changes necessary.
Creating Different Designs Per Language
Using Conditions and Dynamic Content
@since Cornerstone 7.8.0+
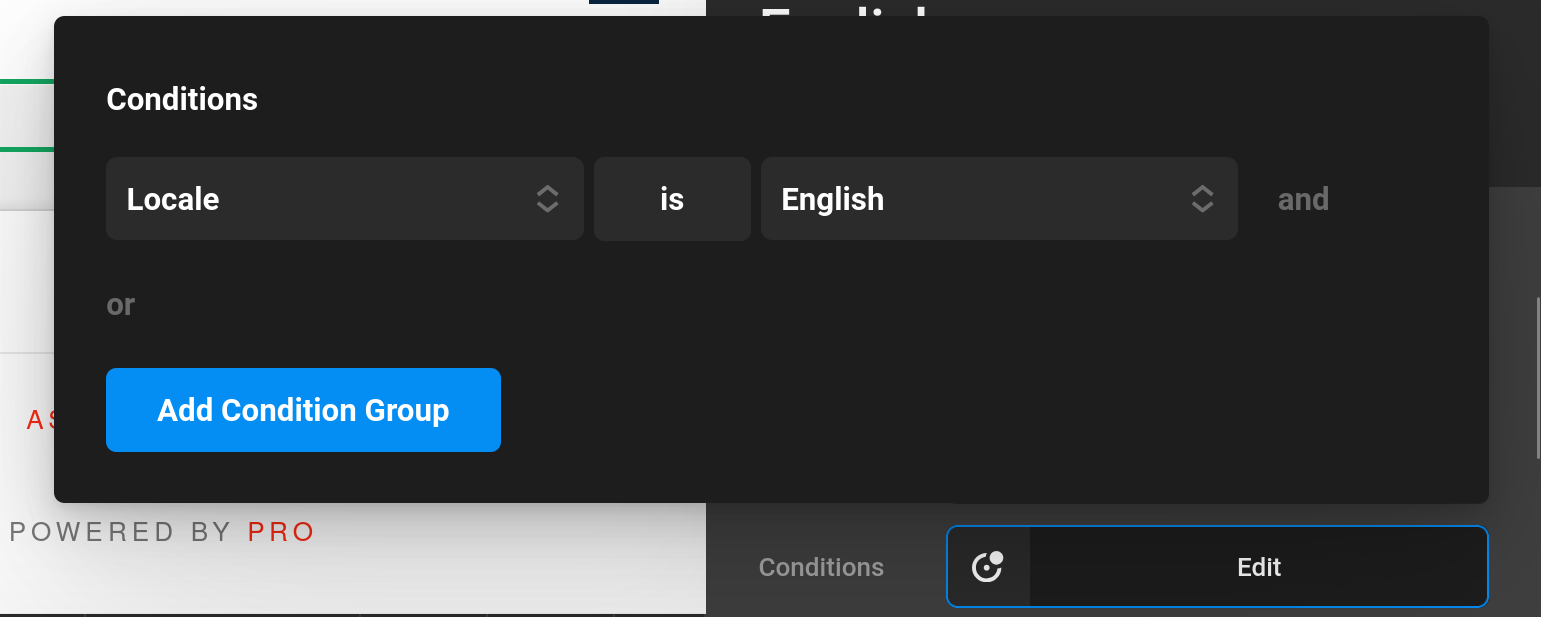
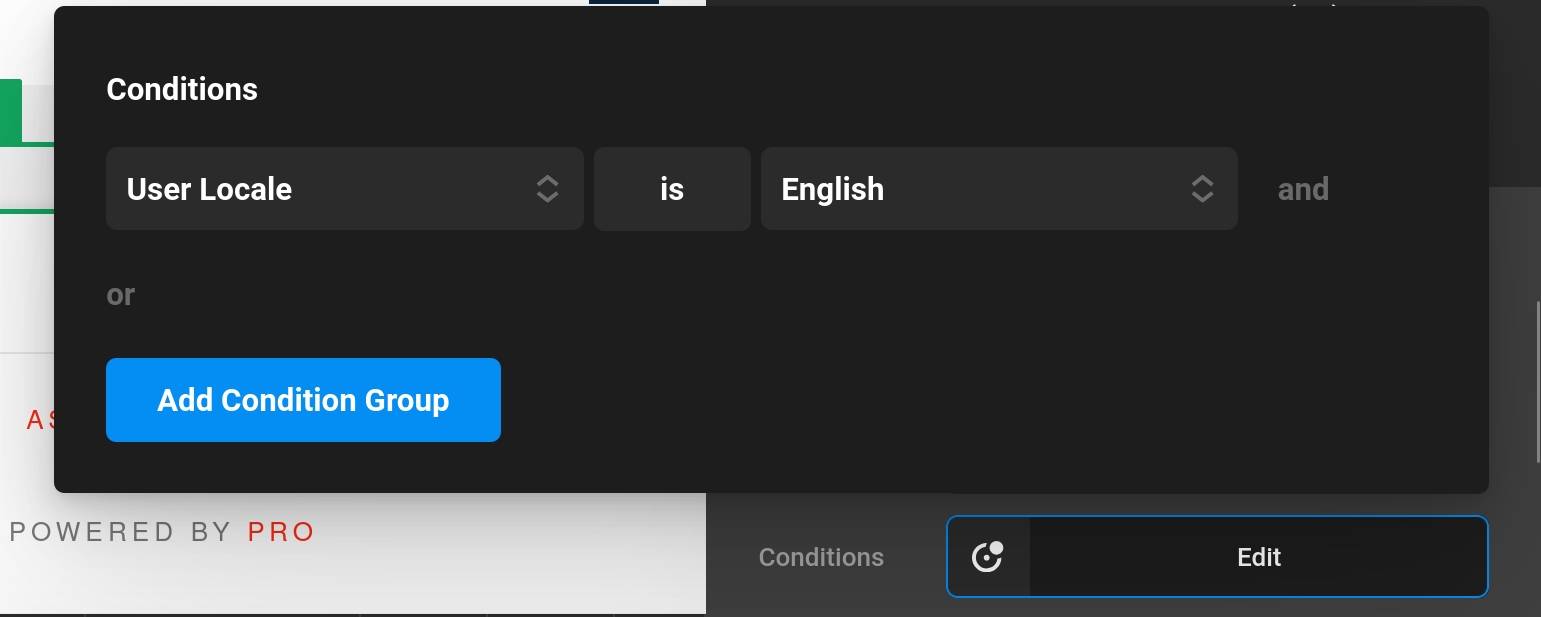
Using conditions based on Locale and User Locale you can design different parts of the page for different locales. This has the added benefit of keeping all your pages content to one Cornerstone document which means you'll be able to change content for all translations easily.
The Locale condition will work based on your sites current Locale. So if you are on the English version of your page, the Locale will be English. If you have a Locale condition for English on a section, when you go to your Spanish translation this piece of content will not display on the Spanish translation.
The User Locale condition will work based on the users locale. If you set a piece of content with a User Locale condition of English. A user who has their language as Spanish will not be able to see this content.
Also see our Localization Dynamic Content.
Advanced Editor
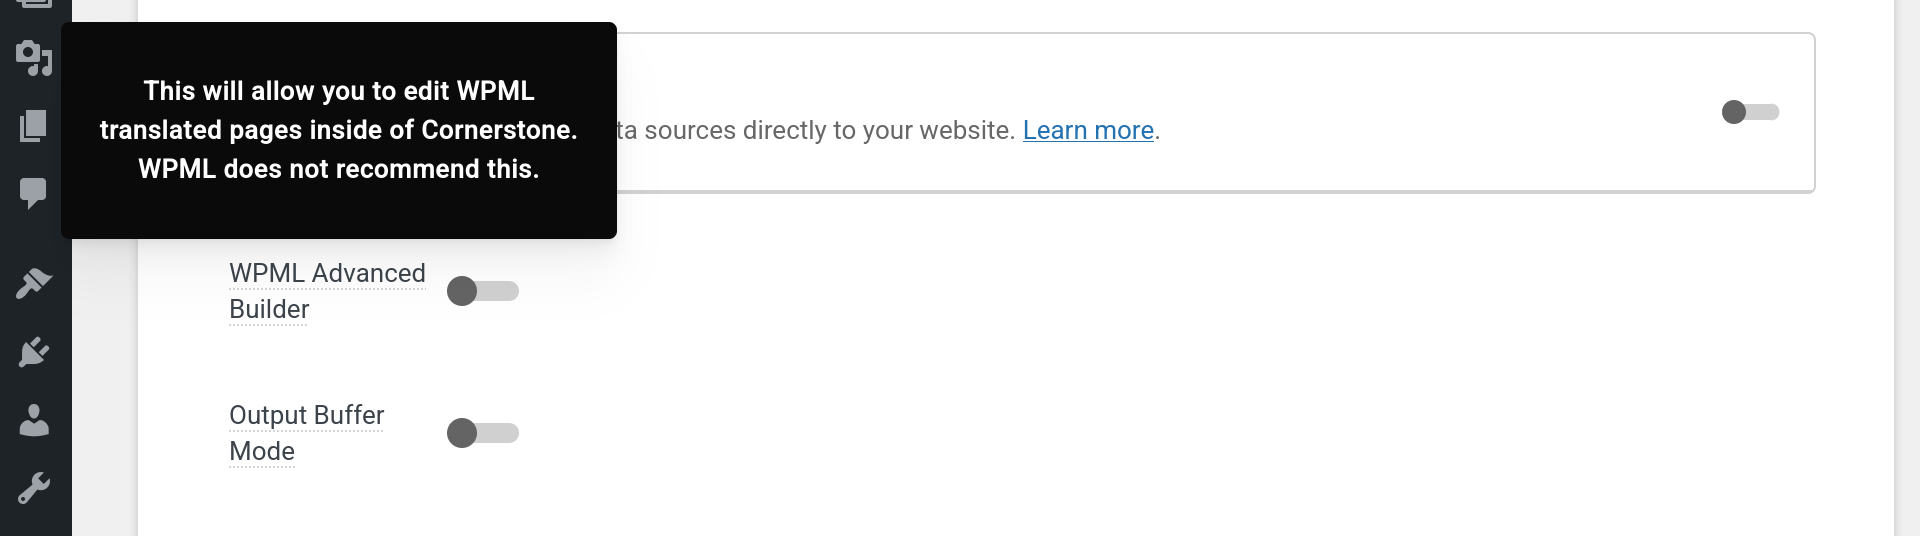
The Advanced Editor is being deprecated as of Cornerstone 7.8.0. This system will have numerous flaws when it comes to making changes to the source language. As a result WPML and Themeco does not recommend using this system. This system will still be in place as we work out potential issues. In the Cornerstone settings you can enable this editor in the Advanced tab under WPML Advanced Builder. Sites upgrade from previous versions will have this setting on by default.
Besides translating your texts, you can also show completely different content in each language. This option is useful when you want to localize your content for international audiences.
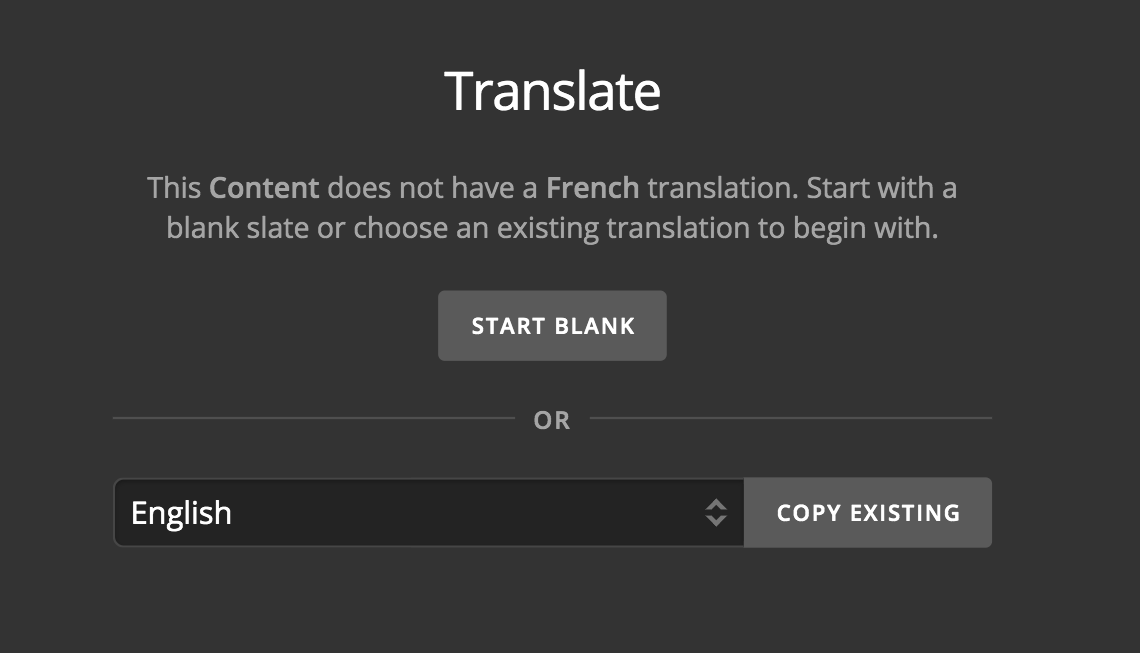
To create different designs in each language, open the page you want to localize using the Cornerstone editor and click the language icon at the top.
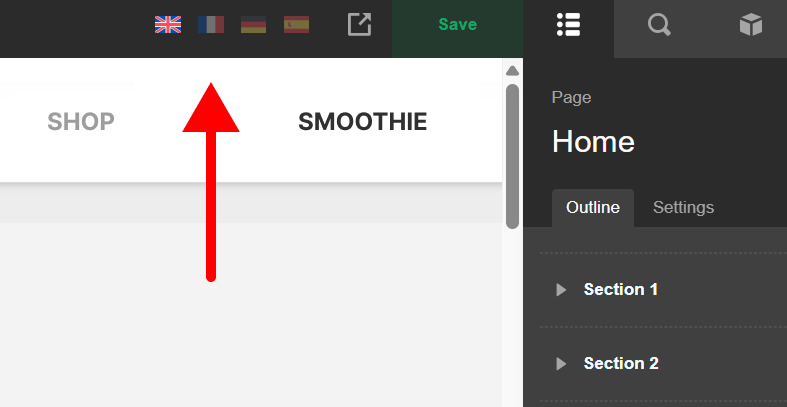
In the pop-up that appears, click Start Blank to design your page from scratch, or Copy Existing if you want to start from the default language design.
Finally, create your new design and when done, click Save. Your page will now have different content in each language.
Further Reading
For more information, check out these articles on the WPML site:
- Compatibility between X theme and WPML
- How to translate pages built with X Theme (Cornerstone Builder)
Texts not Translating?
If some of your texts don’t translate, they are likely “strings”, pieces of text that don’t belong to pages, posts, or custom posts.
To translate strings, go to WPML → Translation Management, and scroll down to the Other texts (Strings) section. Search for the texts you want to translate, select them, and send for translation.
Additional Resources
For additional translation guides, check out the following articles on WPML:
See Also
Summary
Now you know how to install the WPML plugin and get started with translating your content using the builders.
See something inaccurate? Let us know