Author
In this article, we're going to discuss the Author Element, its settings, and using it as a quick starting point to output information about the user who wrote the current Post, Page, et cetera.
Oftentimes when working certain types of content on your website, it is common to include an Author information section in the design. This may include things like the author's Gravatar, display name, biographical information, et cetera. Our included Author Elements serve as a quick starting point that wires up all of the appropriate Dynamic Content for this pattern along with some simple styling to get you up and running in no time.
Introduction
The Author Elements are "prefab" Elements, which means that they are composed of the core Elements from our Library across all Builders. Its topmost Element is a Div Element, with a relatively simple child Element structure. There are two variants to explore, one with a vertical orientation:
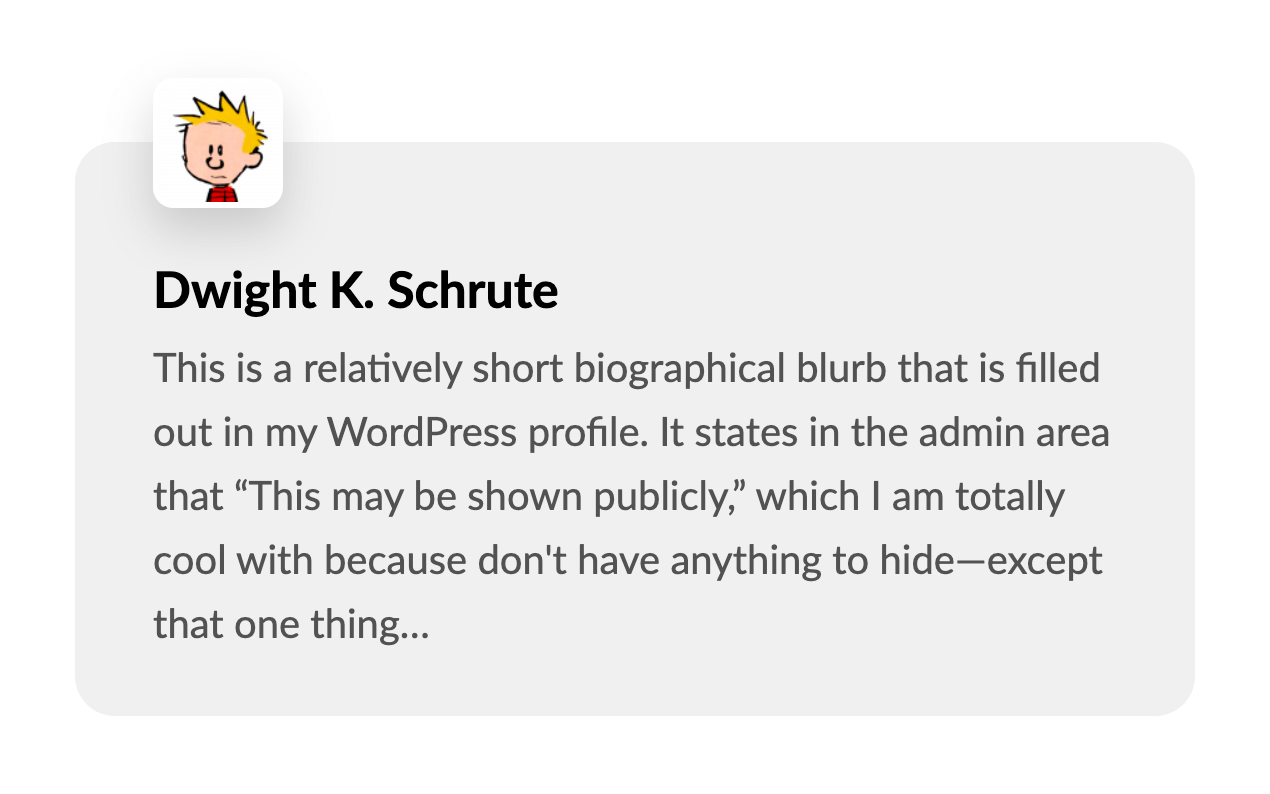
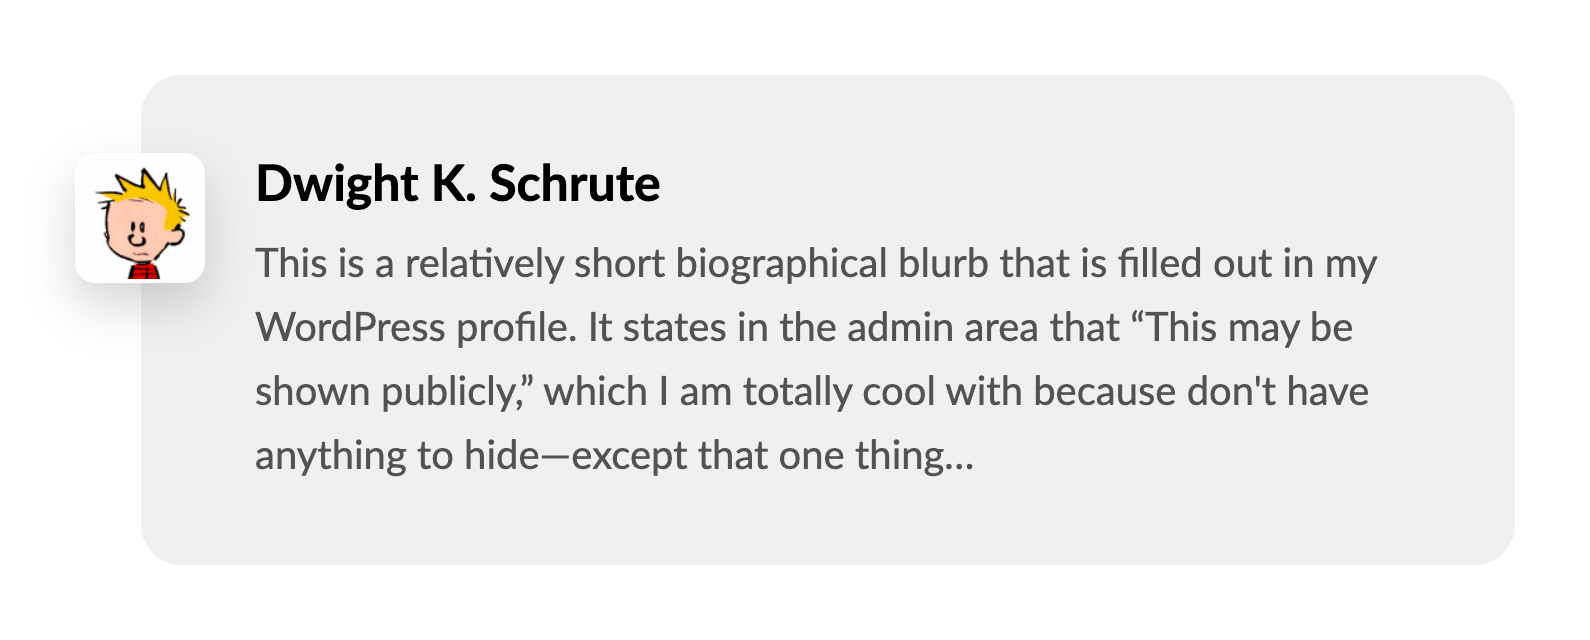
And another with a horizontal orientation:
The Markup
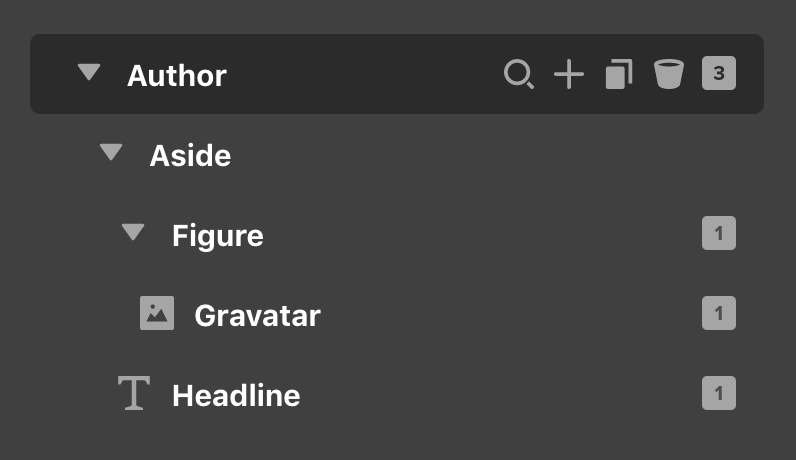
The child structure of these Author Elements is identical between the two, just uniquely styled to achieve these different layouts. The child structure can be seen from the Outline Pane in the Workspace:
The topmost Author Element has its Tag set to an <a> with a link value of {{dc:user:url}}, which will take users to the Author's frontend profile page if one is setup (if you do not wish for this Element to link out to anything, change the Tag at this level to your desired markup and remove the href to make it static). This layer does not have any unique, Element-specific styling applied to achieve the looks seen above, so it can be easily altered to apply margin, padding, et cetera as needed.
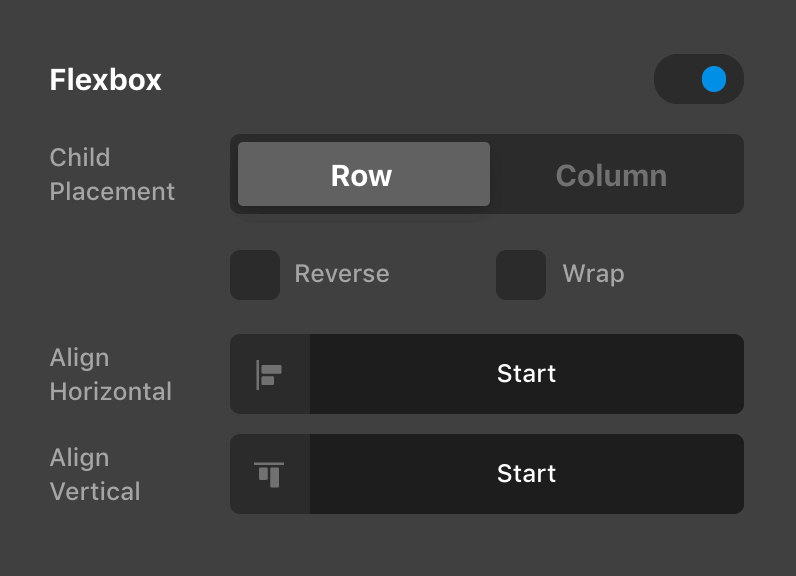
Inside of that we have another Div Element renamed to Aside, which has its Tag set to <aside>. This is done partly isolate some of the Element-specific styling needed to achieve the looks seen above, but also to utilize this semantic markup as our topmost Element is already set to an <a> tag. This is also where the primary layout differences begin between the two Author variations. The vertical orientation defines its internal Flexbox layout like so:
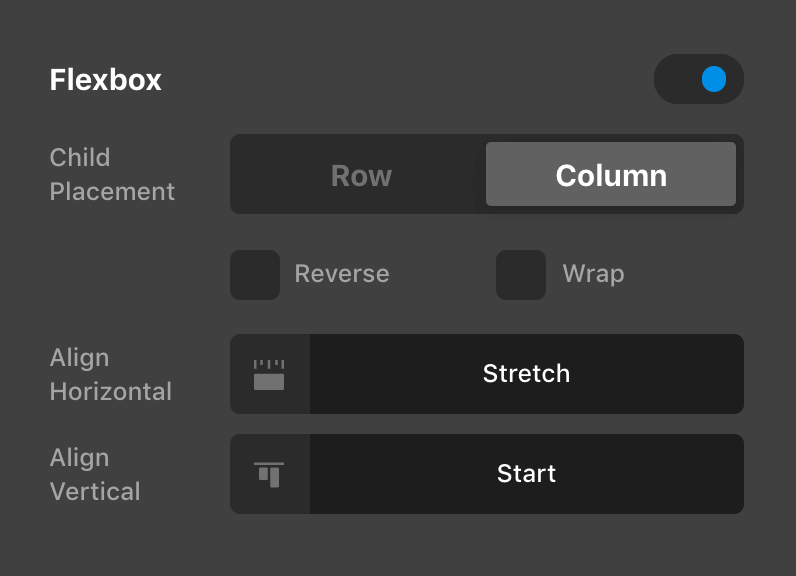
While the horizontal orientation defines it with the following settings:
This is also where the styling for the gray box you see in each screenshot above comes from. Another variation of note is the Margin control on each of these orientations, as they both feature an offset of 26px on different sides to offset the negative margin set on the Figure Element within. Beyond that, we have the Figure Element which contains the Gravatar set for the user's account and a Headline Element that has both the primary and subheadline text enabled.
Demo
To see live demos of the Author Element variations, see below:
See something inaccurate? Let us know