Envira Gallery
In this article, we'll cover some usage examples of how you can utilize Envira Gallery within your X or Pro-powered site. We'll mainly be focusing on how to use Envira Gallery and so may skip over some finer details.
Envira Gallery is a fantastic responsive WordPress gallery plugin that allows you to create beautiful photo and video galleries for your site in minutes.
Getting Started
Go to Pro > Validation or X > Validation for X then look for Envira Gallery. Click Install.

Once installed, the Install button will change and say Activate. Click that button and it will activate the plugin. You will then see the status change to Installed and Activated.

Once activated, you should see the Envira Gallery menu item on the WordPress dashboard like this:

Go ahead and click on Envira Gallery, once you've clicked that, you'll see the Envira Gallery main admin screen like this:

Adding a new Envira Gallery
In this article, we'll cover creating an Envira Gallery and then adding it to a new page on our website.
Go ahead and click Add New on the main Envira Gallery admin page.

This will take you to the screen to add a new gallery like this:

You'll see that below the Title field, there are two tabs: Native Envira Gallery and External Gallery. External Gallery is only available if you have Envira Addons. Otherwise, you'll see a message like this:

If you go to Envira Gallery > Addons on the menu, you'll be sent to the Envira Gallery Addons page that looks like this:

In order to get these addons, you will need to upgrade your Envira Gallery account. Clicking the Upgrade your Envira Gallery account link or any of the Upgrade Now buttons will lead you to the Envira Gallery Pricing Page where you can upgrade your account.
While upgrading your account is an option for you, in this article we'll only the Native Envira Gallery tab.

In this tab, you'll see two buttons: Select Files from Your Computer and Select Files from Other Sources. You'll also notice there's text above the two buttons that says Drop Files here. That means you can open your computer's File Explorer, select the images you want to add to the Envira Gallery, then drag it to the drop panel and it will add the images to the gallery.
Now, if you click the Select Files from Your Computer button, your computer's File Selector window will popup. Simply locate the files you want to add to the gallery then click Open.

If you click the Select Files from Other Sources button, the Media Library popup will display and you can select from the files already in your media library or also upload new files. Once you selected the media files you want to add to the gallery, click Insert Into Gallery.

Once you've added files to the Envira Gallery, whether it was added using any of the 3 methods mentioned earlier, you will see something like this:

You'll notice there are two buttons on the top left part of each image on the gallery. The blue pencil icon is the Modify button while the red trash bin icon is the Remove button.

Clicking on the Remove button removes the image from the gallery while clicking on the Modify button opens up a popup where you can edit the photo's metadata like this:

As you can see you can update following:
- Status
- Title
- Caption
- Alt Text
- URL
- And select whether to open URL to a new window
Once you've updated the metadata just click on Save Metadata to save your changes and then click the x top right to return to the screen you was on.
In the panel where your gallery images are located, you'll see there are various other tabs which contain different options you can set for your Envira Gallery. One of those tabs is the Configuration tab:
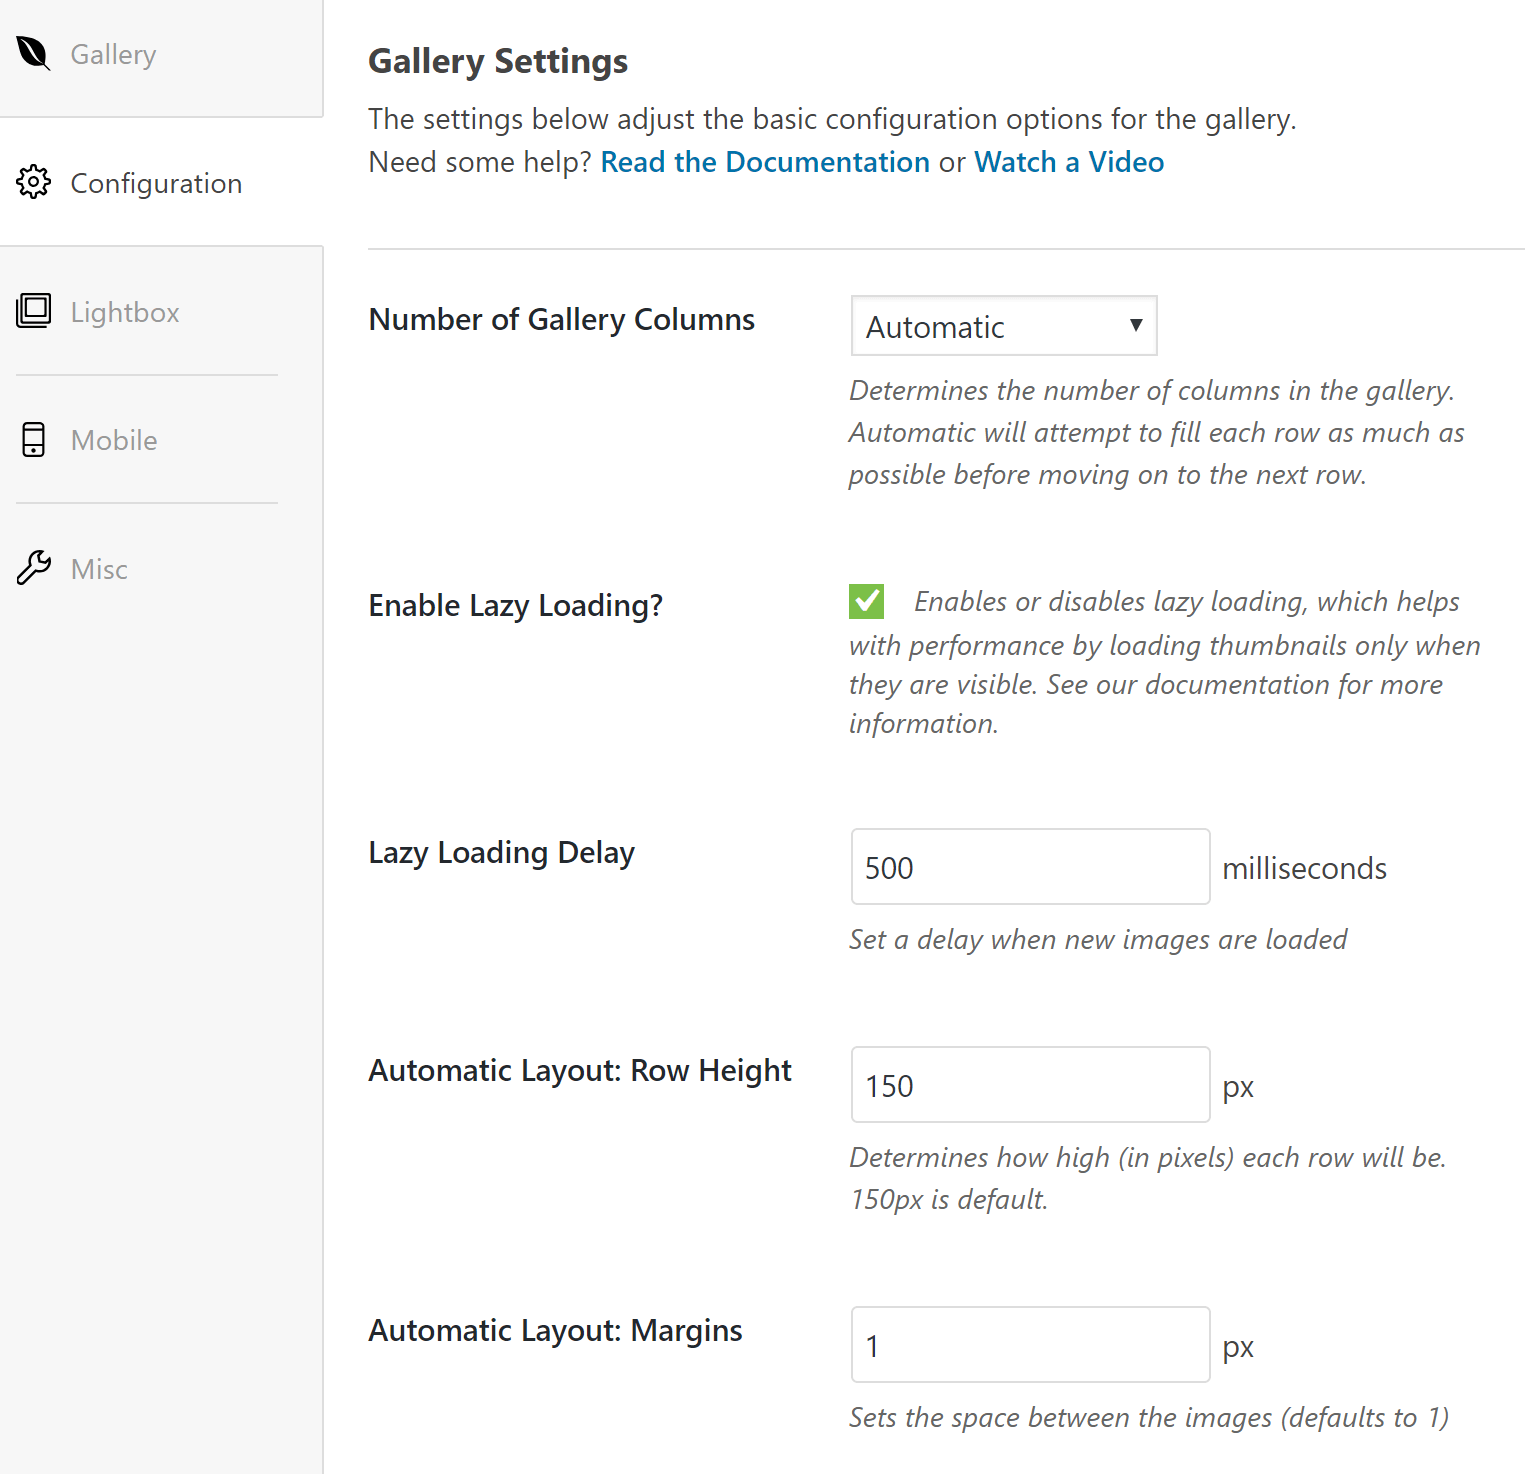
This allows you to make selections such as how many columns your gallery has, the individual image dimensions and if they should be cropped. Whether to enable the lightbox when clicking on a gallery image and whether to create a mobile-specific gallery for mobile devices among many other options.
We won't cover every option here and will leave everything set to its default settings. But feel free to play around and find the best option suitable for your gallery.
Once you are happy with your gallery, go ahead and click on Publish on the right-hand side of the screen. If the publishing/saving was successful, you should see a notice at the top of your page reading Envira gallery published.
How to Use Envira Gallery in Cornerstone/Content Builder
For the purpose of this article, we're going to cover adding Envira Gallery on a new page through Cornerstone / Content Builder, but you can add it to an existing page/post anywhere you want. Load up the page/post you want to add it to in Cornerstone / Content Builder.
If it's a new page/post, add a new section in Cornerstone / Content Builder which will contain the Envira Gallery. Search for the Classic Envira Gallery element to add it on the page/post:

Drag and drop that Classic Envira Gallery element into the new section you just created. If you have created multiple galleries, you'll need to click on the gallery it adds and then select the gallery you wish to use from the drop-down option in Cornerstone / Content Builder:

Once you've added the slider and any other content to the page, you'll notice in the Cornerstone / Content Builder preview area that the gallery doesn't display.

Don't be concerned about this. You see this only because the Envira Gallery element does not currently support the Cornerstone / Content Builder preview area. The gallery will be displayed perfectly on the front-end of your site.
Okay, so Save the changes and you'll then be able to see the gallery when you visit the page on your site like this:
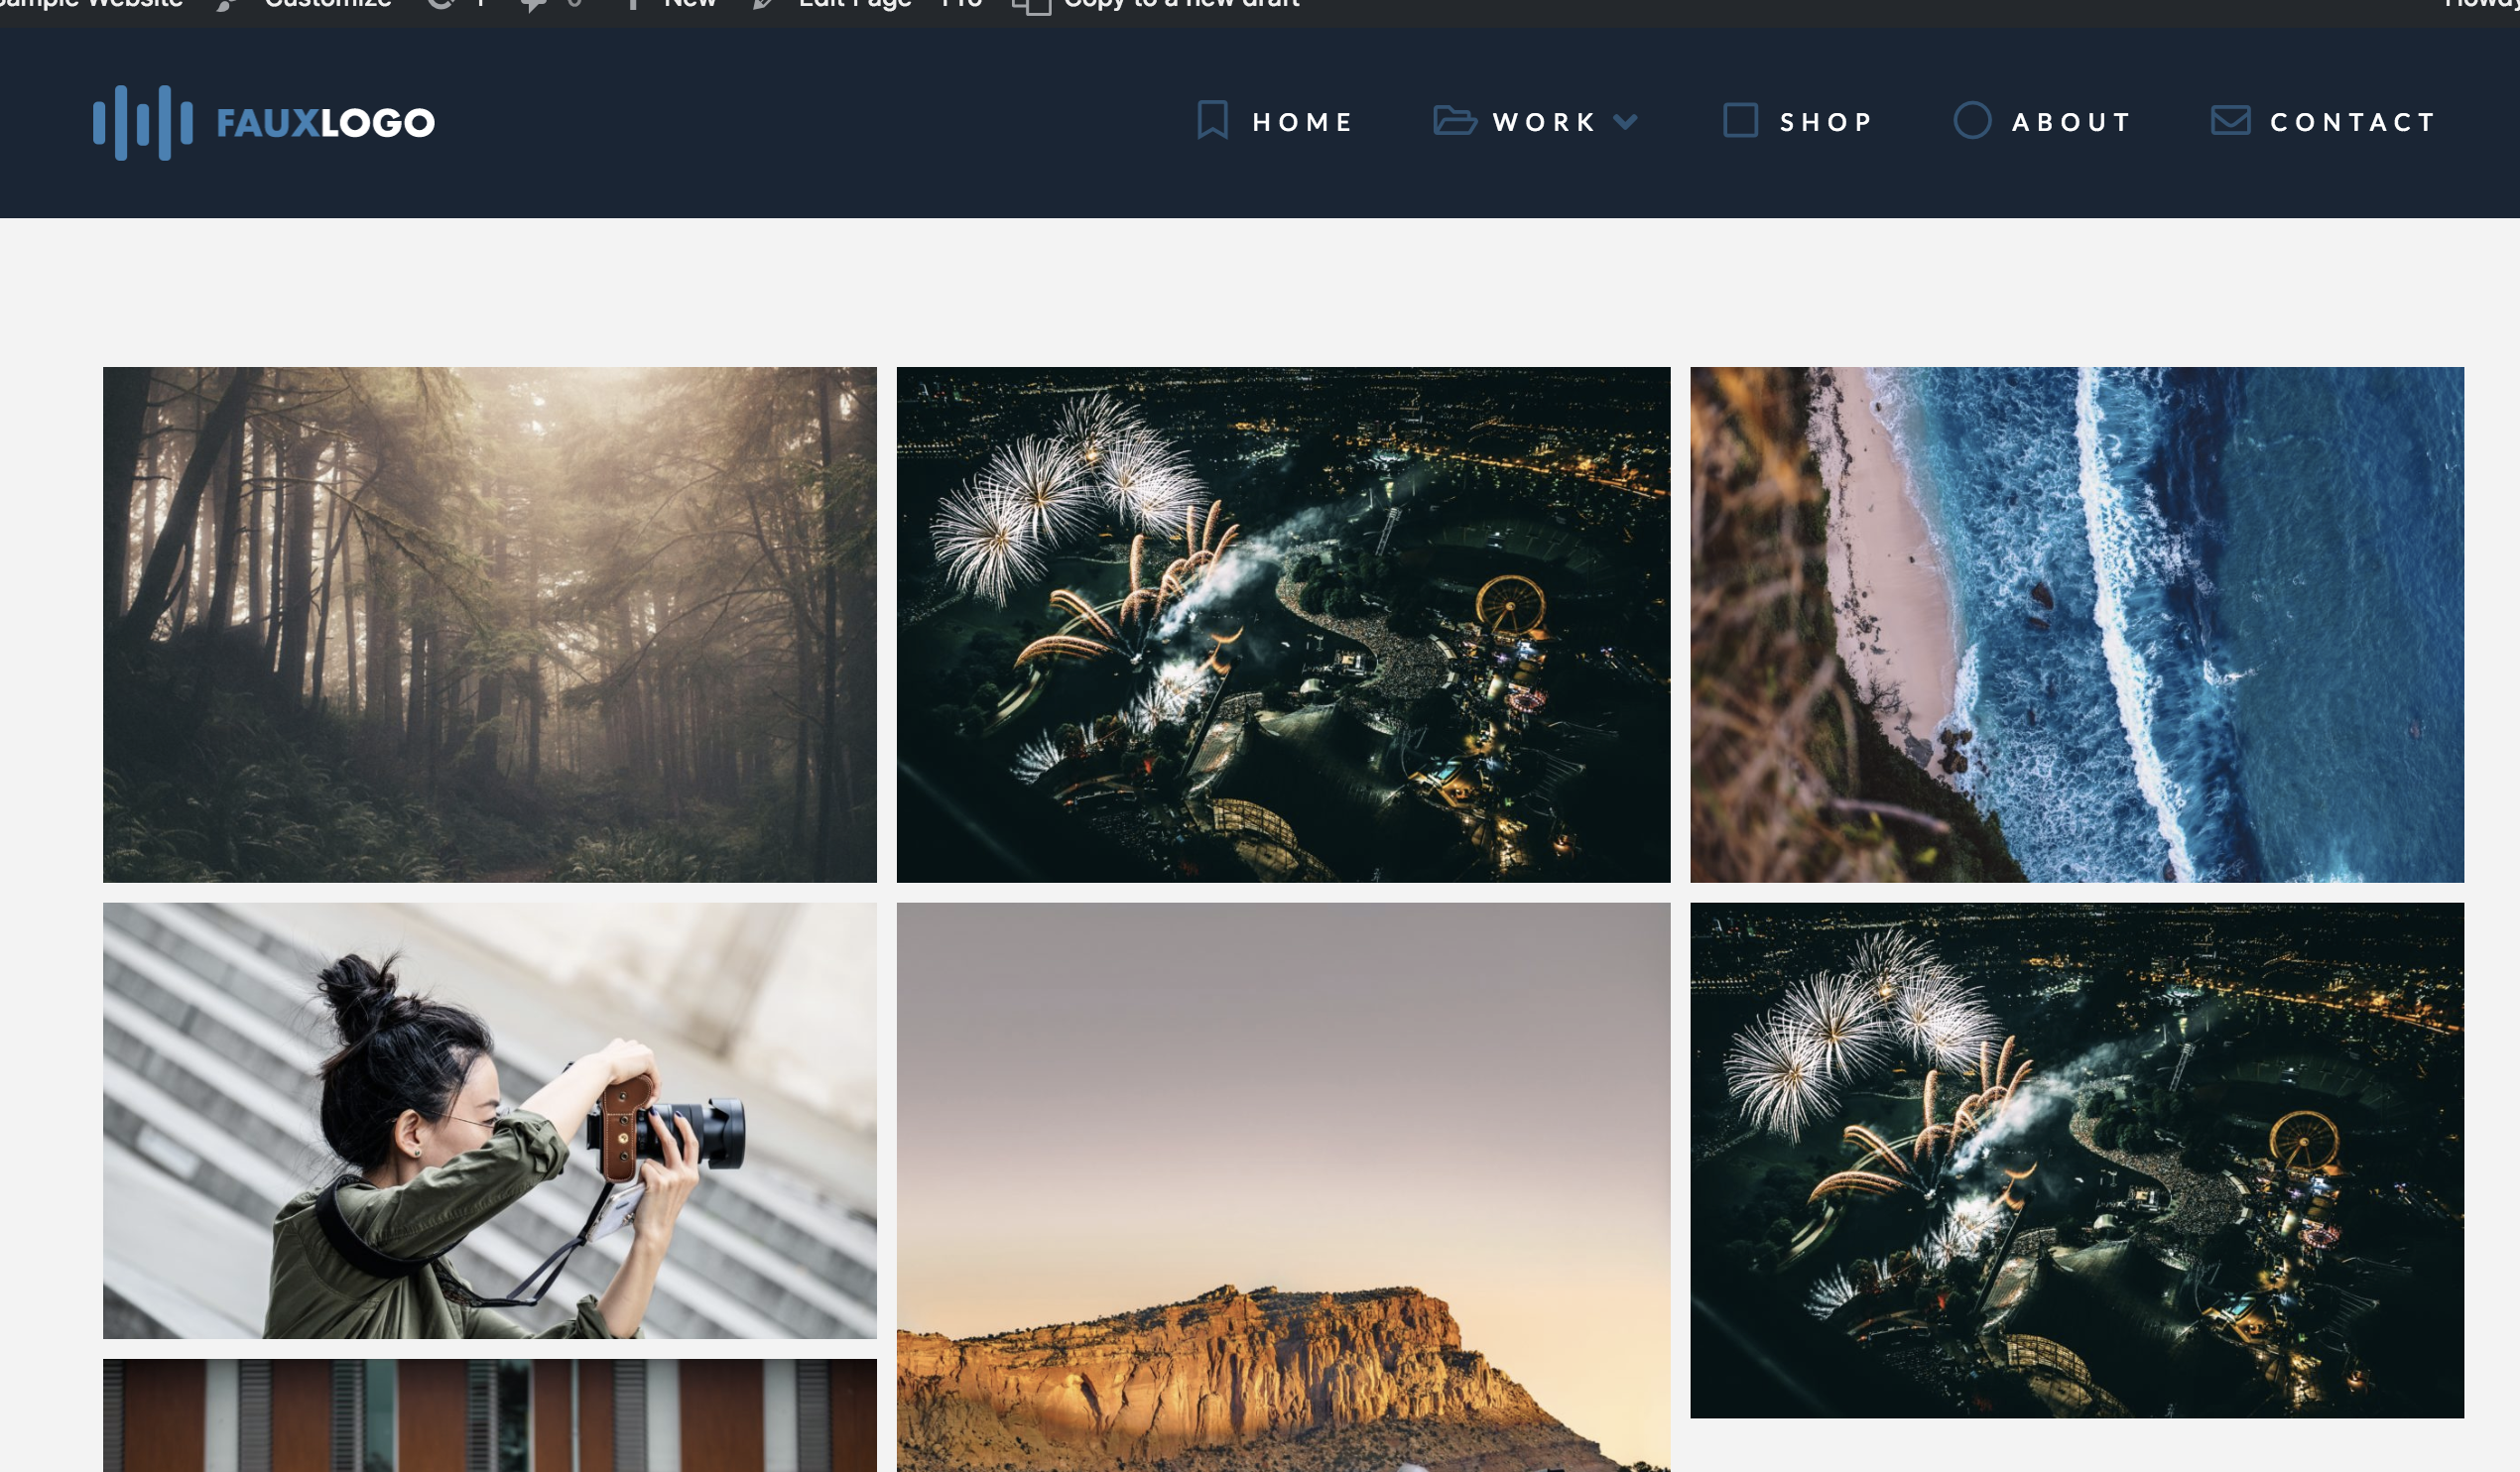
Clicking on any of the images in your gallery will open the image in a lightbox, which will allow you to also browse through the rest of the gallery like this:

Bundled Version
Users will frequently inquire about the version of Envira Gallery being utilized within X or Pro. Because of the way that we are utilizing the plugin in X or Pro, it should be noted that the version of Envira Gallery included with the theme is made intentionally for numerous reasons. The following is just a few of the reasons why we do not always utilize the latest version of the Envira Gallery plugin:
We have removed the Settings page from Envira Gallery and Soliloquy per some code provided by Thomas (plugin author) as we provide them in an “integrated” fashion. You can add this back in if you have extensions you would like to use by adding a function to your functions.php file in your child theme like so:
add_action( 'after_setup_theme', 'x_show_envira_license' );

function x_show_envira_license() {
  remove_action( 'envira_gallery_admin_styles', 'x_envira_gallery_hide_key_box' );
  remove_action( 'admin_print_scripts', 'x_envira_gallery_hide_license_errors', 20 );
}
This will overwrite our custom functionality in /x/functions/global/plugins/envira-gallery.php and should make things behave in a default manner again.
Keep in mind that this will also display the no valid license warning as well, so if you don’t have a personal license or plan on using Envira extensions it is recommended you do not overwrite this.
Summary
We've only scratched the surface of what you can do with Envira Gallery. There are many more options, configurations, and styles you can use all of which is covered by the official documentation.
That being said, we've learned the fundamentals of this plugin. We've learned how to create a new gallery, how to add images to that gallery and how to add it on Cornerstone / Content Builder.
Further Reading
Here are some articles from the Envira Gallery's official documentation that we think you'll find particularly useful:
- Debugging Envira
- How to Supersize Lightbox Images
- How to Import and Export Galleries
- How to Bulk Edit Gallery Images
- How to Change Lightbox Overlay Transparency
- How to Style Your Gallery Images on Hover
See something inaccurate? Let us know