Theme Translations
In this article, we're going to explain how to translate our themes into any language.
This article will cover translating the X theme into any language apart from the default (en_US). This article won't cover translating plugins, if you'd like to learn about translating plugins, here are some great articles you can check out.
Before we get started, you should have the following:
X downloaded and installed on your WordPress site
FTP/SFTP details (for uploading the translation)
We'll be covering one main method of translation and then have a brief section on other ways you can translate.
Getting Started
For the purpose of this article, we'll just be translating one string as an example, but this same principle applies to translating the whole theme.
The specific string we're translating is "Below you'll see everything we could locate for your search of" for this article, we're going to use Deutsche, but you can translate in any language and we'll cover that below.
Downloading Required Resources
For the translation, we'll be using a tool called "Poedit" Poedit is a translation tool for translating strings from there original language to the one you want. It's simple to use and quite straightforward.
Head to Poedit and click on the free download button

Click on open and unzip/uncompress the zip file, the file just contains the Poedit application. Congrats! Poedit is now installed and ready to use.
Translating With poedit
To begin translating, open the directory where your theme (X or Pro) is located. This could be in a local development environment, but for the purpose of this article, we're going to use FTP. Here are some FTP client options. We'll be using Coda for this demonstration. We will also be referencing Pro, but the same instructions work for X.
Open up your FTP program and login with your FTP credentials, if you don't know where to find these, you can use the cPanel file manager or ask your host.
Once you're logged in, you should see a file structure similar to this
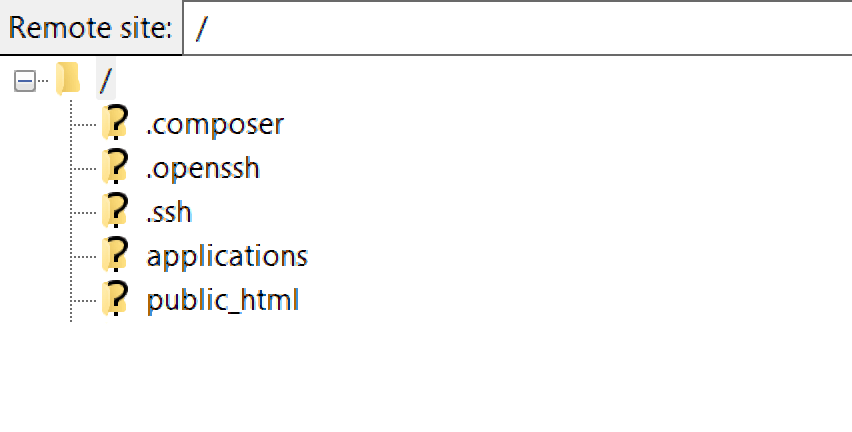
It's worth noting here though that not all file structures will be the same if you get stuck at all, open a support topic and we'll be right along to assist.
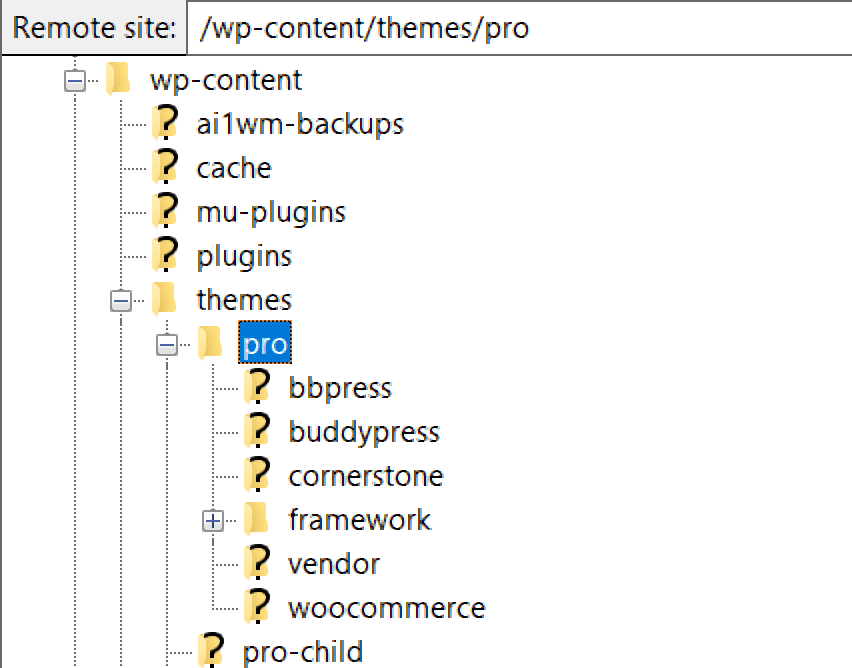
Navigate to your wp-content/themes/pro/ folder, normally located in /public_html/ (if it's the root of your install), if you have multiple domains it might be something like /public_html/yourdomain.com/wp-content/themes/pro
You should have a screen like this
Now click on the framework folder, and then the "lang" folder, so the complete path you should be at now is wp-content/themes/pro/framework/lang You should see the pro.pot file within the lang folder like this.
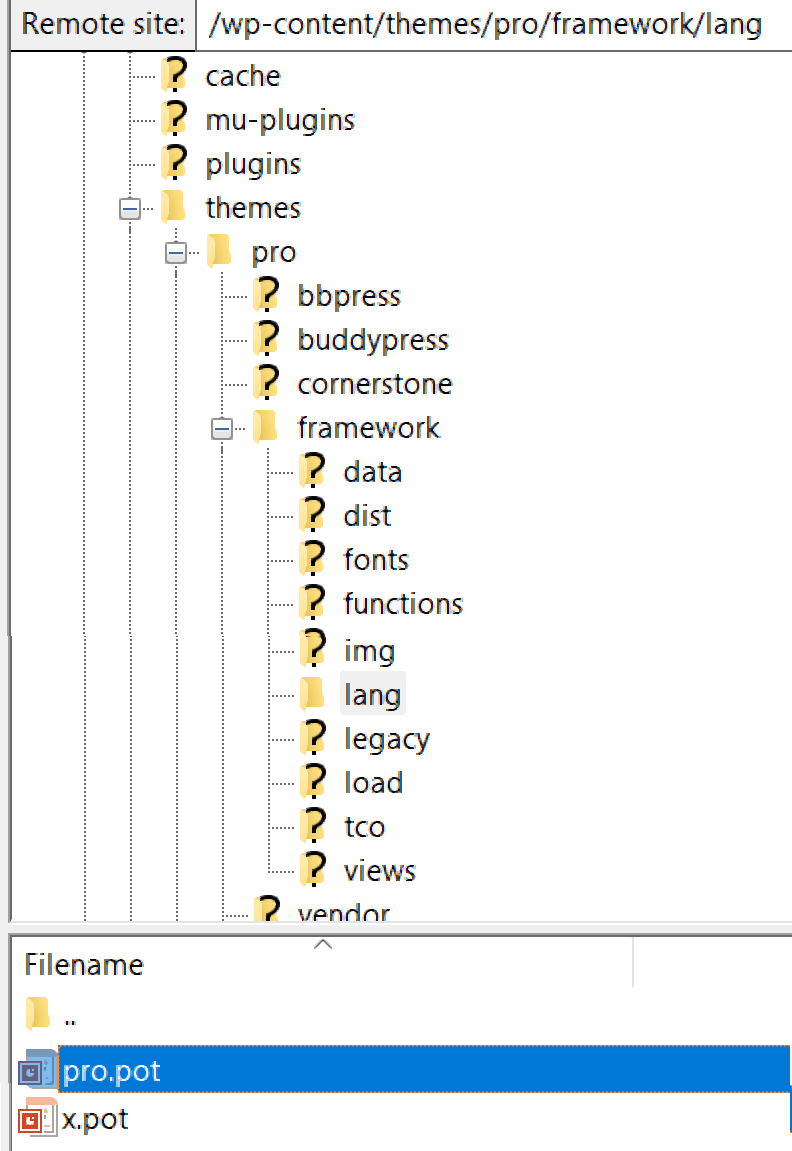
Right-click on the pro.pot file and click "open with Poedit".
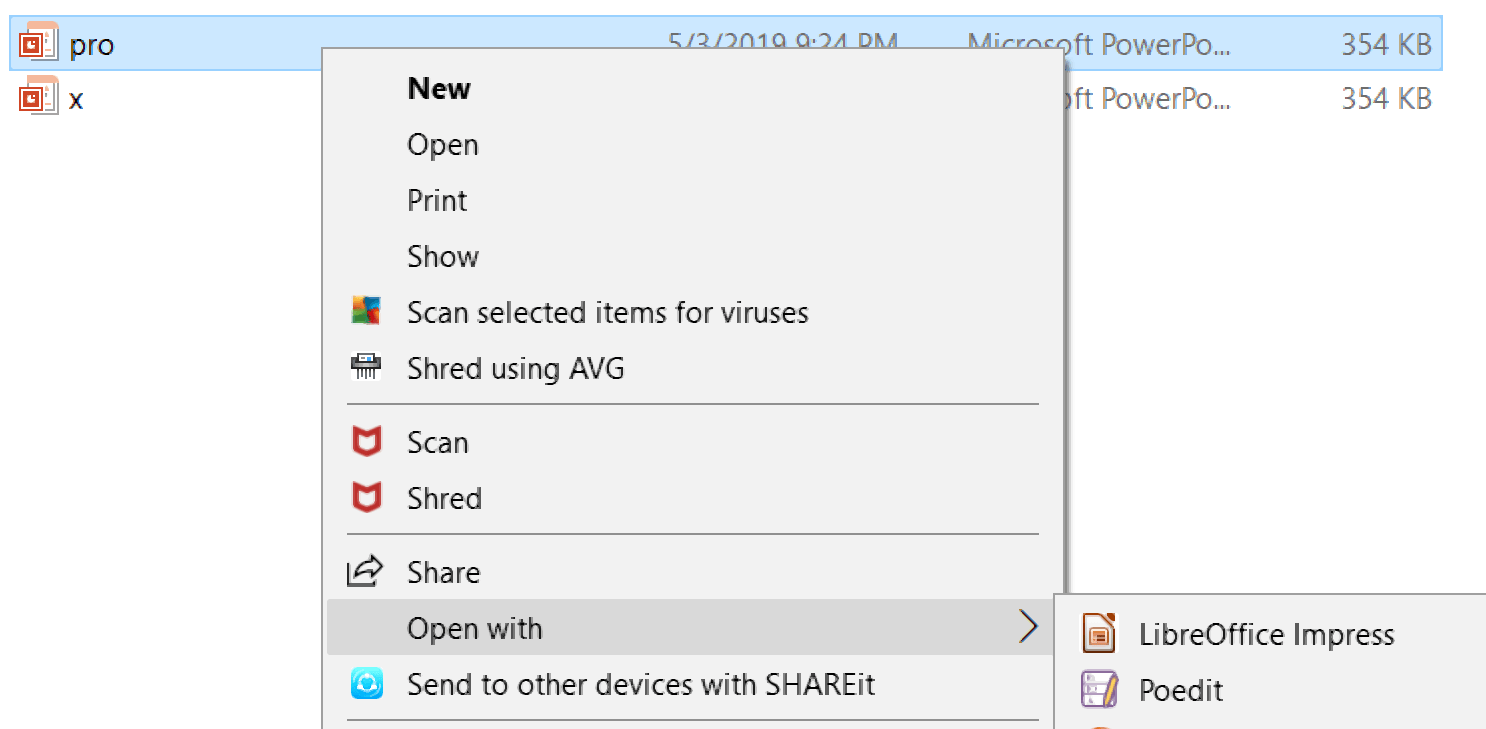
Note: If you don't have the same option, right click and download the x.pot file and then open with Poedit, either way, is fine.
Creating a new Translation
Click on "Create New Translation"
You should see the following
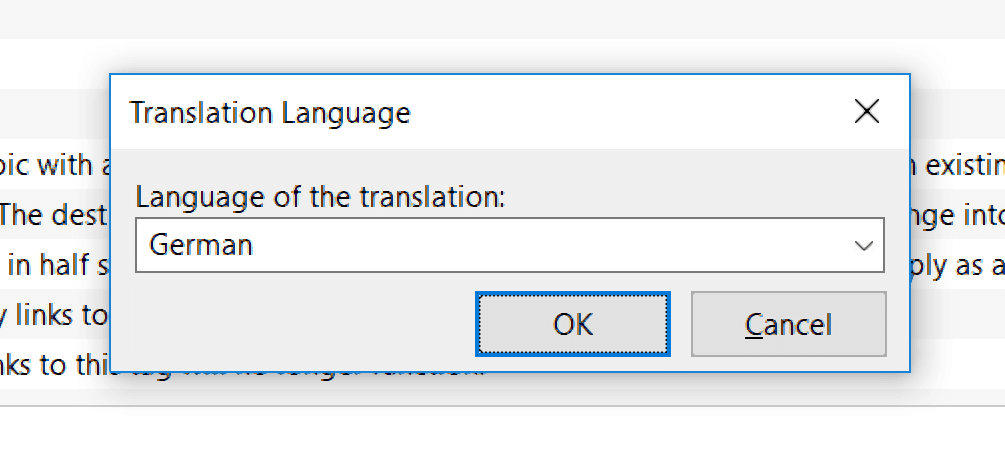
Enter the language of the translation itself. This would be the country code or you can use a country name, so for German, we could use de or just type "German".
Once you've done that click "ok" and your new .po file is automatically created. Now it's time to actually translate the theme, as we covered further up, for this purpose of this example, we're just going to translate one string, but you can translate as much or as little of the theme as you want and what you've translated will still work.
So the string we're going to translate as mentioned earlier is "Below you'll see everything we could locate for your search of".
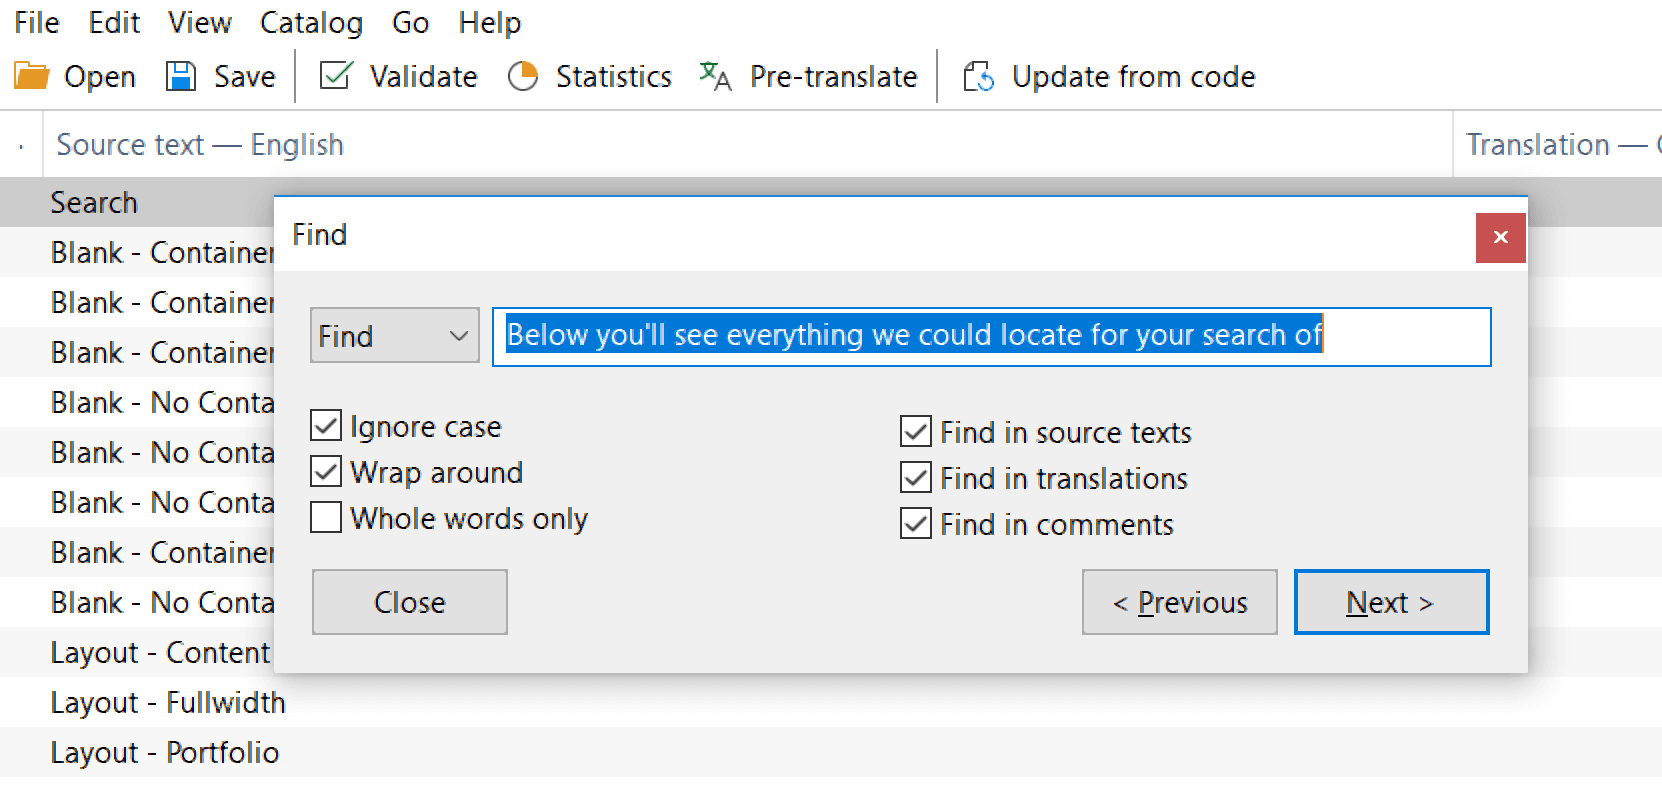
Poedit has a great feature, which allows us to find any string we want. On Mac, just hold cmd + f to bring up the search bar.
Once you've brought up the search bar which should look like this

and click "next", which will take you to that specific string like this
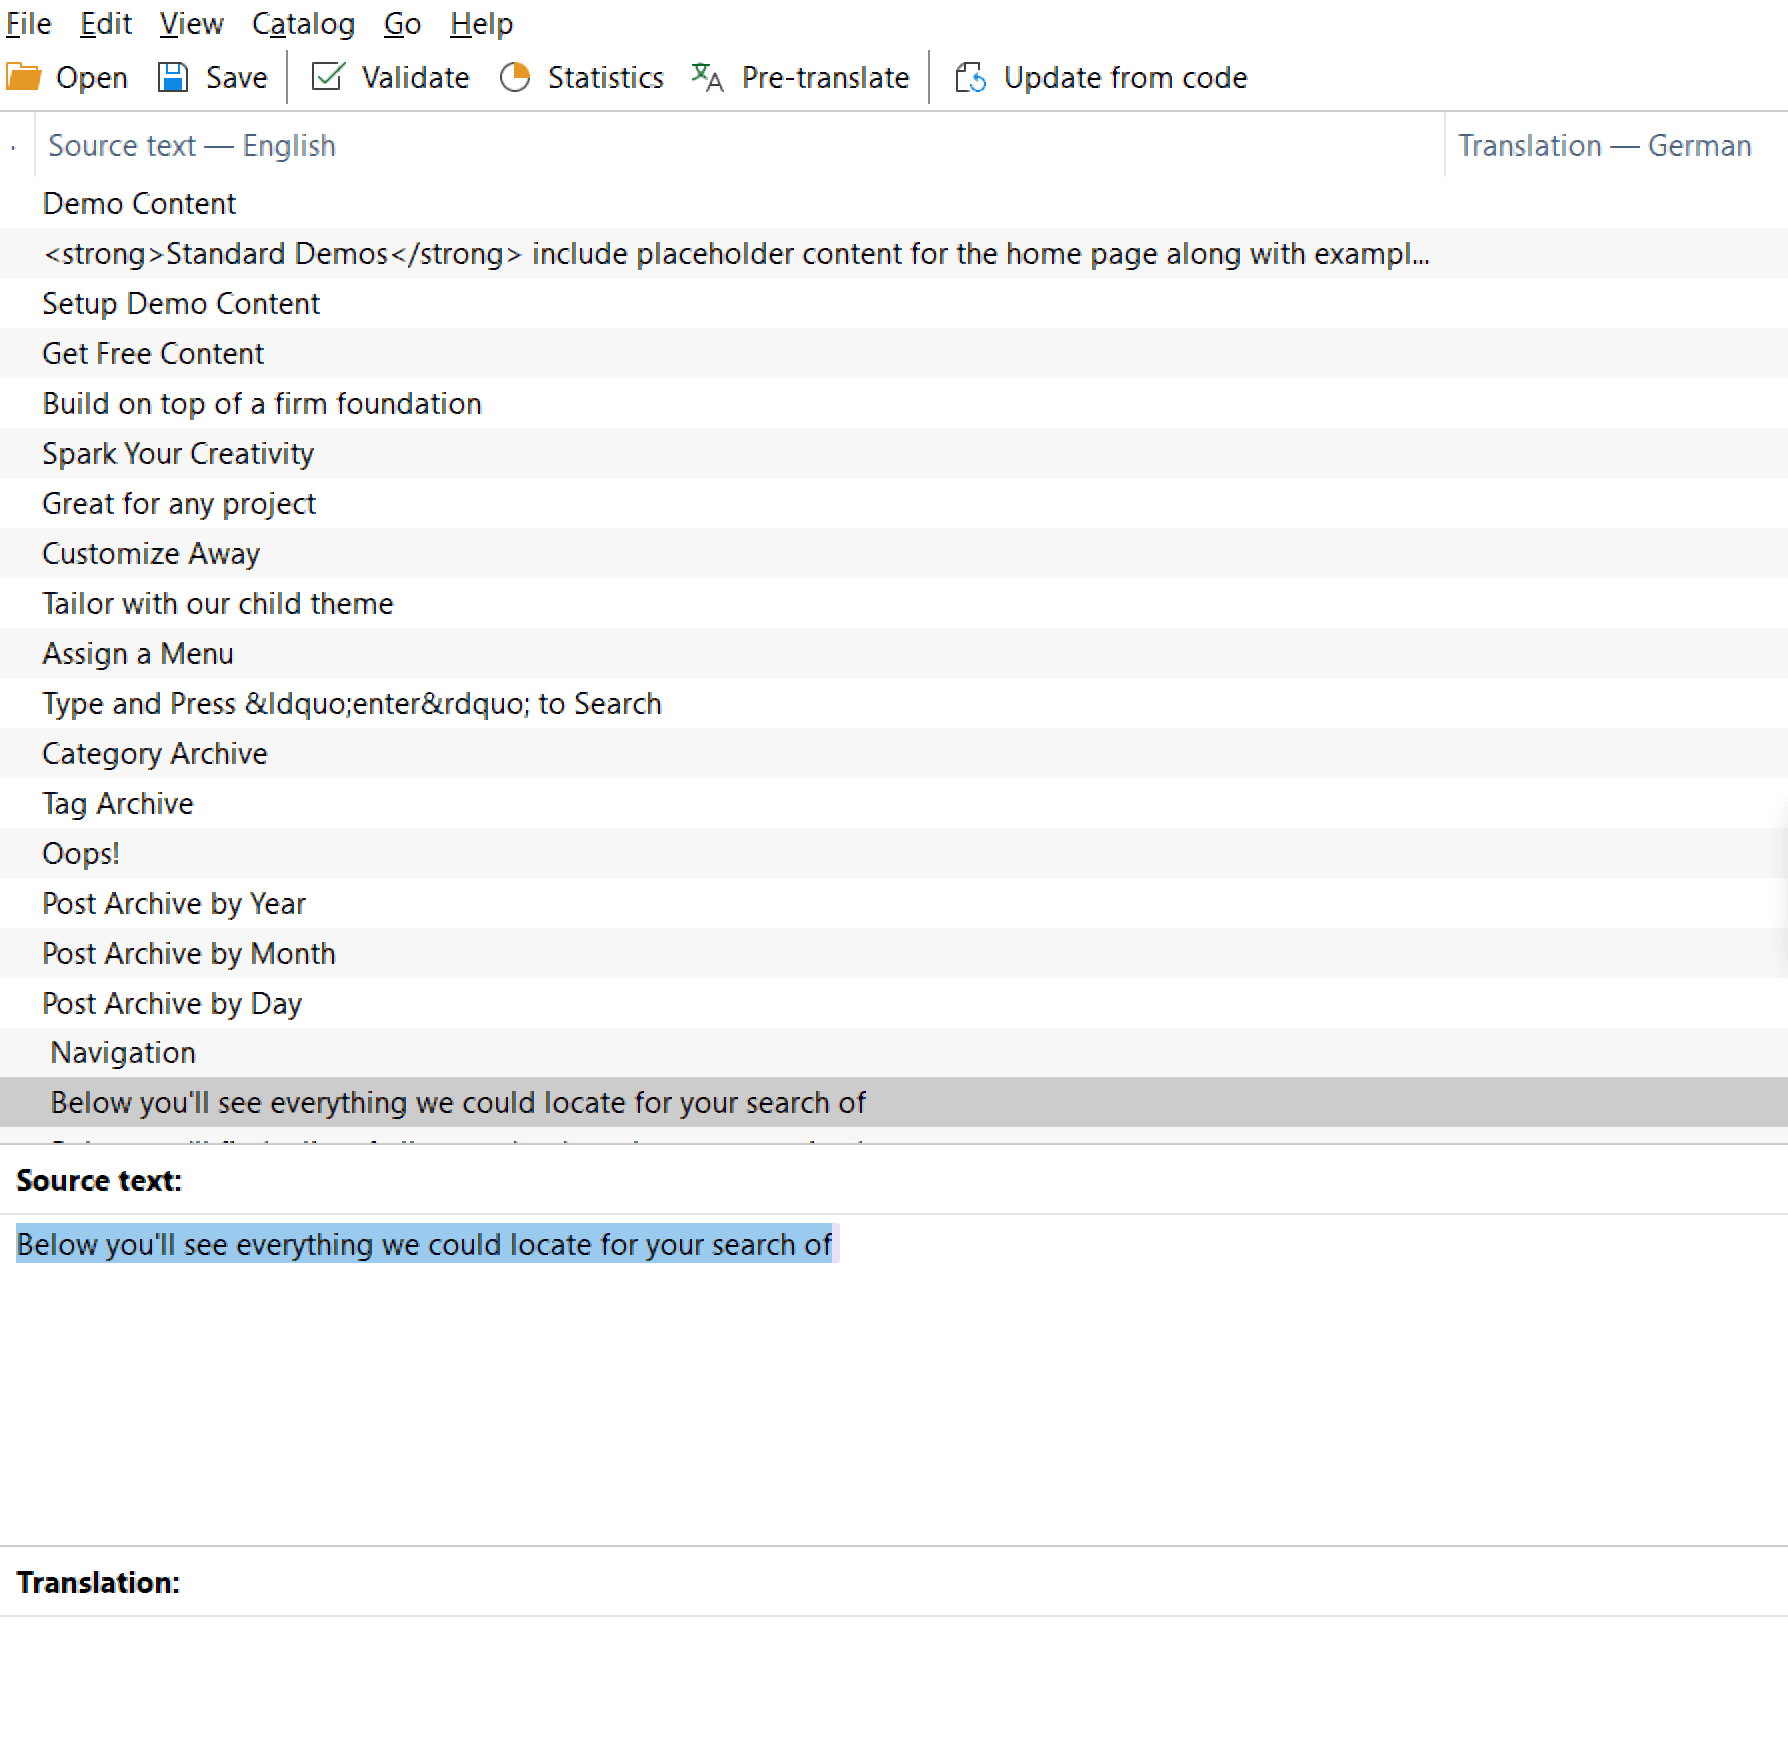
As you can see, right now our translation for this string is empty, so let's change that.
Enter in your translation for that string, so in my case, that's "Unten sehen Sie alles, was wir gefunden haben zu Ihrer Suche nach" As I'm translating in German.
Note: At this point before moving on to the next steps, you can translate as much as you want, just go through the file and click on each string in Poedit and add your translation, once you've completed that, follow the steps below.
Now you've added your translations, let's make sure we save it, so in Poedit Go to > File > Saves As, name it in your language code, so for this article as it's German, we'd use "de_DE.po", save it anywhere on your computer, as we'll upload it via FTP (or it should allow you to save it straight to FTP anyway).
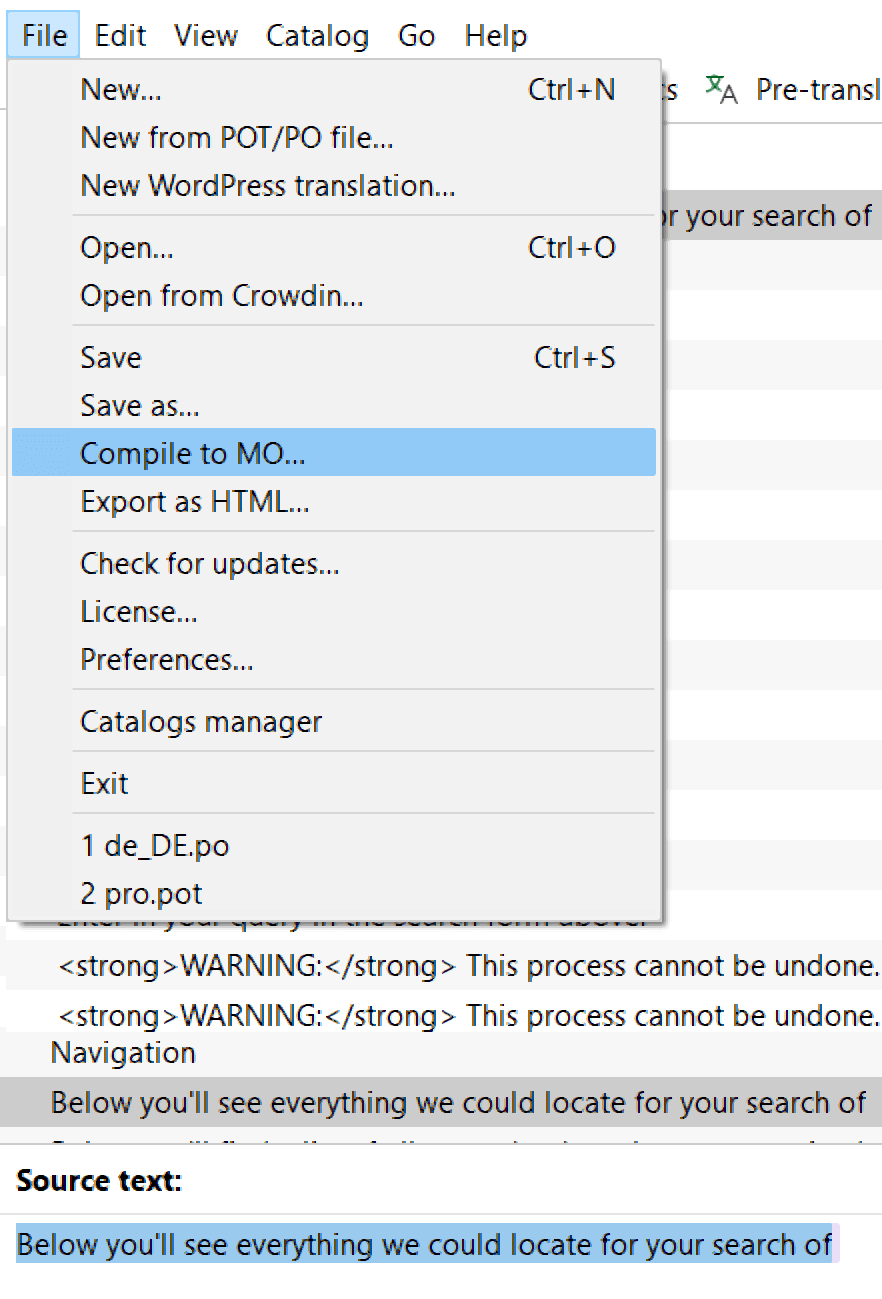
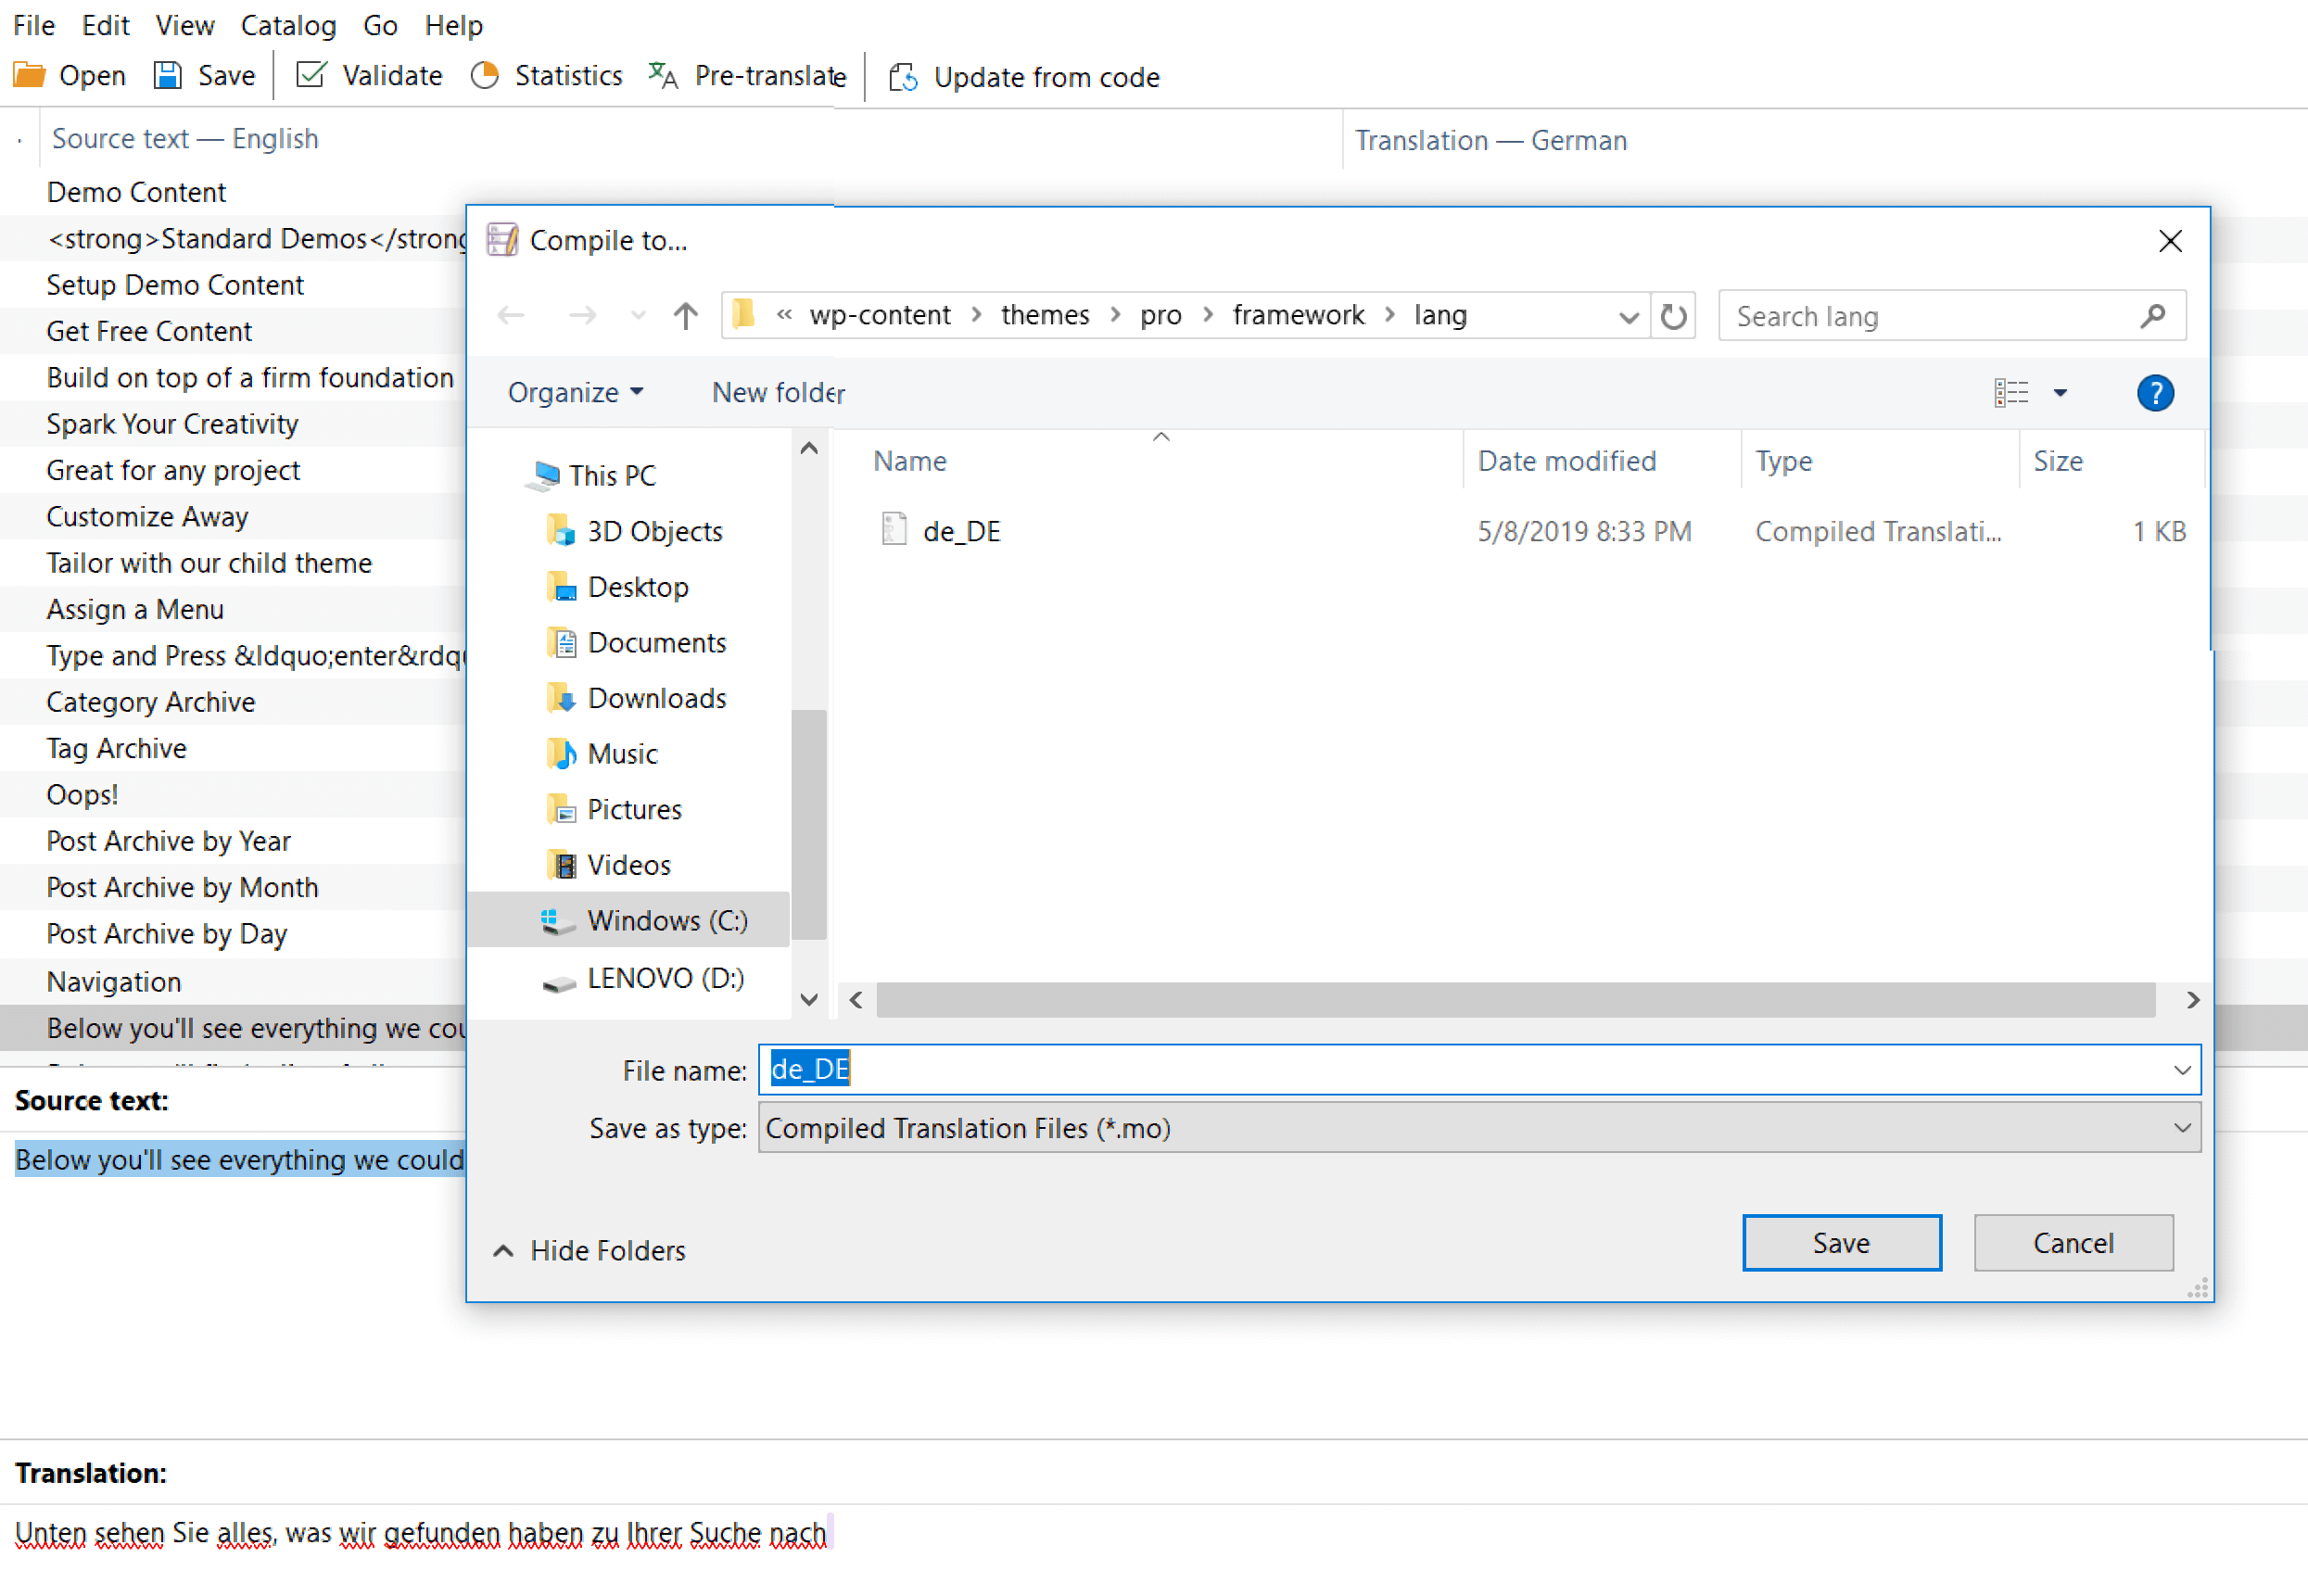
Next, we need to create what's known as a "machine-readable file" or .mo for short, so in Poedit Go to File > "Compile to MO" like this:
Save that as your language code, so in this case, it'd be de_DE.mo like this
Phew! That was a long section, but now you have a translated theme! Congrats.
Uploading your Translation
Now you've got your translation files ready to go (both .po and .mo files). You can upload those to /wp-content/themes/pro/framework/lang.
Important! Uploading your translation files to the parent theme will mean they'll be overwritten on a theme update and lost. We'd highly recommend the following two methods below instead.
Uploading your Translation in a Child Theme
This section presumes you already have a child theme set up. Click here to learn more about setting up a child theme.
Create a languages folder in your child theme, for example, /wp-content/themes/x-child/languages and upload your translations to that file.
But now we need to tell WordPress to load the translation, open up your child themes functions.php and add the following code
function load_child_language() {
  load_child_theme_textdomain( '__x__', get_stylesheet_directory() . '/languages' );
}
add_action( 'after_setup_theme', 'load_child_language', -10 );
This tells WordPress to find the translation in the child theme languages directory.
Now the final step to making your translation show up is setting your language in WordPress, to the language you translated the theme in. Since WordPress 4.0, we no longer need to add a define to the wp-config.php, instead we set in the wp-admin > settings > general. You should see a screen like this
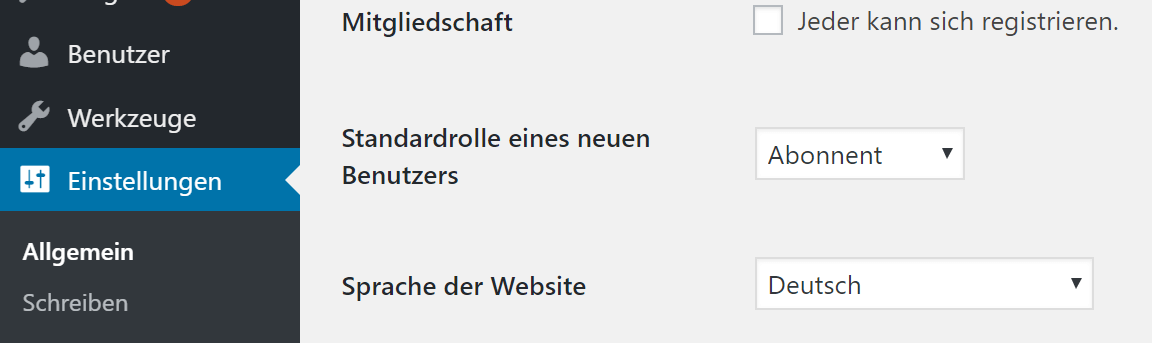
Select your language from the drop-down box and click "save".
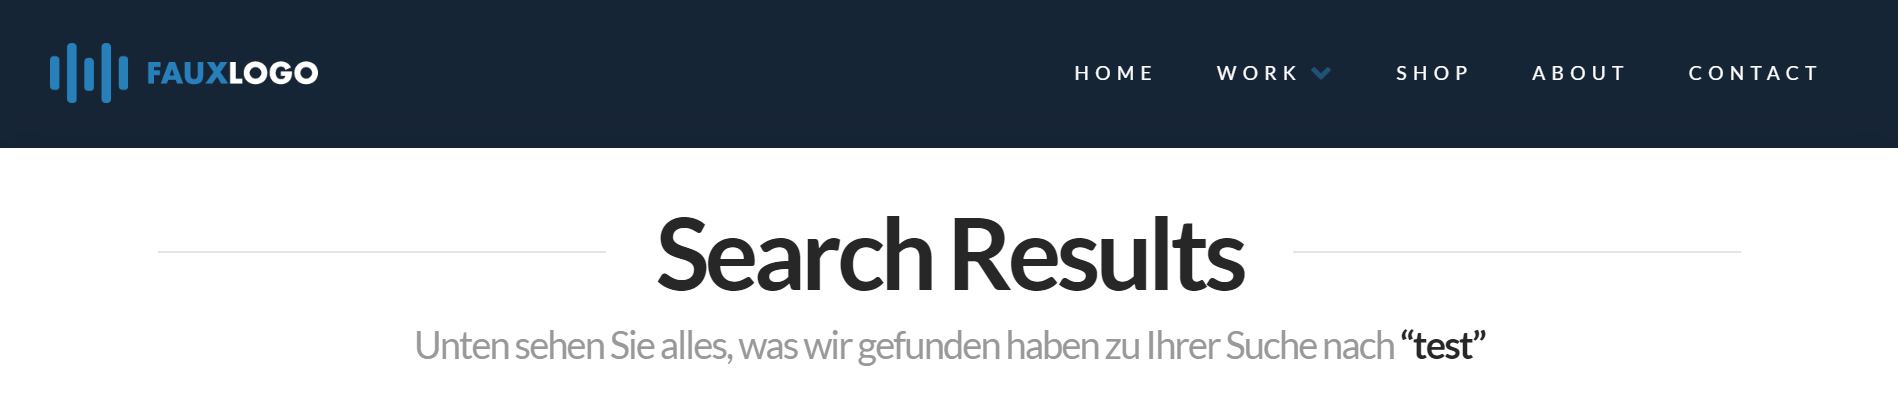
Now when we go to the front-end of our websites, we should see our translated string like this
Congrats! You've successfully translated your website. The same basic principles also apply to translating plugins.
Alternative Upload Method
Rather than using a child theme, you could upload your translation to /wp-content/languages/themes, the main difference being if you upload that way, you'll need to use the text domain of the theme/plugin you are translating in the naming of the file. For example, for this article, we'd use the Pro theme slug which is pro and then with the language code like this: pro-de_DE.po and pro-de_DE.mo
Single Sentence Translation
In some cases that you only need a one or two sentence change or translation you can install a Child Theme and add the code below to functions.php file of the Child Theme:
function custom_text_translate($translated) {
  $translated = str_ireplace('Description', 'More Information', $translated); return $translated;
}
add_filter('gettext', 'custom_text_translate' );
The code above replaces Description with More Information.
You can use the example above and translate/change the text which is generated in the theme.
Alternative Ways of Translating
Below are a couple of alternative translation methods, both being plugins, that you can use from within the WordPress admin area to translate themes and plugins.
WPML - Pro and X includes built-in integration with WPML and works flawlessly straight out of the box, if you already have WPML installed, you can read about translating a theme with WPML here.
qTranslate X - A free alternative to WPML, offering the ability to translate WordPress themes and plugins from the WordPress admin.
Further Reading
Below are some great further reading material, both on the subject of general translation and more specific topics on translating themes.
- WordPress Codex: Translating WordPress
- WPMU Dev: How to Translate a WordPress Theme
- WPExplorer: Localize & Translate Your WordPress Themes
Summary
Great job! You are now an expert in translating themes!
See something inaccurate? Let us know