Installation & Validation
Get up and running quickly.
If you're new to WordPress, the product installation process can feel a bit clunky at times. But fear not...we're here to help! In addition to installation, you will want to ensure that your products are properly validated and updated to the latest version by submitting the license code that comes with your purchase. Benefits of product validation include:
- Automatic Updates
- Product Support
- Extensions
- Design Cloud
This article will be broken up by product and cover each unique process individually. We also have a dedicated article on product validation. Without further ado, let's dive right in.
X: Downloading
There are two methods for downloading X, which we will cover below
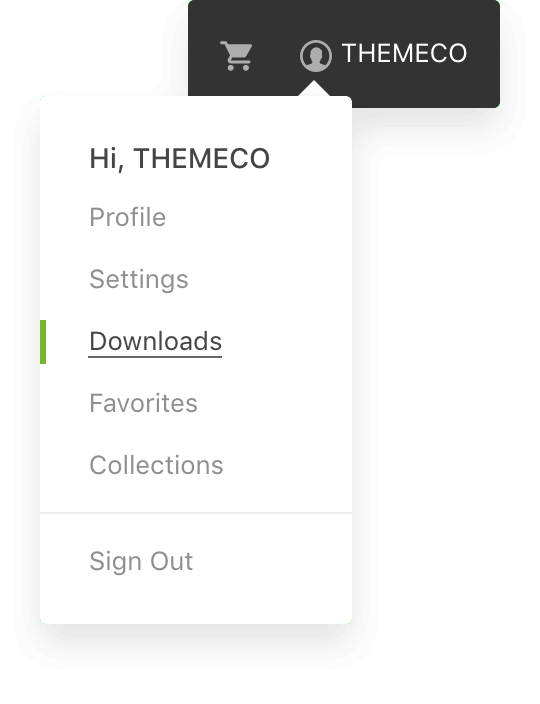
ThemeForest – After logging in, hover over your account name in the top right corner of the screen and select Downloads from the dropdown menu:
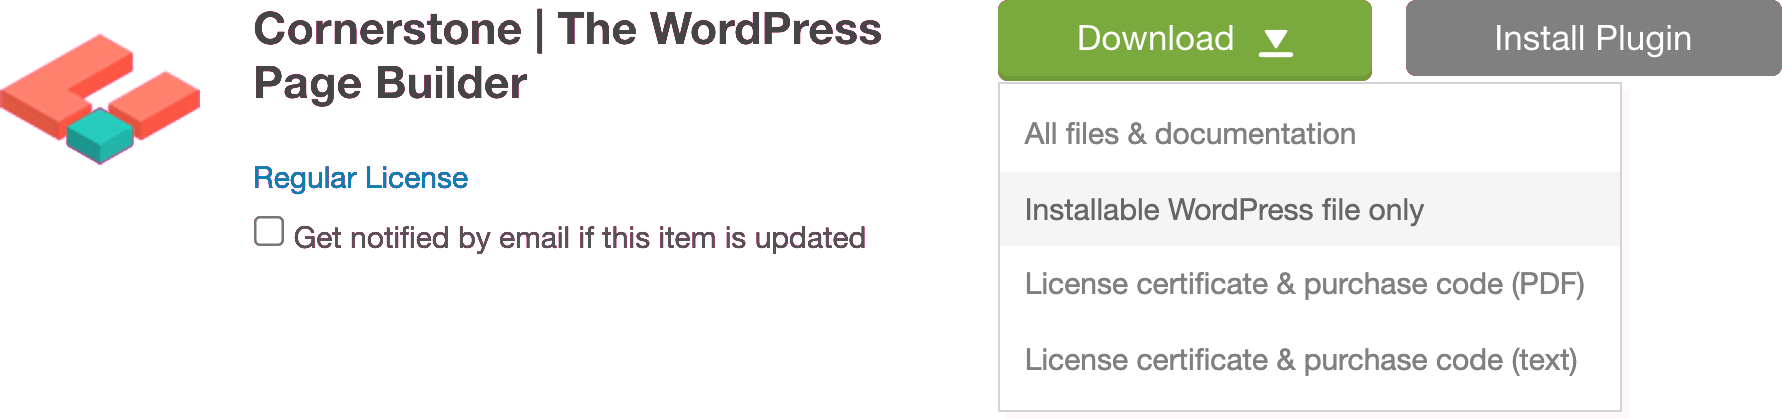
On the following page you will see a list of all items you've purchased. Locate X, click the Download button and select Installable WordPress file only from the dropdown:

Themeco Dashboard – After logging in, select your license from the list in the sidebar. Once the main content on the right appears, select the Download button and the installation file will be saved to your computer:
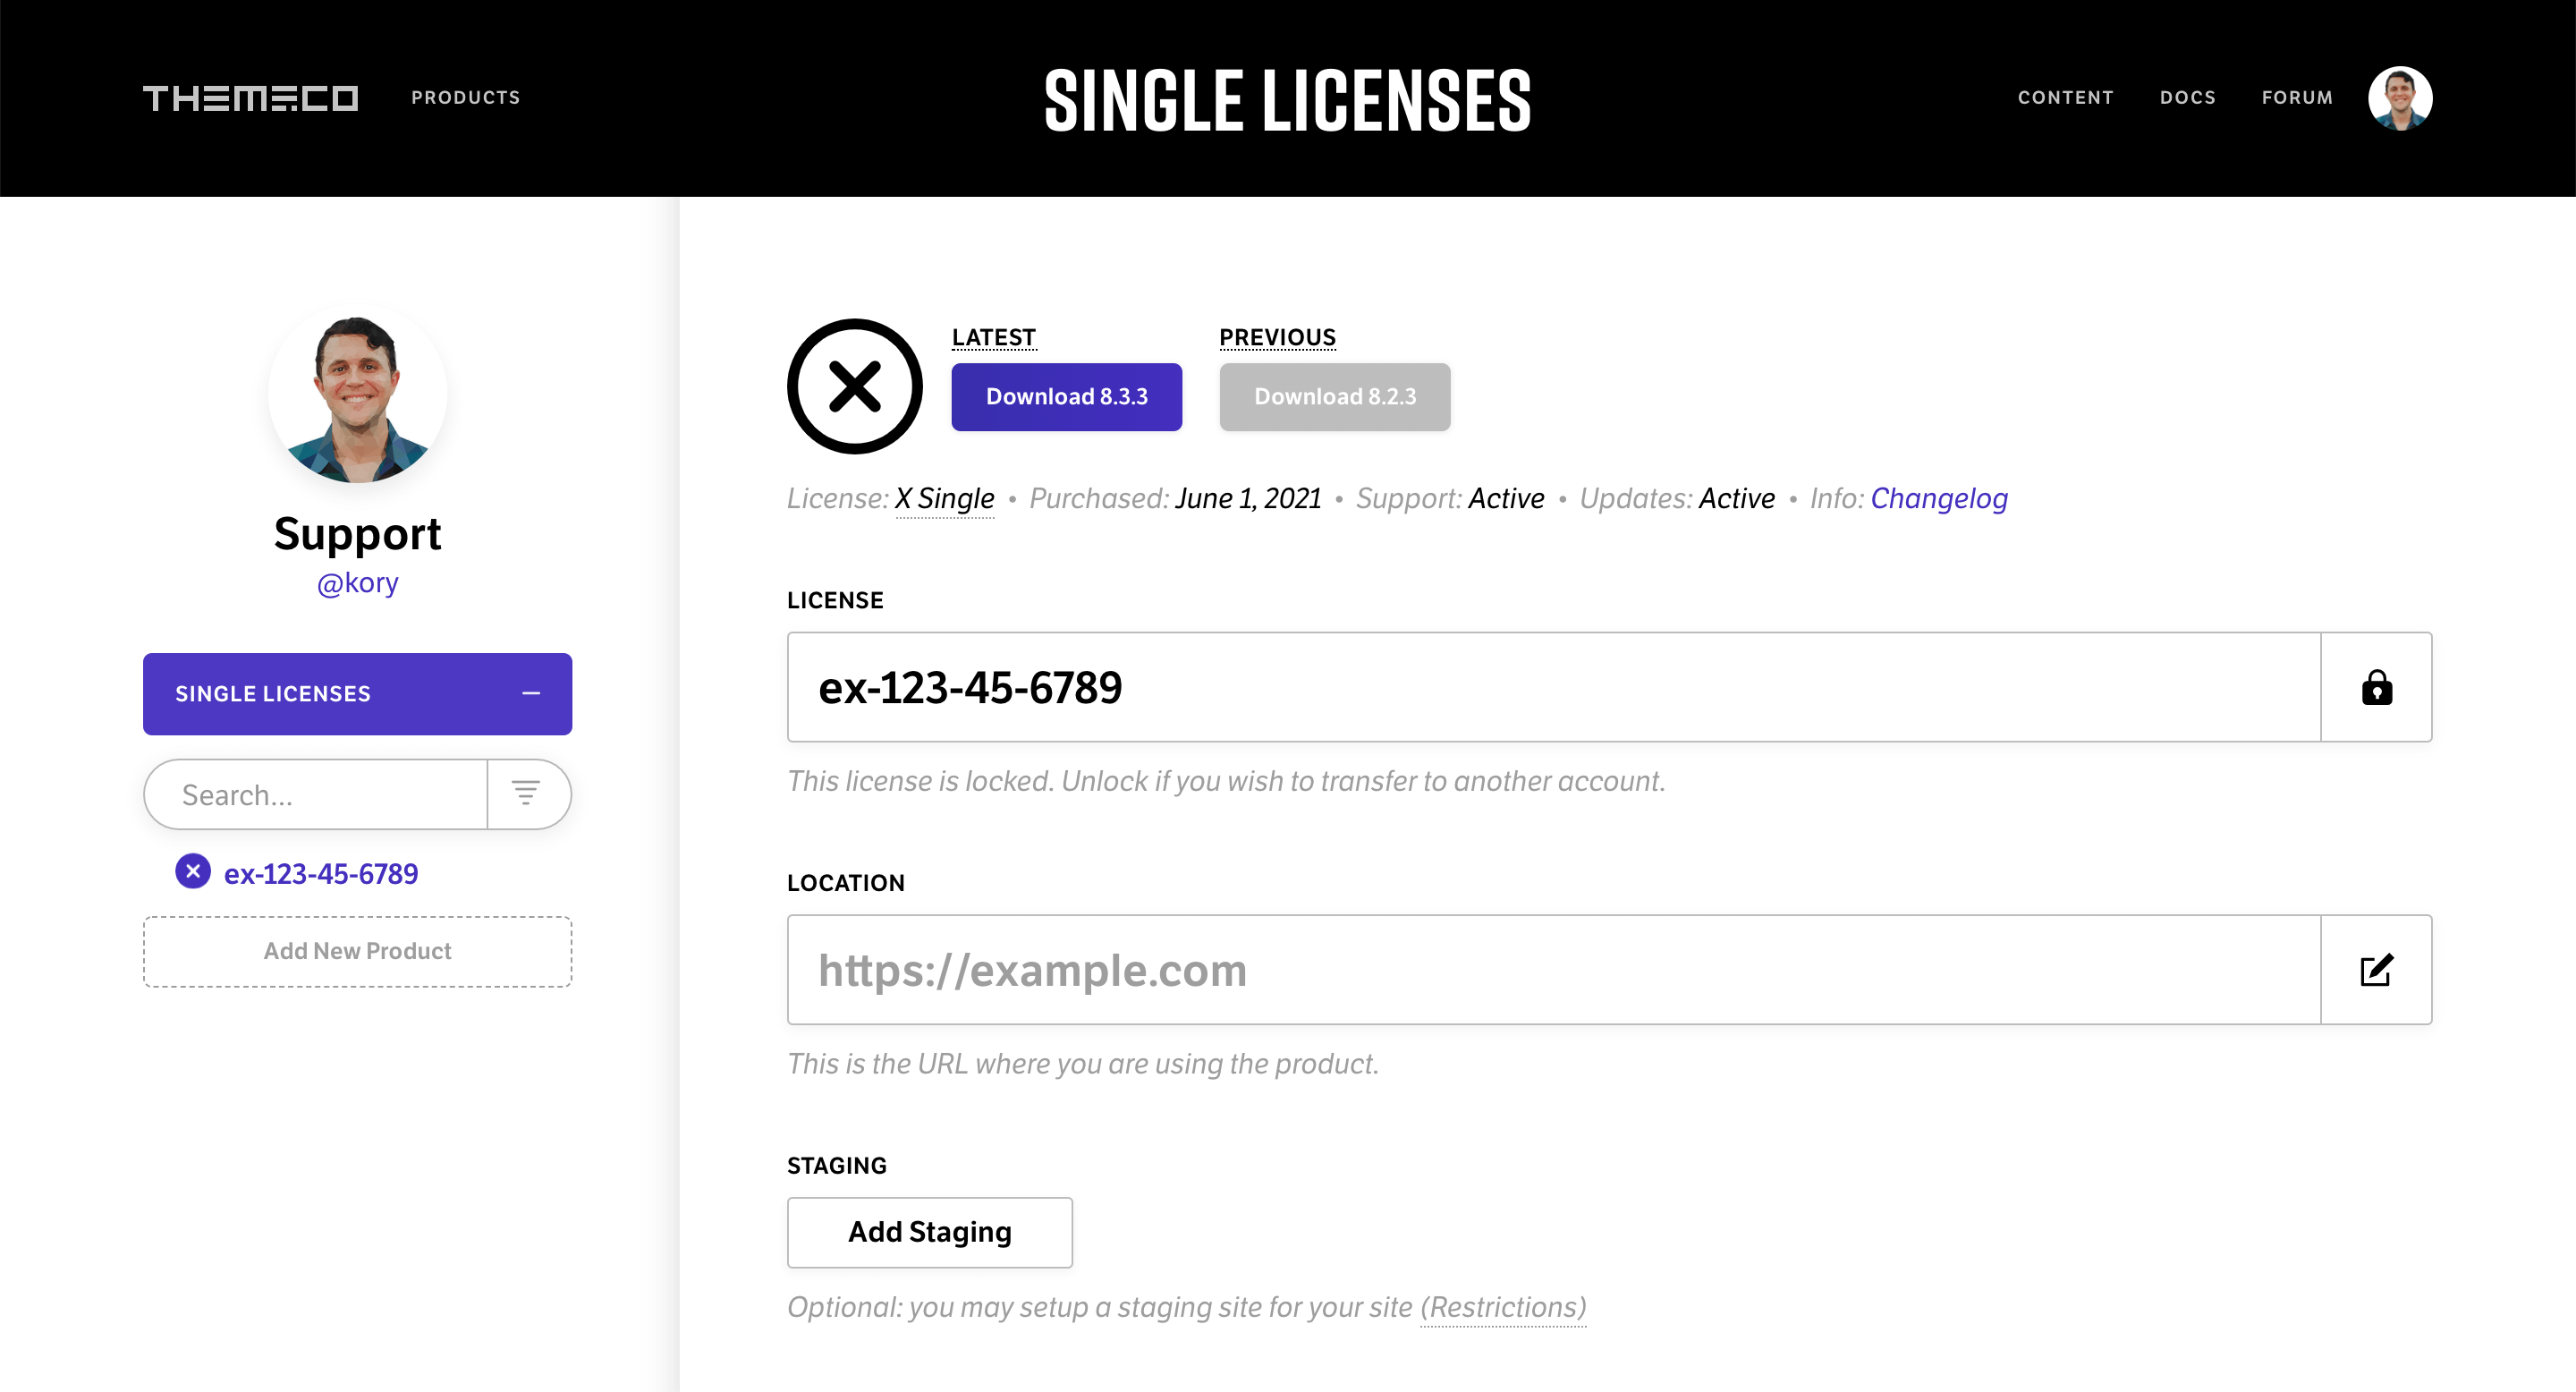
There are two options you can choose between: Latest, which is the most up-to-date version of X, and Previous, which is the “stability” version of X that you can downgrade to if you happen to run into any issues during the update process.
X: Installing
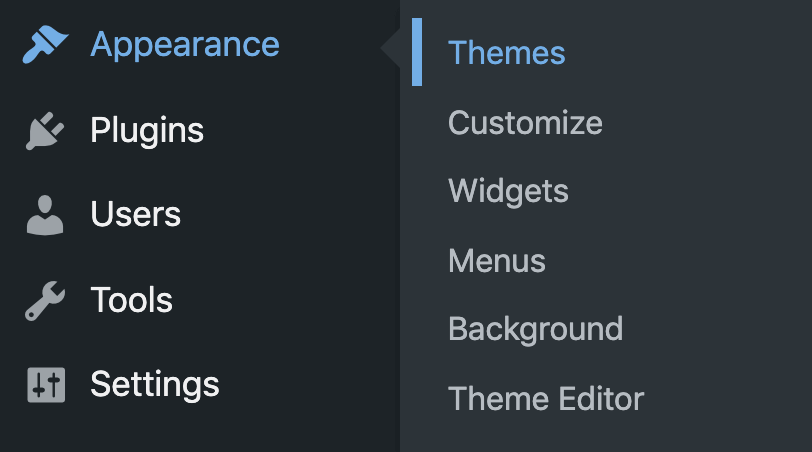
Now that you've downloaded the theme, you're ready to install it! In your WordPress admin, navigate to Appearance → Themes:
Once the Themes page has loaded, click Add New near the top:

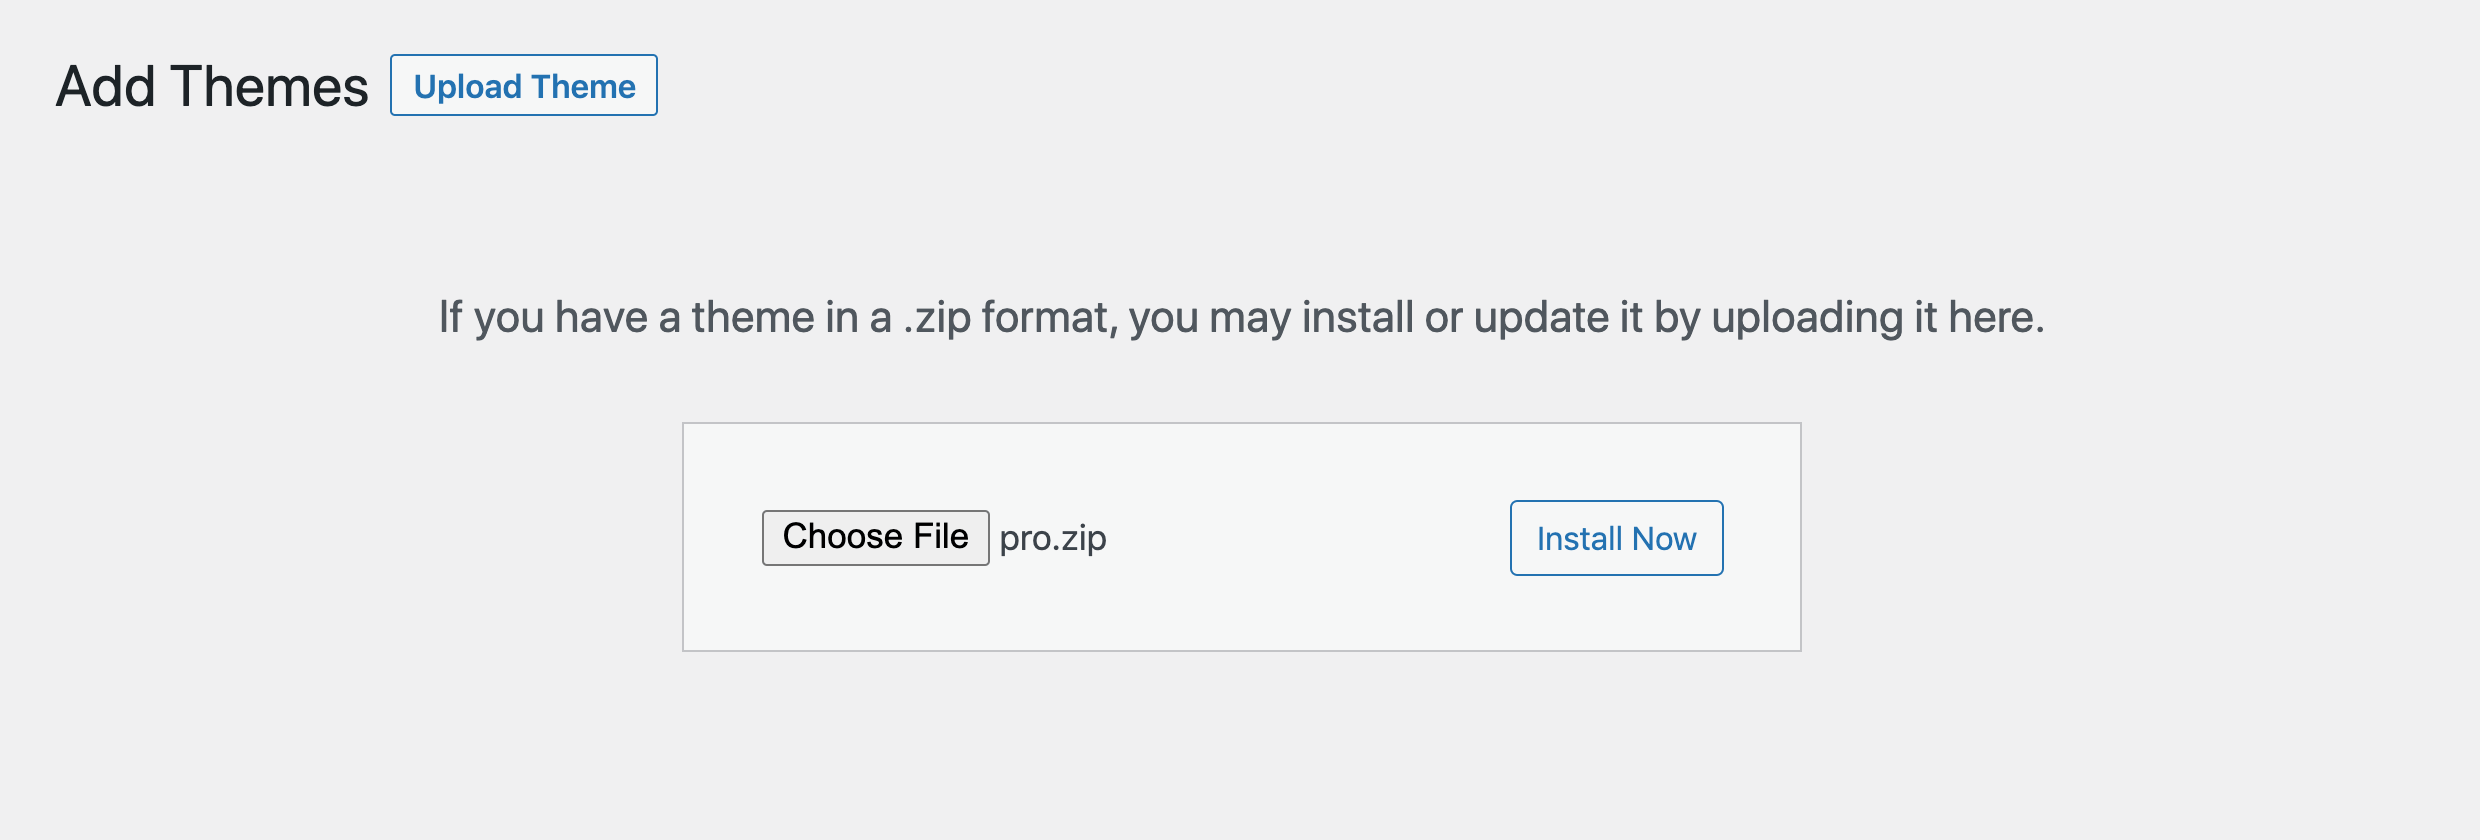
Next, you'll be taken to the theme installation page. When that has loaded, click Upload Theme near the top:

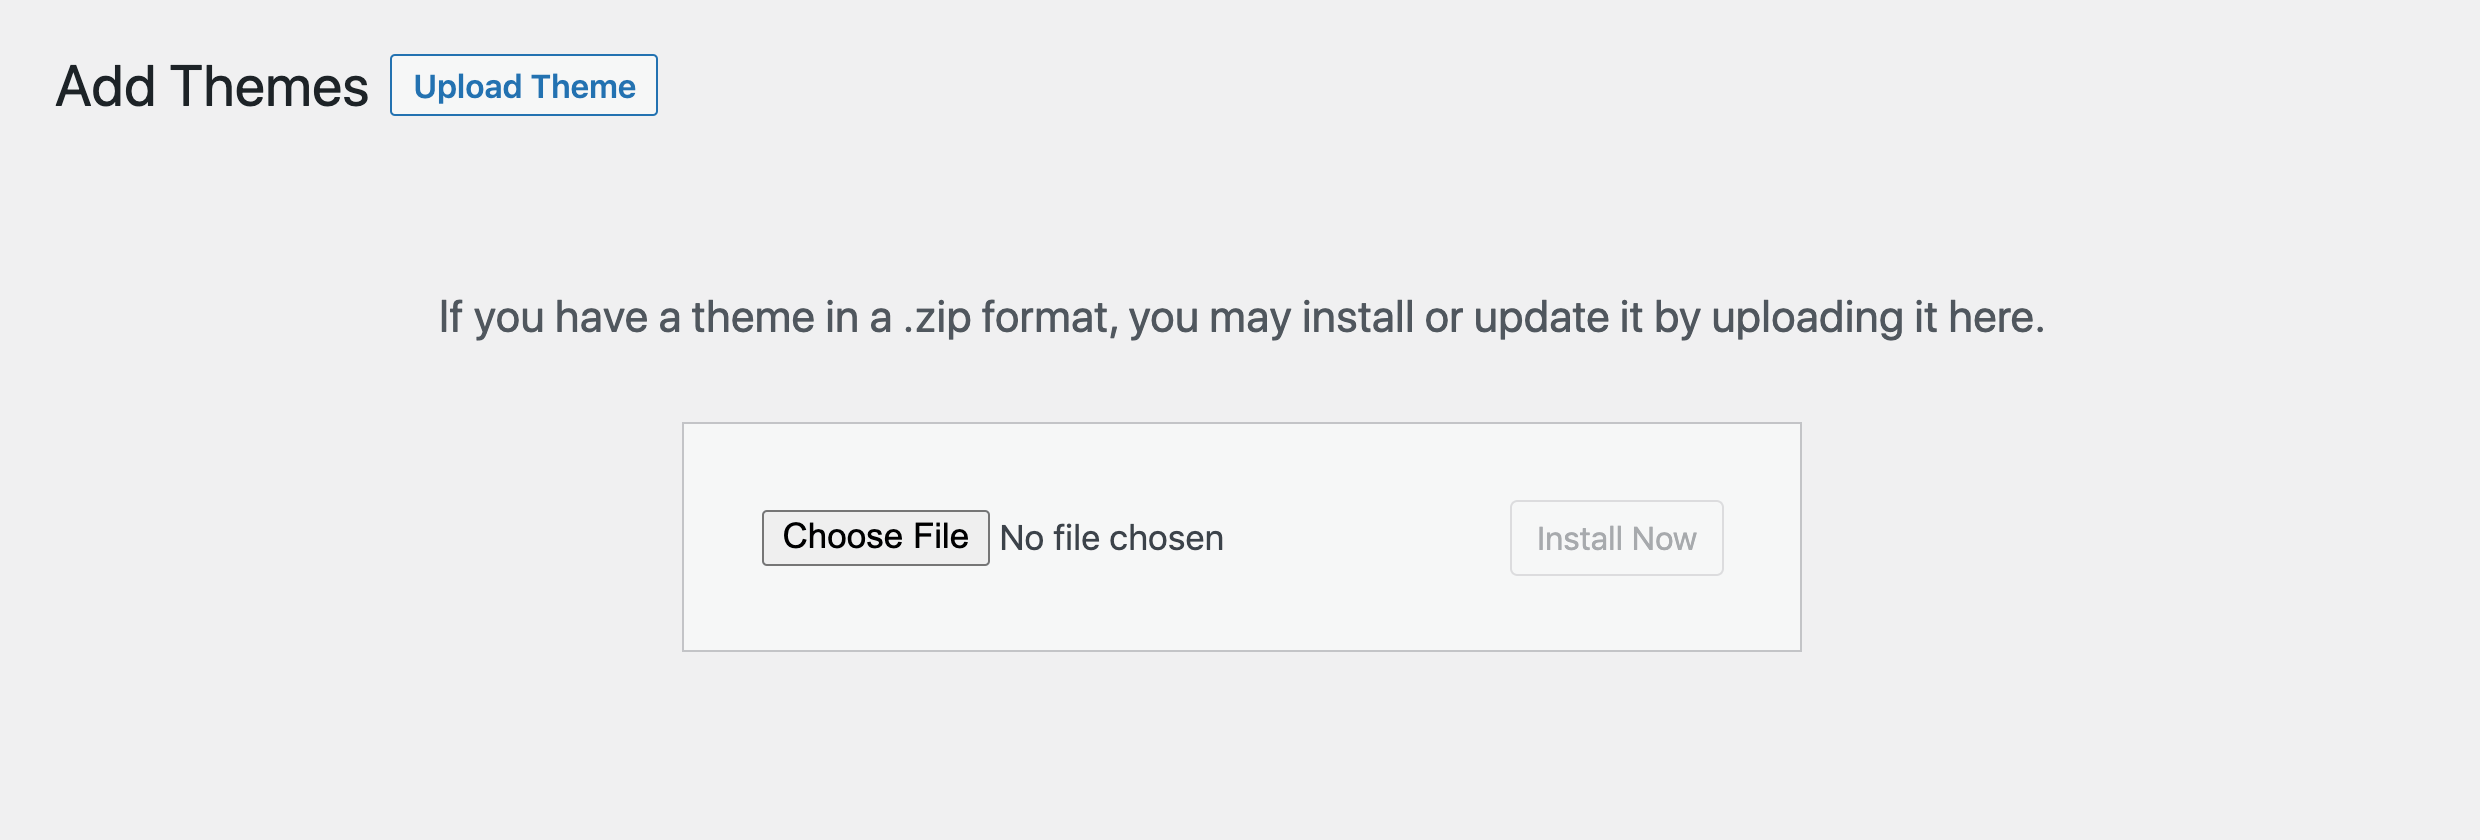
Upon clicking that button, an upload form will appear below. Select Choose File within that form to locate the .zip file you download earlier on your computer:
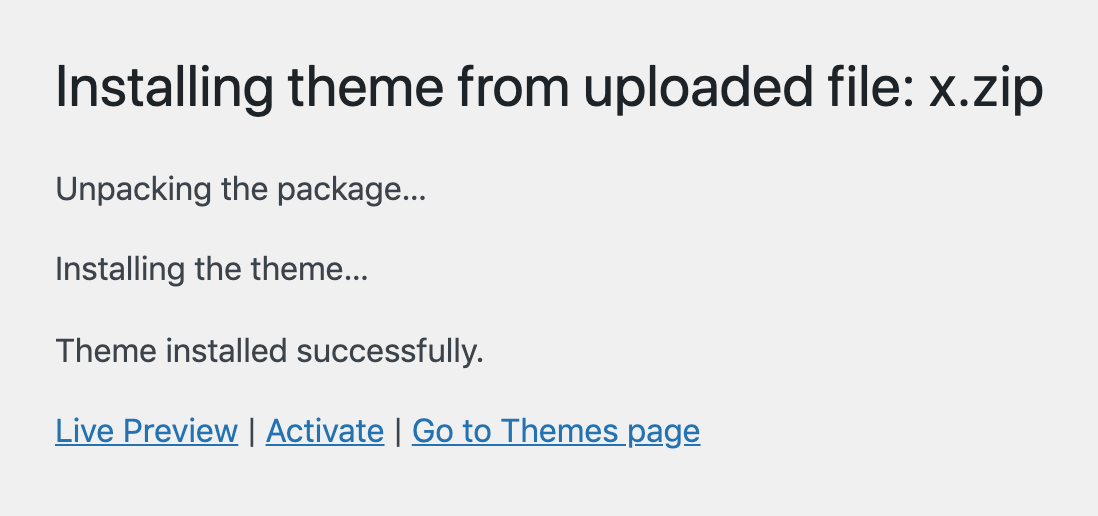
After locating and adding the .zip file, click the Install Now button:

Upon successful installation of your theme files, you will see the following screen. Click the Activate link to enable X on your WordPress installation:
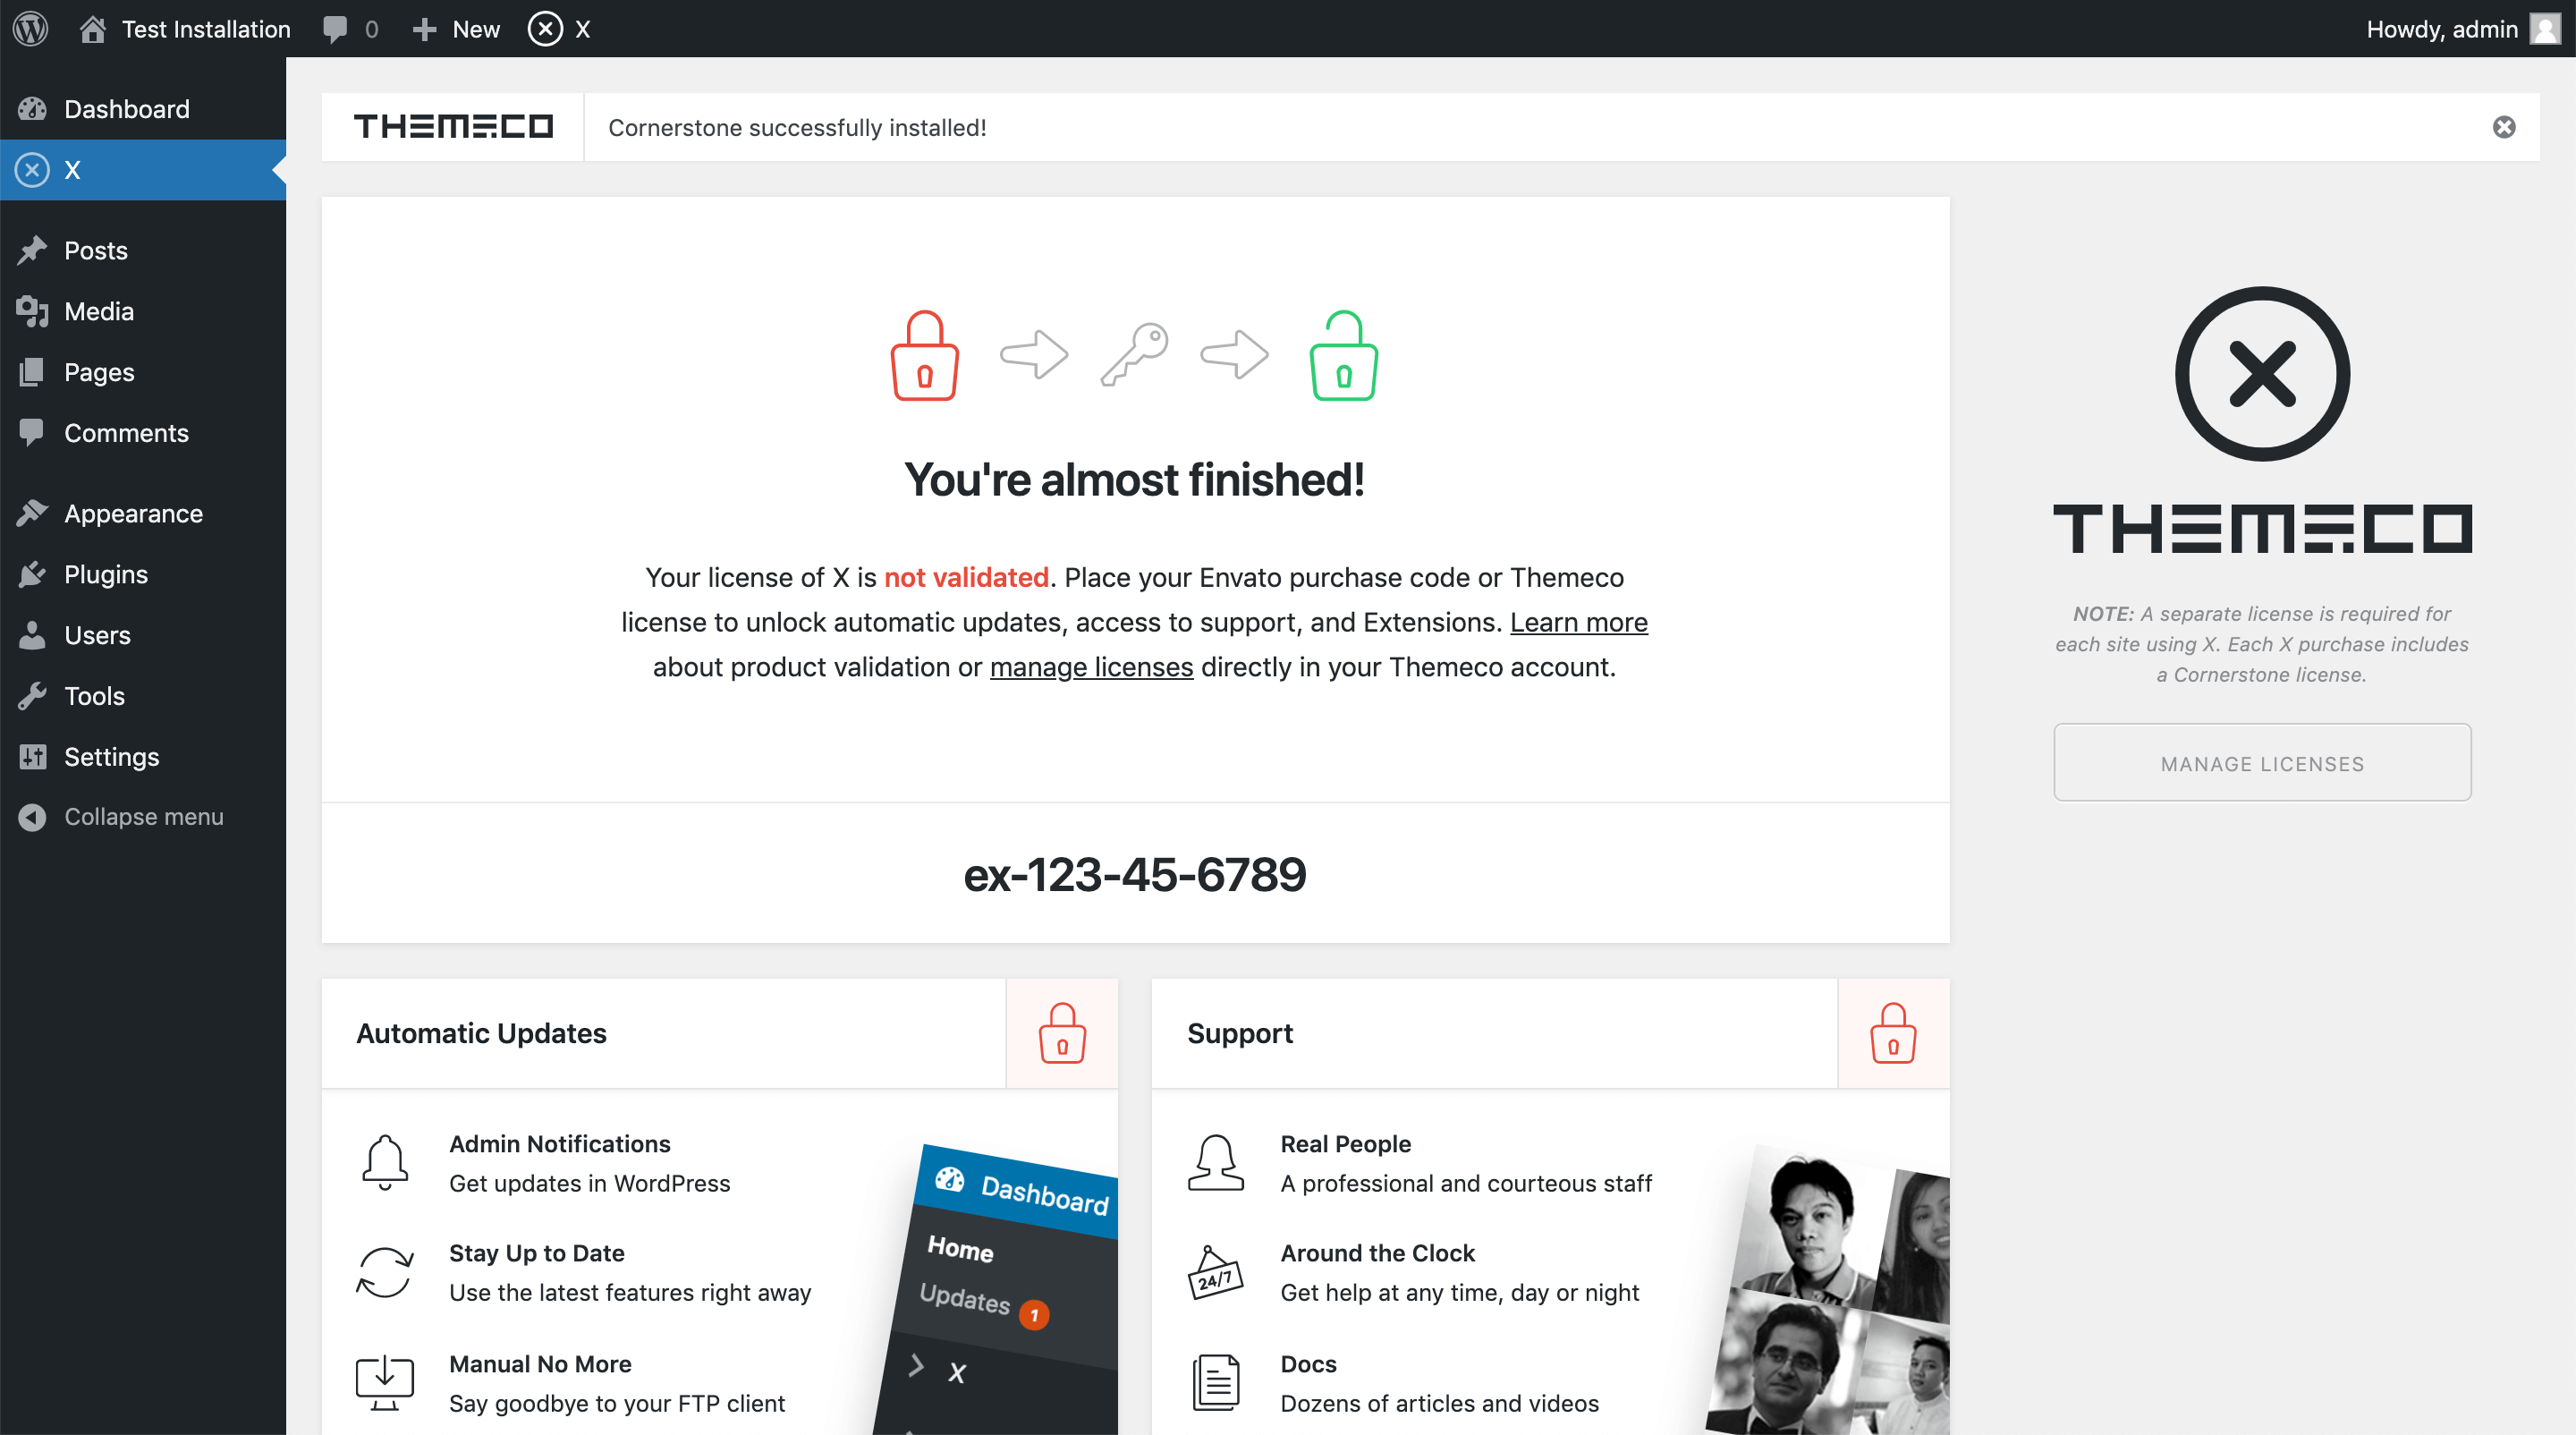
Once X has been activated, you will be taken to the theme dashboard. If this is your first time installing X on this WordPress installation, you will see a notice at the top of the screen prompting you to install and activate Cornerstone, which is required when using X. Click that link to finalize that process:


Congratulations! X and Cornerstone have been successfully installed and you're ready to start building.
X: Validating
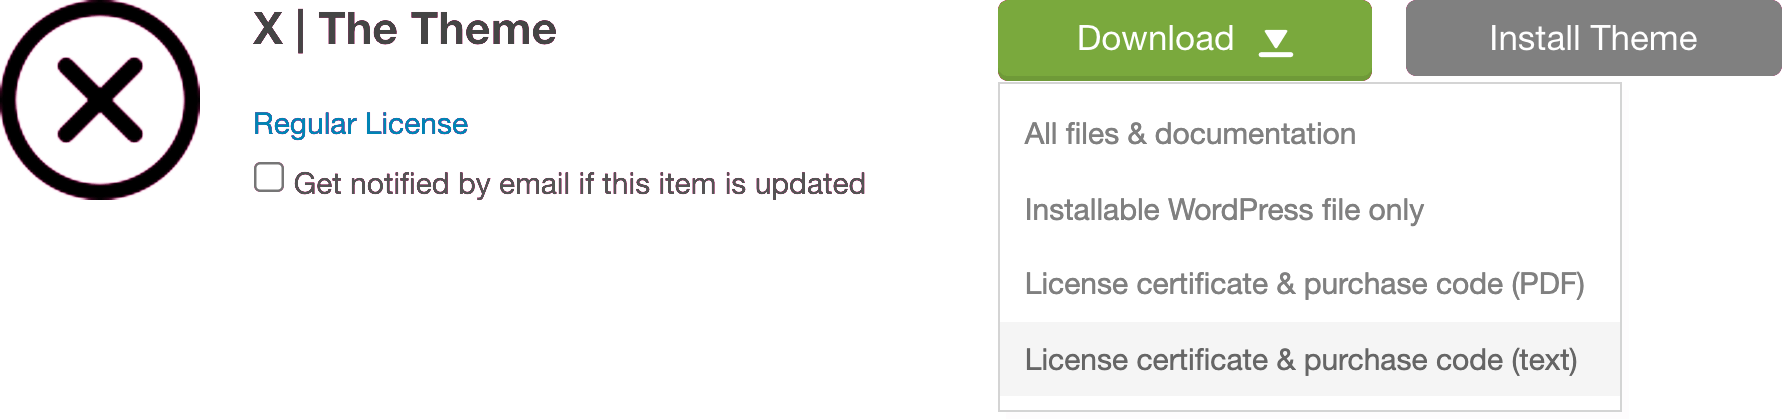
To complete the product validation step for X, you will need your license certificate from ThemeForest. Once more, hover over your account name in the top-right corner of the screen and select Downloads from the dropdown:
Next, navigate through your list of downloads to find your purchase of X and click the Download button and select the License certificate & purchase code (text) option from the dropdown:
This will download a .txt file to your computer, which you should be able to open with any standard word processor. Inside that file, look for a line labeled Item Purchase Code and then copy the string directly below that line only. This is the code you will take back to your validation screen inside WordPress:
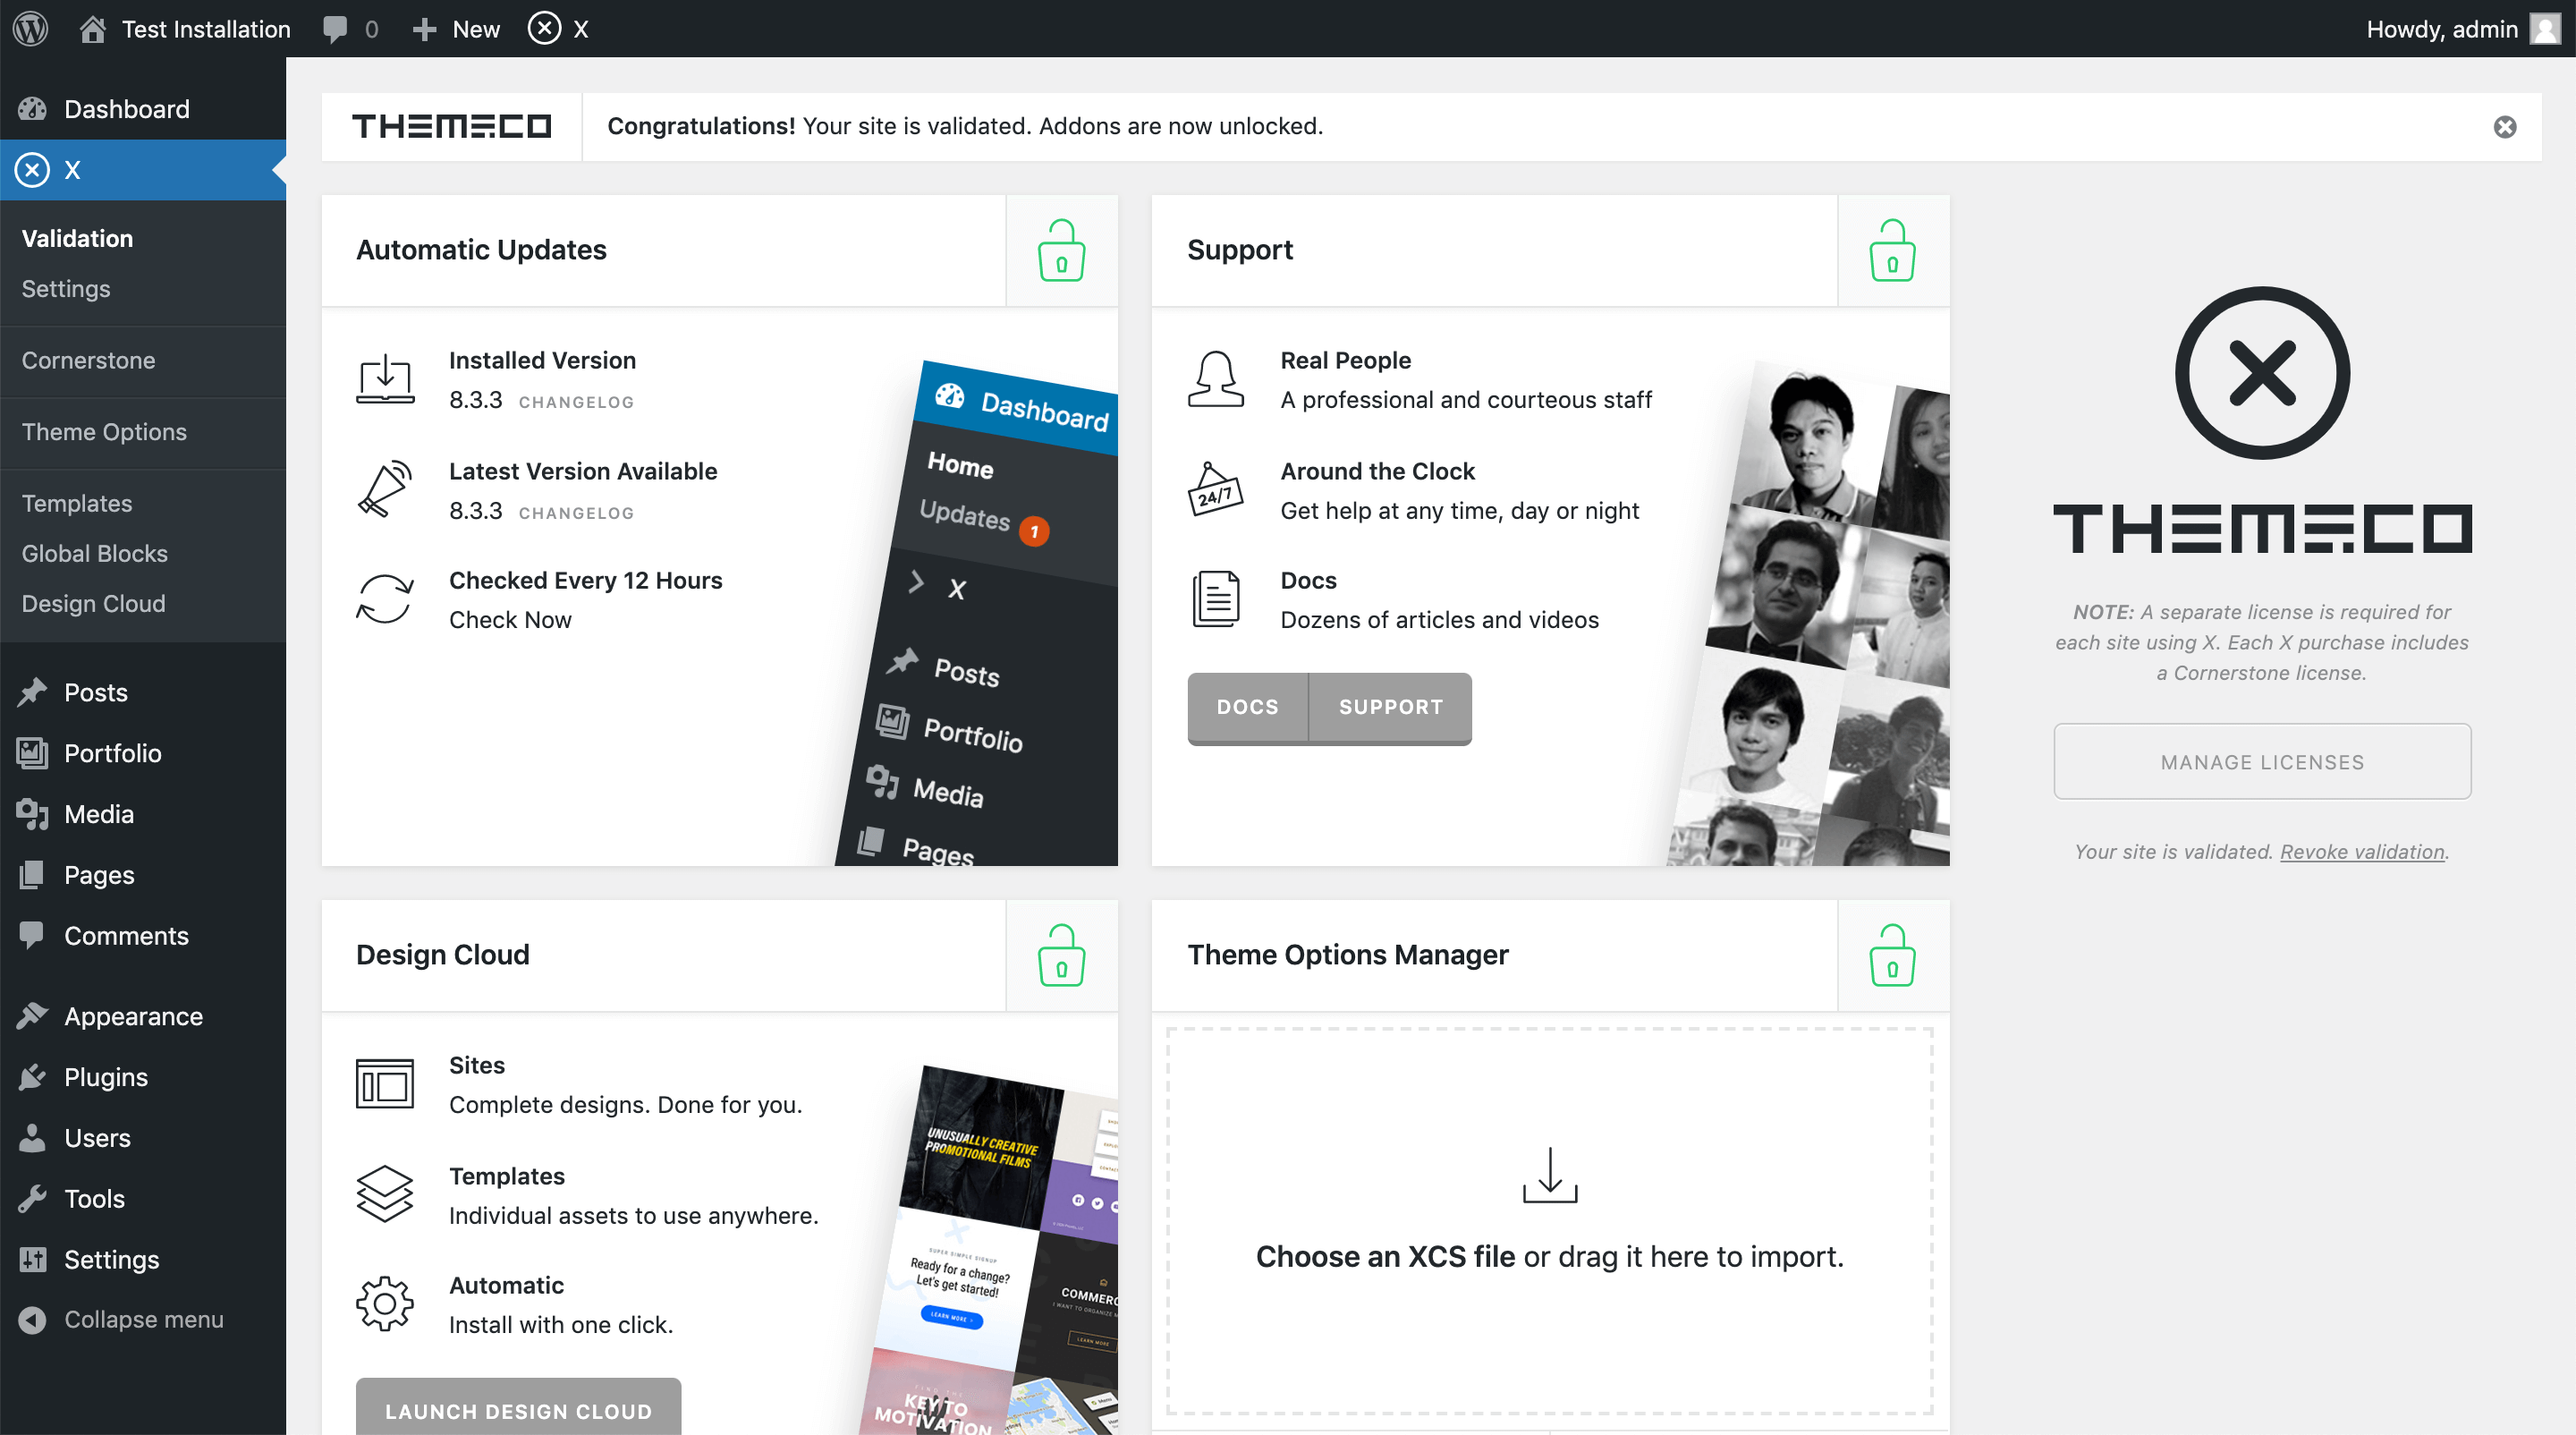
Upon hitting enter, your purchase code will be accepted and you should now see that all additional features of X are unlocked:
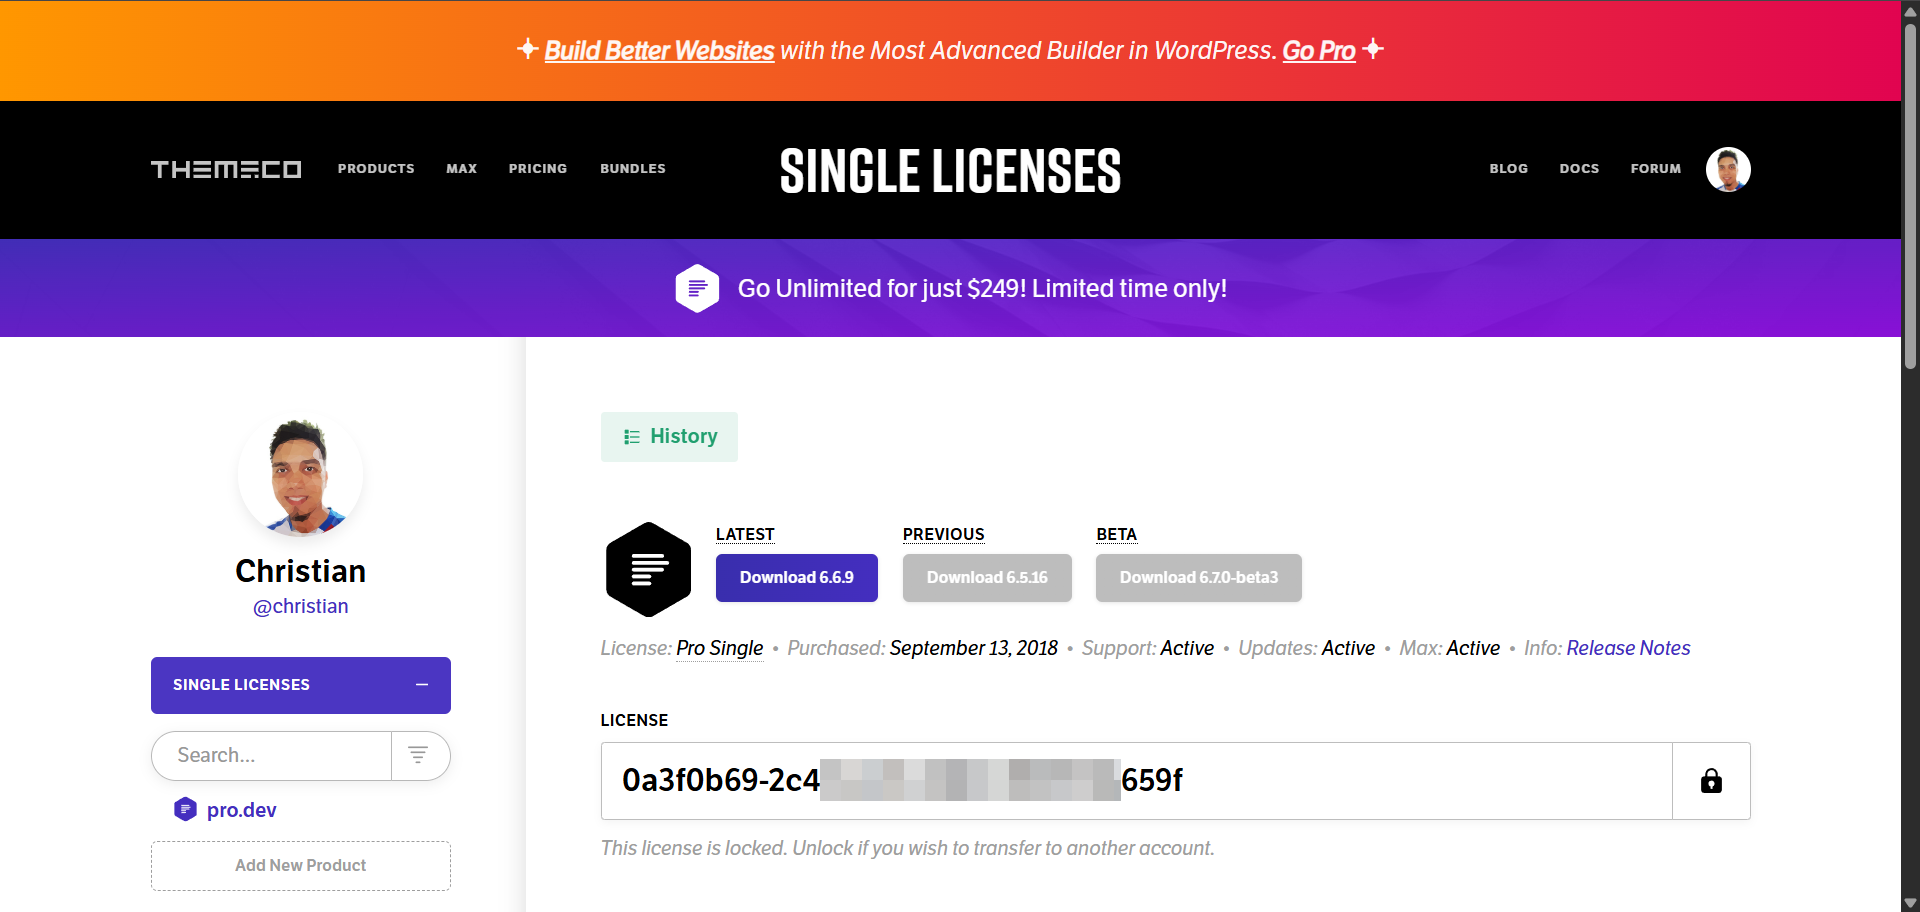
Pro: Downloading
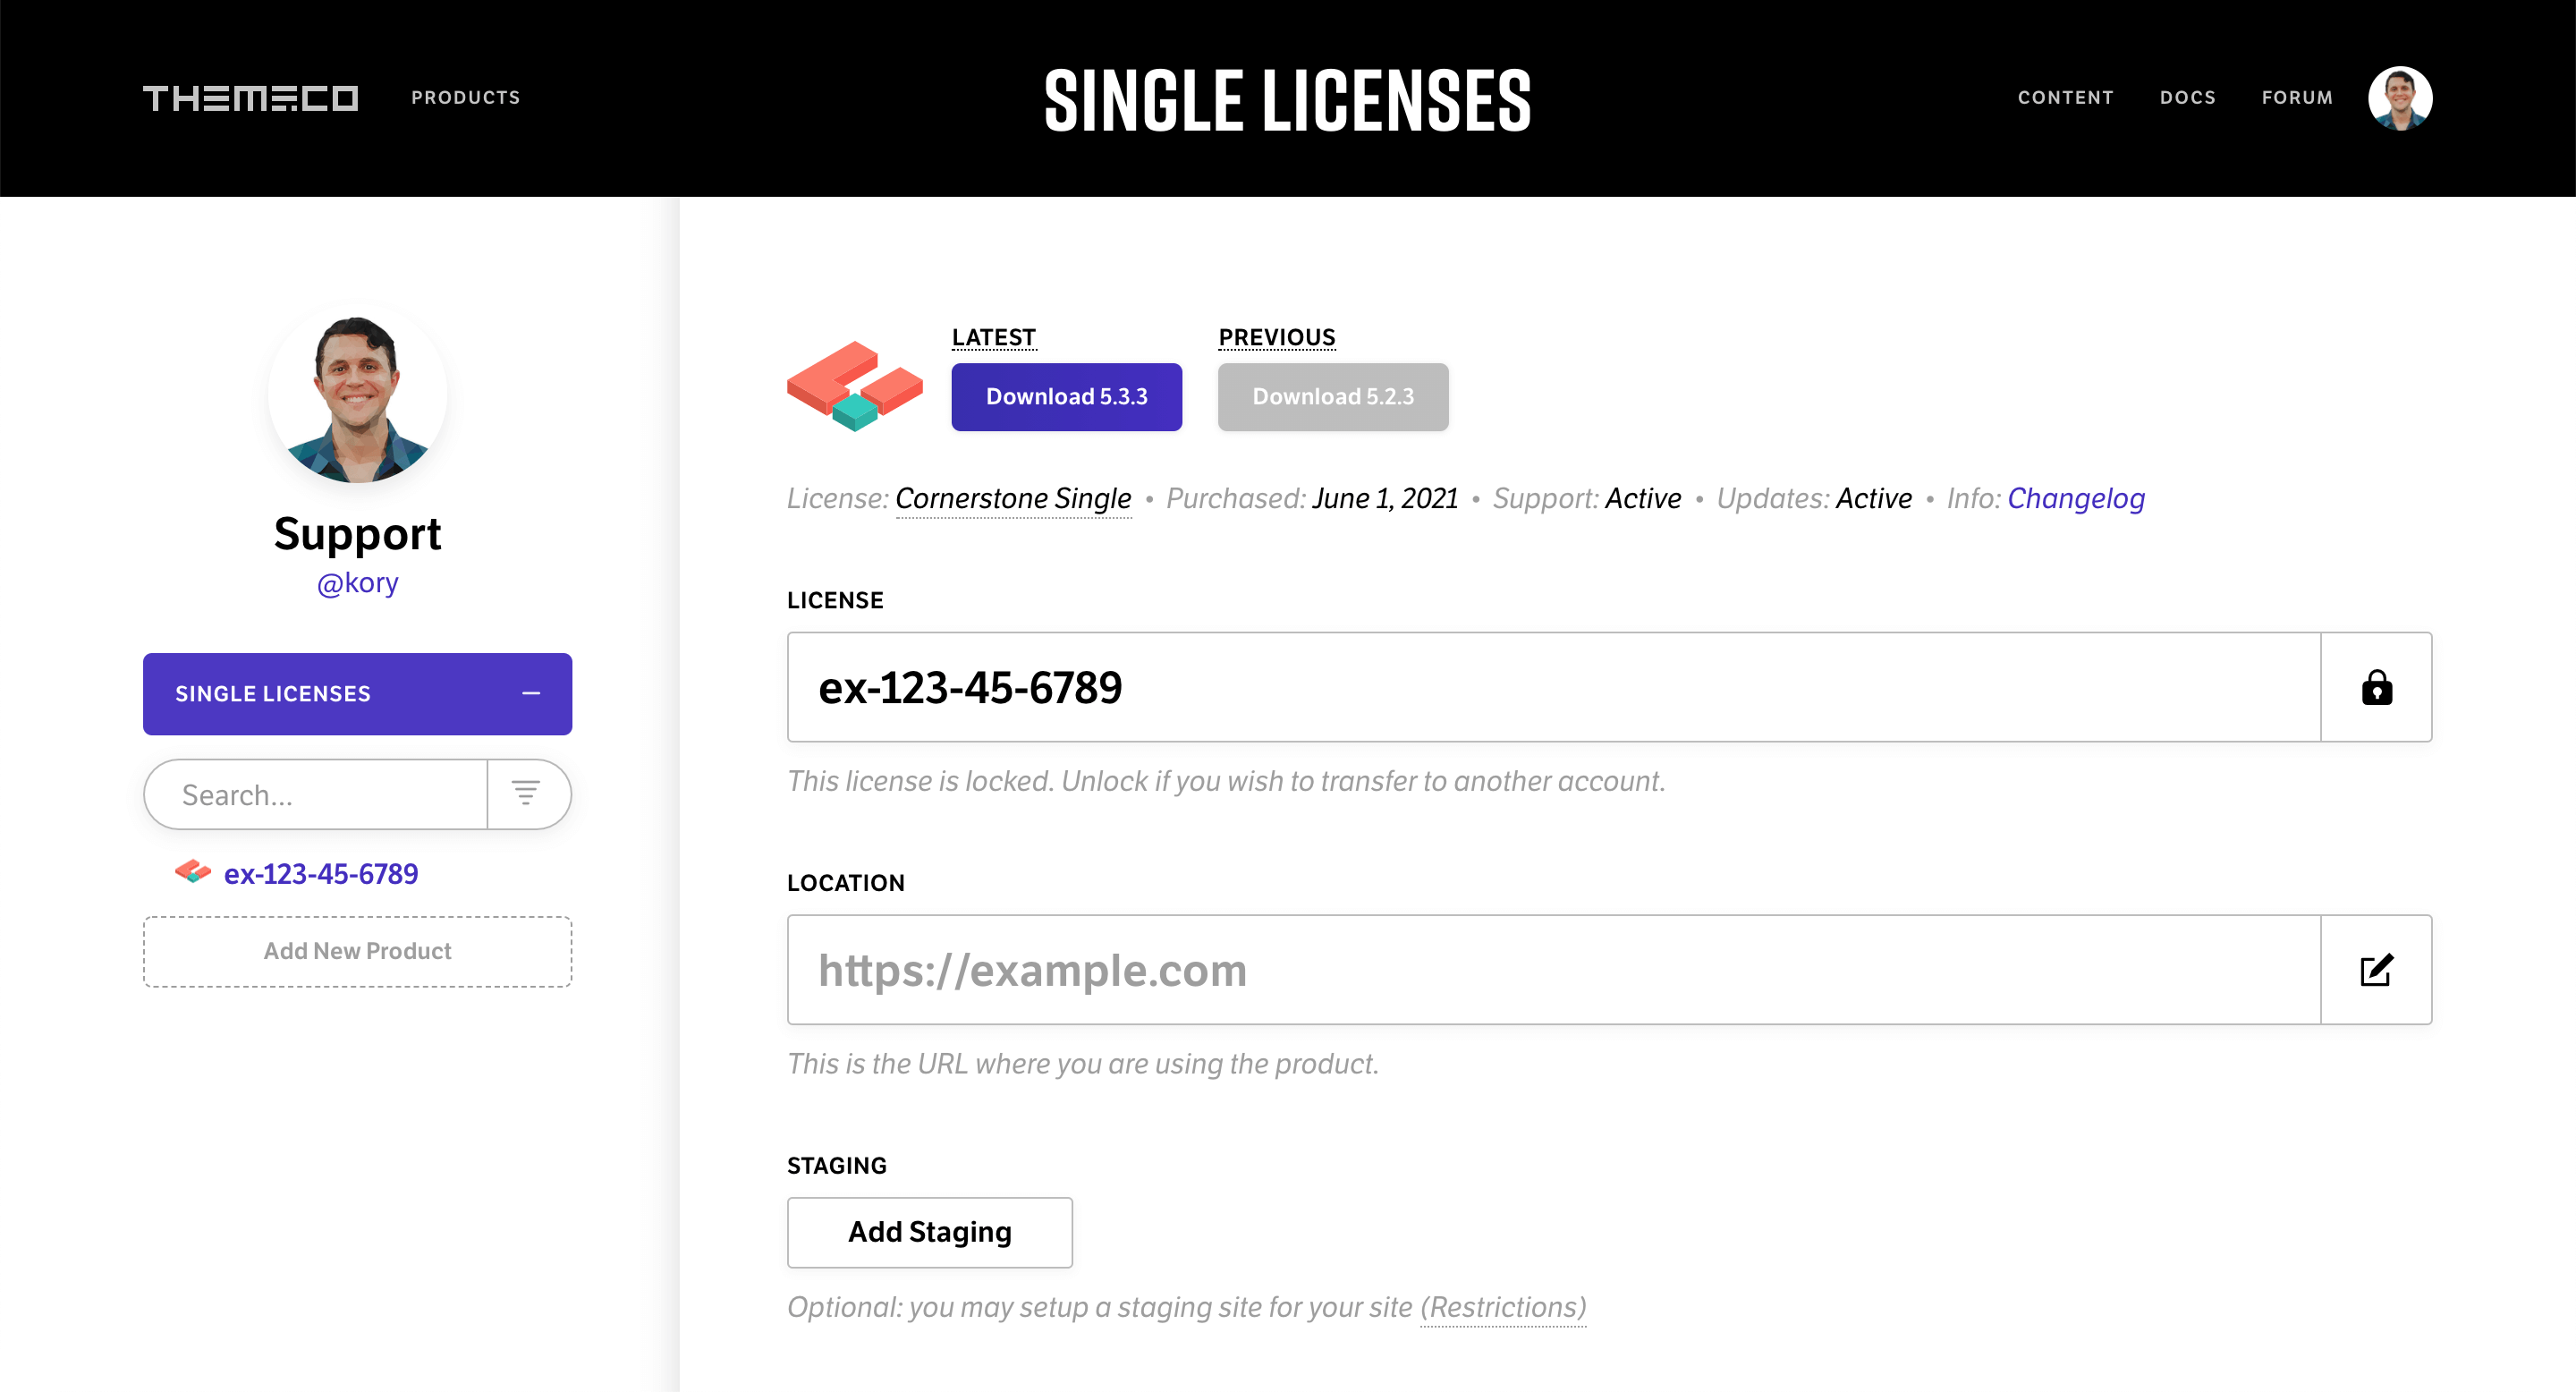
Pro can be downloaded from your Themeco Dashboard after you have completed your purchase. Once logging in, select your license from the list in the sidebar and when the main content on the right appears, select the Download button and the installation file will be saved to your computer:
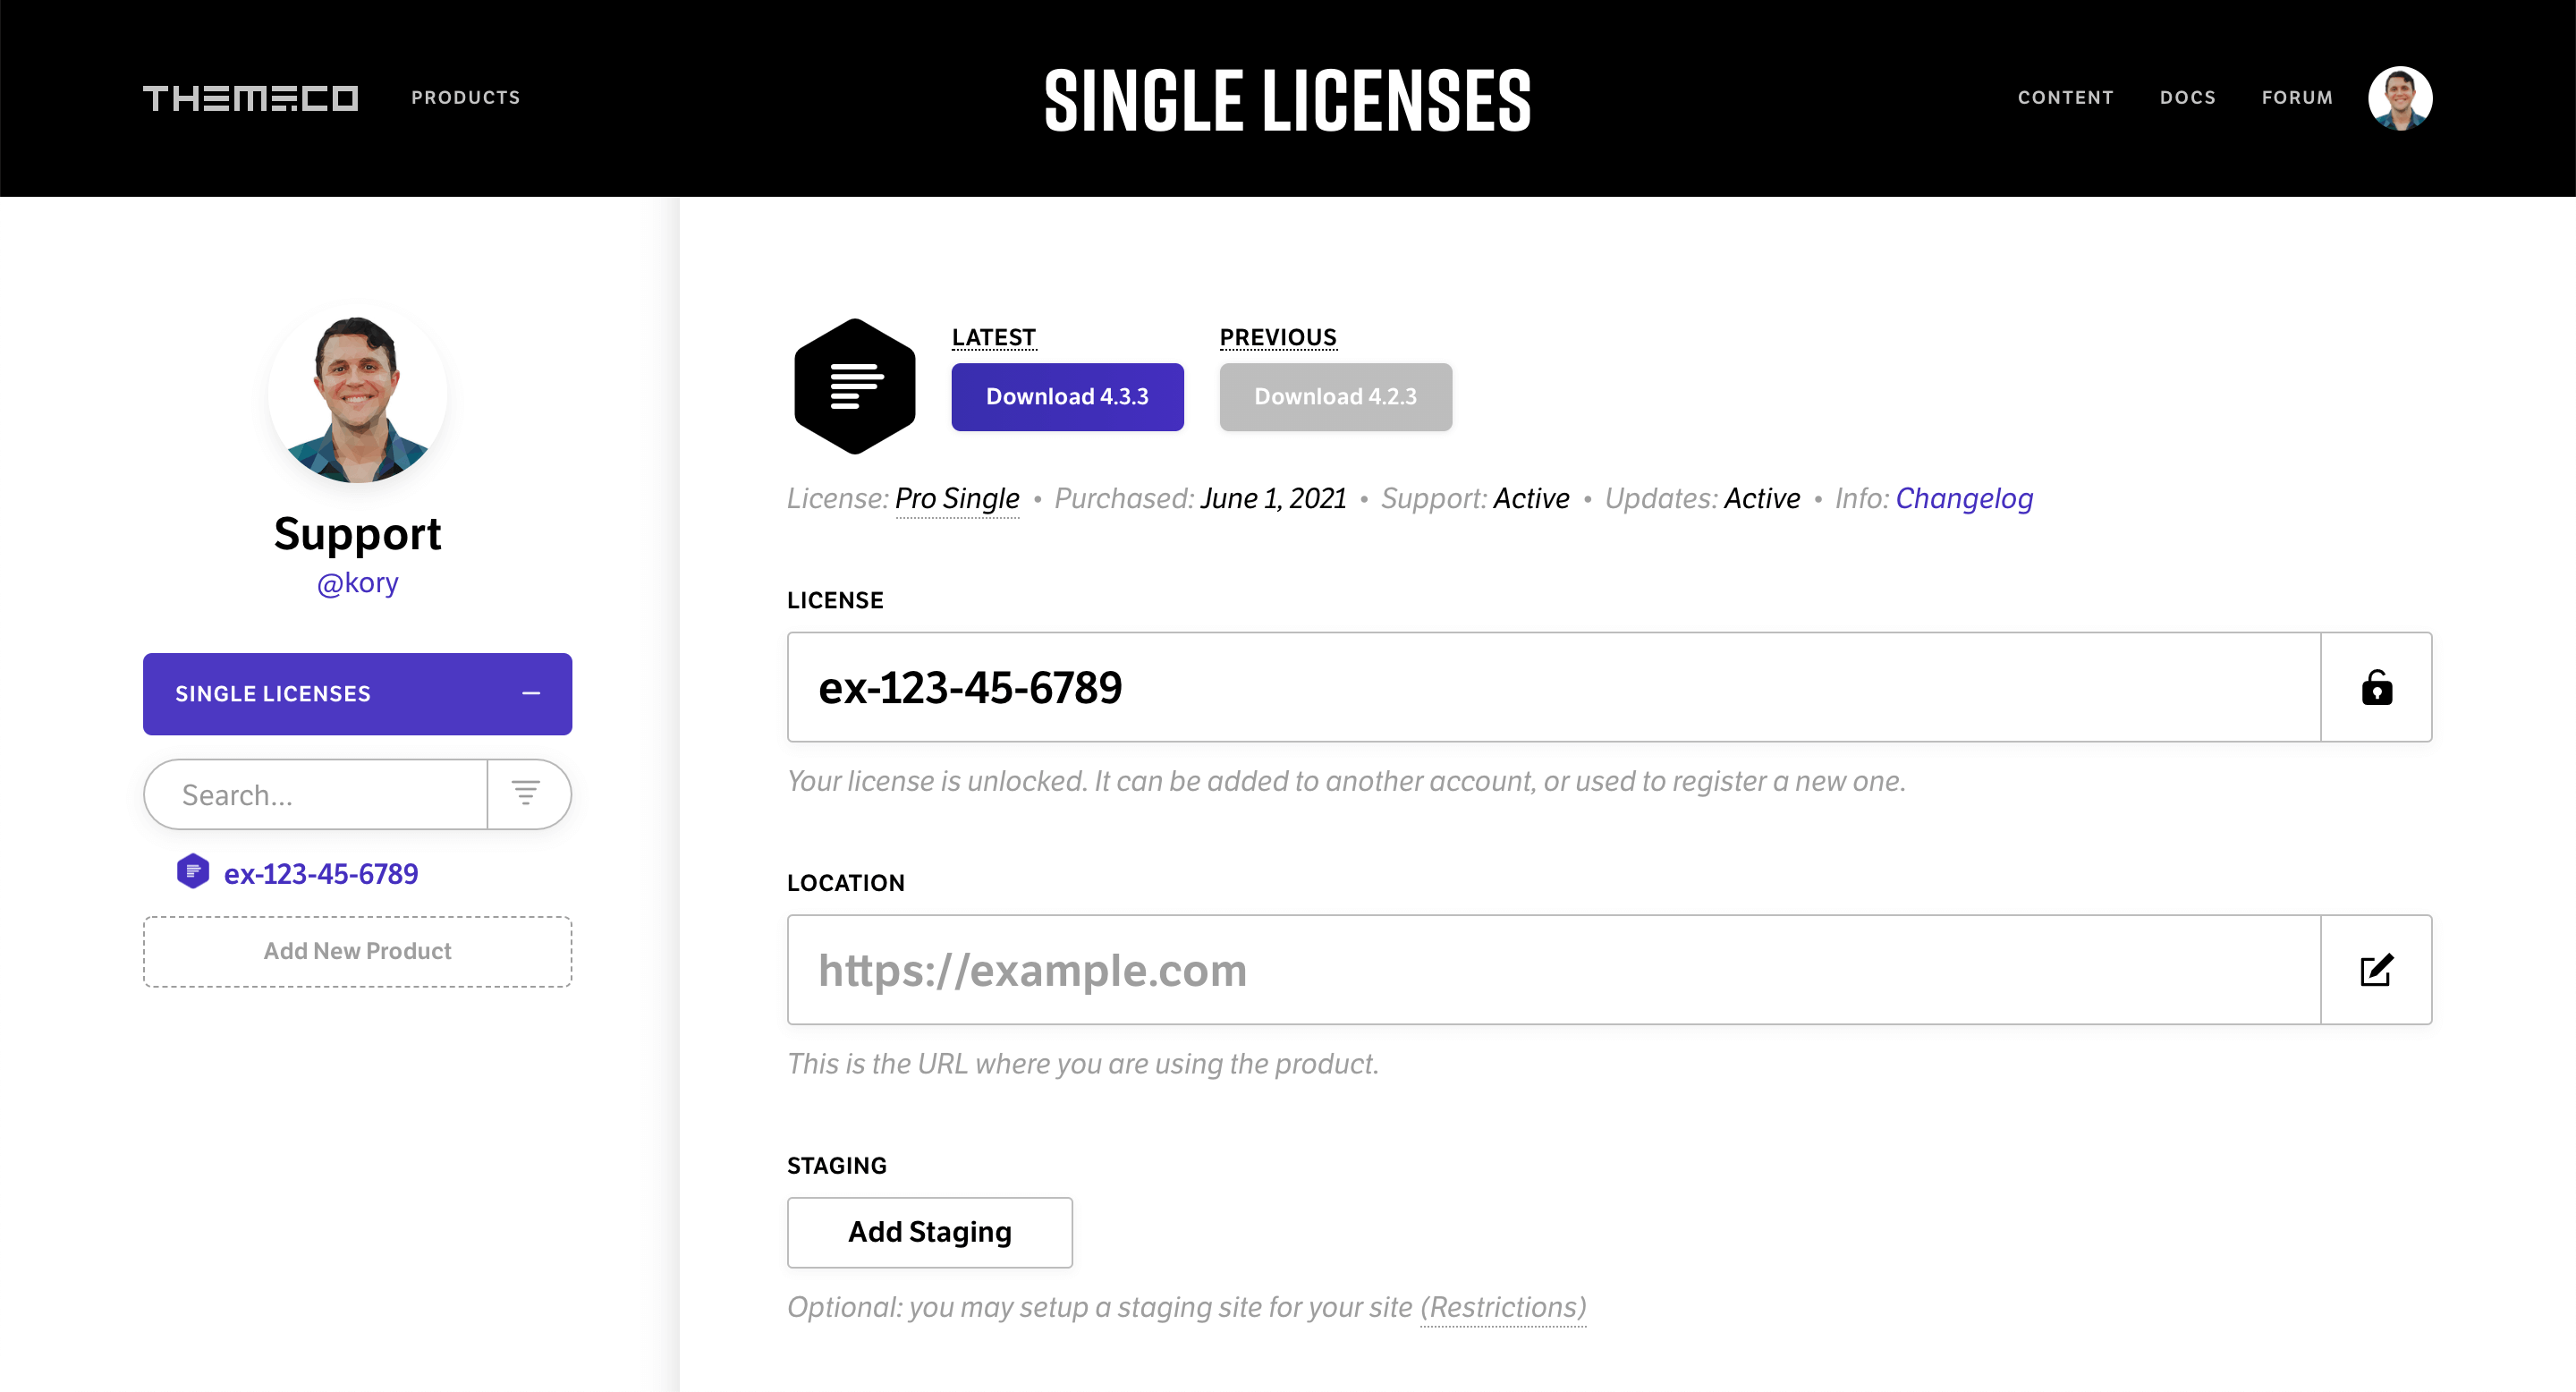
There are two options you can choose between: Latest, which is the most up-to-date version of Pro, and Previous, which is the “stability” version of Pro that you can downgrade to if you happen to run into any issues during the update process.
Pro: Installing
Now that you've downloaded the theme, you're ready to install it! In your WordPress admin, navigate to Appearance → Themes:
Once the Themes page has loaded, click Add New near the top:
Next, you'll be taken to the theme installation page. When that has loaded, click Upload Theme near the top:
Upon clicking that button, an upload form will appear below. Select Choose File within that form to locate the .zip file you download earlier on your computer:
After locating and adding the .zip file, click the Install Now button:
Upon successful installation of your theme files, you will see the following screen. Click the Activate link to enable Pro on your WordPress installation:

Remember that with Pro, Cornerstone is built right into the theme, so there is no need to install it separately. Once the activation process is complete, you should see the following screen:
Congratulations! Pro has been successfully installed and you're ready to get started with your build.
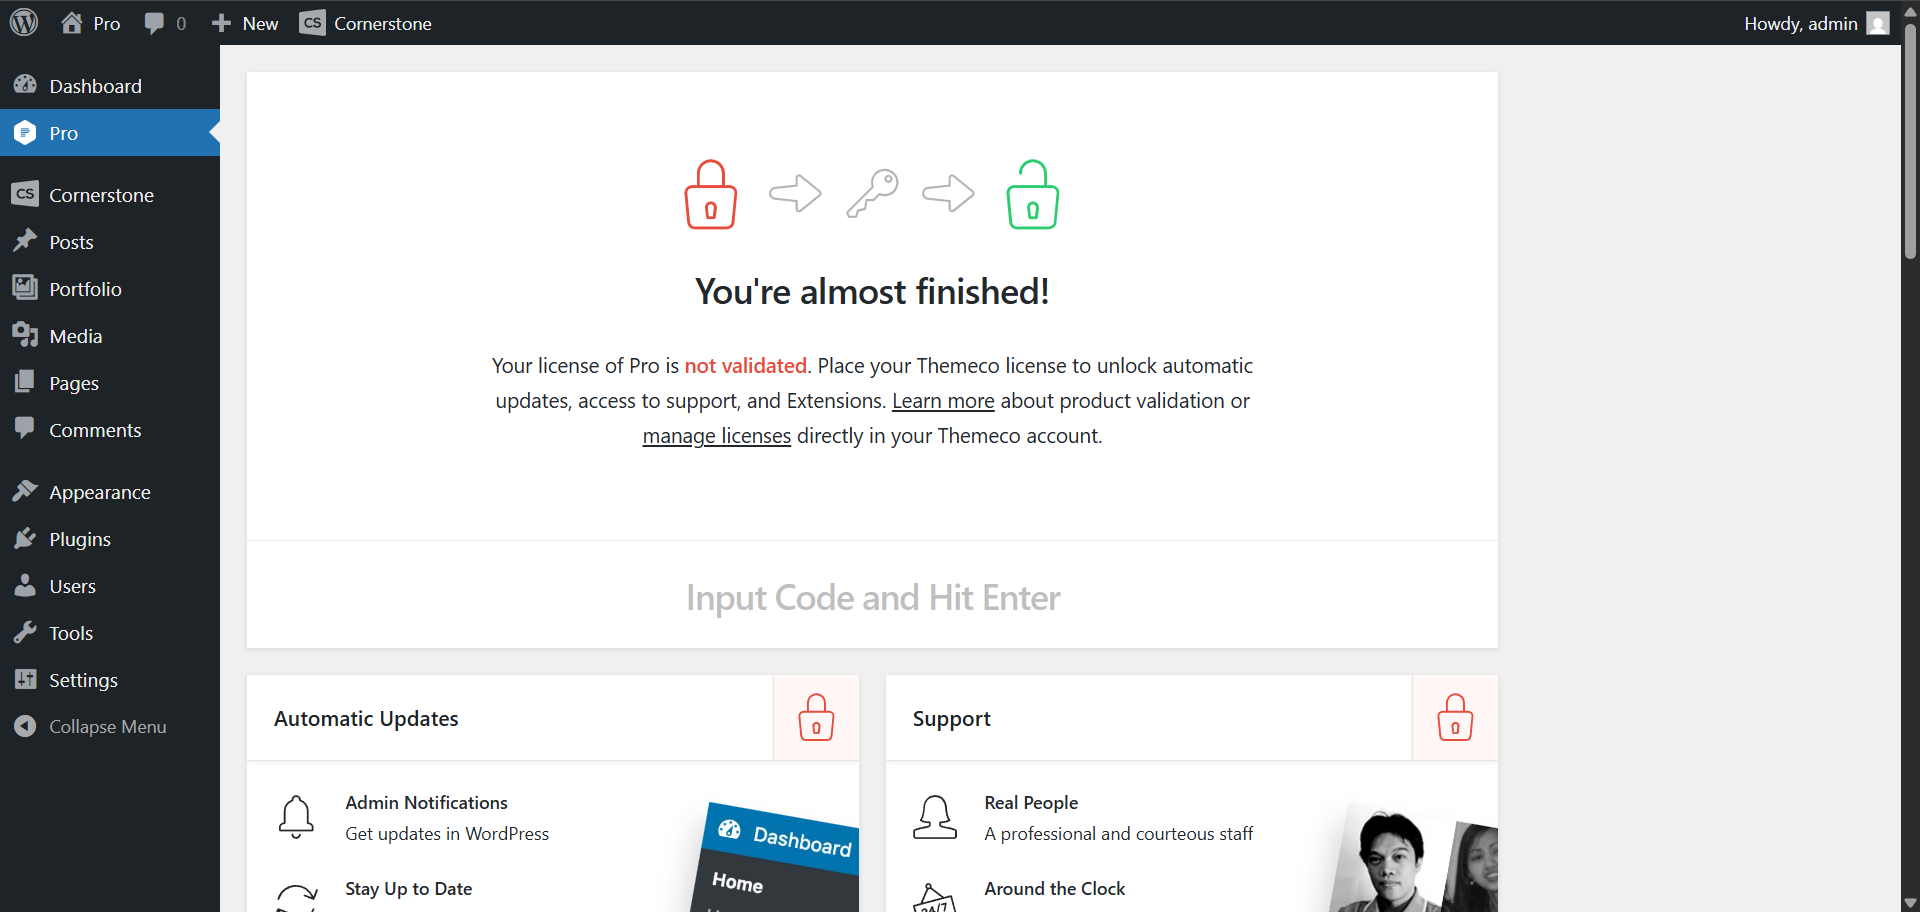
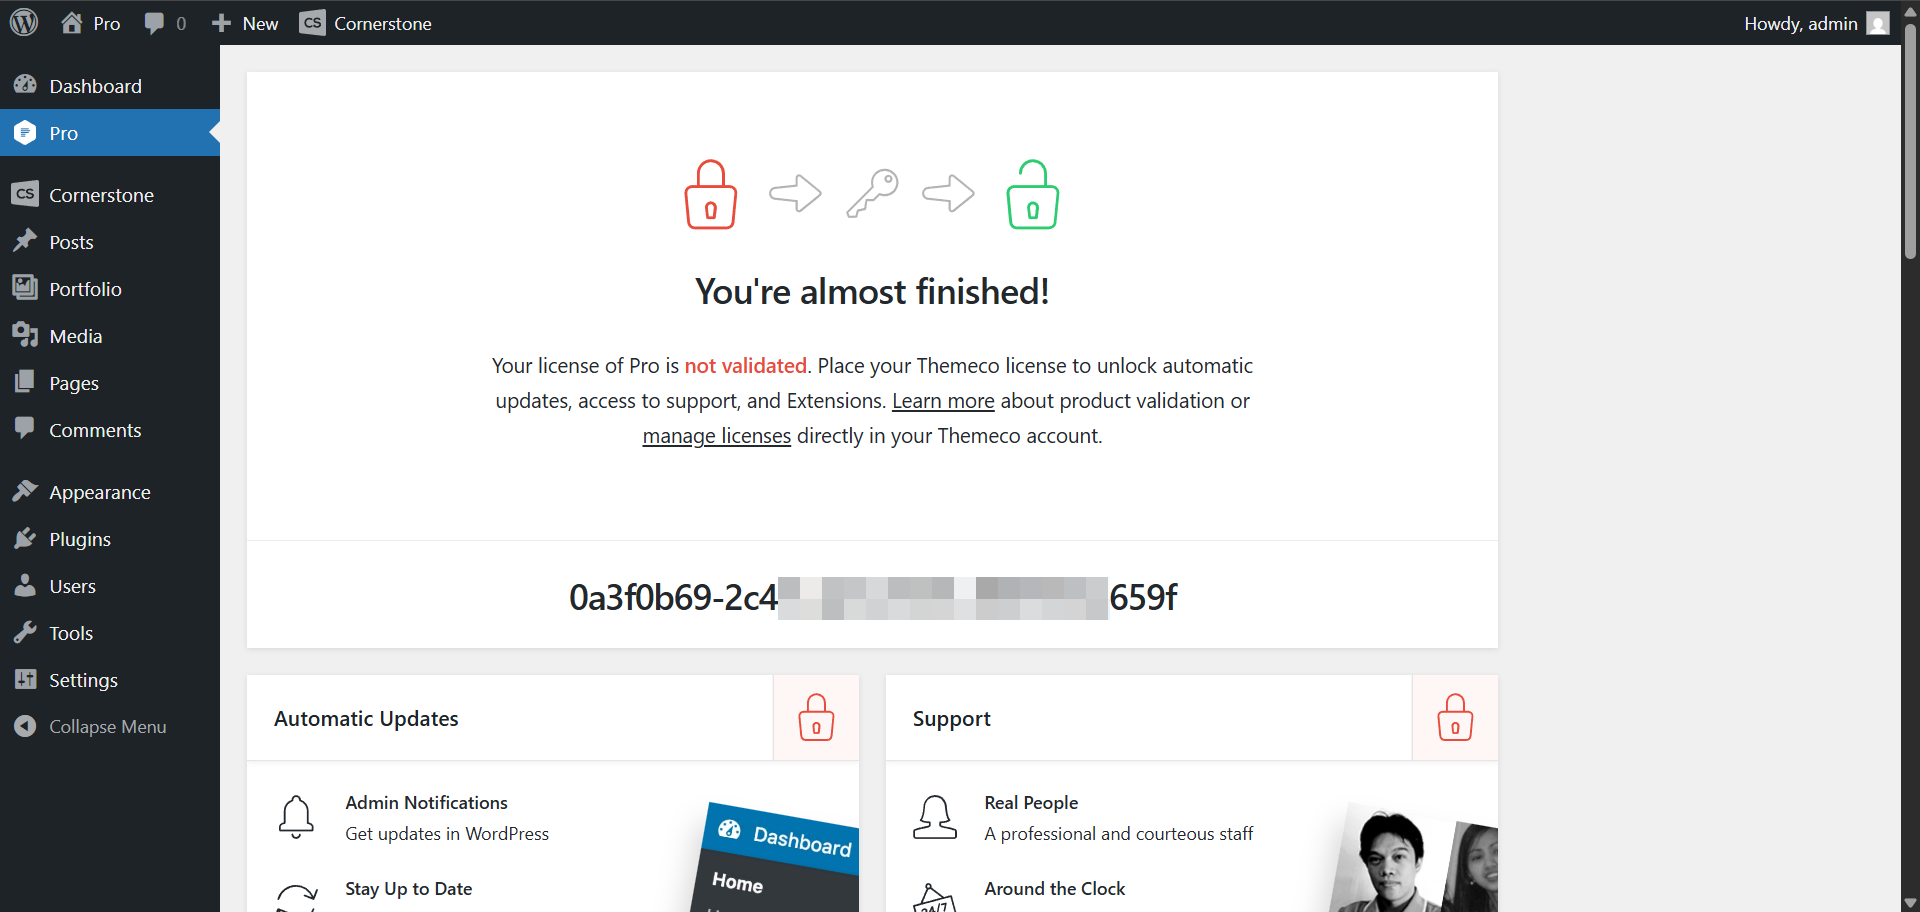
Pro: Validating
To complete the product validation step for Pro, you will need your product license from your Themeco Dashboard. Once more, select your license from the list in the sidebar and when the main content on the right appears, copy your code from the License input:
This is the code you will take back to your validation screen inside WordPress:
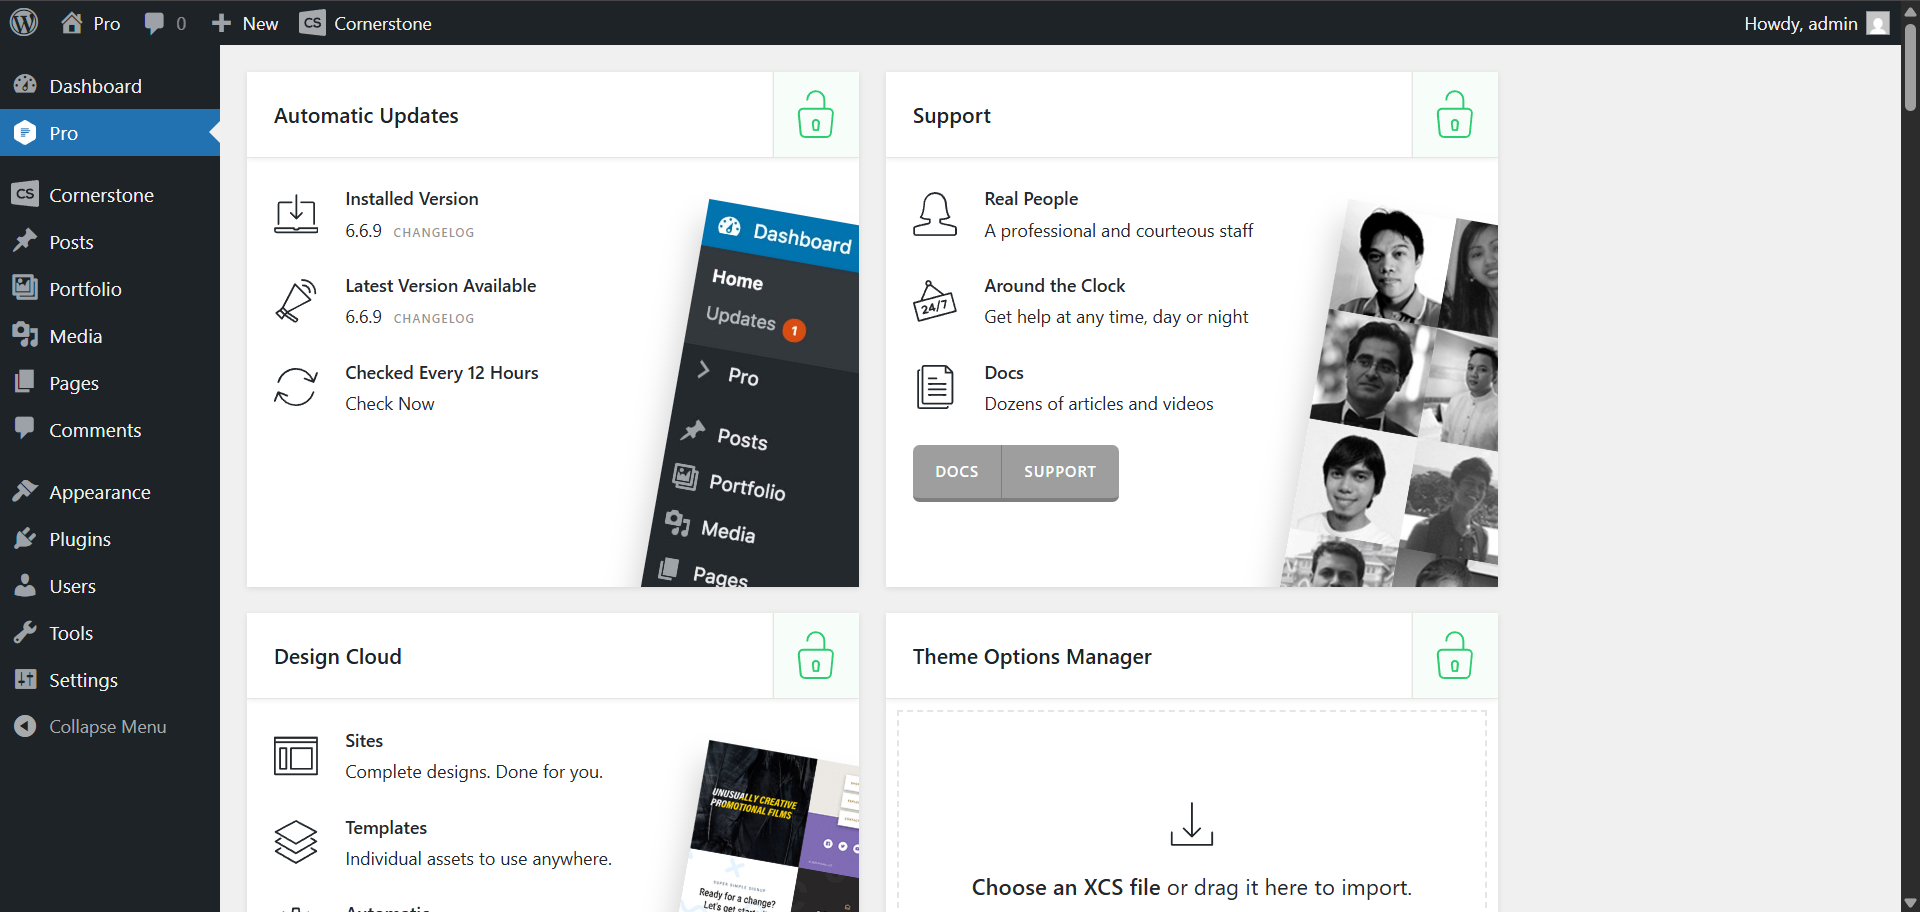
Upon hitting enter, your purchase code will be accepted and you should now see that all additional features of Pro are unlocked:
Standalone Cornerstone: Downloading
This method only applies if you are using Cornerstone with another theme. There are two methods for downloading Cornerstone, which we will cover below.
CodeCanyon – After logging in, hover over your account name in the top right corner of the screen and select Downloads from the dropdown menu:
On the following page you will see a list of all items you've purchased. Locate Cornerstone, click the Download button and select Installable WordPress file only from the dropdown:
Themeco Dashboard – After logging in, select your license from the list in the sidebar. Once the main content on the right appears, select the Download button and the installation file will be saved to your computer:
There are two options you can choose between: Latest, which is the most up-to-date version of Cornerstone, and Previous, which is the “stability” version of Cornerstone that you can downgrade to if you happen to run into any issues during the update process.
Standalone Cornerstone: Installing
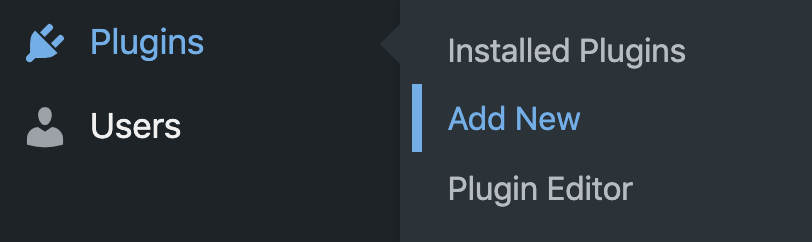
Now that you've downloaded the plugin, you're ready to install it! In your WordPress admin, navigate to Plugins → Add New:
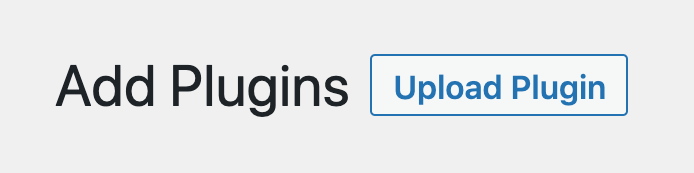
You'll be taken to the plugin installation page. When that has loaded, click Upload Plugin near the top:
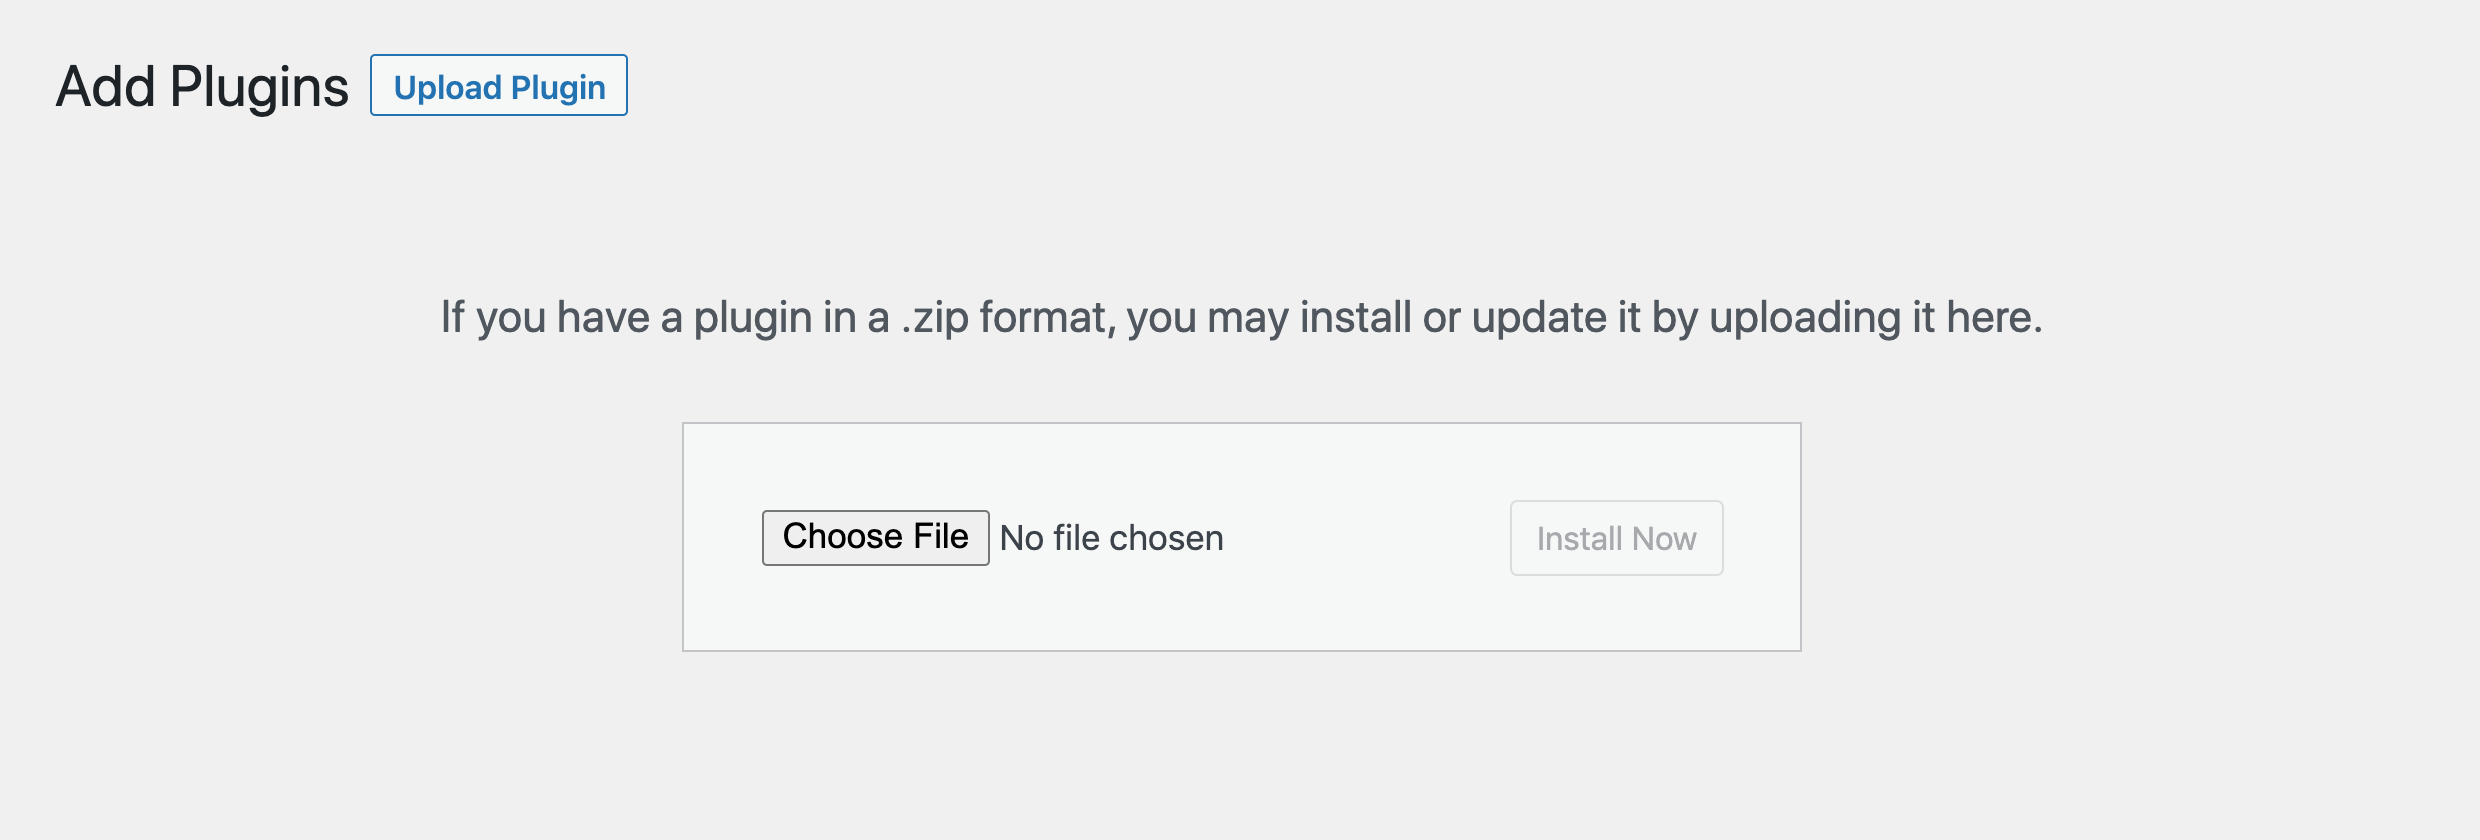
Upon clicking that button, an upload form will appear below. Select Choose File within that form to locate the .zip file you download earlier on your computer:
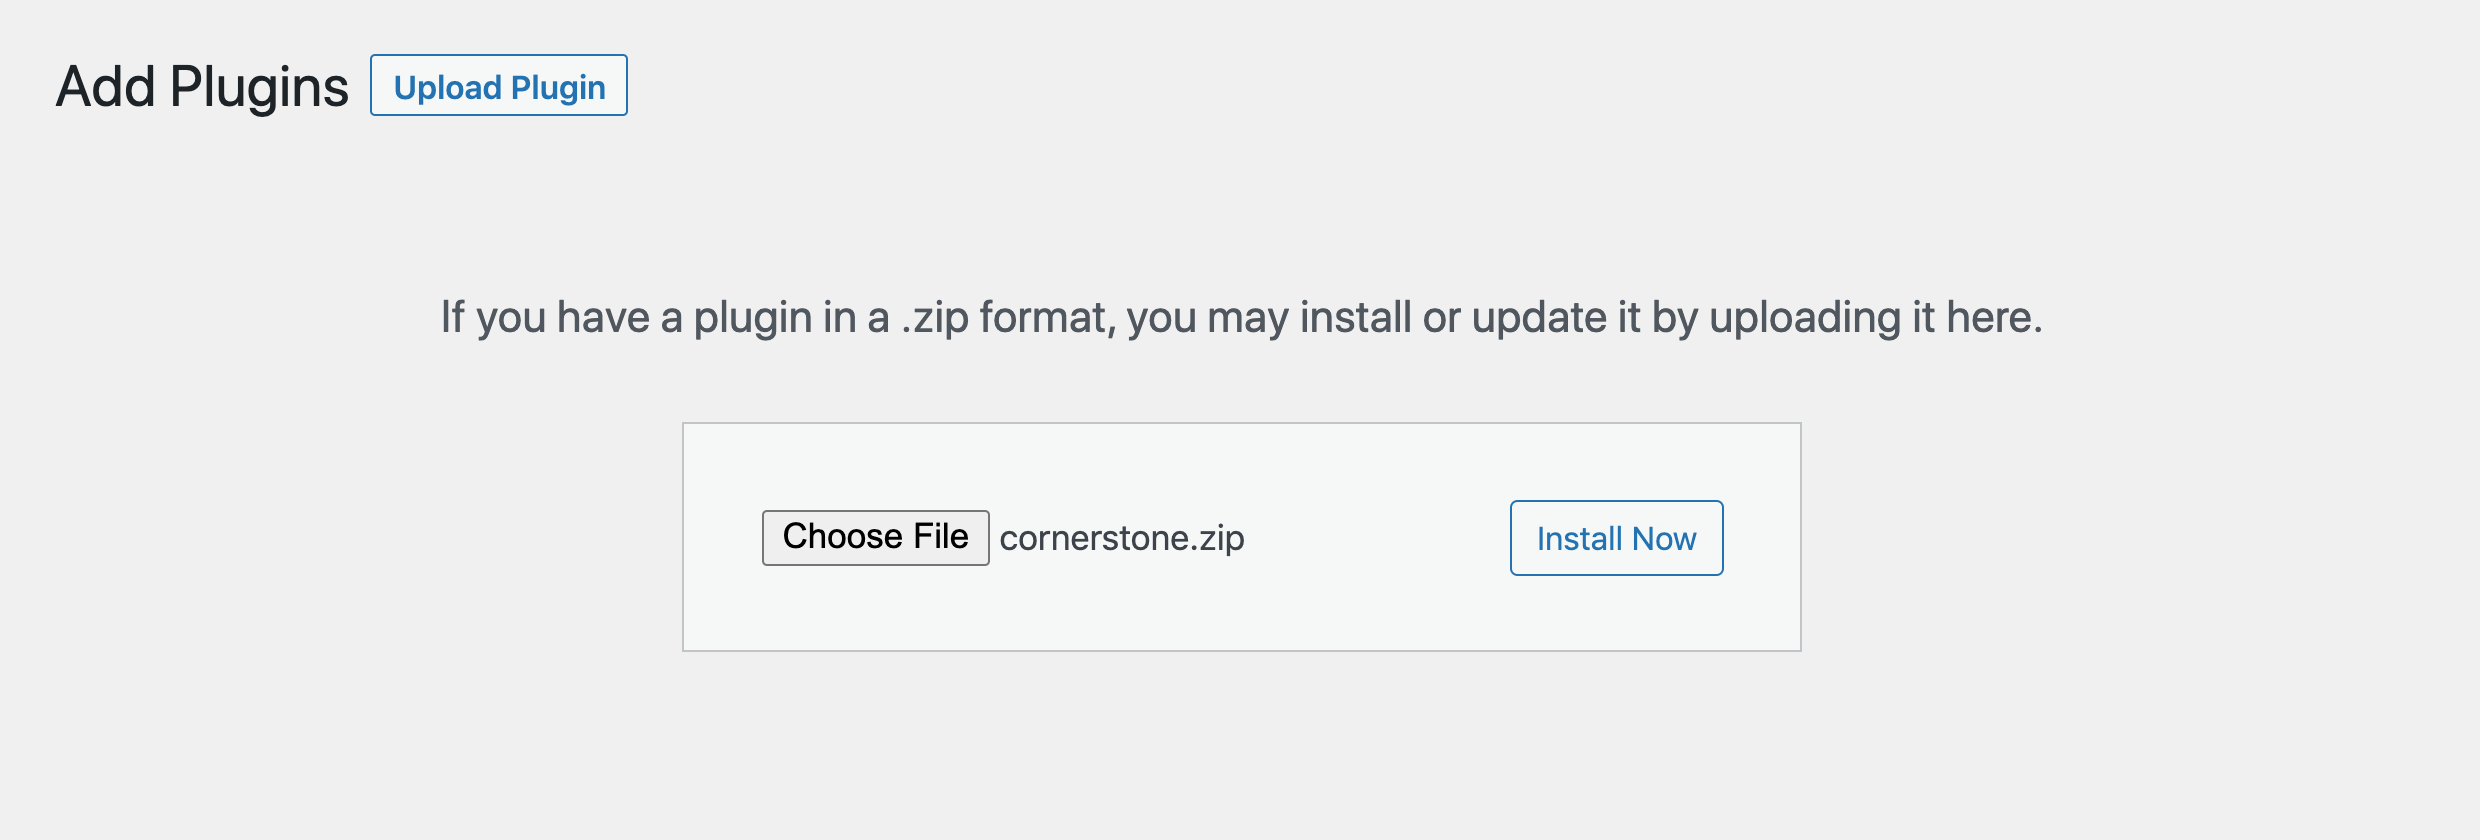
After locating and adding the .zip file, click the Install Now button:
Upon successful installation of your plugin files, you will see the following screen. Click the Activate Plugin button to enable Cornerstone on your WordPress installation:
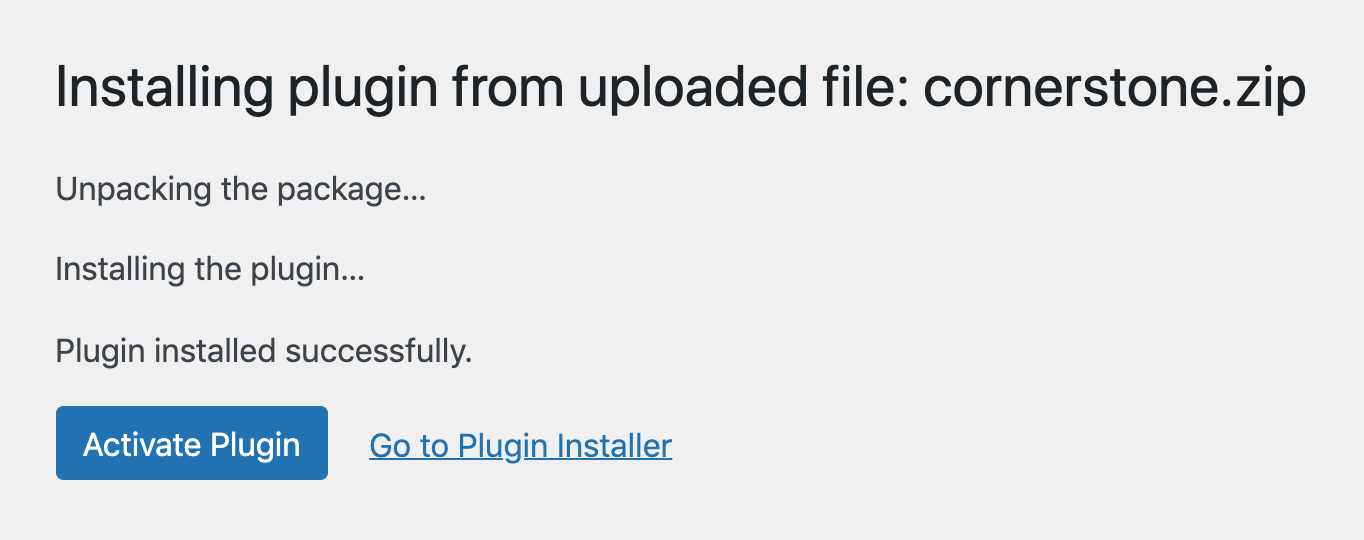
Once Cornerstone has been activated, you will be taken to the Plugins page in the WordPress admin and will see a confirmation message:
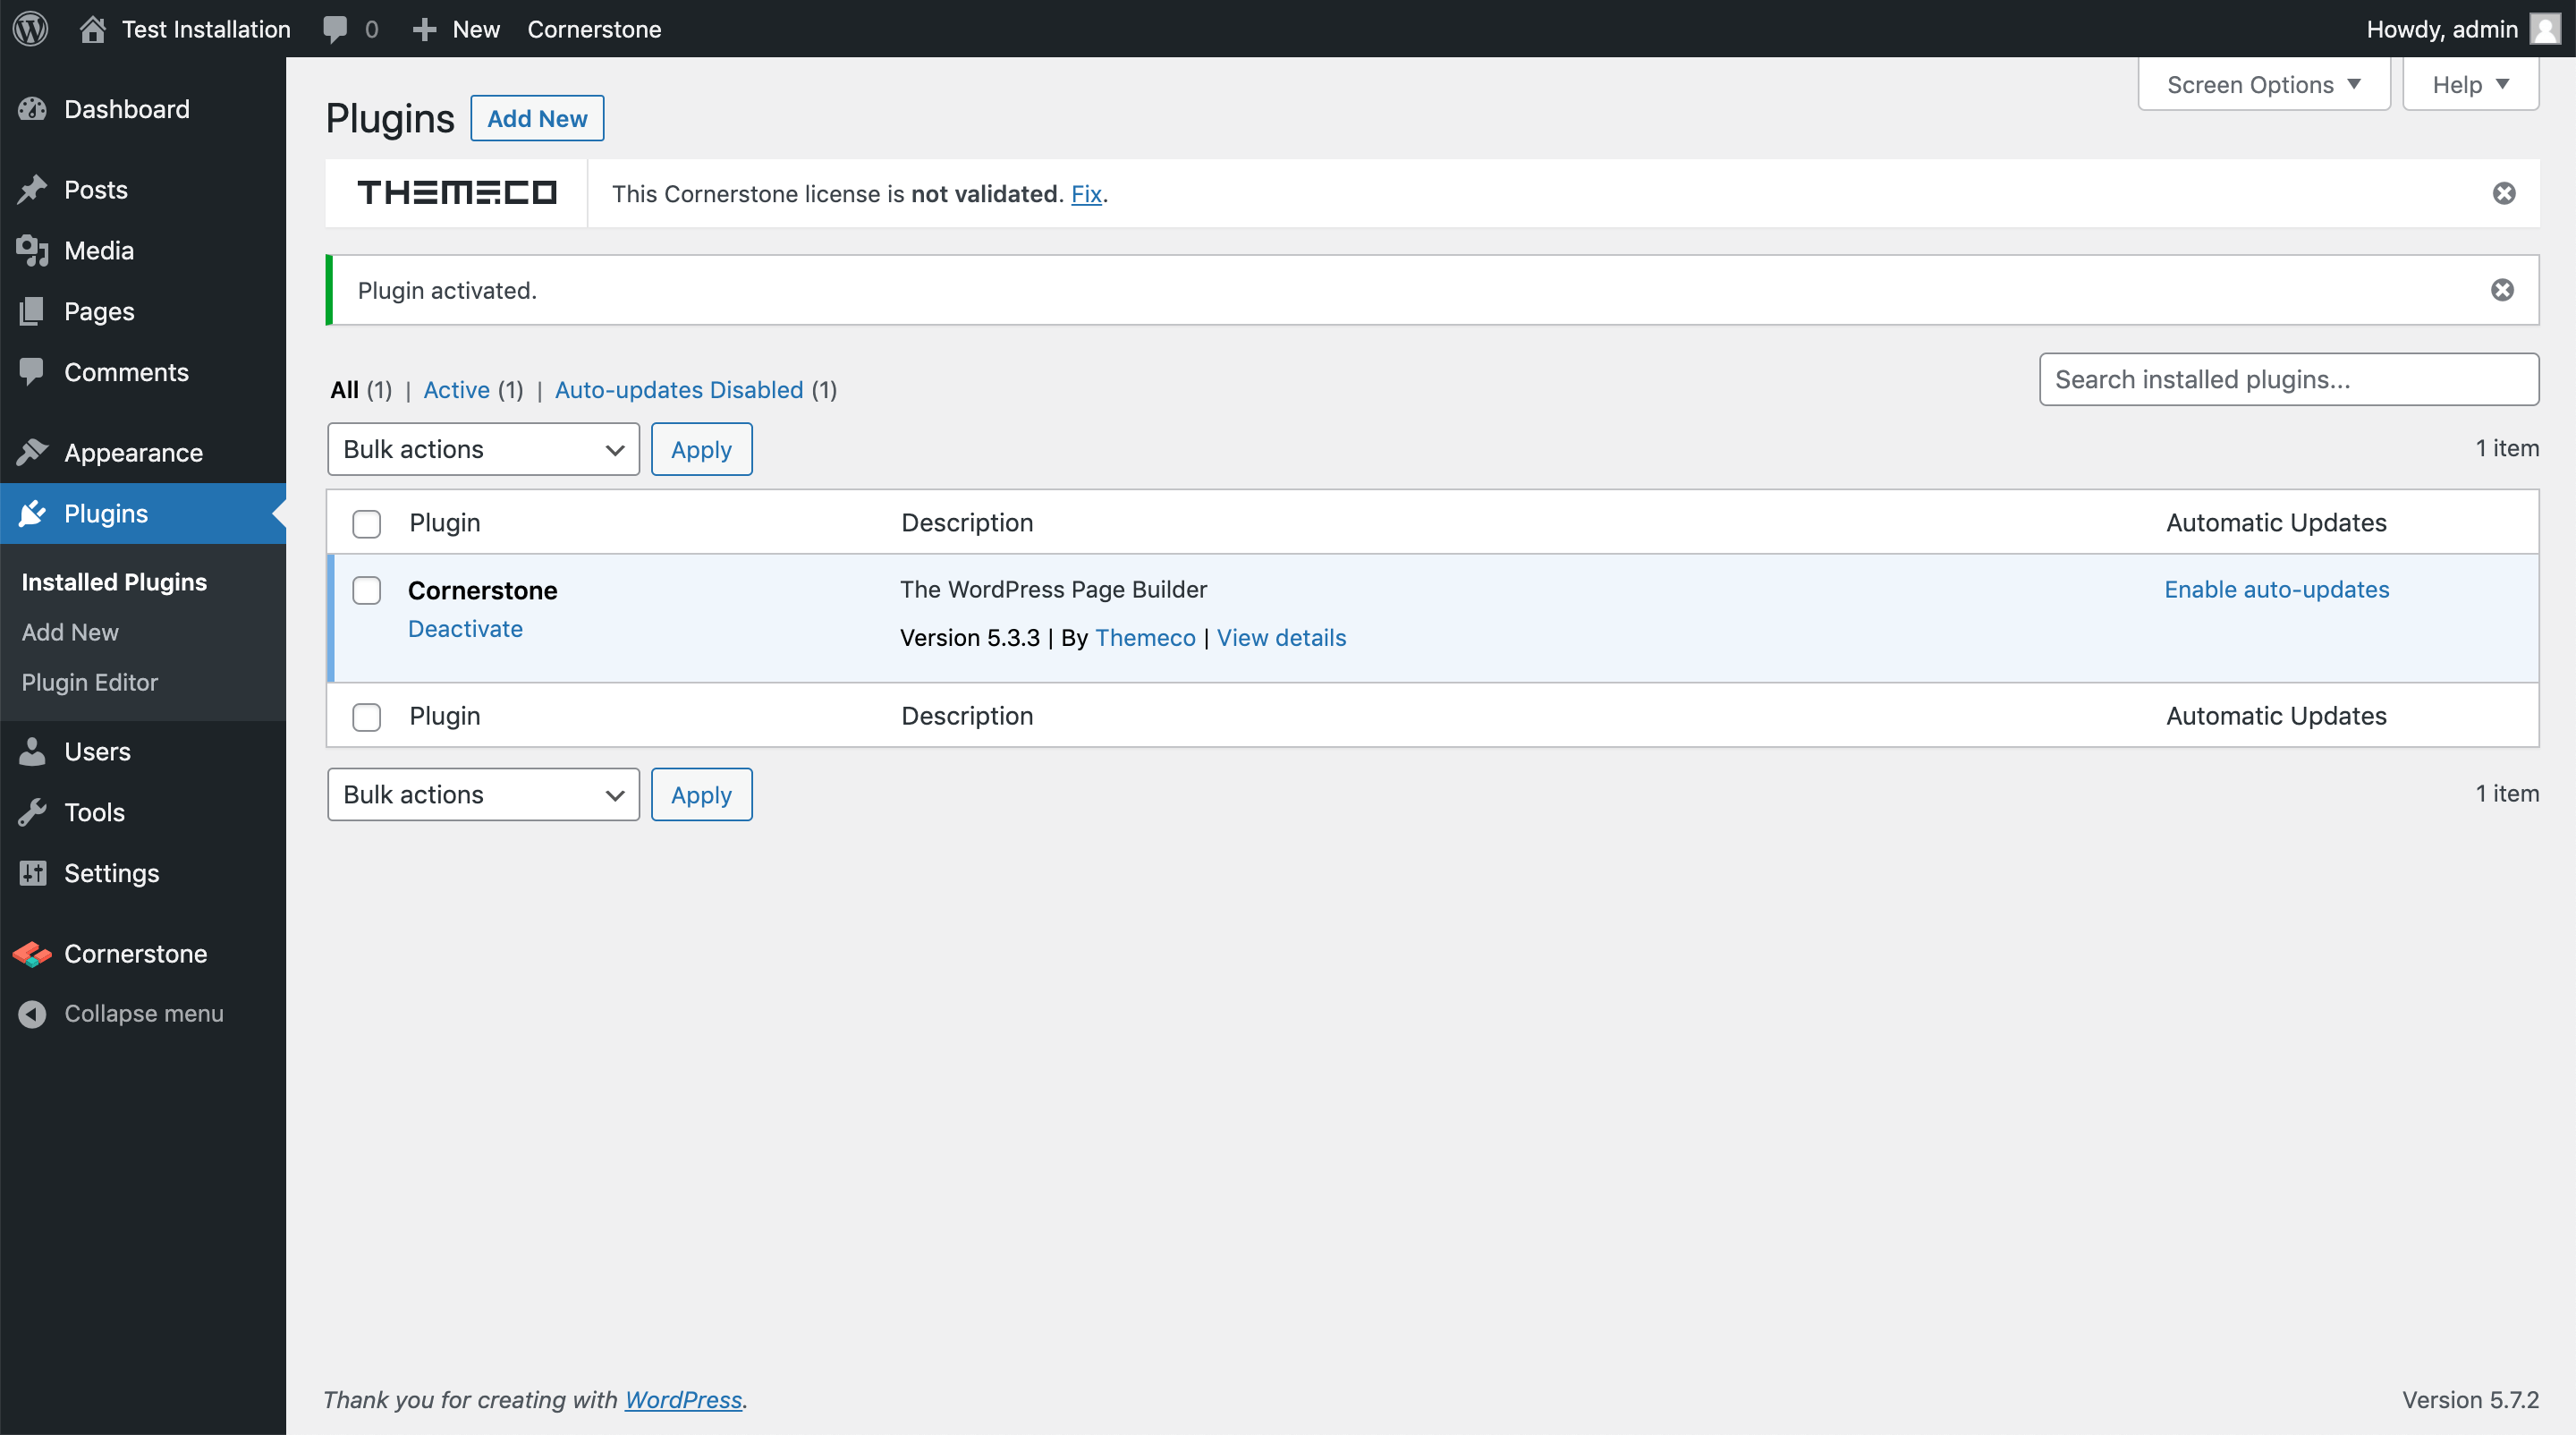
Congratulations! Cornerstone has been successfully installed and you're ready to start building.
Standalone Cornerstone: Validating
To complete the product validation step for Cornerstone, you will need your license certificate from CodeCanyon. Once more, hover over your account name in the top-right corner of the screen and select Downloads from the dropdown:
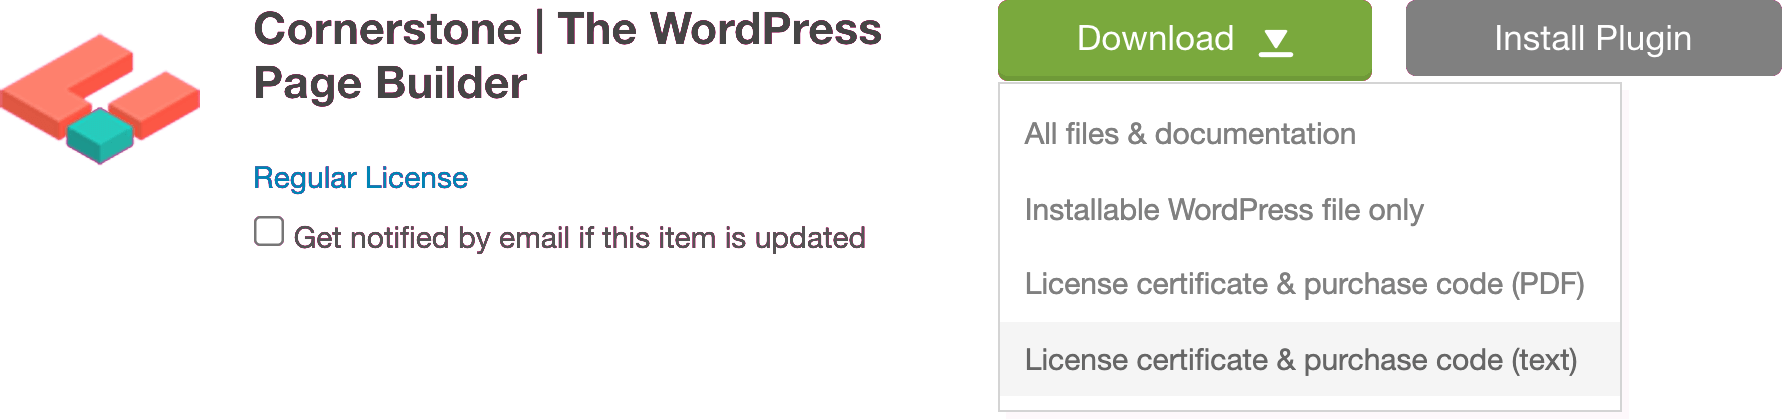
Next, navigate through your list of downloads to find your purchase of Cornerstone and click the Download button and select the License certificate & purchase code (text) option from the dropdown:
This will download a .txt file to your computer, which you should be able to open with any standard word processor. Inside that file, look for a line labeled Item Purchase Code and then copy the string directly below that line only. This is the code you will take back to your validation screen inside WordPress:
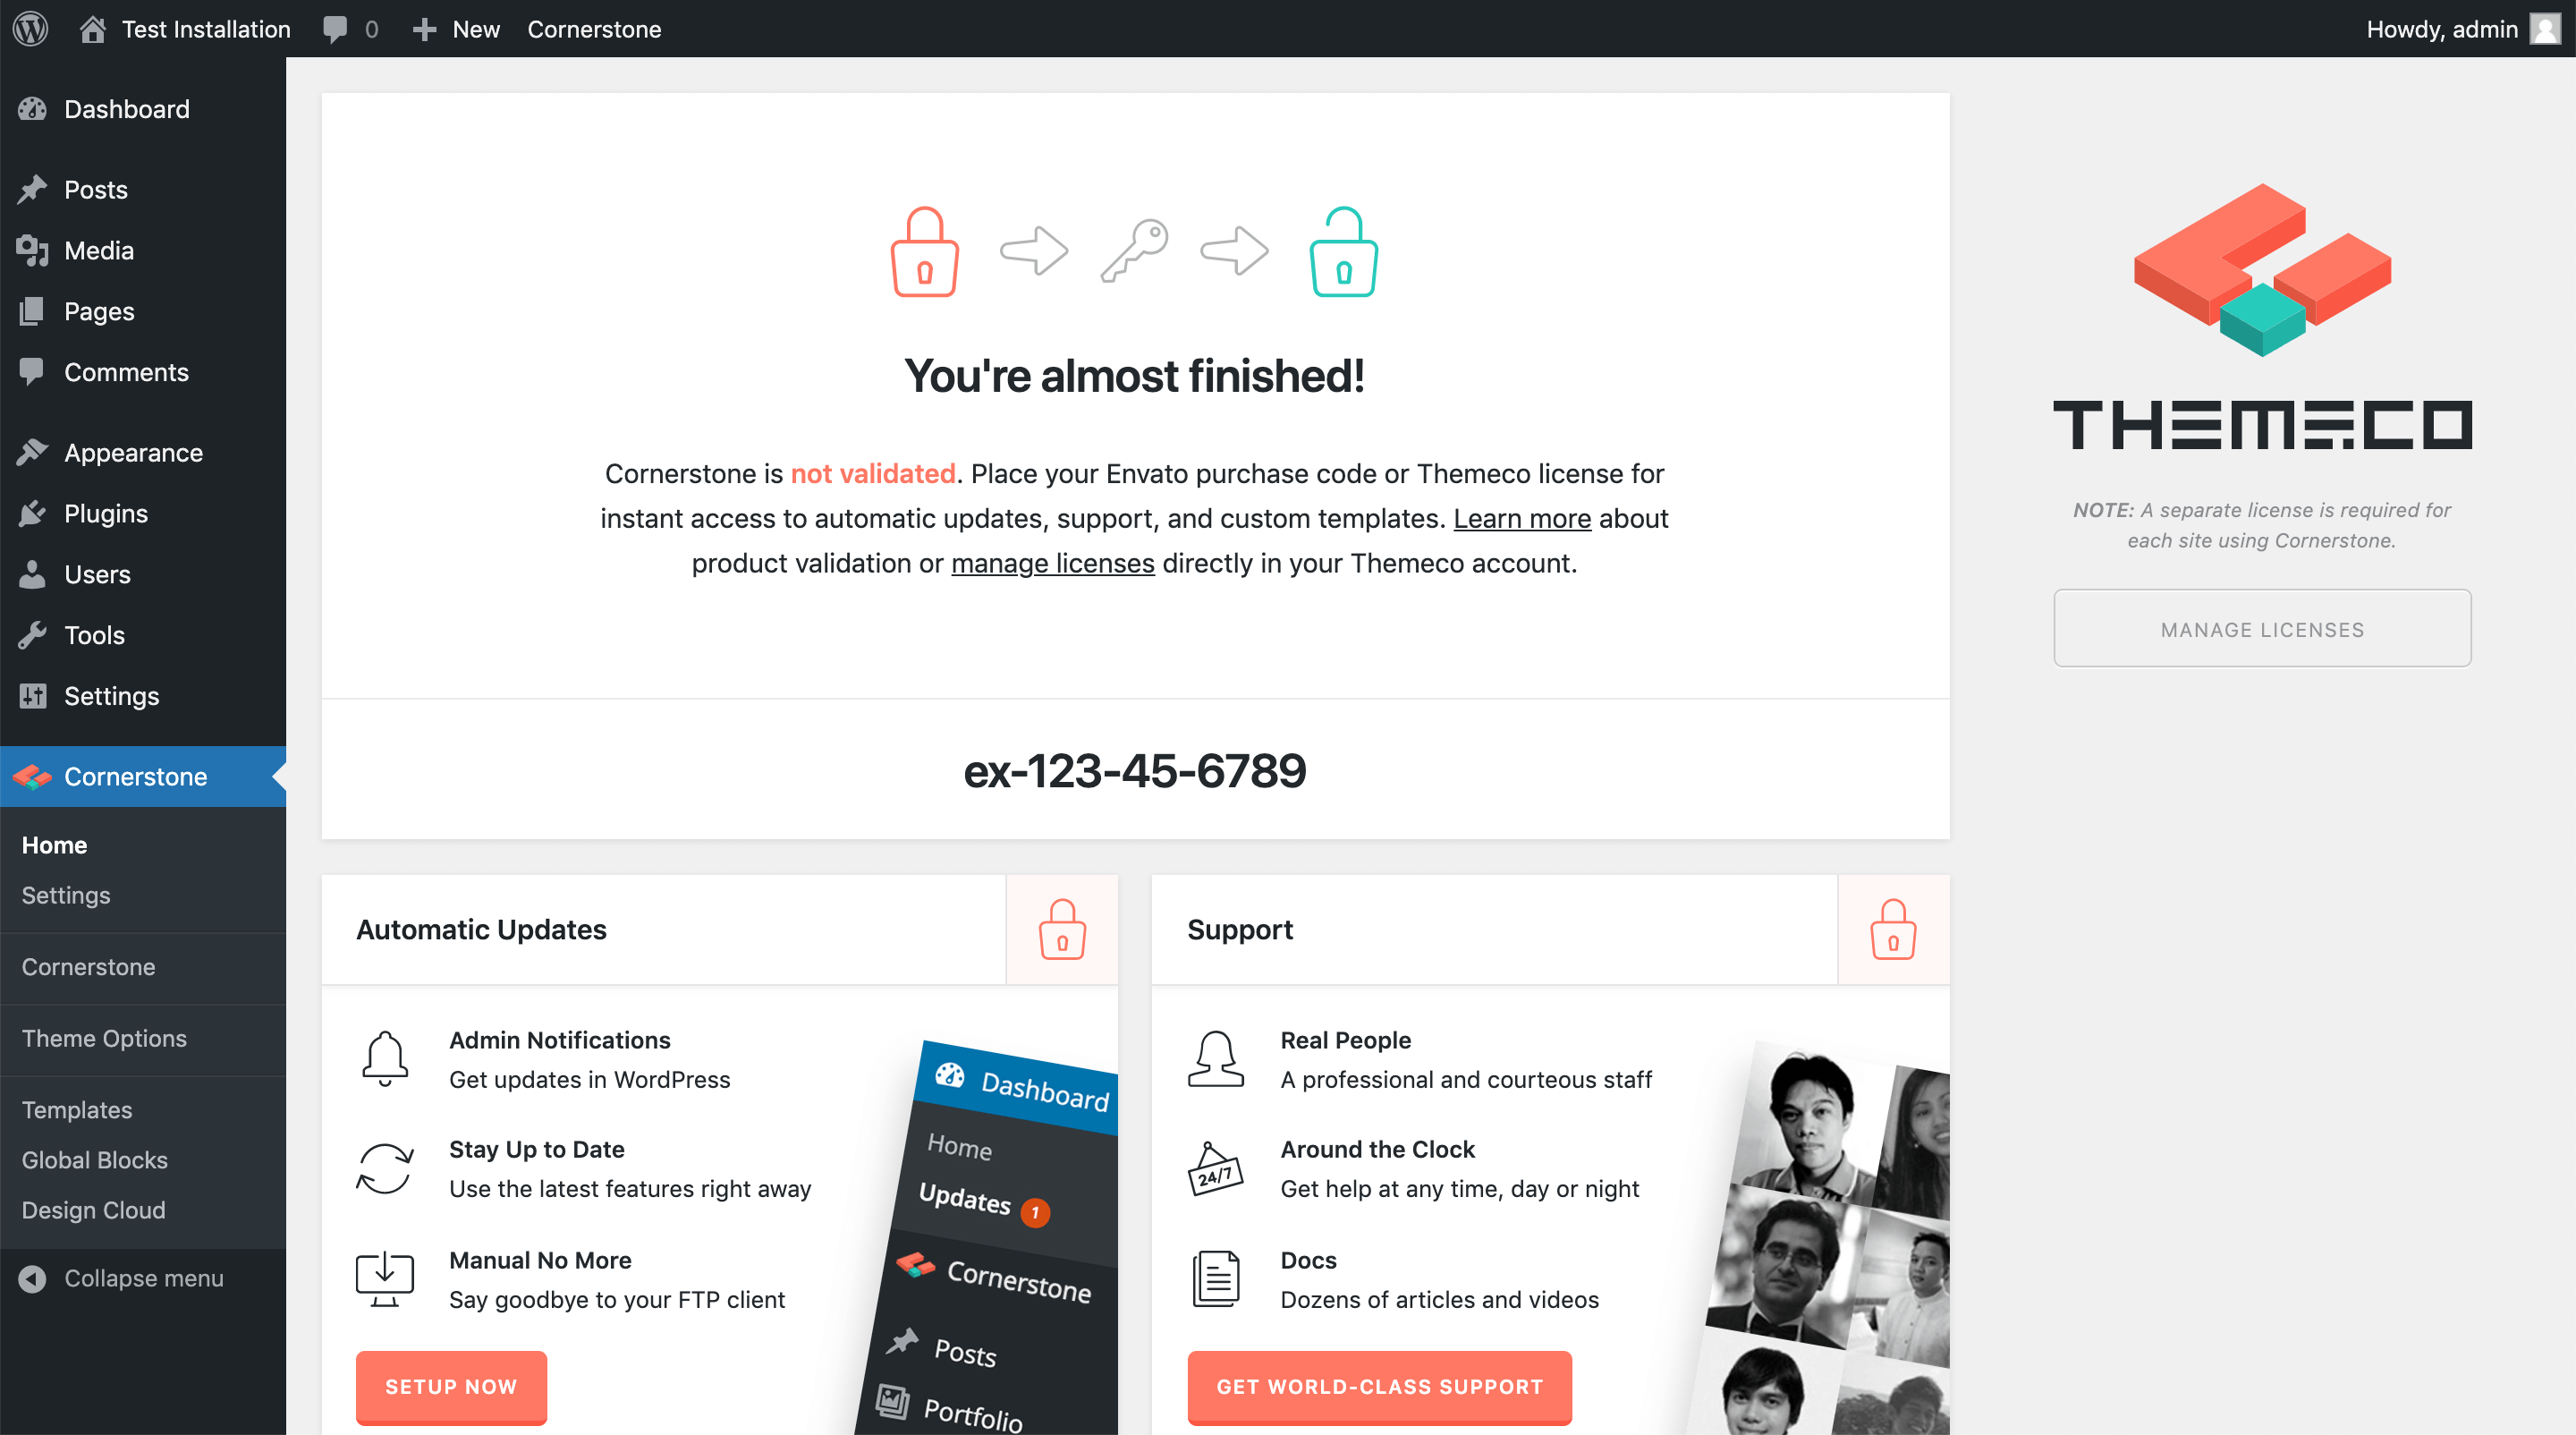
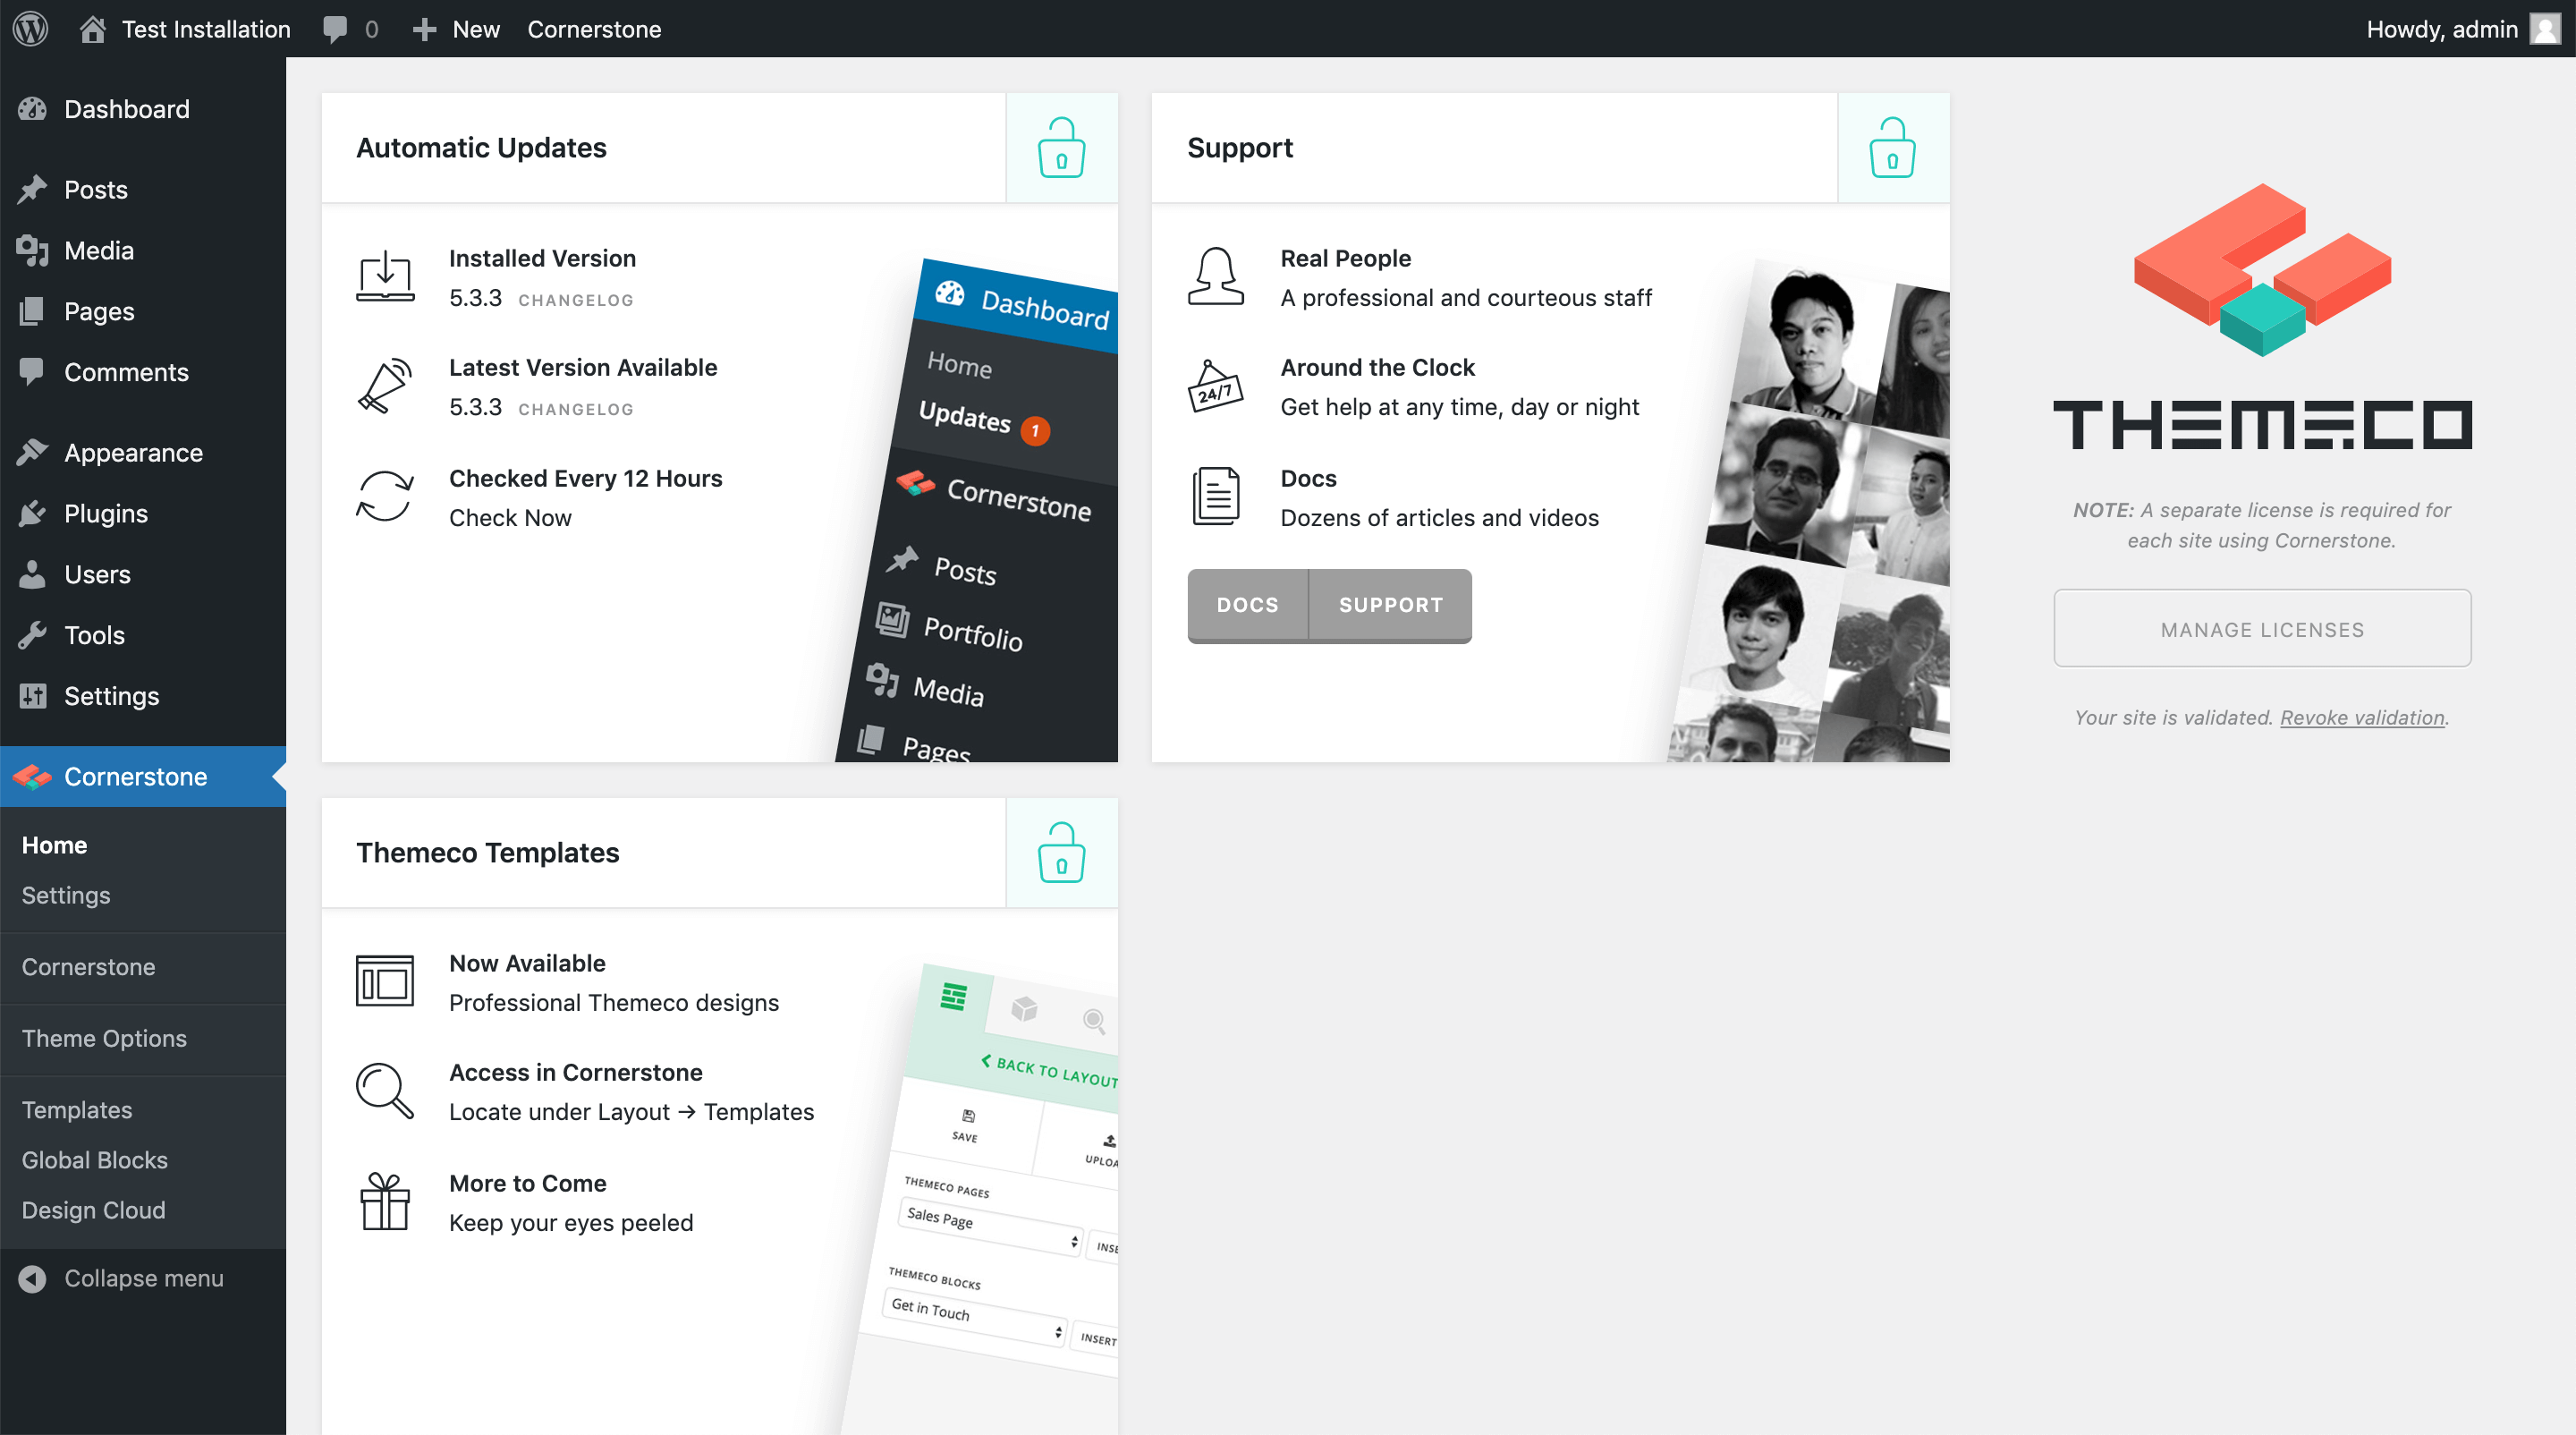
Upon hitting enter, your purchase code will be accepted and you should now see that all additional features of Cornerstone are unlocked:
See something inaccurate? Let us know