WooCommerce Image Size Changes
In this article, we're going to explain how to set the image sizes or the WooCommerce plugin if you see abnormal behavior.
WooCommerce Gallery Styles
The X and Pro themes do not have specific controls over the WooCommerce image quality and sizing process so you need to use the native controls that the WooCommerce plugin provides to set the image sizes. Follow the steps below to set the image sizes in the WooCommerce plugin:
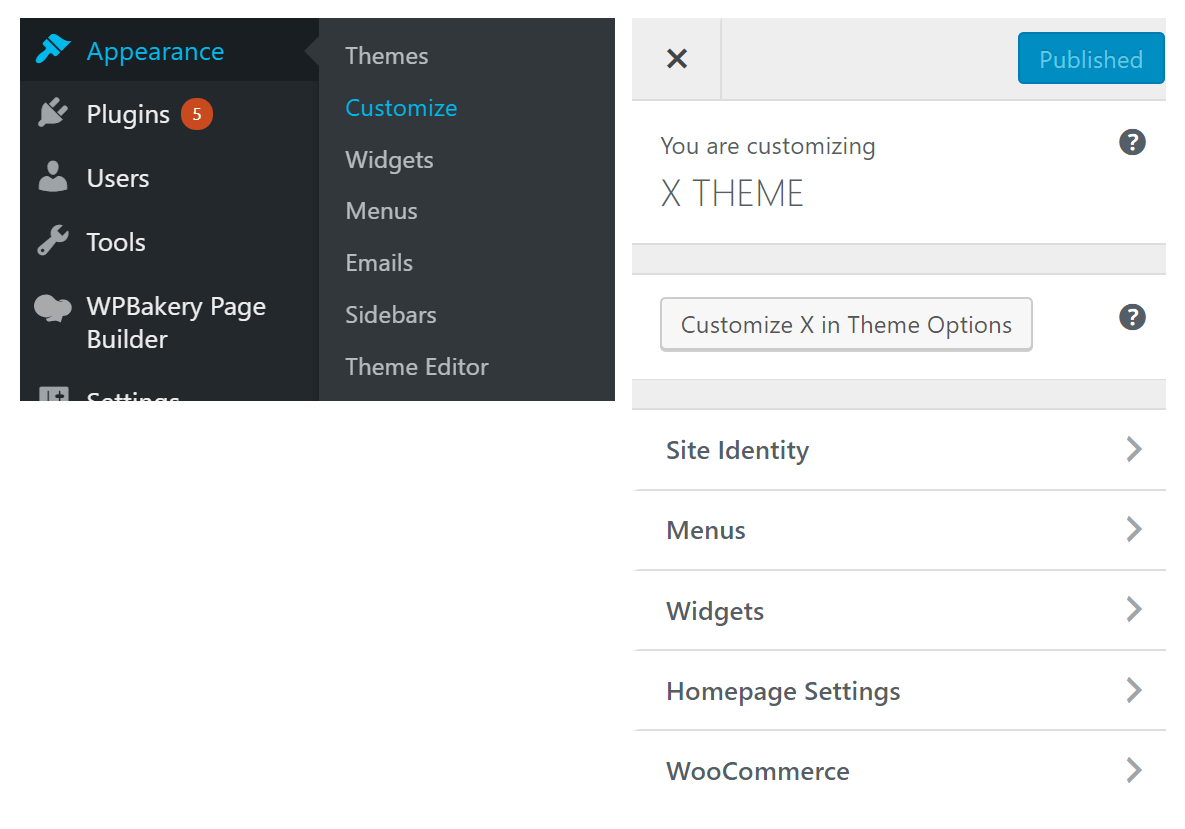
- Go to Appearance > Customize menu.
- Click the WooCommerce menu item in the customizer.
- Click the Product Images menu item in the WooCommerce menu.
- Set the image sizes according to your website design and needs.
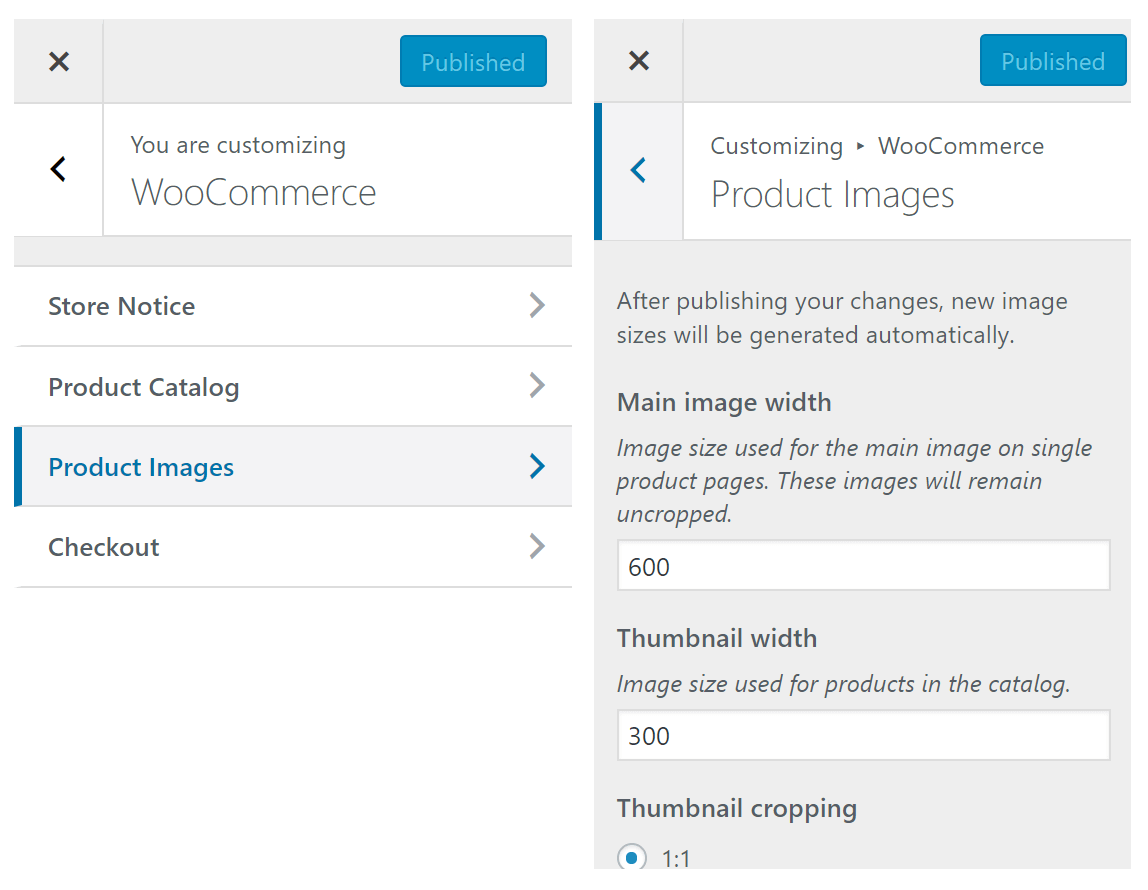
You will also have an option to crop the thumbnail images as square, crop them with the custom aspect ratio or keep the thumbnails uncropped.
The size you will want to set will depend entirely on how you want them to display on your website and if you have any third party plugins/code that removes/modifies how images are shown.
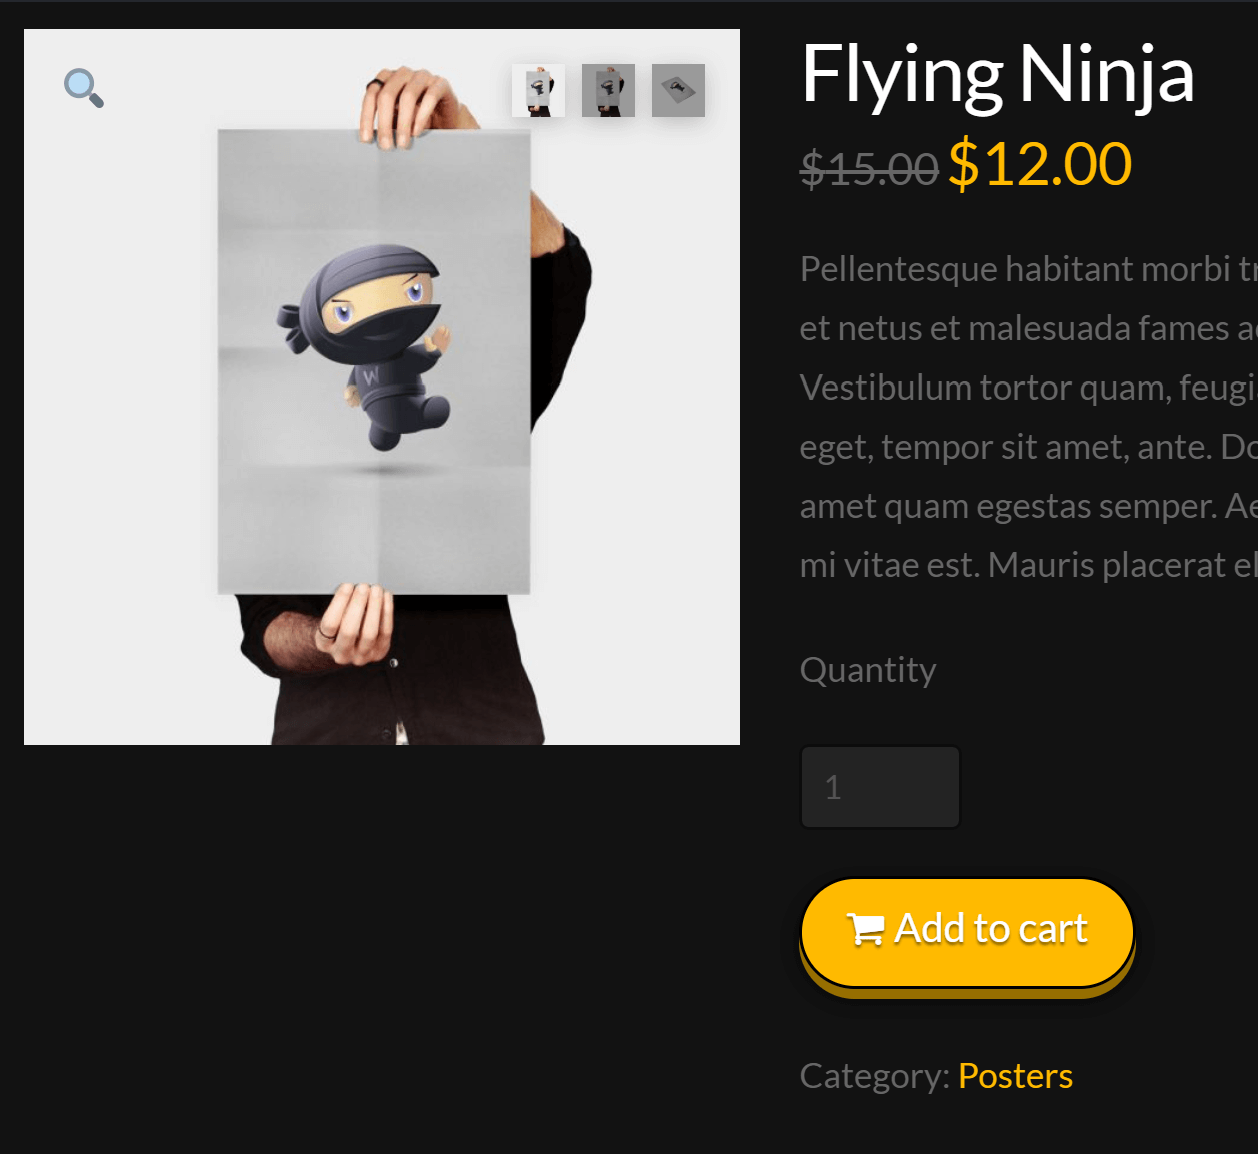
For example, by default both X and Pro use the slider support in WooCommerce, which means your single product page images would look like this:
You can remove the support for the WooCommerce Slider by adding the code below to the functions.php file of your Child Theme:
add_action( 'after_setup_theme', 'remove_woo_three_support', 11 );
function remove_woo_three_support() {
remove_theme_support( 'wc-product-gallery-zoom' );
remove_theme_support( 'wc-product-gallery-lightbox' );
remove_theme_support( 'wc-product-gallery-slider' );
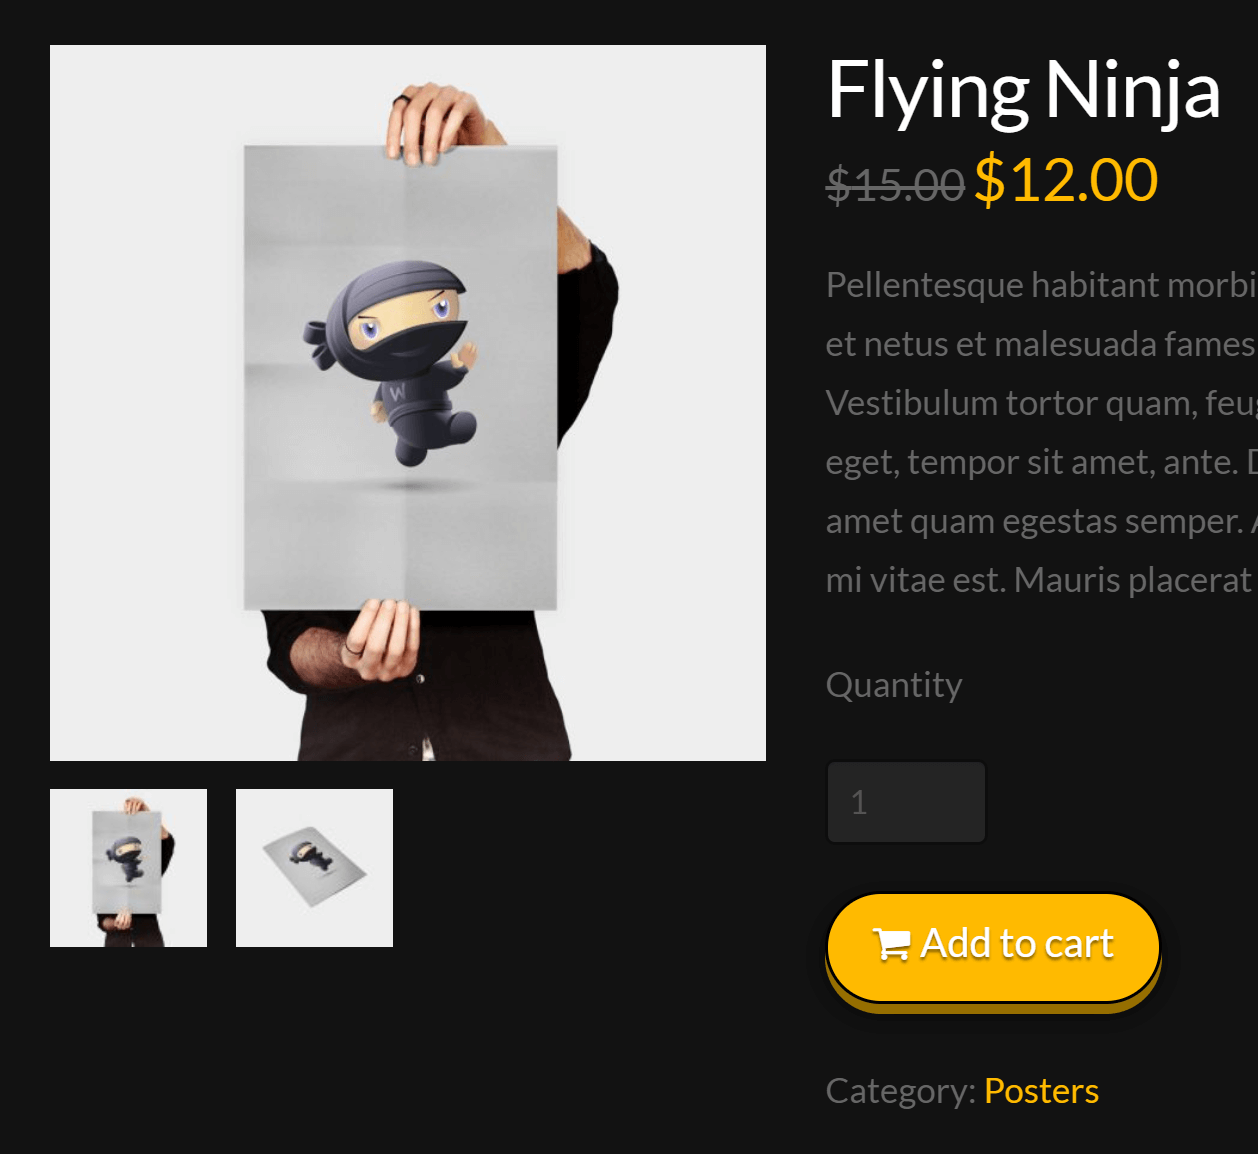
}If you disable the support for the Woocommerce Slider the images will look different and you'll need to modify the sizes. If you remove theme support for the gallery slider, your single product page would then look like this:
Getting the exact image dimensions for your site will take some experimentation and factors will include custom code added, custom CSS, the type of product image (narrow, wide, large, small, etc.) and a varying combination of other factors.
Product Images Additional Resources
Follow the additional resources below if you want to have a broader research regarding the WooCommerce Images:
- Click here to read the official documentation about images in the WooCommerce.
- Click here if the product images appear blurry on your website.
Regenerating Thumbnails
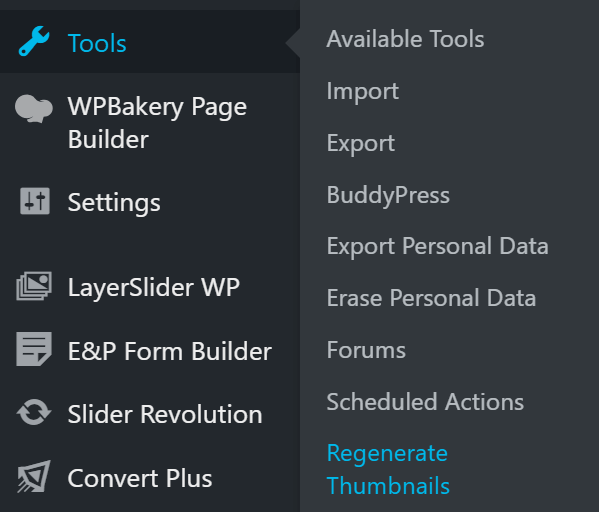
Once you've modified the image sizes, you'll need to regenerate thumbnails for the changes to take effect. Luckily there's a range of plugins that can do this for you. Head on over to your Plugins > Add New in the search box type Regenerate Thumbnails and then press Enter. On the results screen, the first plugin should just be called Regenerate Thumbnails and has 1+ million active installs. Go ahead and install the plugin, once the plugin is installed and activated. You'll see a new option called Regenerate Thumbnails under the Tools admin menu item.
Click that, and then on the next page there is just one button to start the regeneration process. It will go through your images one by one and a progress bar and running total will keep you updated on how close to completion the process is. Keep in mind that you will need to do this every time after updating your image size.
Summary
We've discussed the WooCommerce images and how you can set the image sizes using the native controls of the plugin. Also, we've talked about the problems you might encounter regarding the WooCommerce Gallery and blurry images and how to fix them. Finally, if you need more help you can contact our support and our support staff will be happy to help.
See something inaccurate? Let us know