Superfly
In this article, we're going to explain how to setup a menu using the Superfly plugin and fine-tune the look of the menu on the front end of the website.
Superfly enables you to alter the navigation of your WordPress site. Easily create engaging menu layouts in a breeze.
Getting Started
Superfly is a responsive WordPress menu plugin that generates space-efficient vertical push/sliding/static navigation, icon toolbar or fullscreen menu on your choice. It can be used as standalone navigation or compliment your main menu. Superfly makes navigation much easier and user-friendly both on desktops and mobiles.
To get started, go to Pro > Validation or X > Validation then look for Superfly. Click Install.
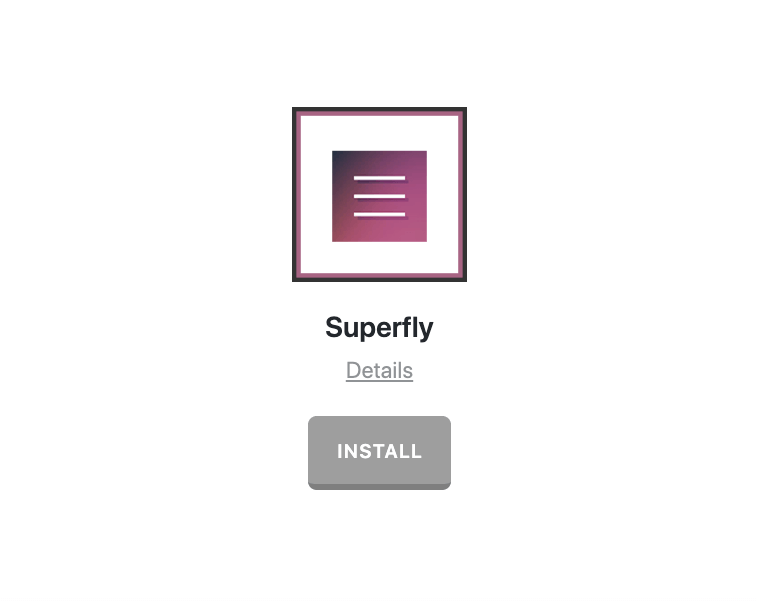
Once installed, the Install button will change and say Activate. Click that button and it will activate the plugin. You will then see the status change to Installed and Activated.
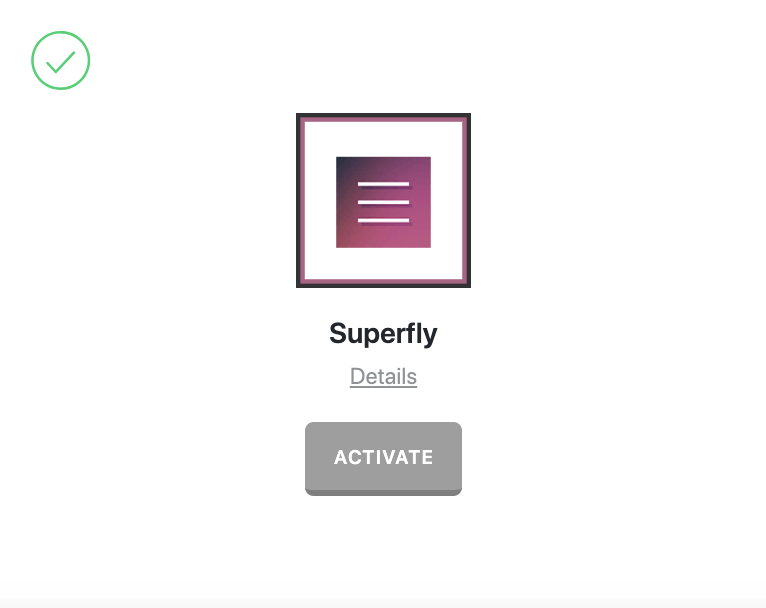
You will now see the Superfly menu item on your WordPress dashboard.
After the Superfly installation, you need to activate the plugin to be able to use the plugin in the X or Pro theme. Follow the steps below to activate the Superfly plugin:
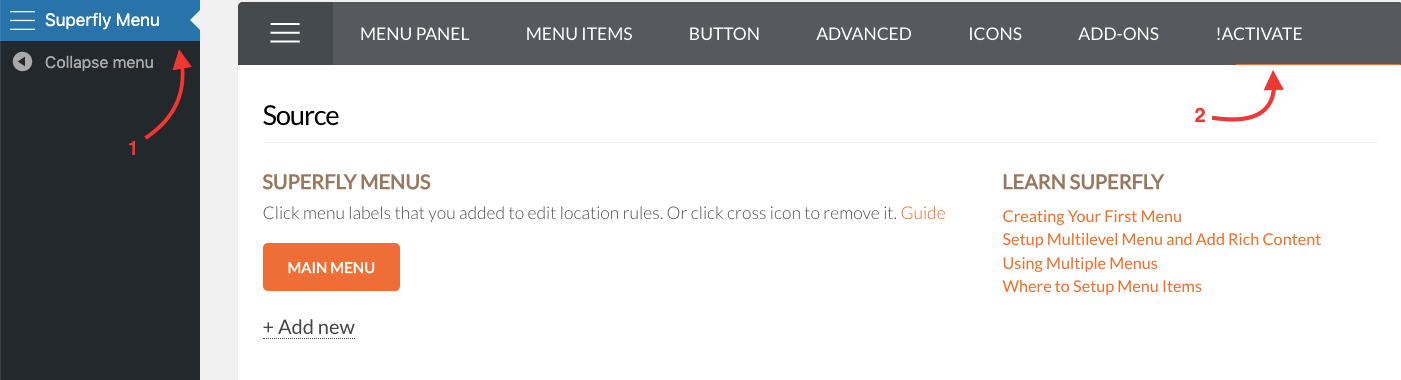
- Go to WordPress Dashboard > Superfly Menu.
- Click the Activate link at the top right corner.
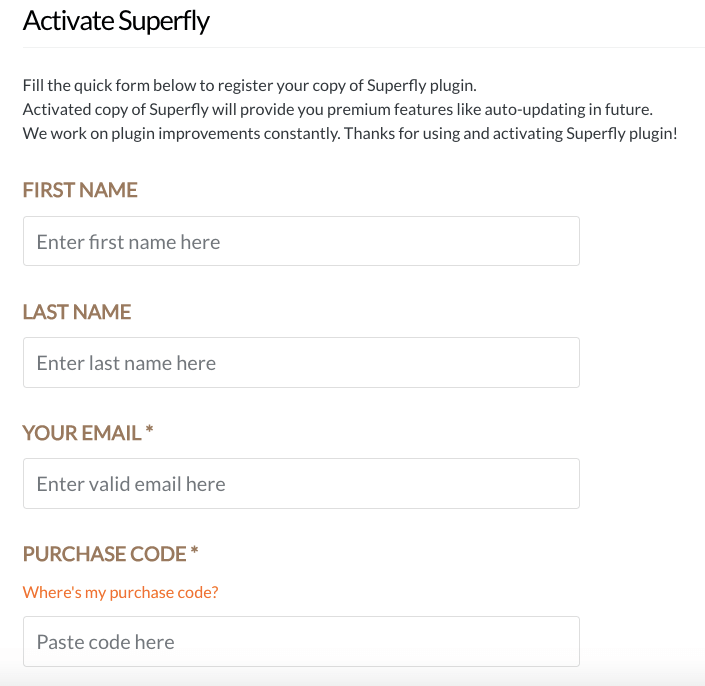
- Add your First Name
- Add your Last Name
- Add your Email
- Click Save and the activation will be completed. (You do not need to provide and Purchase Code when using X or Pro theme)
Setting Up Your First Menu
If you haven't already created a Menu for your WordPress install go to WordPress Dashboard > Appearance > Menus and configure a new menu. Once you've done that go back to WordPress Dashboard > Superfly Menu and click the hamburger menu at the top left corner of the screen and click Add New under Superfly Menus section:

Once you've clicked dd New, you'll see a drop-down to select from all available menus on your site, this is useful if you want multiple different menus and may want your main navigation kept separate from your superfly powered navigation. When you've found the menu you want to add to Superfly in the drop-down click the orange plus button. Now in your main Superfly settings, you should see the menu added like this:
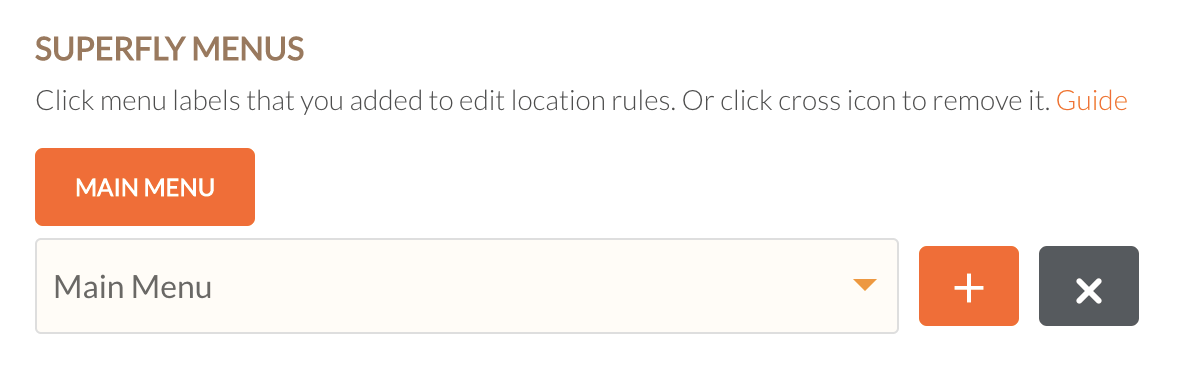
Congrats! Now you've successfully added a Superfly menu, but what about getting it to actually display on your site?
Display Rules
There is a range of display rules within Superfly to allow you to tailor your menu exactly where you want it to display, maybe you want a different menu per page, maybe you want different menus based on the post type. The simplest way to get going is by allowing the menu to show everywhere. If you click on your added menu. That will then open up a Popup window like this:
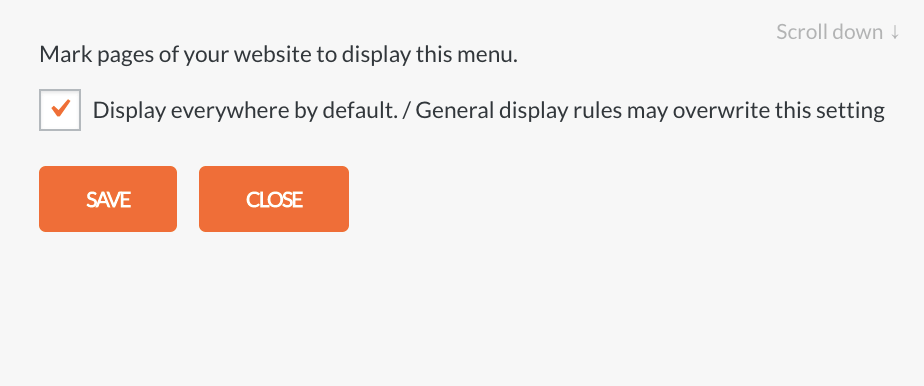
As you can see by default it's set to appear everywhere. If you uncheck that, you'll then see additional options like this:
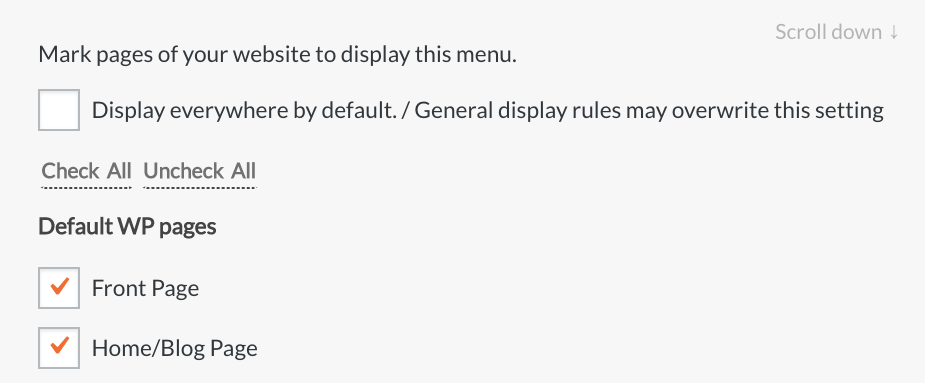
You can check or uncheck any of these as you want, remember a checked option means the menu will show on that page or page/post type. Unchecked means it won't show on that page or page/post type. You may have noticed a note in the Popup mentioning that general display rules may override the individual menu display rules. On the main Superfly settings page if you scroll down slightly, you'll see the general display rules like this:
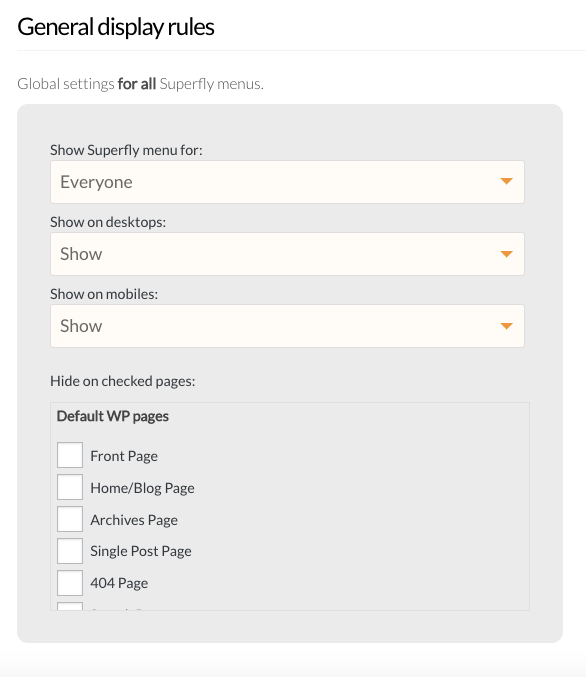
Here there are the following options:
- Show Superfly Menu for: Options include Everyone, Logged in users and Logged out users.
- Show on Desktops: Enable the option if you want to show the menu on Desktop.
- Show on Mobile: Enable the option if you want to show the menu on Mobile.
- Hide on Checked Pages: This option allows you to hide all Superfly menus on specific pages. This will override the show/display rules on each individual menu. For example, if you set here for Superfly not to show on the Front Page, but have an individual menu set to show on the Front Page, it still won't show, as the general display rule will override the per menu display rule.
Adding a Skewed Panel Menu
We're going to add a Skewed Panel menu to our website. As we've already added our menu in the first steps of the article above, we're now going to make that a Skewed Panel and get the button to display to open the menu. First of all, go to the Menu Panel section in Superfly and select Skewed Panel. Once you've selected the Skewed Panel menu option, you'll see the following related options:

The most important options here to pay attention to are the Behaviour options which are:
- Slide-In
- Push Content
- Always Visible
To add a button to the Superfly menu we need to go to the button settings and enable and configure the button to complete the menu settings:

Congrats! Your Superfly menu is now added and displayed on your site. You can see different modes that you can use the Superfly menu by checking the demo page here.
Modifying Your Superfly menu
Once you've added the Superfly menu you want, you'll then be able to configure individual menu items. Follow the steps below to edit the individual menu items:
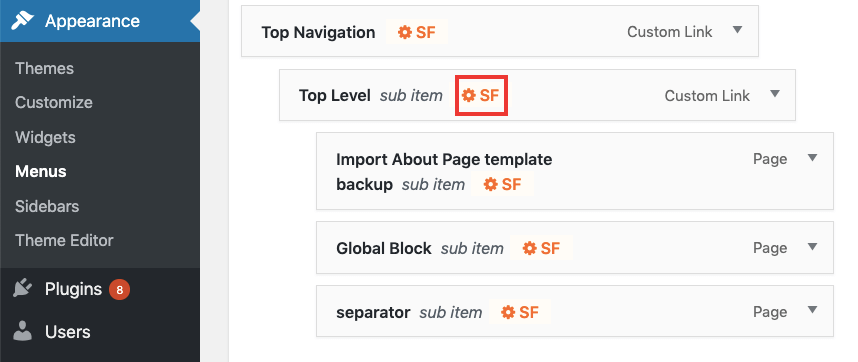
- Go to Appearance > Menus and you will see the SF button in front of each menu item.
- Click the SF button on a menu item to edit the Superfly related characteristics of the menu item.
Upon clicking the SF button a dialog will show which you can edit the settings below:
- Attached Image (Shows on the left side of the menu item)
- Custom Icon Color (for if your menu item has a custom icon)
- Second Line (Text will display under your menu item)
- Section Heading (Shows above the menu item)
- Custom HTML or Shortcode (shown in a panel when the user hovers/clicks)
- Custom Panel Color (background color for custom panel content)/
- Toggle switch for hiding items and custom content on mobile, default is no
Once you have that set as you want for that menu item click Save & Close and do the same for each menu item on your menu.

Further Reading
We discussed the most common setup options for the Superfly plugin. Now it is time to learn more in-depth about the options and features that this awesome plugin provides. Click here to read the official documentation.
In addition to the above documentation, Superfly also has great details on customizing Superfly which can be found here.
Summary
We've discussed the Superfly plugin features and the methods it provides awesome effects and turns the menu of the website into a vertical navigation. We talked about the plugin installation and walked you through a typical setup of the menu. We also introduced the individual menu item editing feature and finally provided official resources for further reading.
See something inaccurate? Let us know