Facebook Comments
In this article, we're going to explain how to create a new Themeco account and talk you through the various options you'll see inside.
Facebook Comments enables you to replace the WordPress comments with the powerful comments of Facebook.
How to Enable the Extension
Go to Pro > Validation or X > Validation then look for Facebook Comments. Click Install.
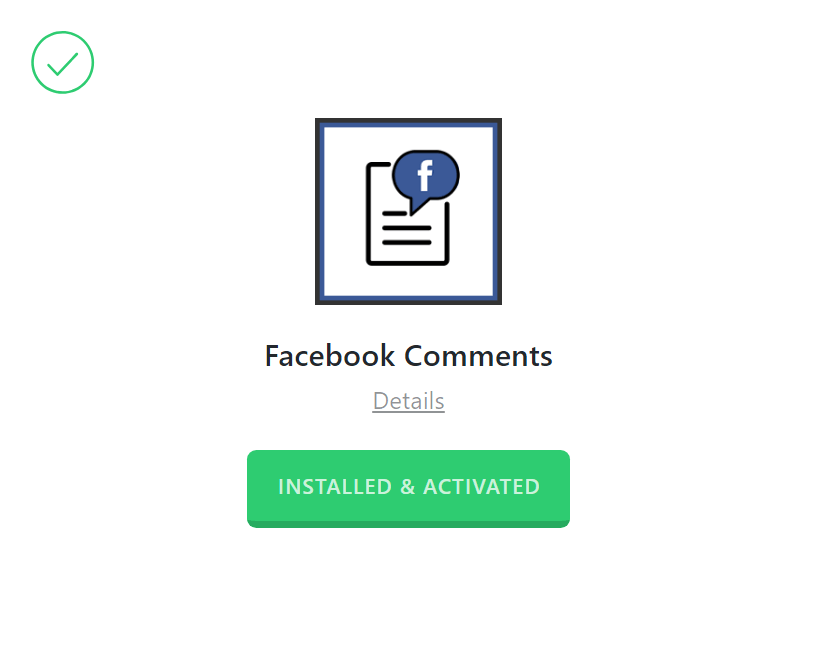
Once installed, the Install button will change and say Activate. Click that button and it will activate the plugin. You will then see the status change to Installed and Activated.
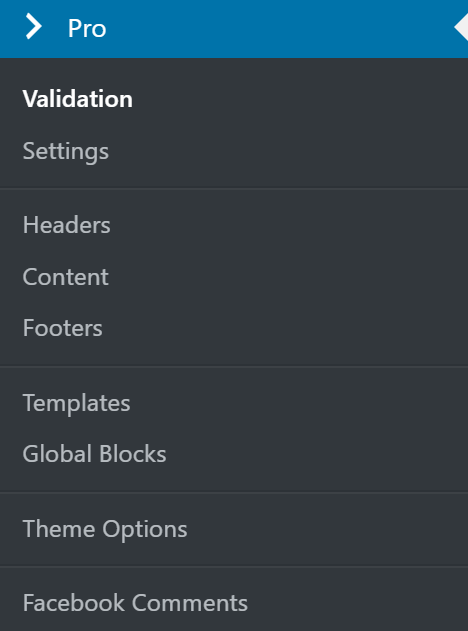
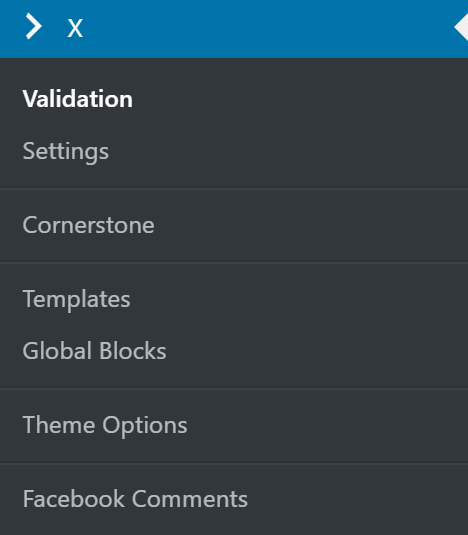
After installing and activating Facebook Comments, you'll find its settings under the X menu item if X is installed and activated, or the Pro menu item if Pro is installed and activated.
From the main Facebook Comments settings screen you can choose to disable or enable the plugin as needed:
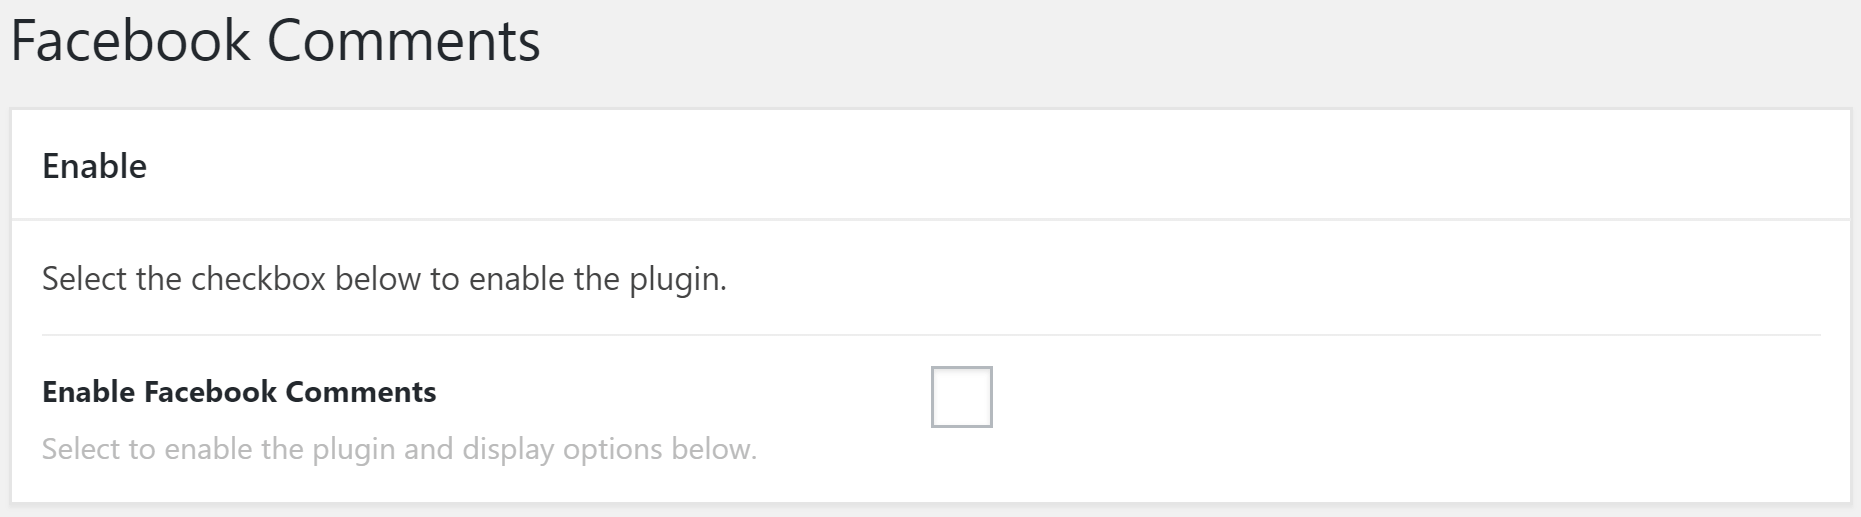
Disabling the plugin will effectively turn off all output from the plugin (e.g. HTML, CSS, JavaScript etc). This is useful as a quick way to toggle activity if you ever need without having to go through the Plugins menu and worry about activating/deactivating it completely.
Selecting the enable checkbox will bring up the Settings meta box below. This is where you will adjust any options for the plugin and input your data as needed.

What Facebook Comments Does
The Facebook Comments extension integrates the Facebook Comments platform with your WordPress website, replacing the default WordPress commenting system.
Setting Up Facebook Comments
The first thing you need to do is to create a Facebook app, we'll take you through this step by step so you know exactly what to do. Navigate to the Facebook Developers portal here.
Creating Your App
On the right side part of the main navigation, you'll see the My Apps menu item. Click that and then click Add New App.
You'll a modal window that looks like this:
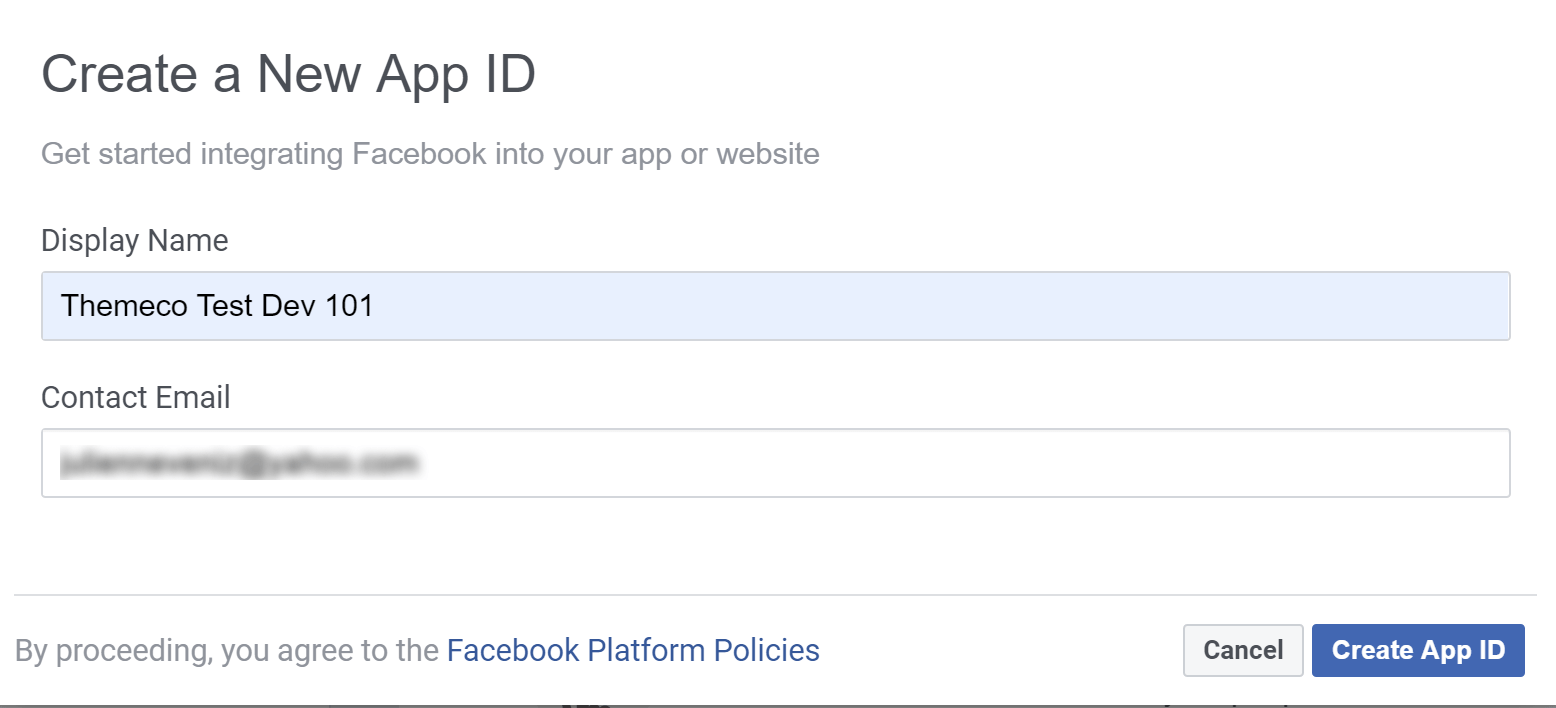
Enter the display name. This is the display name of your app and will be shown to your visitors so pick wisely. Then enter your contact email address and finally pick a category for your app. Once you're happy with everything entered click on Create App ID.
You'll then be taken to the newly-created app's main page.
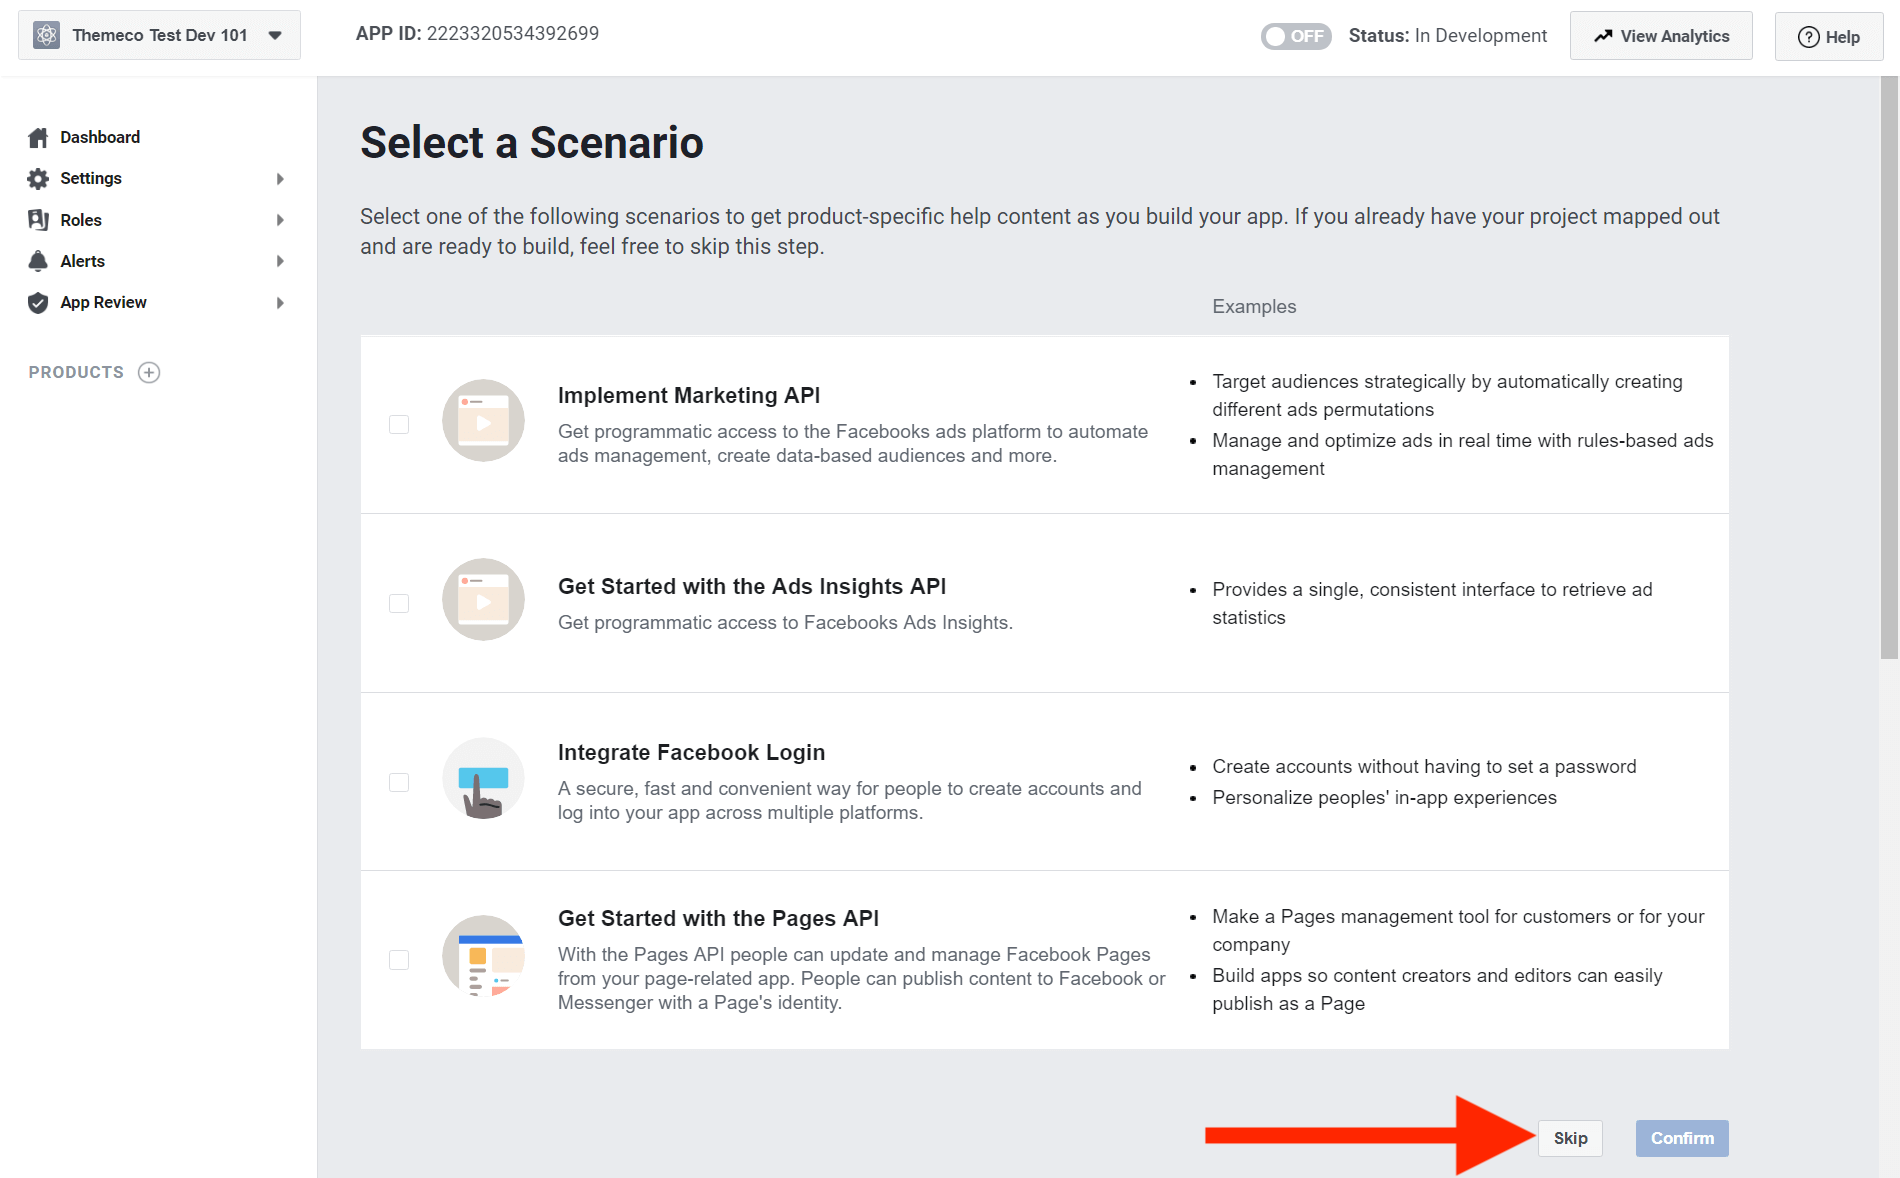
Go all the way to the bottom and then click SKIP button as shown above. You'll be redirected to the app's dashboard.
Now you need to add your domain to the app otherwise it won't work correctly on your website. To do that, click on Settings > Basic on the sidebar menu of your app's dashboard. You'll see a page that looks like this:
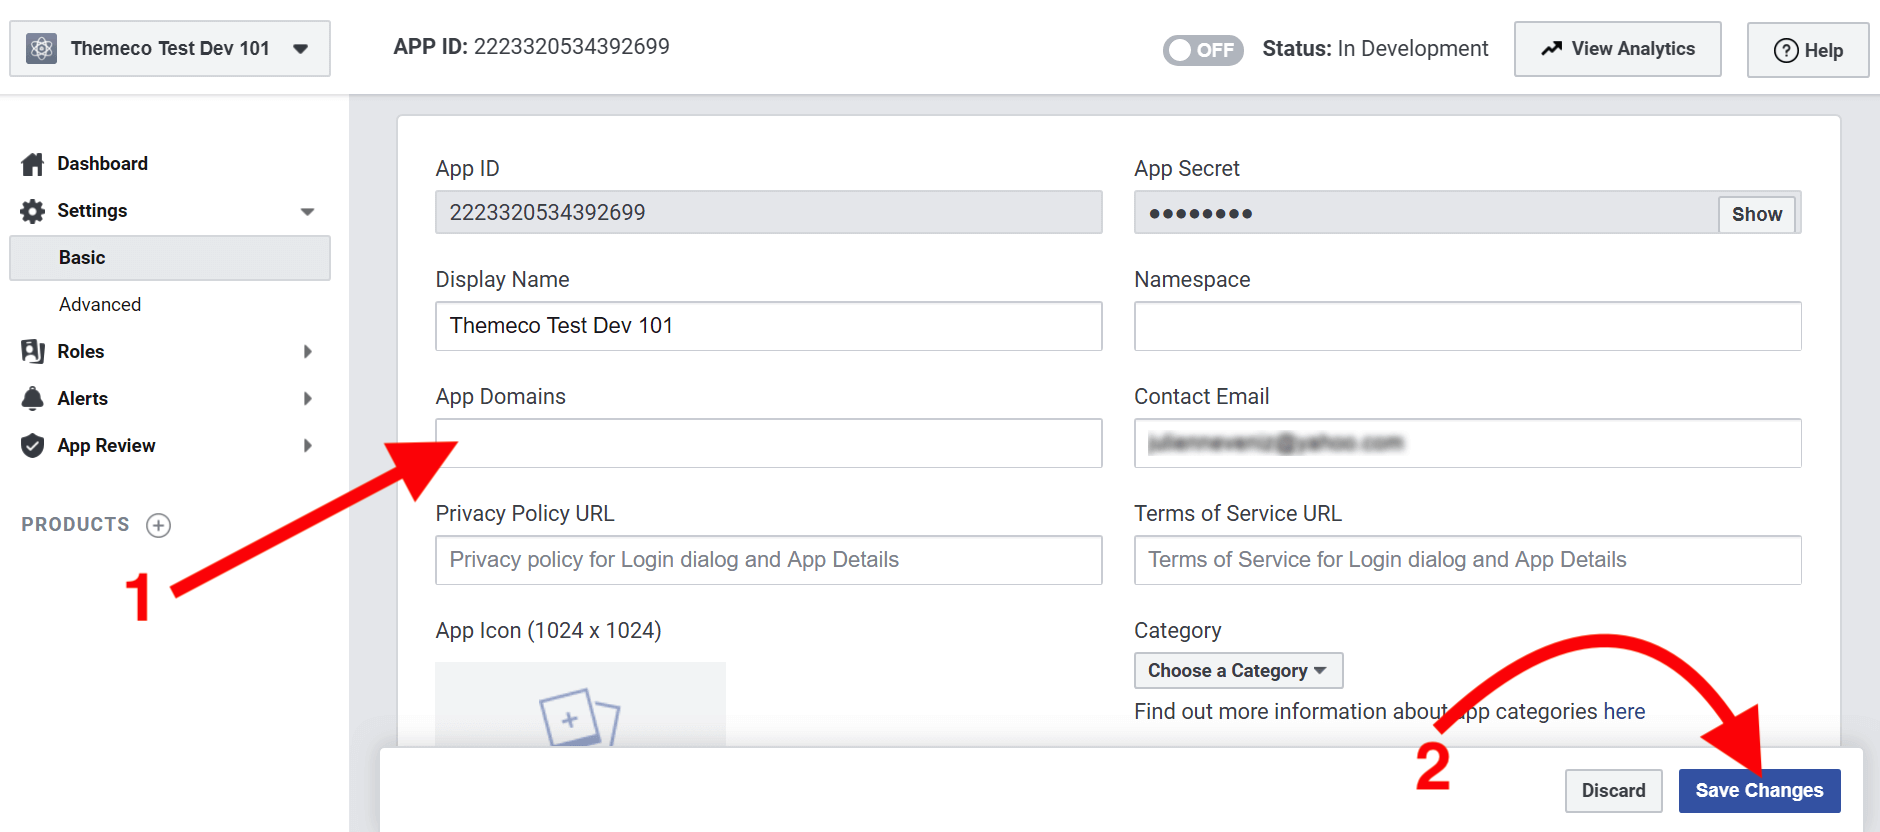
Enter your domain then click on Save Changes on the bottom right of the App Dashboard.
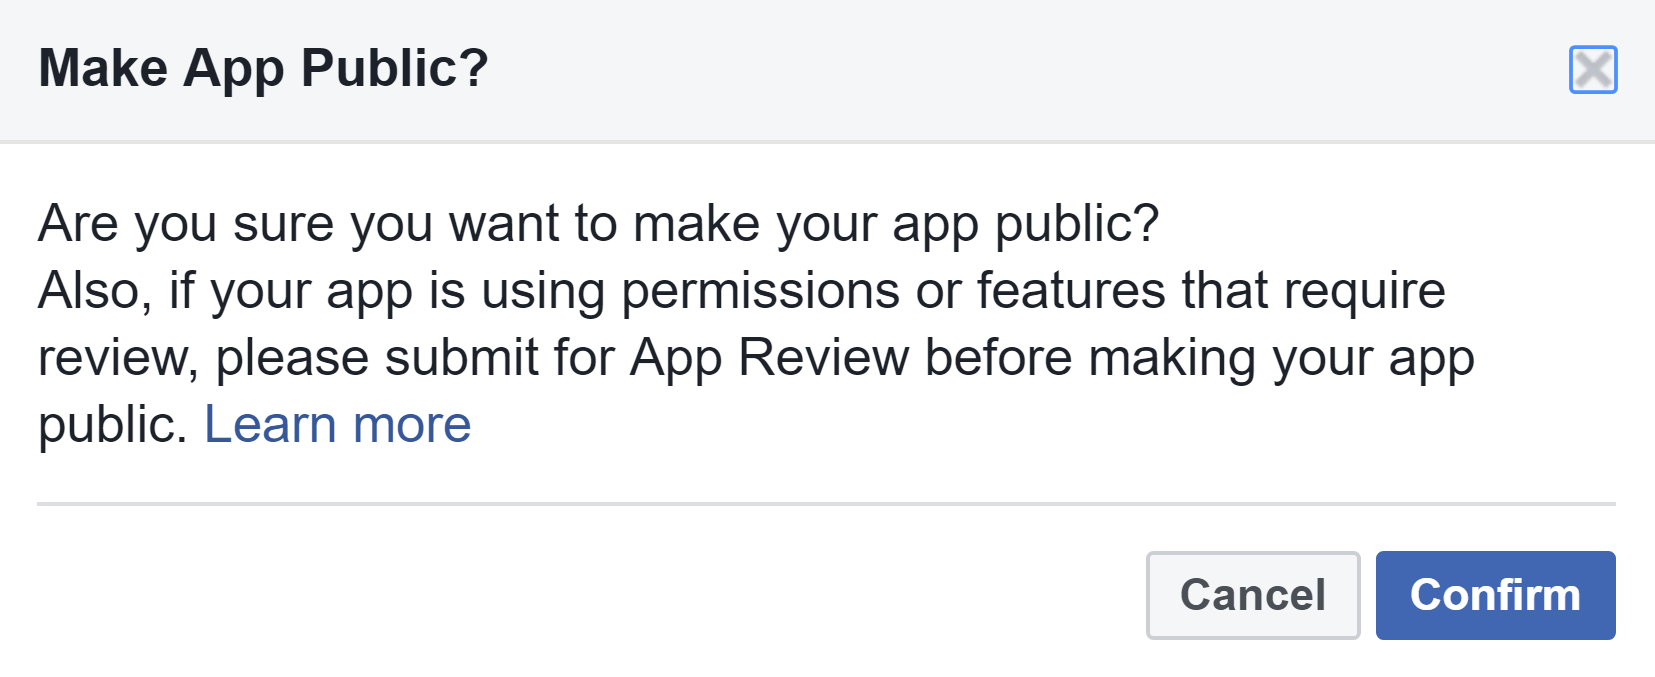
By default, Facebook apps aren't enabled. This means we need to make our app public. Below the main navigation area, you'll see a switch button that allows you to change the app's status.

If you click that switch a confirmation modal will appear, asking if you really want to make your app public. Just click Confirm.
Note: You don't need to submit your app for review, as we are only using the default permissions. Failure to add valid Privacy Policy URL will trigger this popup:

Once the app is live, you'll see that the Status is changed to Live and the switch is now turned On.

Now your app is public, go back to Settings > Basic then copy the App ID and App Secret and paste it into the Plugin Settings.

Adding Your App To Your Website
With both the App ID and App Secret copied, head back on over to your WordPress Dashboard > X / Pro > Facebook Comments and add your App ID and App Secret to the appropriate boxes.

Additional Settings
The remaining options can all be left at their defaults, though you can change and modify the values as you wish.

Once you're happy with everything click on Update to save your settings.
Once everything has been saved, visit any page or post that has comments open and you should now see the new Facebook Comments system like this:

Summary
Congrats! You've now successfully set up the Facebook Comments system on your website.
See something inaccurate? Let us know