Font Manager
In this article, we're going to discuss the Font Manager and how to use it when building or managing your site.
What is the Font Manager
The Font Manager allows you to give a name to a font for use on your site. Meaning you can switch a font under an alias and it'll instantly update sitewide, saving you time on going back and forth editing individual fonts.
The beauty of the Font Manager is if you ever want to go back and make adjustments to your site's fonts, you can update it in one spot in the Font Manager and it will be automatically reflected across your entire website! This is an incredibly powerful tool that should certainly be taken advantage of for large builds, and even smaller sites alike. Imagine if you had a long landing page full of Elements. It's easy to imagine that you might be calling up the same fonts over and over again across your design...probably hundreds of times. One thing to keep in mind is that hosted fonts from a service like Google Fonts or Adobe Fonts add weight to your site, so make sure to keep your selections minimal when utilizing those rather than system fonts like Georgia, Helvetica, et cetera.
When to Use the Font Manager
The Font Manager serves as an abstraction layer for easily assigning and updating fonts throughout Cornerstone. For example, say you have some pages you've designed and they're using a couple very specific fonts. Maybe you have dozens or even hundreds of instances of these fonts across your site from paragraphs to headings to buttons and more. Now let's say that down the road you decide that one of those fonts used throughout those hundreds of instances needs to be updated. Without the Font Manager, you would need to revisit every element and update that font...one by one...hundreds of times over. With the Font Manager, you can instead label a font however you see fit (e.g. "Body Copy") and assign that labeled font. If you ever have to go back and update that font, you can simply update it once in the Font Manager and it will change all assignments of that font throughout your website.
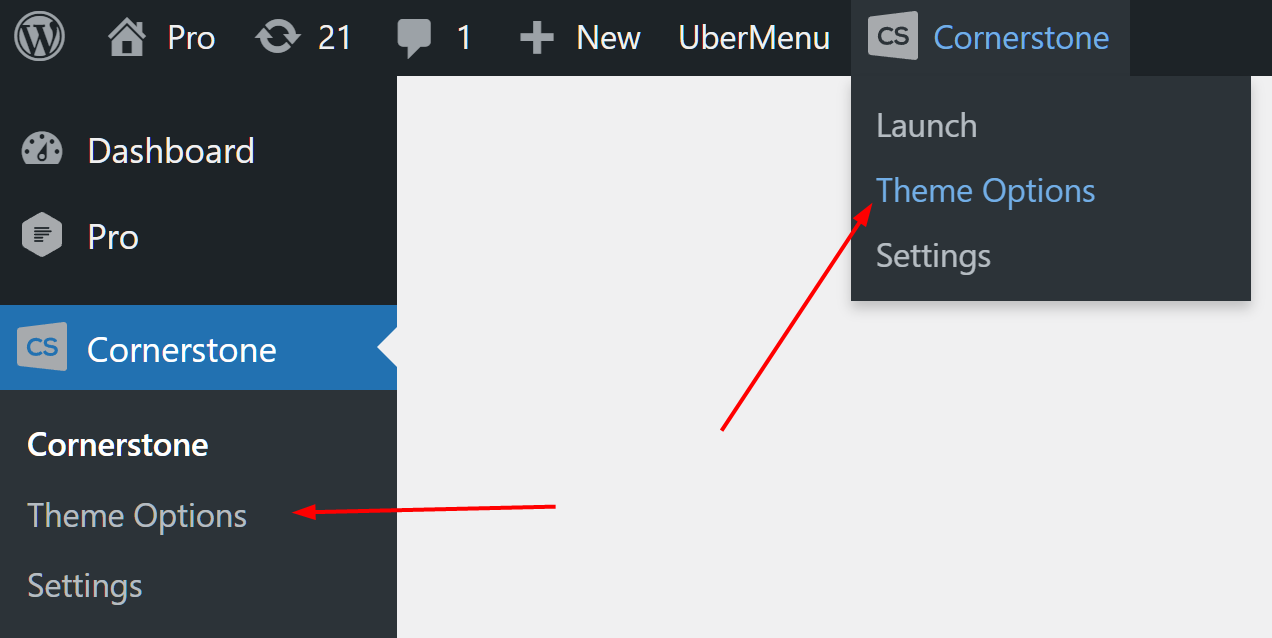
How to Access the Font Manager
- Go to Cornerstone > Theme Options in the WordPress Admin Menu.
- Click on the Layers icon to access the Theme options.
- Select Fonts from the control tabs.
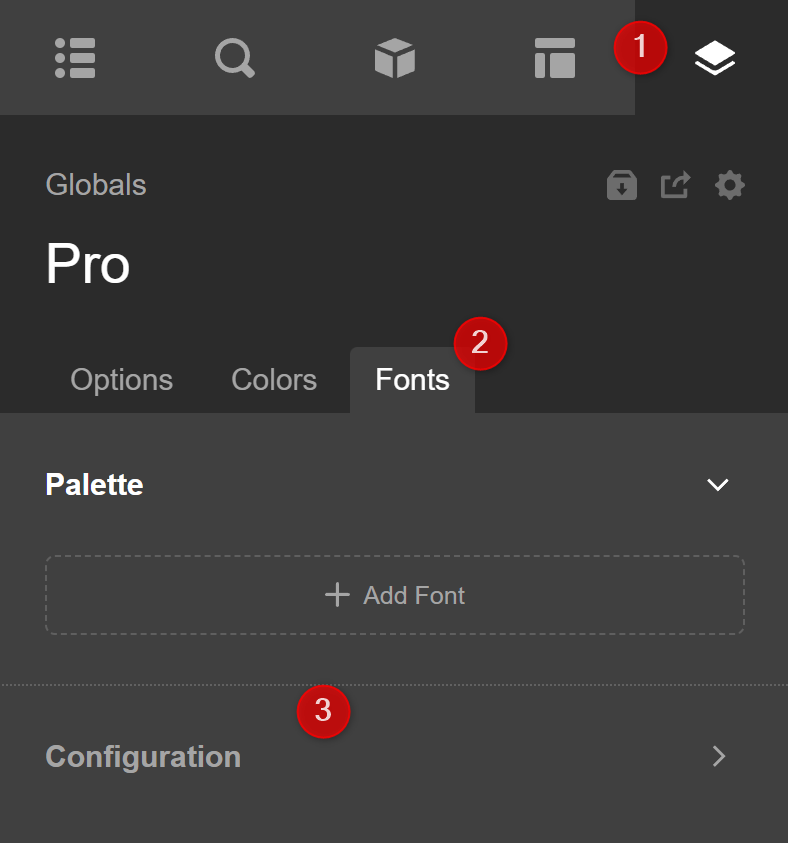
How to Setup the Font Manager
In the Fonts tab, open the Configuration dropdown and you'll see the following options.

The Font Manager submenu is broken down into five different sections that allow you to manage fonts throughout your site:
- Google / System Fonts: Add aliases and assign fonts to theme.
- Google Subsets: Add Google Font subsets if needed.
- Adobe Fonts: Connect your website with your Adobe Fonts account if you want to use that service for your website fonts.
- Custom Fonts: Upload custom web fonts to your website (e.g. .woff files).
- Font Display: Manage how fonts are loaded into the browser and when they should display.
Google / System Fonts
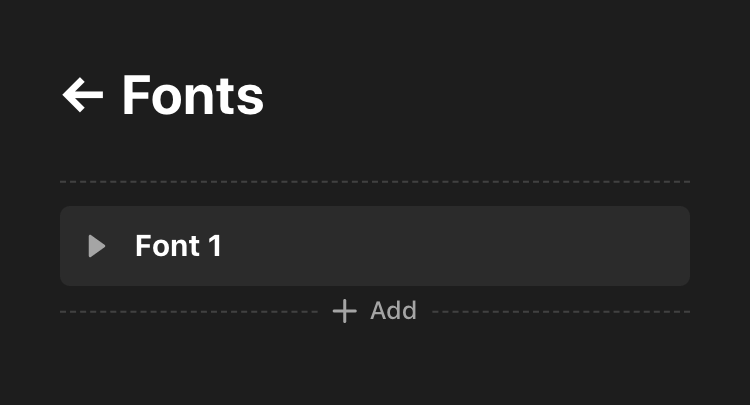
To utilize Google Fonts or system fonts for your design, you will start with the first section at the very top. If you have not yet added your first font, click the Add New button and you will see the following:
Each item added in this sortable list represents a font family. You can rename these items however you would prefer, but we typically find it is best to use more general names like “Body Copy” or “Headline Copy” rather than the actual font family used. In keeping with that example, if you wanted to add two fonts to use for your design, you could do something like the following:
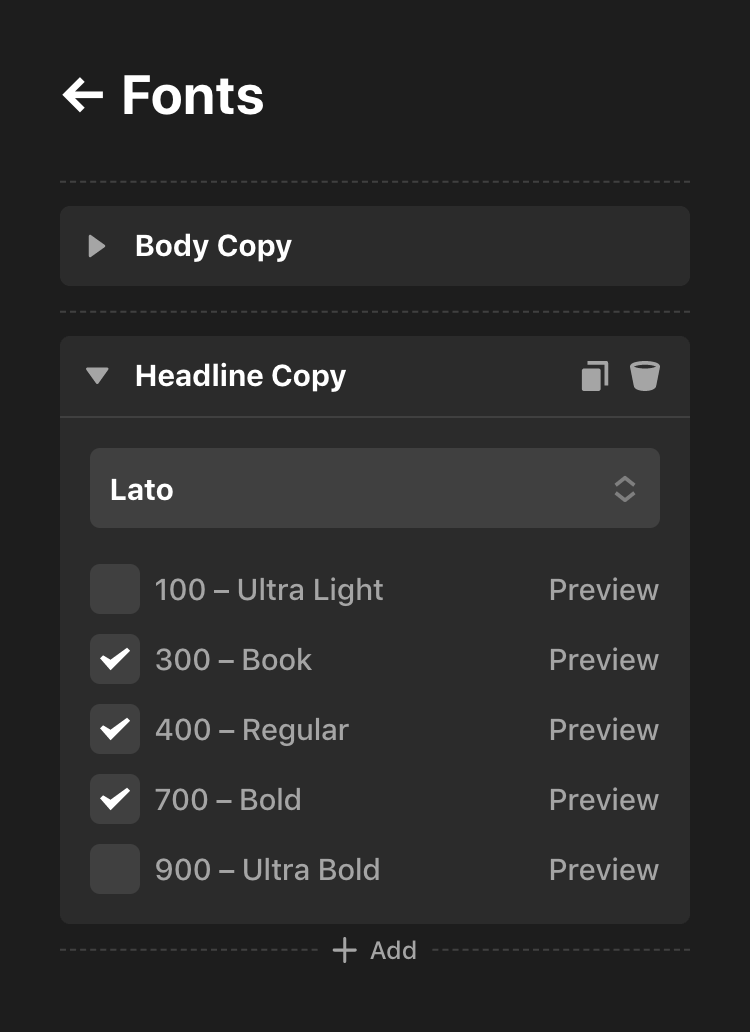
Take note that for each font family added, within that sortable item you will select the actual font family used along with your desired font weights to pull out of that family. The families and weights you specify here will be used later in the design process. Once you have setup your font families and weights the way you want, make sure to click the Save button in the Builder.
Google Subsets
In case you are using a language other than English and require certain glyphs and figures for your design (and are using Google Fonts), you can specify your desired subsets here.

Remember to click the Save button in the Builder if you have added any Google Fonts subsets to your design.
Changing the Google Fonts URL
We provide the following filter to change the Google Fonts URL. Place this in your child theme and you can change this domain and path that will load when your fonts are usually queried to Google. Note the domain will have support the same scheme as Google Fonts (//fonts.googleapis.com/css?family=Jost:100,200).
add_filter('cs_google_fonts_uri', function() {
  return '//newdomain.com/css';
});
Disabling Google Fonts entirely
We provide the following filter to prevent Google Fonts loading at all. It will not matter if you are using a Google Font in an element or in the font manager.
// Return false to disable loading
apply_filters('cs_load_google_fonts', '__return_false' )
Adobe Fonts
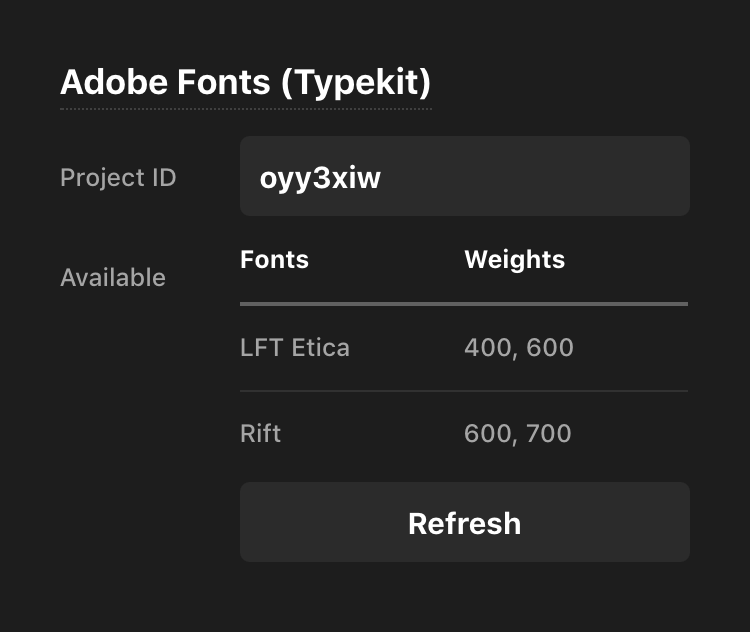
If you are using the premium service Adobe Fonts, you can link your font projects for your design here. To do so, go to your Adobe Fonts account, locate the project you wish to use, and enter the project ID in the input below. Once you enter the project ID and refresh the submenu, you should see a table displaying which fonts you are using for your design:
After adding your project ID, make sure that you have clicked the Save button in the Builder you are using.
Custom Fonts
In the case that you have a custom font file you have purchased from a foundry online, you can upload those files to use within the Builders as well. To get started, click Add New under the Custom Fonts section and you will see a sortable similar to the Google / System Fonts section above:

Rename your font how you want in the sortable handle and then click on the Import Font Files button to bring up the WordPress media library:
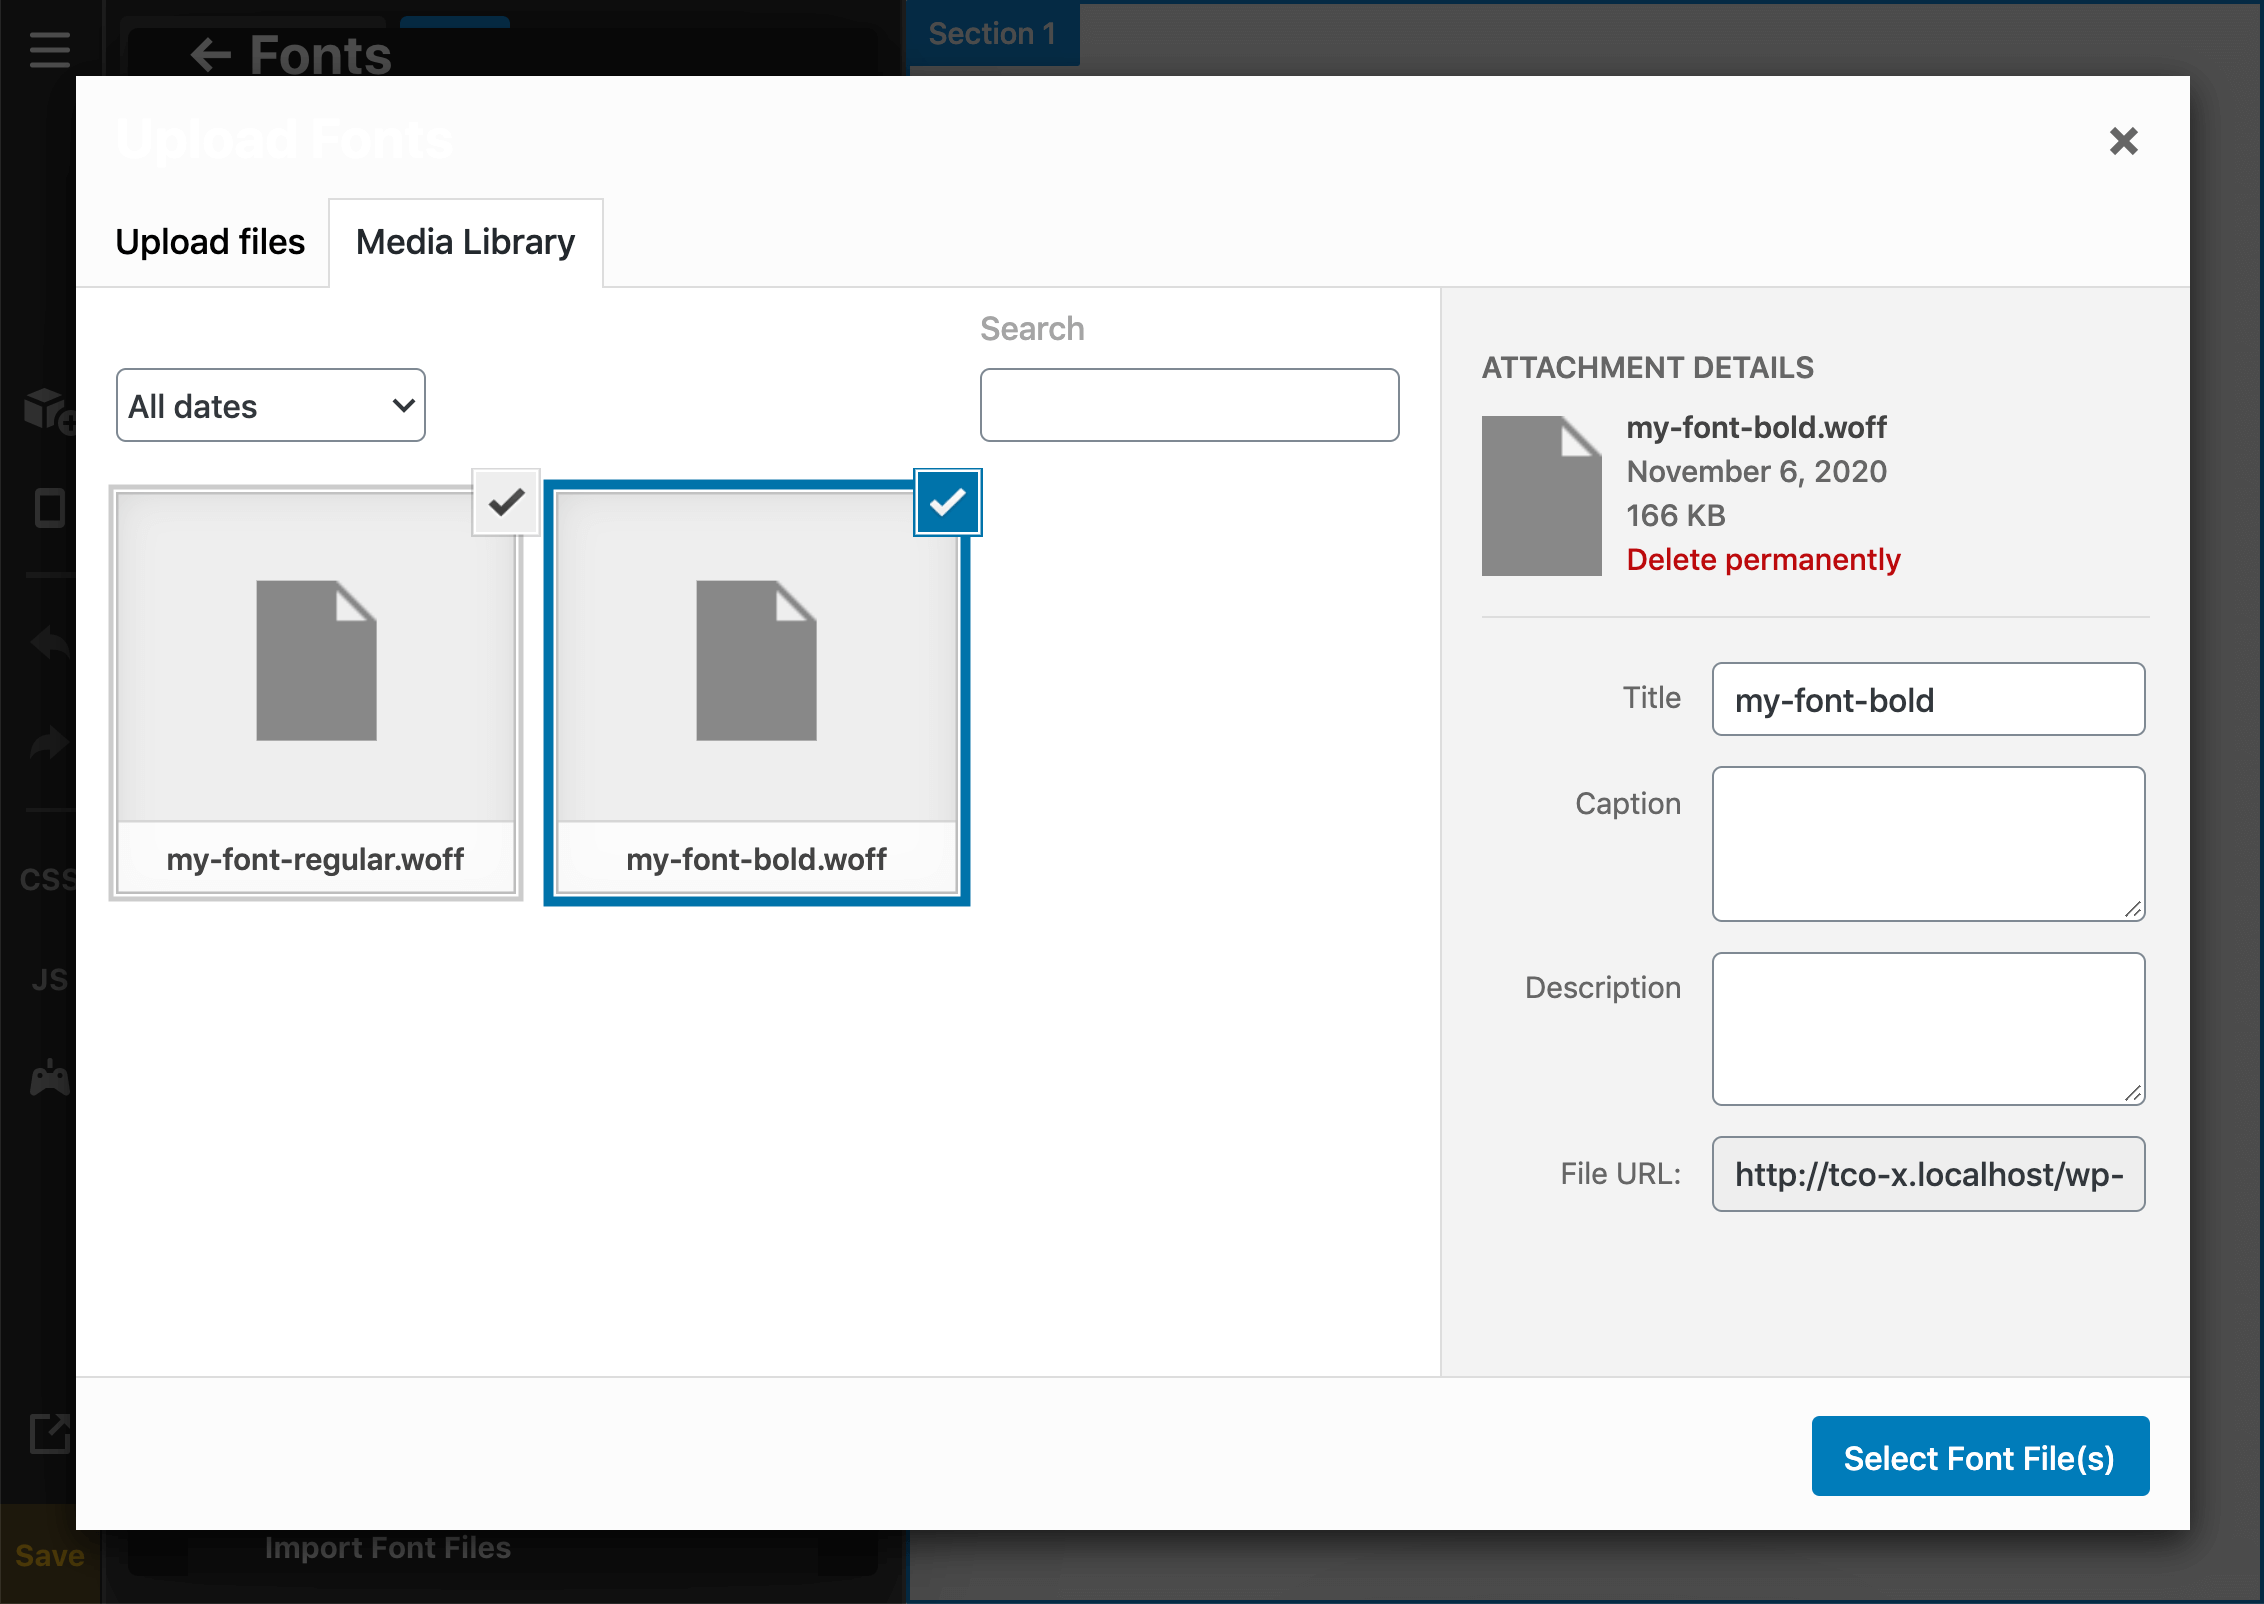
Once the library is open, upload your font files if you have not already done so. It is recommended that you use .woff files for the most broad browser support (otherwise you will have to upload and manage multiple formats). After you have uploaded the fonts you will see something like the following:

For each font file you have uploaded, you can specify what weight and style should be associated with it. You can tweak these as needed in the future, or add new files if you are missing any. Individual files can also be deleted should you run into an issue. As always, make sure to click the Save button in the Builder after you are done setting up your custom fonts.
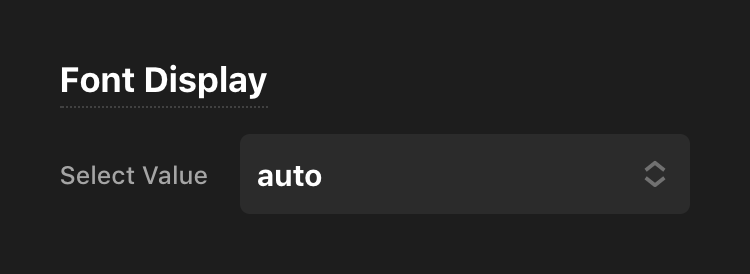
Font Display
Finally, the Font Display section allows you to set the global font-display property value for your site. font-display gives users control over how the timeline for fonts being loaded into the browser should be executed. The value selected will be utilized in supported browsers where applicable across your site:
Like any changes made throughout the Font Manager, ensure you have clicked Save if you update your Font Display setting.
How to Use the Font Manager
Now that you have the font aliases added to the Font Manager you can use those aliases throughout the theme. Whenever you work with an Element in Cornerstone and there is an option to set a font, you will be presented with the list of the font aliases that you already have been created in the Font Manager:
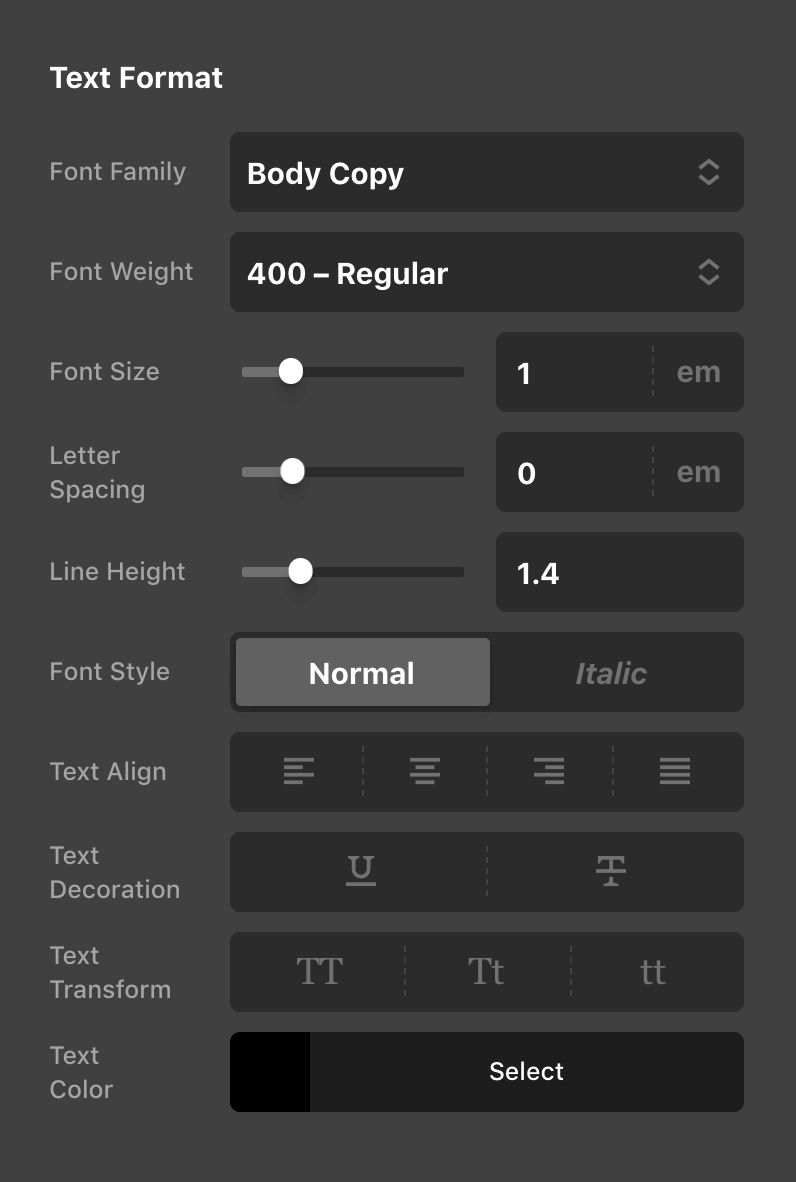
Depending on the font that you choose there, the Font Weight list will change to represent the available font weights of the chosen font.
Enabling Font Manager in the Theme Options
To enable the Font Manager for the whole website including the theme generated text which is not available in the builders you need to follow the steps below:
- Go to Theme Options → Typography.
- Enable the Font Manager Options.
- Scroll down to Body and Heading options.
- Select the proper font which you added int he Font Manager in the Body and Header fonts options.
Summary
We've introduced the Font Manager and explained how to access it and create aliases. Also we've discussed various font types that can be added including system fonts, Google Fonts, Adobe Fonts, and Custom Fonts. Finally, we've talked about the usage of the created fonts throughout Cornerstone and Theme Options.
See something inaccurate? Let us know