UberMenu
In this article, we're going to explain how to use the UberMenu plugin to create awesome navigation menus.
UberMenu is an easy to use, highly customizable, responsive mega menu WordPress plugin that helps you build creative menus.
What's Possible with UberMenu?
UberMenu is a user-friendly, highly customizable, responsive mega menu plugin for WordPress. It works out of the box with the WordPress Menu System, making it simple to get started but powerful enough to create highly customized and creative mega menu configurations. Here is the list of the capabilities of the UberMenu plugin:
- Fully Responsive
- Works with the WordPress Menu System
- Includes 20 Style Presets
- Slide and Fade Effects
- Click, Hover, or HoverIntent Trigger
- Vertical and Horizontal Orientations
- Add Images to Menu Items
- Add Descriptions to Menu Items
- Add shortcodes to the menu
- Widgetized submenus
- CSS-based degrades gracefully without javascript
Getting Started
Go to Pro > Validation, or X > Validation, then look for UberMenu. Click Install.
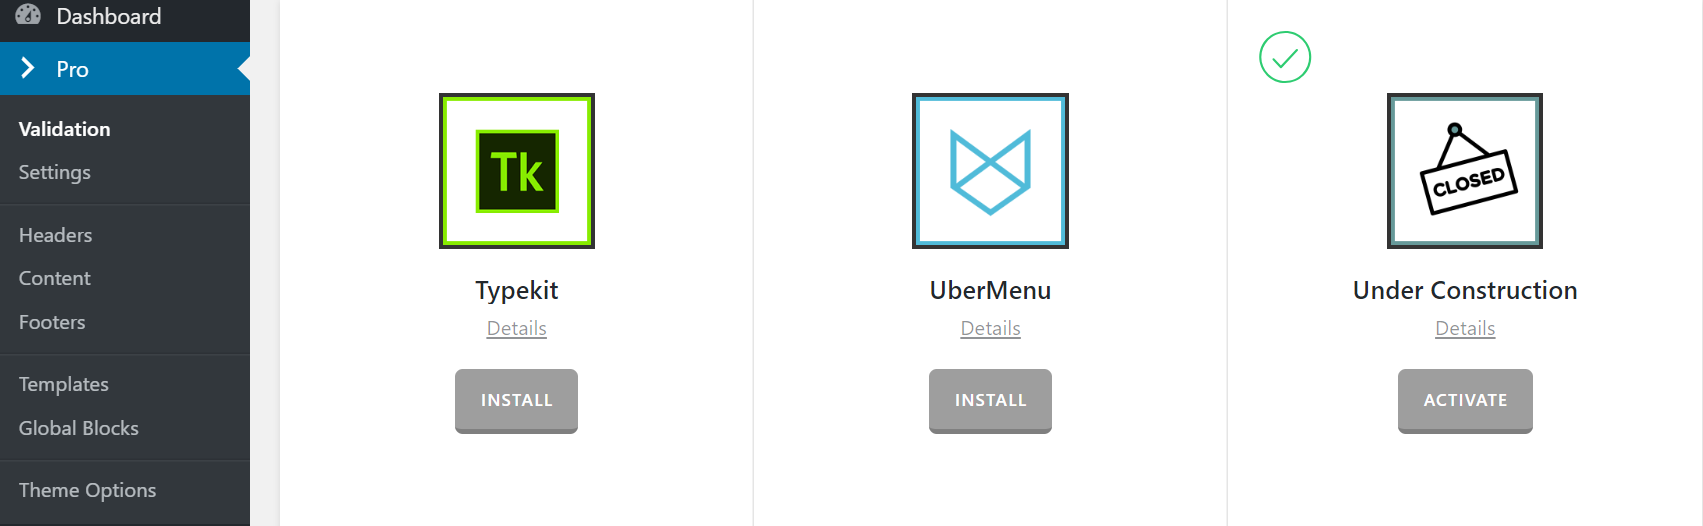
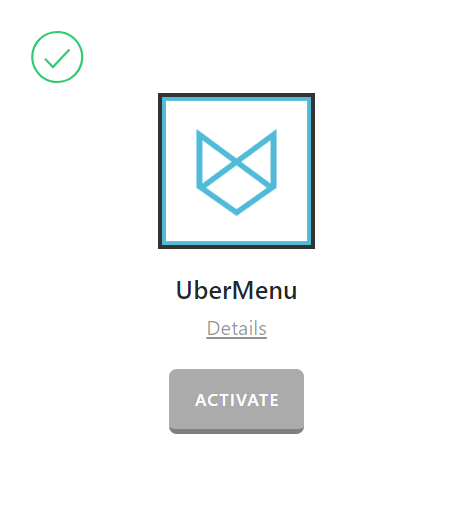
Once installed, the Install button will change and say Activate. Click that button and it will activate the plugin. You will then see the status change to Installed and Activated.
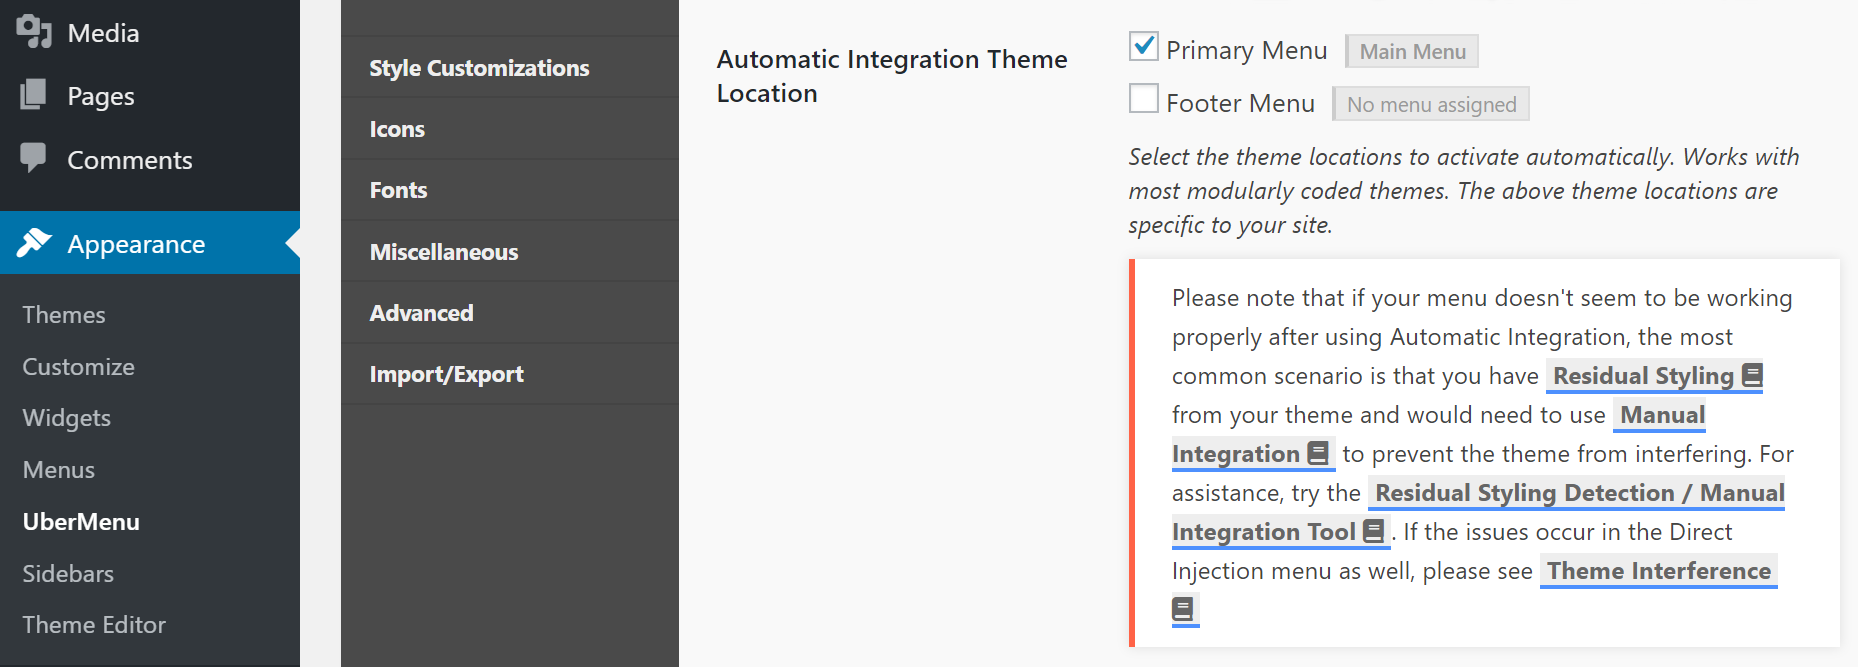
To access the settings of the UberMenu plugin you need to go to WordPress Dashboard > Appearance > UberMenu. X integrates UberMenu automatically into the website and you do not need to follow the manual integration process. Pro integrates the menu automatically if you use the standard header however if you use the Header Builder then check the section below for the integration. The only option that you need to choose is the location of the menu which you want the UberMenu to take control over. As soon as you select the menu location and save the settings the control of the menu will be converted to the UberMenu and it will override the original menu of the website.
The next step is to go to Basic Configuration tab and select the Skin of the UberMenu. Both X and Pro are compatible with the Vanilla skin out of the box and you do not need any custom CSS code. If you are interested in using the other skins you might need to do some customization and write additional CSS code.

UberMenu and the Pro Header Builder
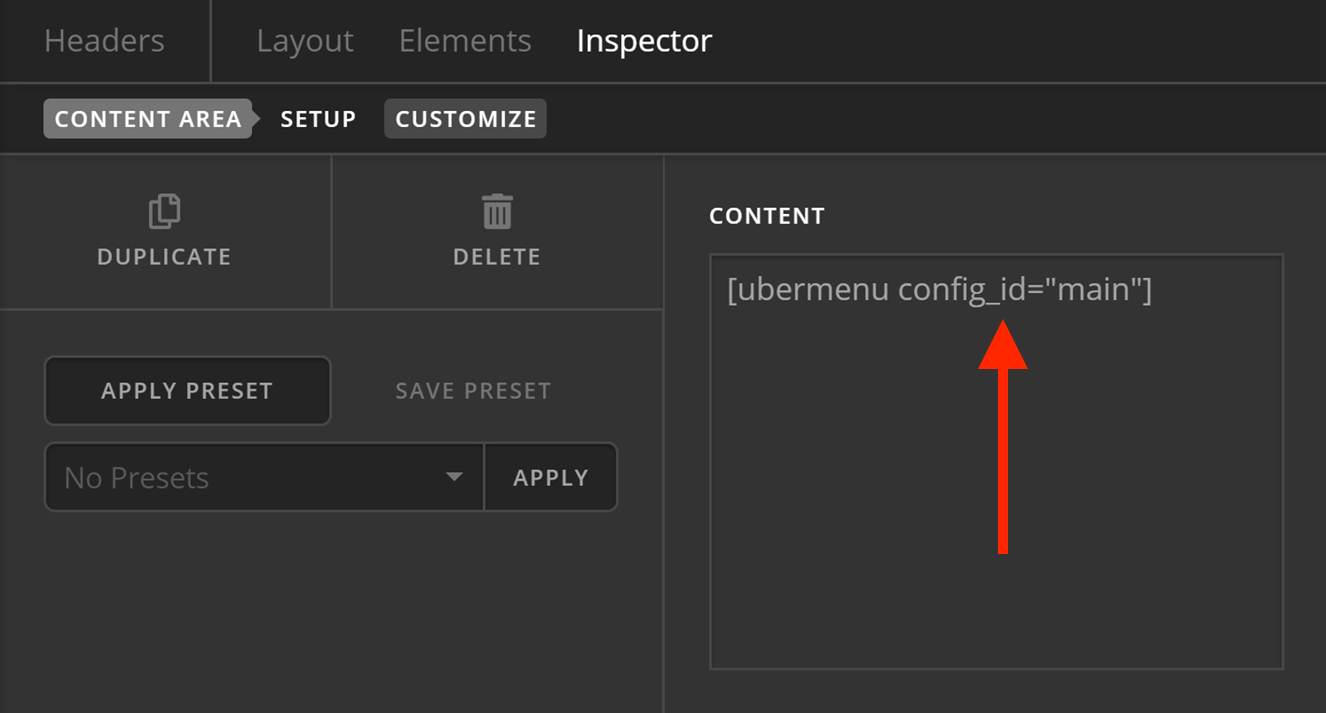
To be able to use the UberMenu in the Pro Header Builder you need to go to Appearance > UberMenu > Integration > Manual Integration and copy the shortcode of the UberMenu:
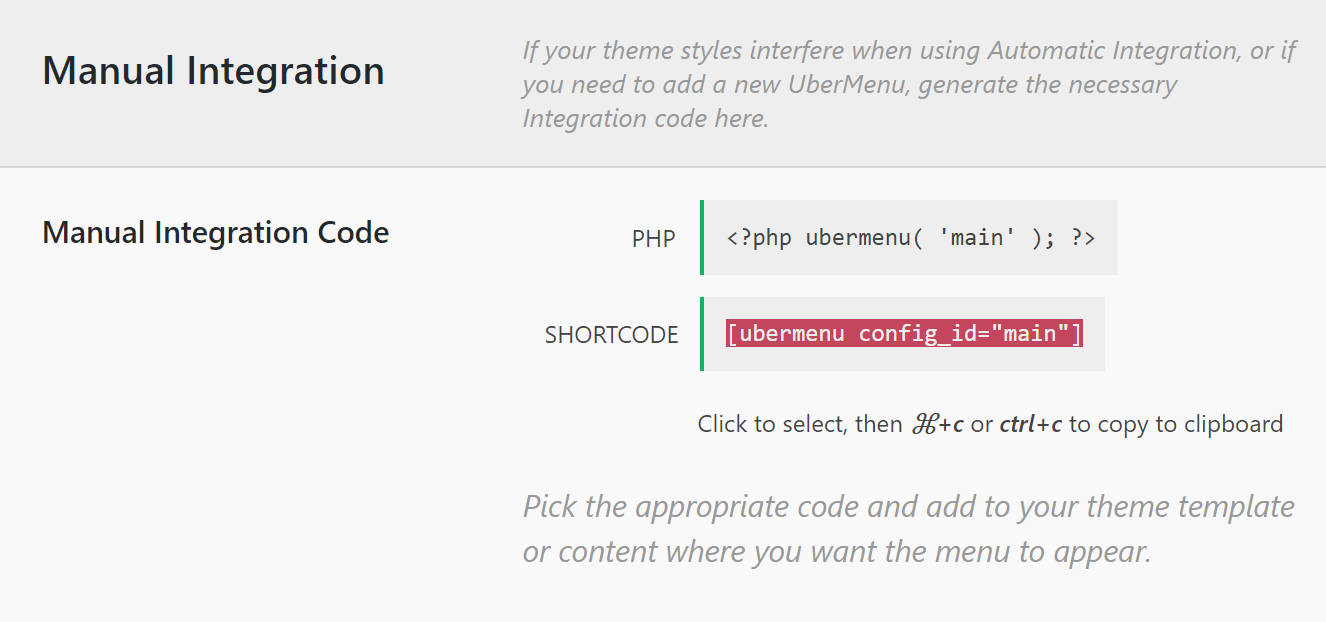
Then, you need to go to Pro > Headers and select the header that you want and use the Header Builder to add the Content Area element. After that, paste the previously copied shortcode to the Content Area element to show the UberMenu enabled navigation.
UberMenu and One-Page Navigation
The one-page navigation is a feature of X and Pro which makes the menu items of the navigation trigger the page to scroll down to a specific section of the page when clicked. As the UberMenu replaces the original menu system of the theme, the one-page navigation feature will not work if you enable the UberMenu. To fix the issue you need to use a third-party plugin called Menu Swapper to have more than one menu and be able to select the menu you want to show on a page. For more information, read the official Menu Swapper plugin documentation.
Troubleshooting
If you have your menu right aligned you may need to add some custom CSS to get menu items aligned correctly, including the cart and search icon. UberMenu provides the code needed along with further explanation in their integration guide).
If you happen to see a notification in your WordPress admin panel asking you to register UberMenu upon activation, simply dismiss this notice as you use the included version of the extension.
Further Reading
This article barely scratched the surface of the UberMenu capabilities. If you are interested in learning the plugin features in more depth we suggest that you check the official documentation. Also to configure the individual menu items you can read this article.
Summary
We've discussed the installation and configuration process of the UberMenu plugin and delved into details of few cases that might be confusing such as the one-page navigation and the Pro Header Builder integration. We also talked about troubleshooting a specific use case and linked to the official documentation of the UberMenu for further reading.
See something inaccurate? Let us know