Estimation & Payment Forms
In this article, we’ll cover some usage examples of how you can utilize Estimation & Payment Forms within your X or Pro powered site.
The Estimation & Payment Forms plugin allows you to create flat visual forms of paypal payment/cost estimation.
Getting Started
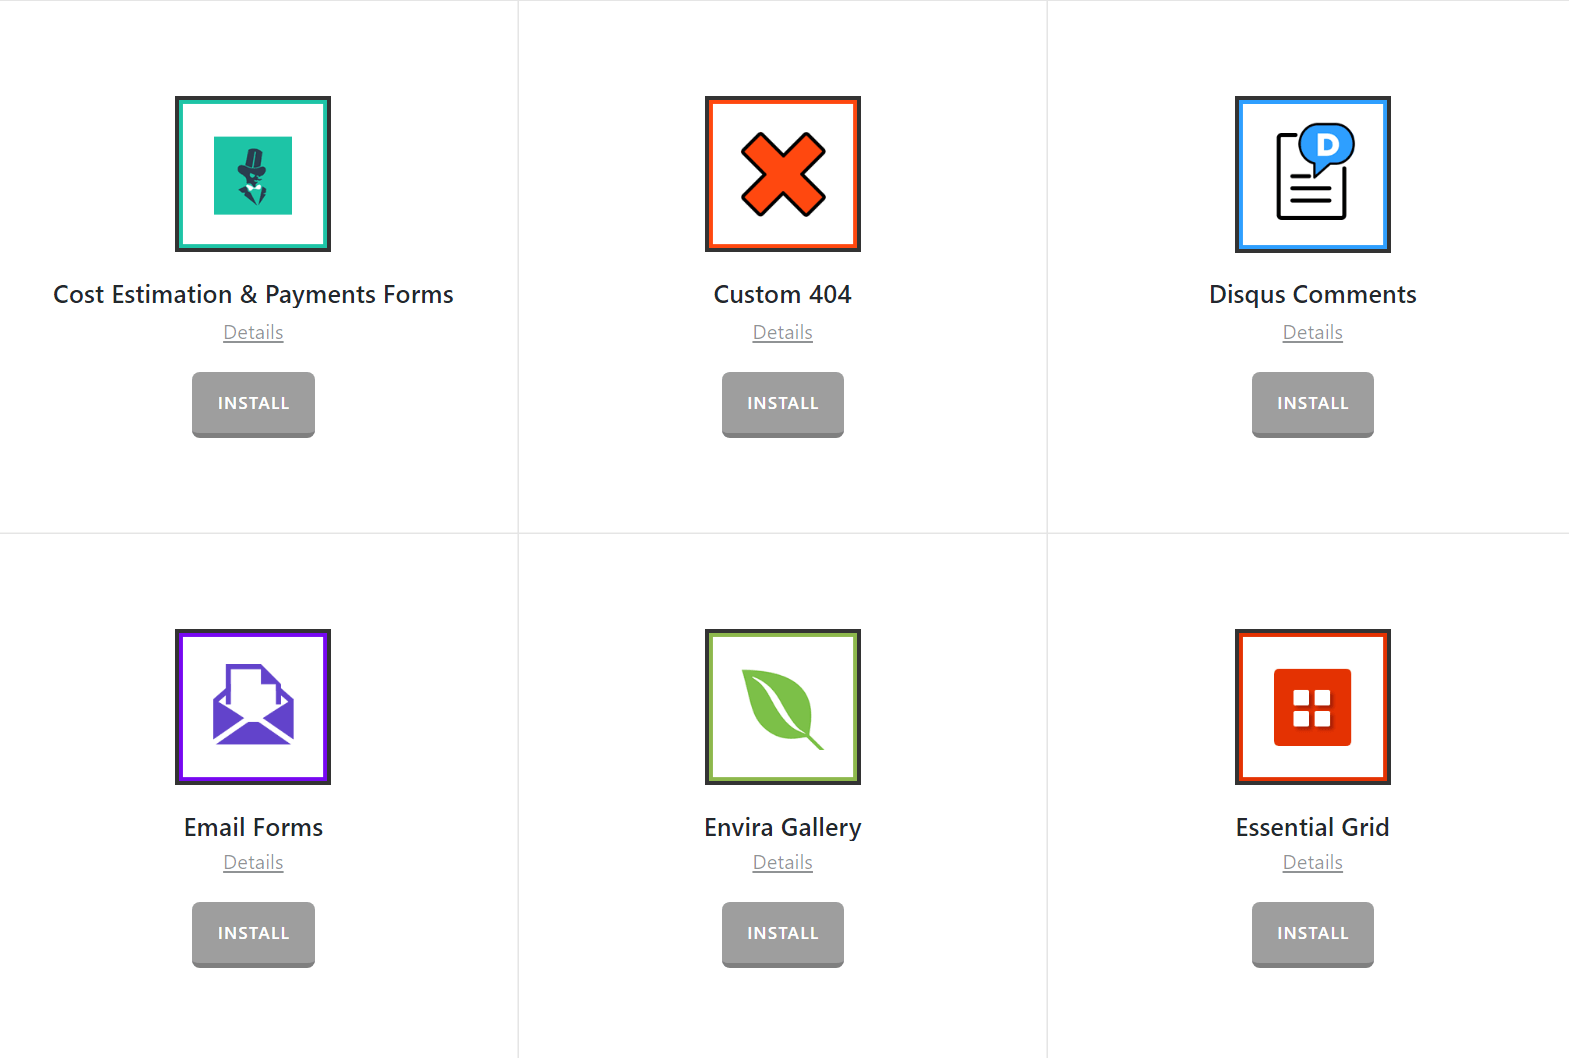
Go to Pro > Validation or X > Validation for X then look for Estimation & Payment Forms. Click Install.
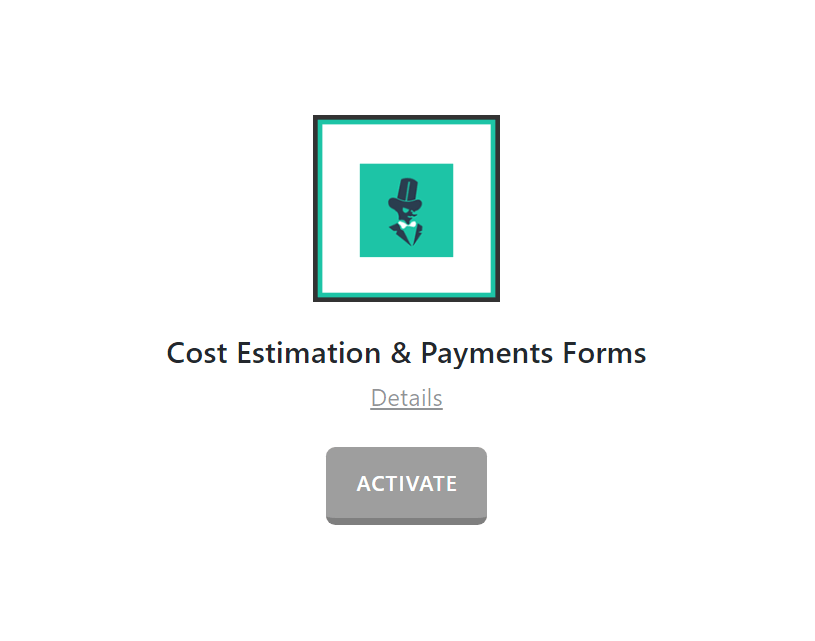
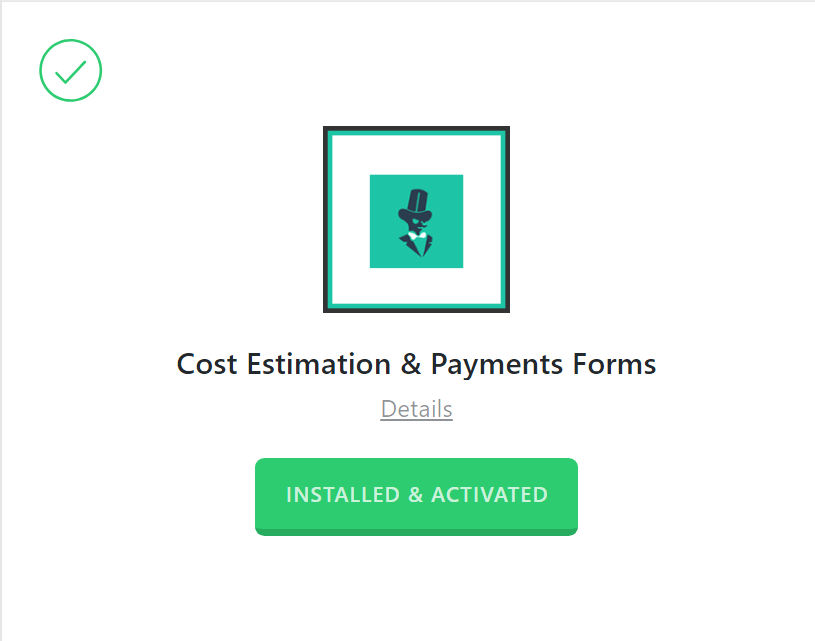
Once installed, the Install button will change and say Activate. Click that button and it will activate the plugin. You will then see the status change to Installed and Activated.
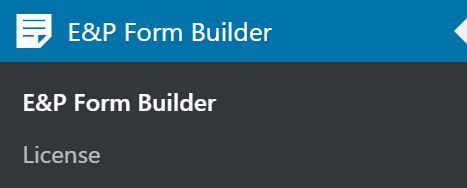
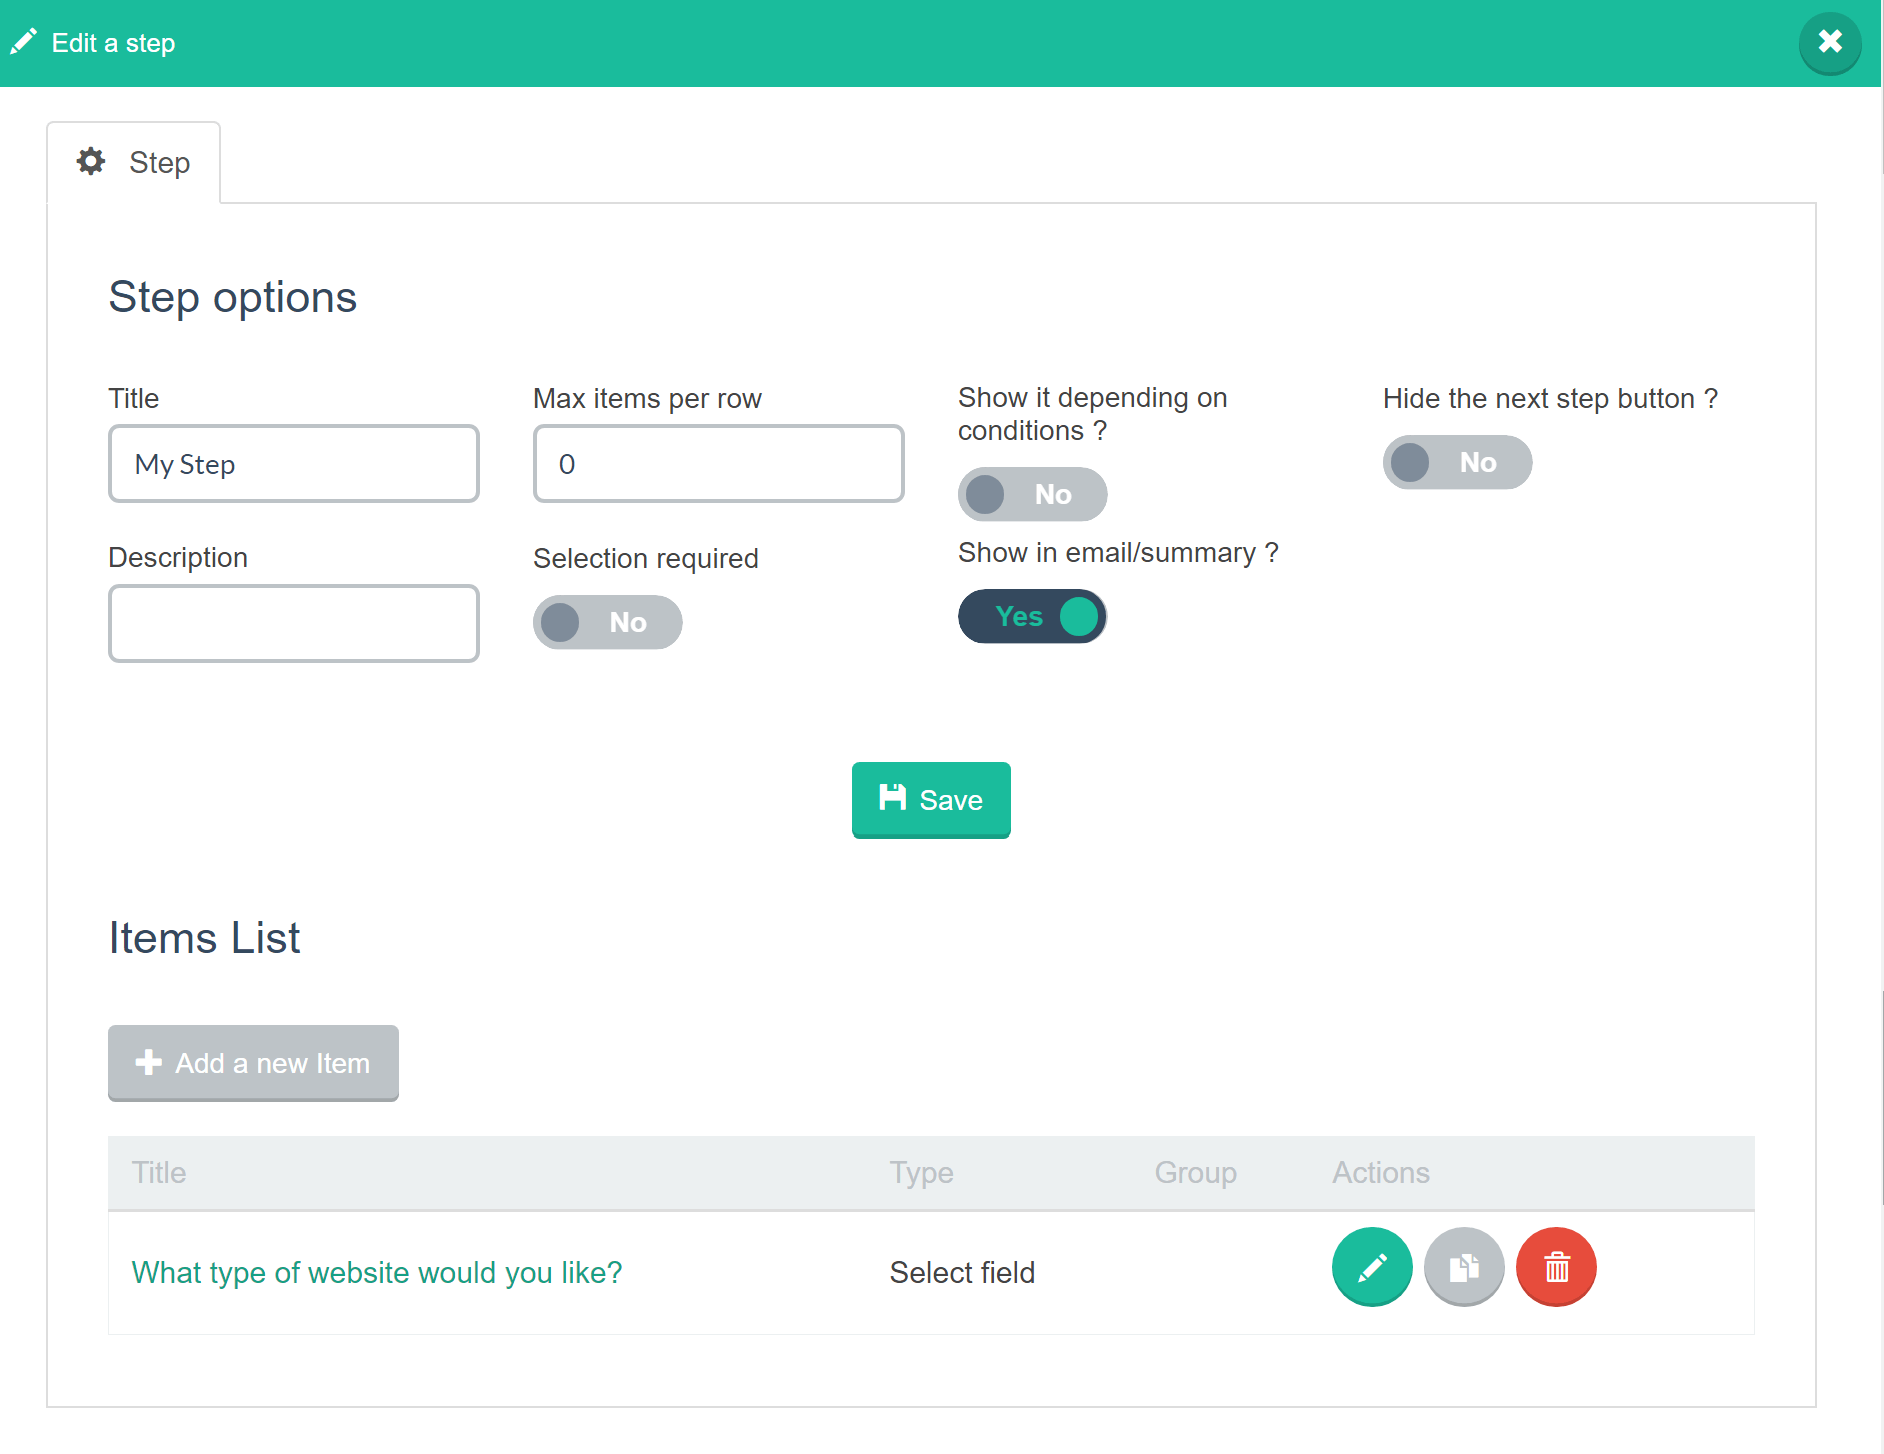
You should see the E&P Form Builder menu item on the WordPress dashboard like this:
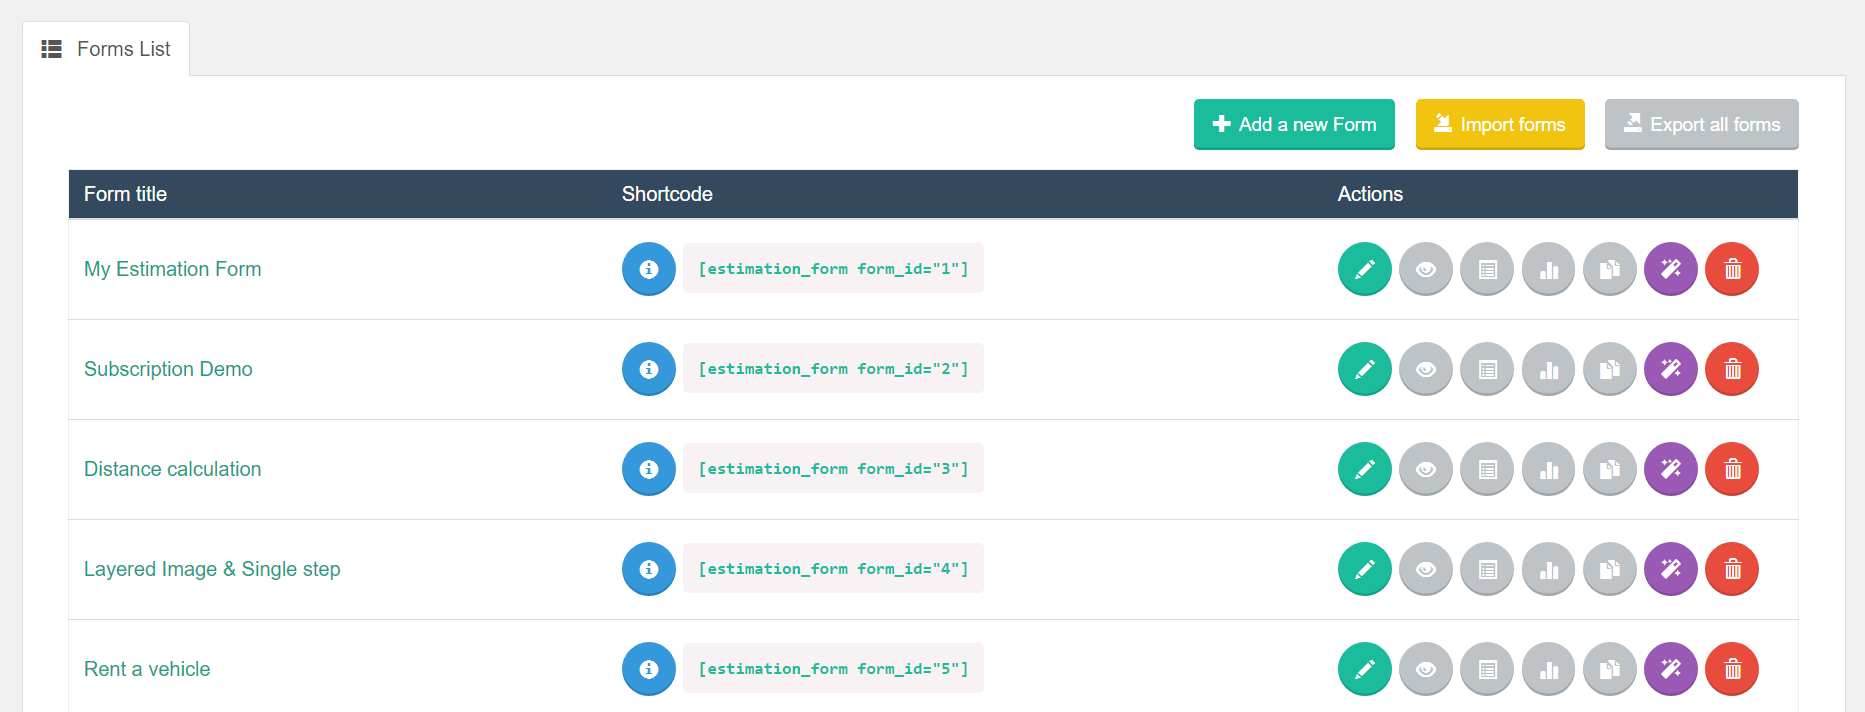
Go ahead and click it and you'll then land on the main Estimation & Payment Forms plugin admin screen like this:
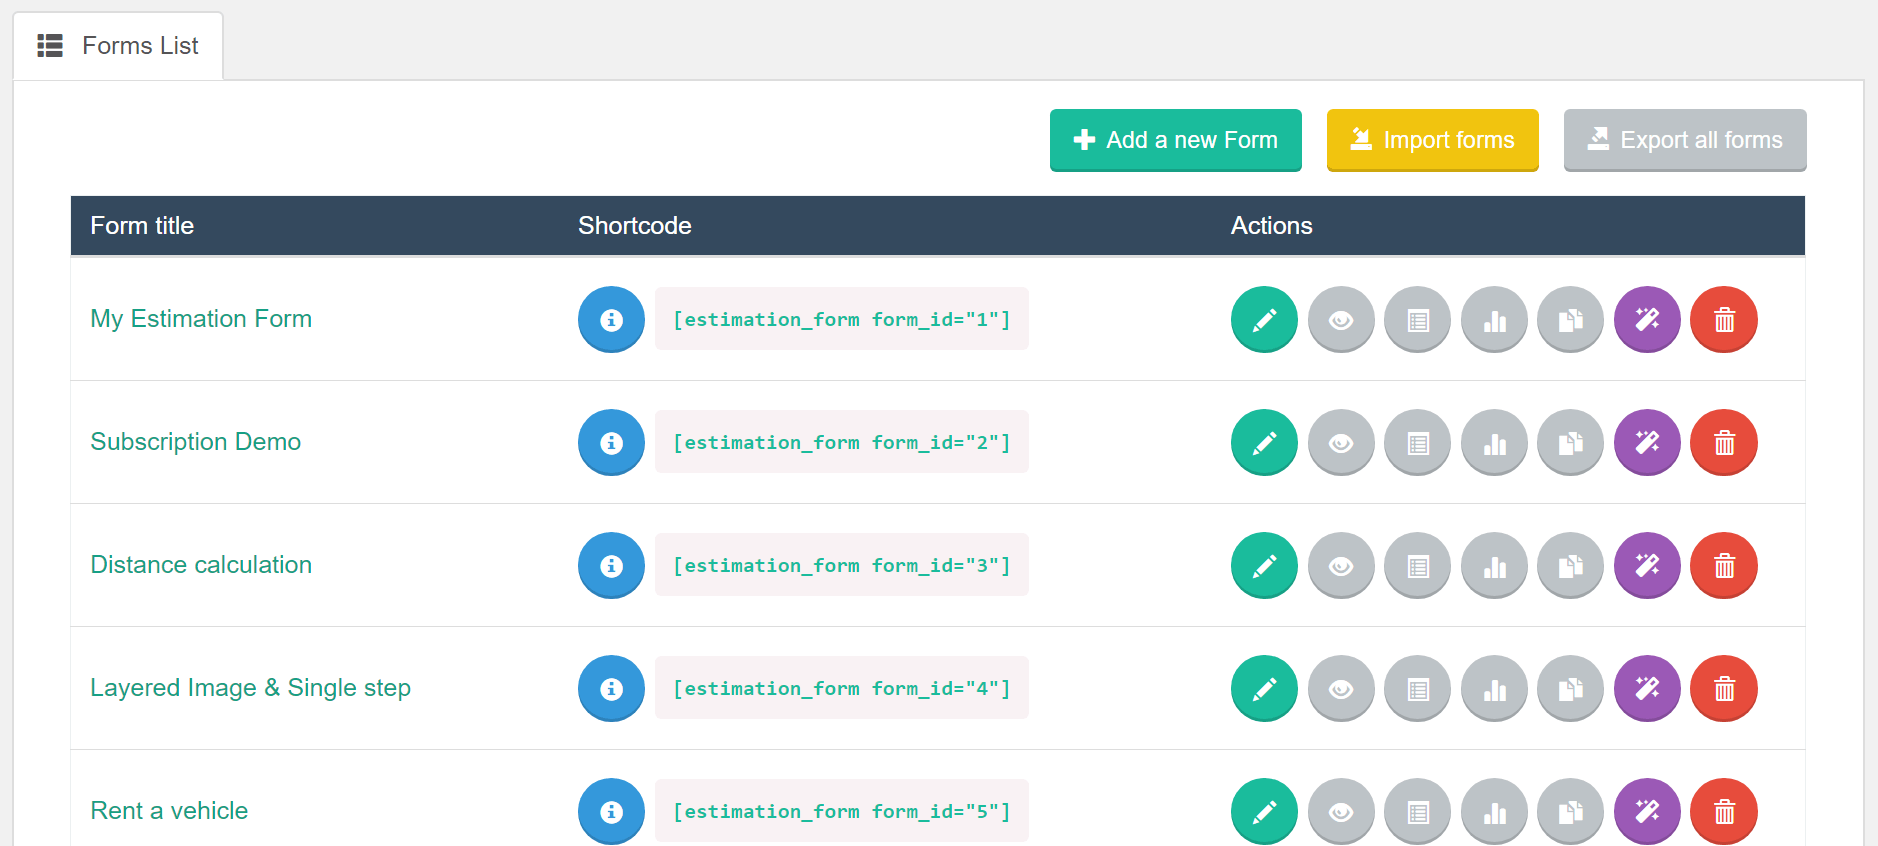
Here you'll see your current forms, be able to add a new form, import forms, and export all forms. When you install and activate the plugin for the first time, you automatically have a form added titled My Estimation Form.
Creating a New Form
Go ahead and click on Add New Form and you'll then see the form builder which looks like this:
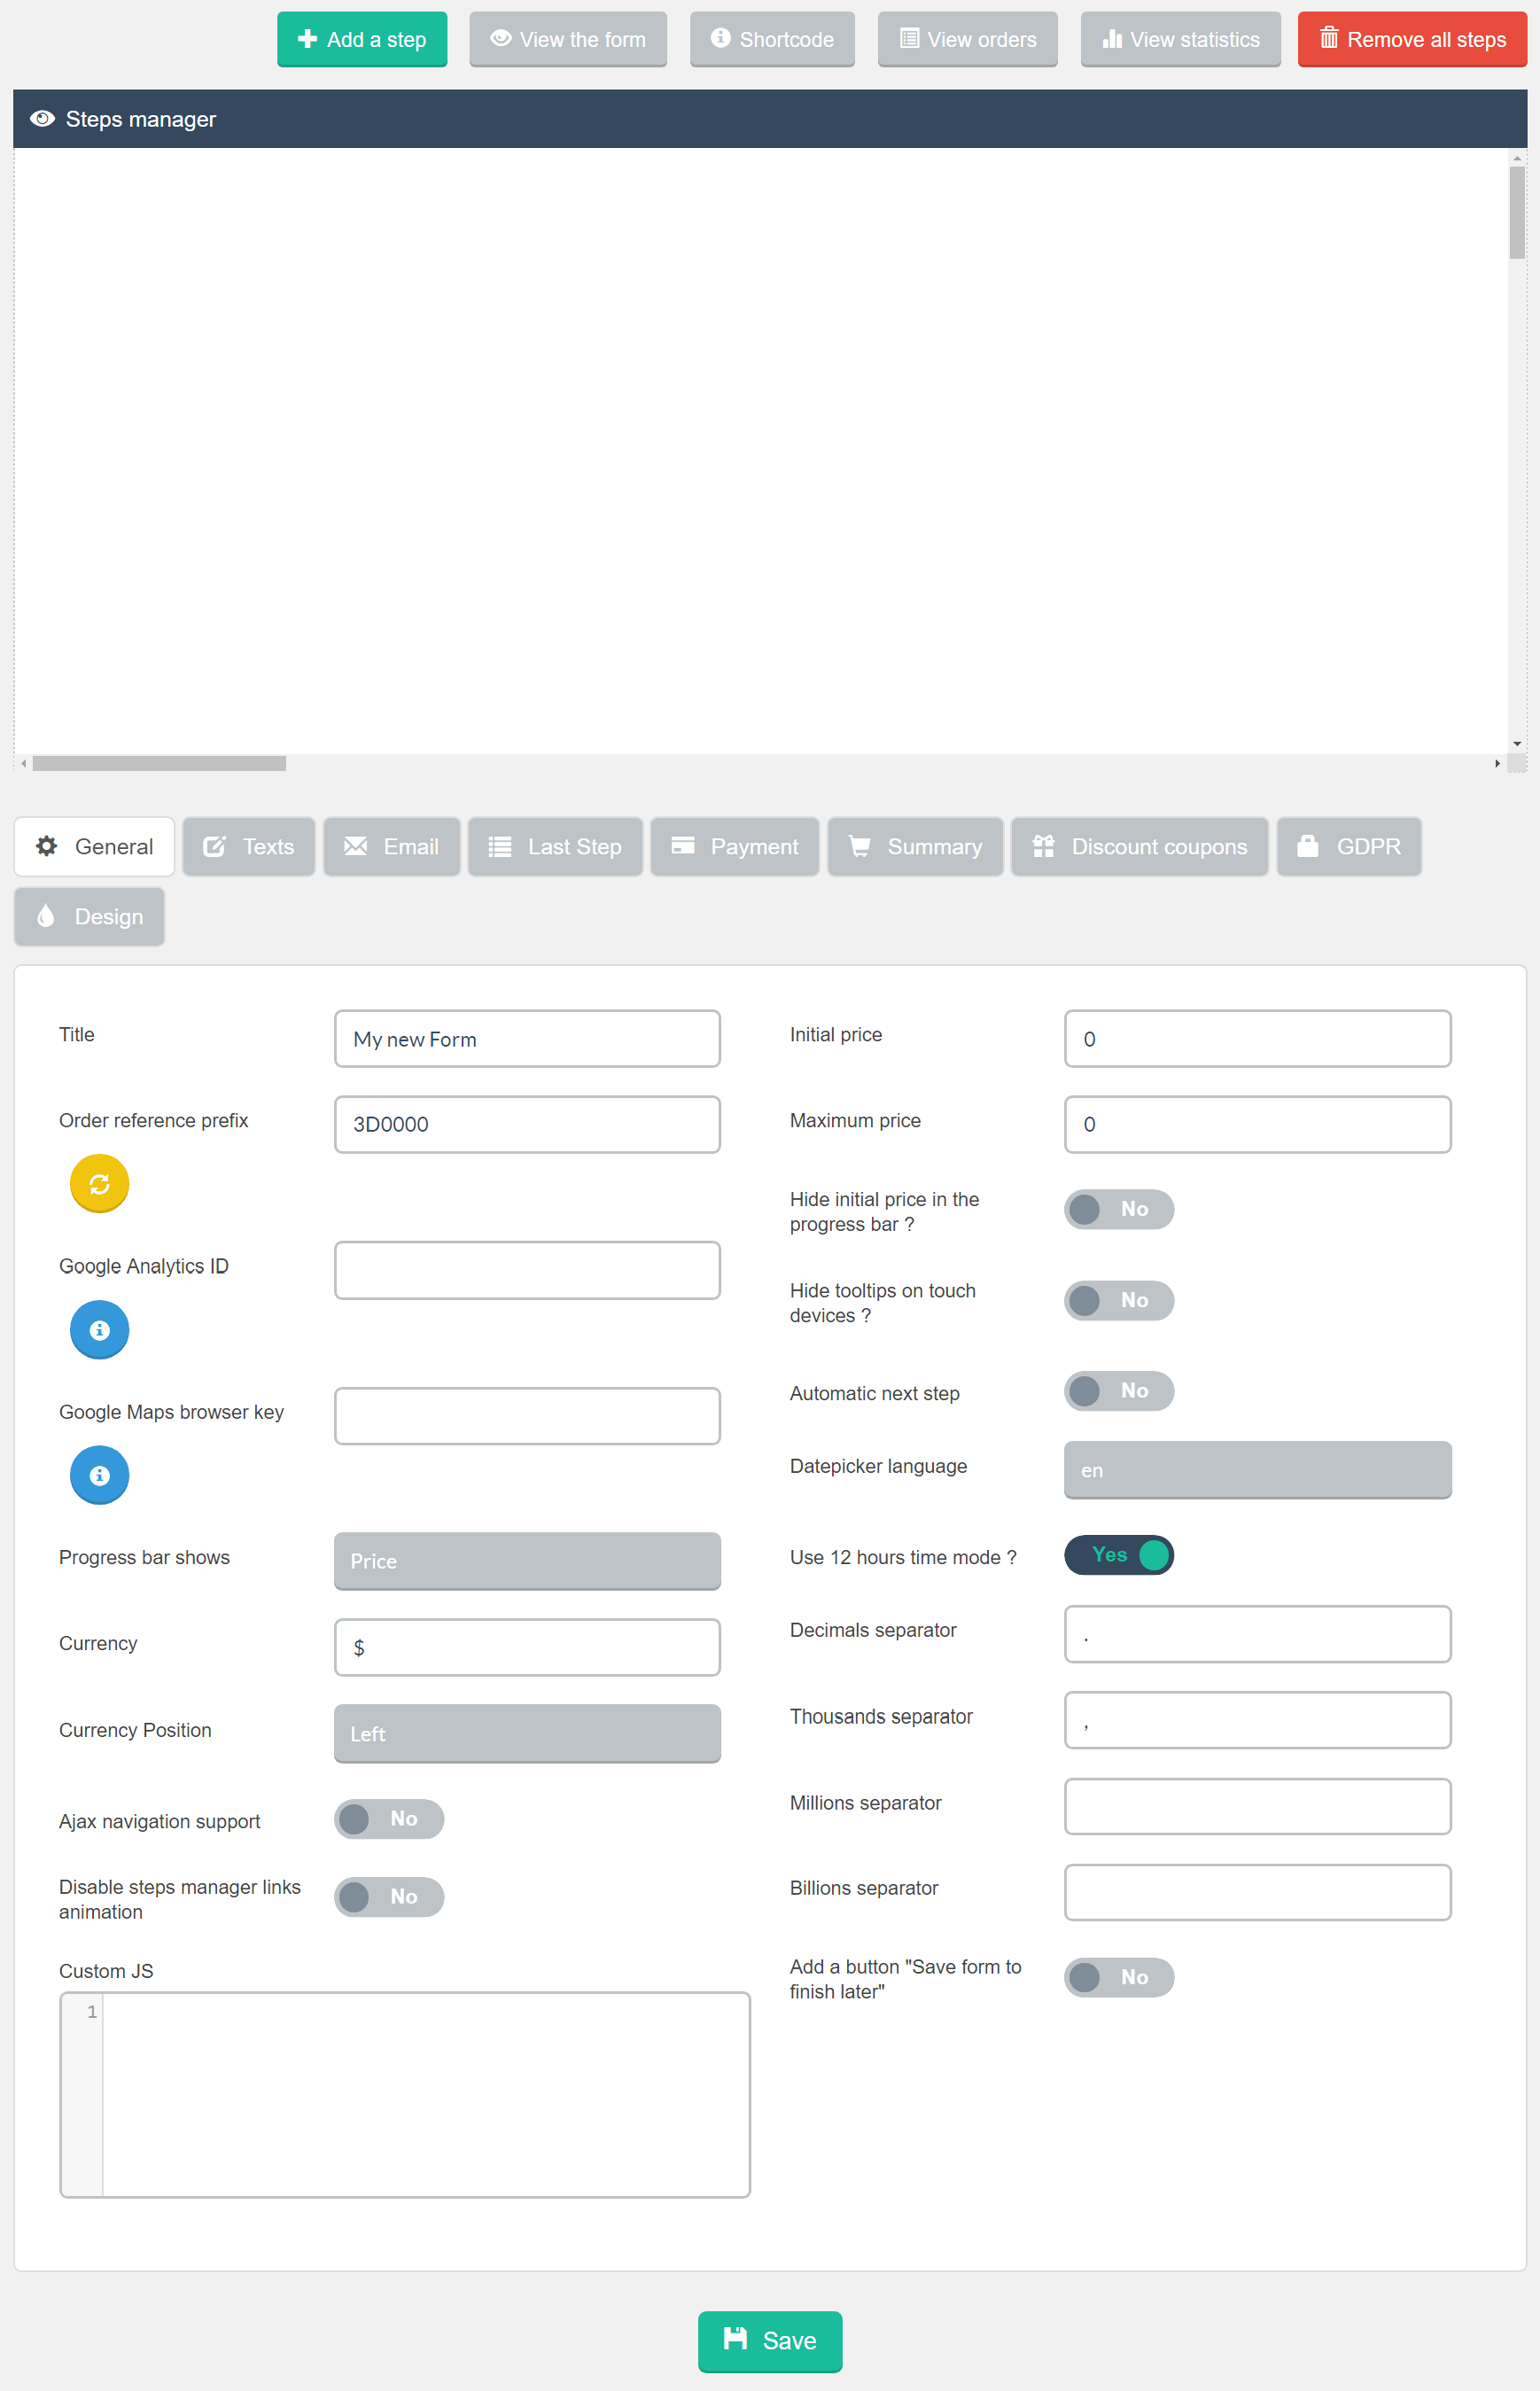
As you can see on the image above there is the Steps Manager and then the Form settings. We'll explore the form settings first then take a look at the steps manager.
Form Settings
The complete forms settings interface looks like this:
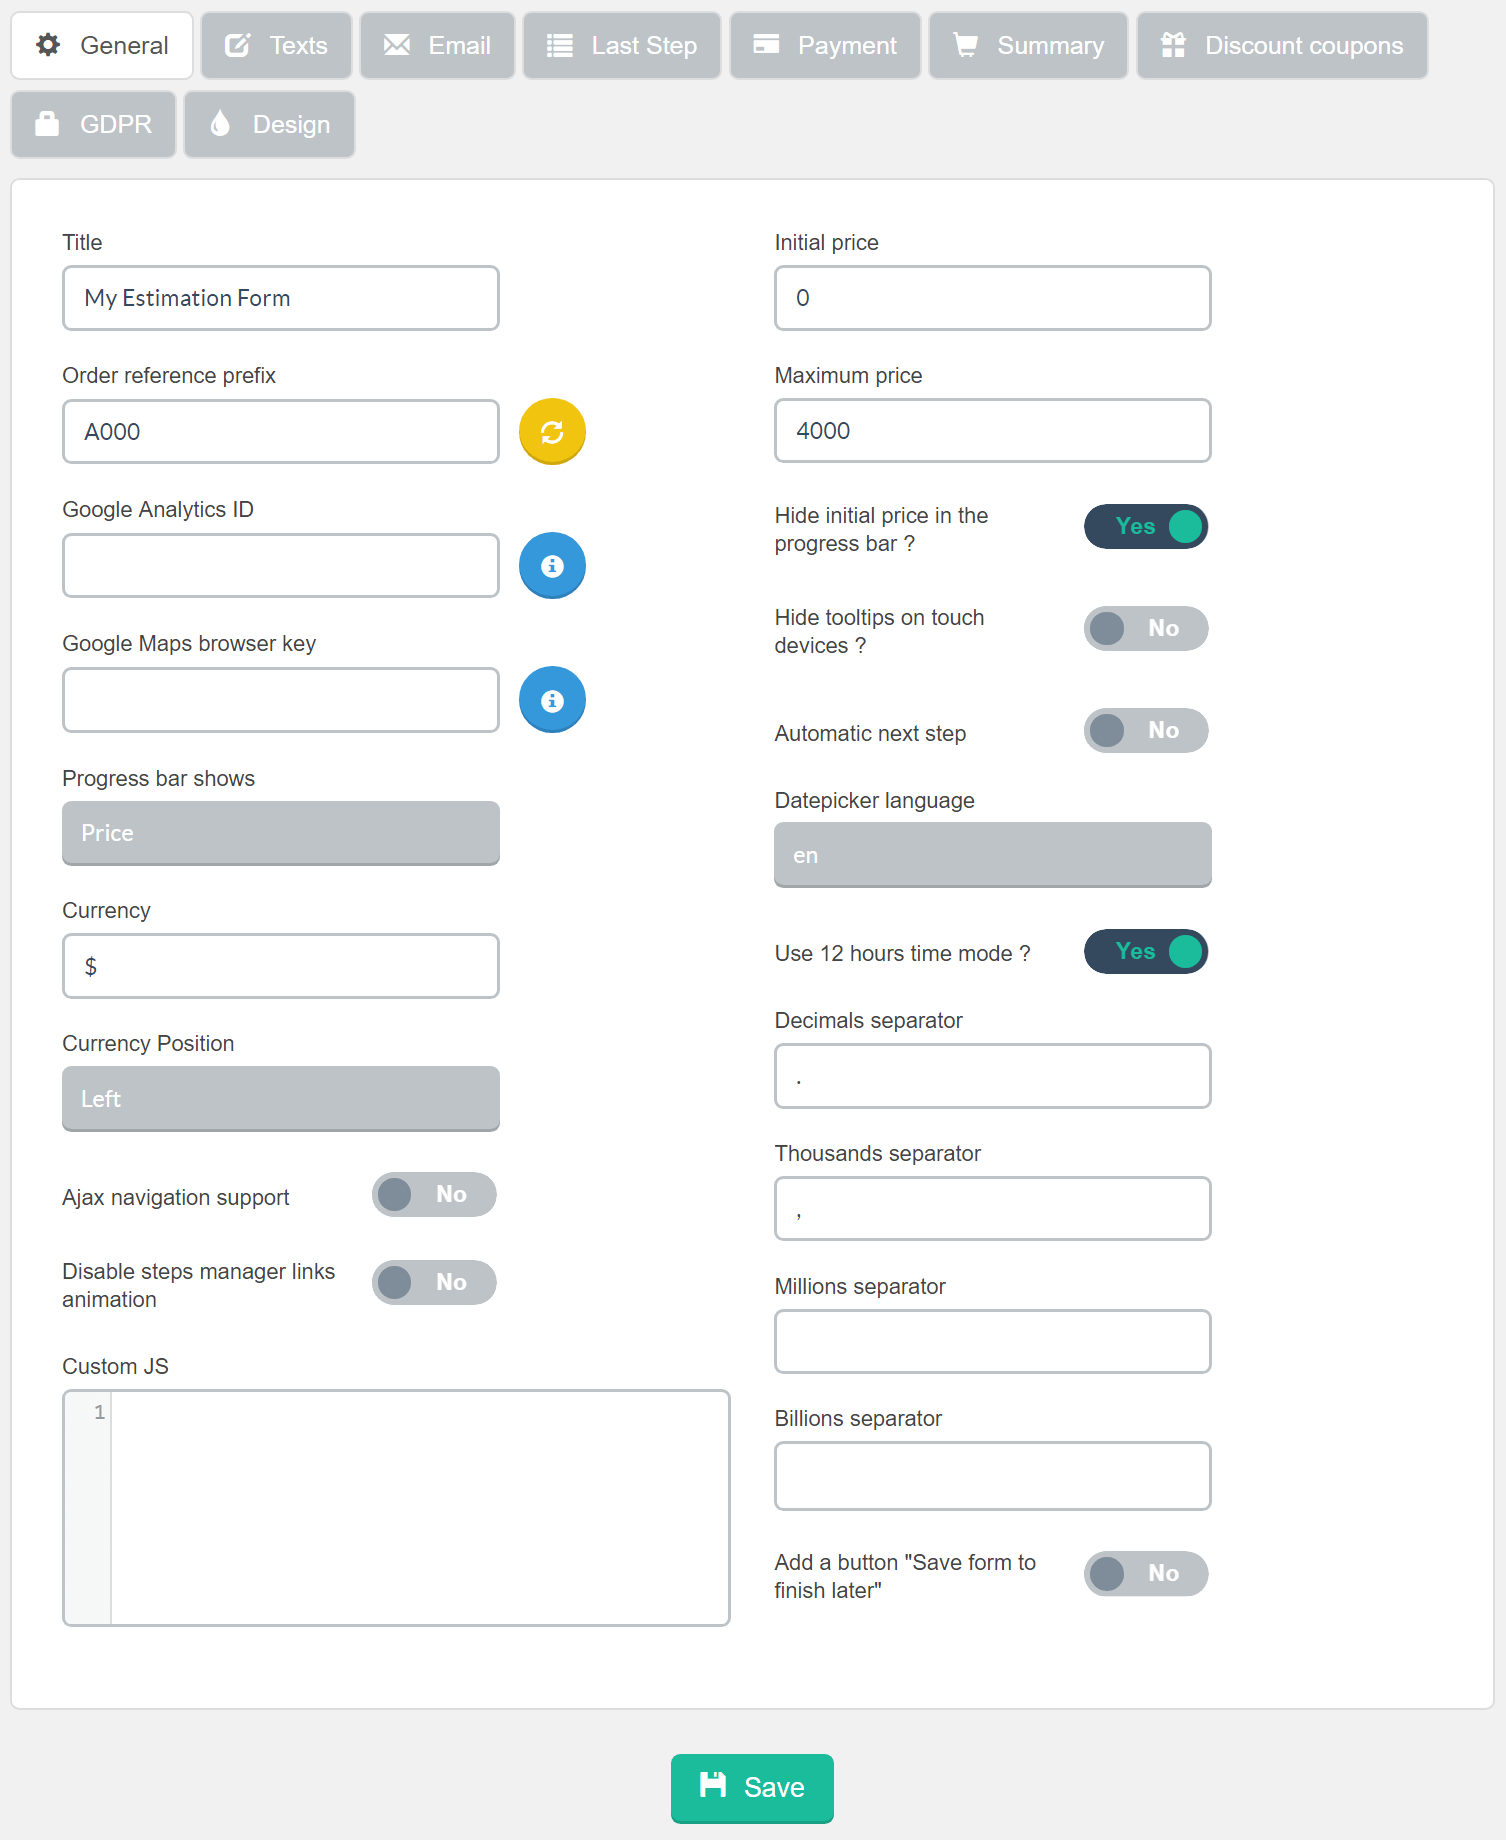
The first tab in Form settings is General. This tab contains basic settings for your form such as the title, progress bar, currency symbol, initial price etc. Each option has a description of its functionality on hover.
The second tab in Form settings is Texts:
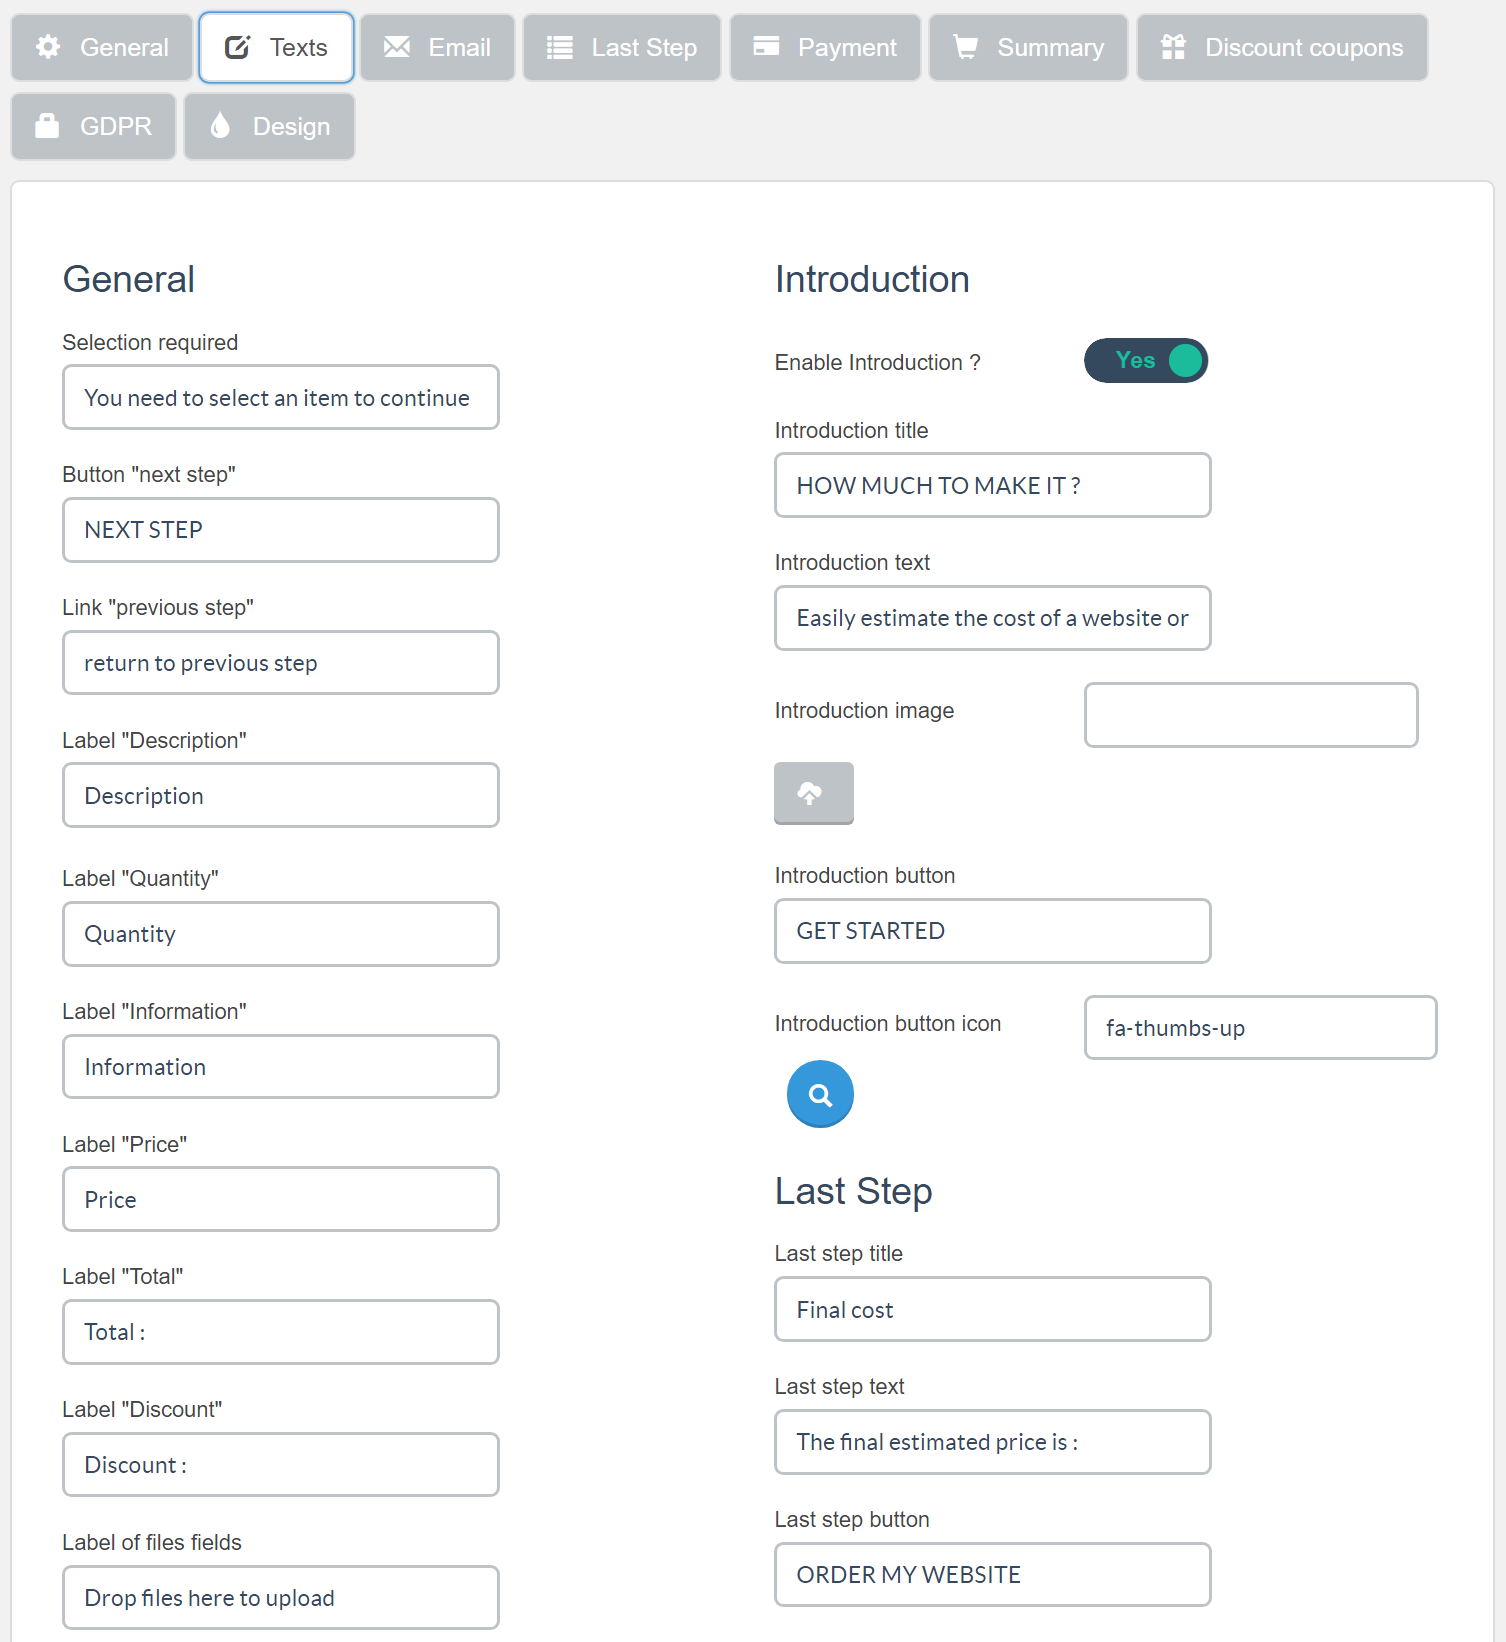
This tab contains options for changing all text that outputs on the front-end of your form.
The third tab in Form settings is Email:
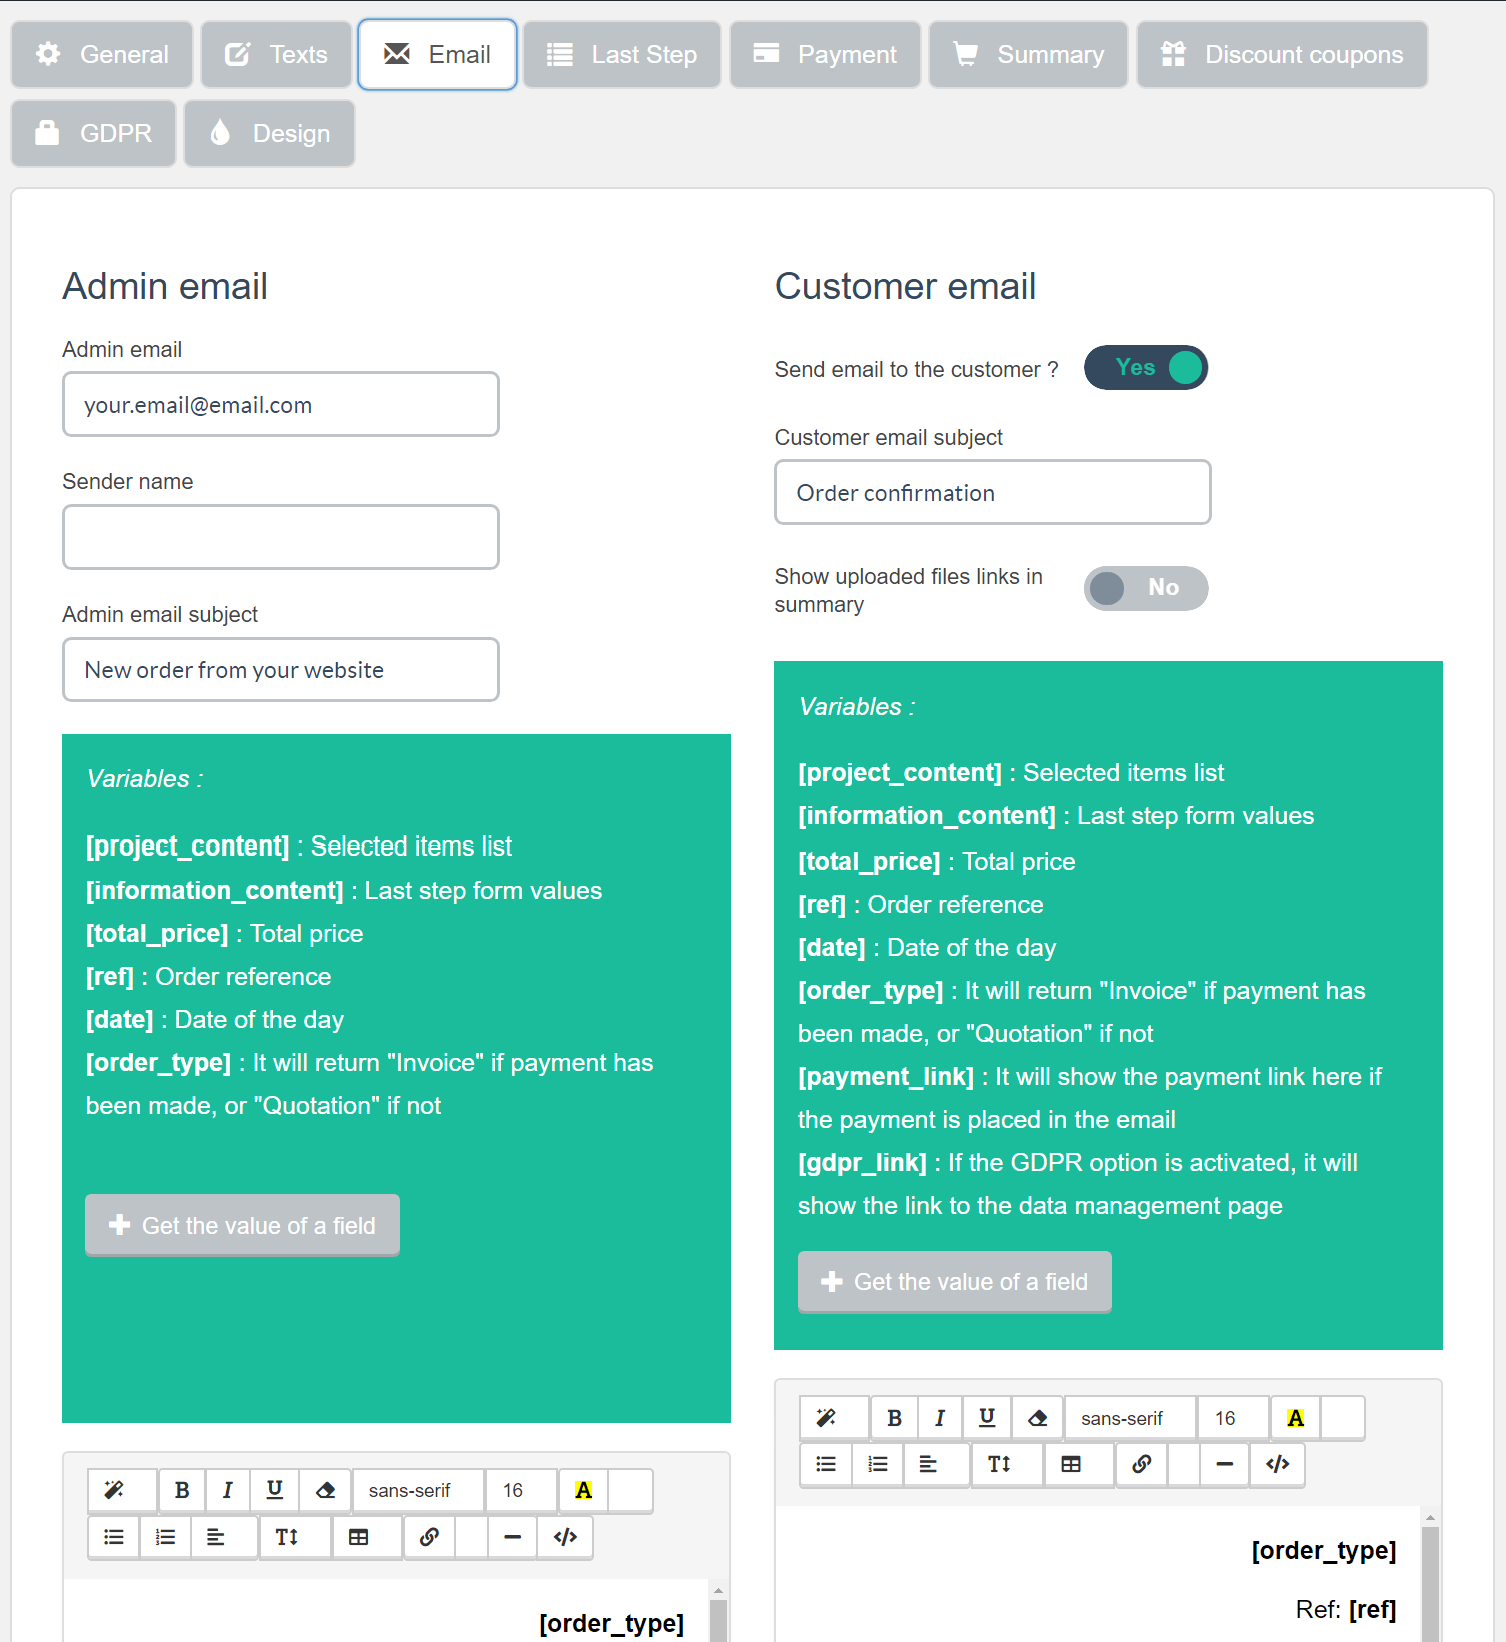
This tab contains options for all the email settings for the form. It's worth noting these are not global settings but rather email settings for the specific form you're setting up.
In addition to being able to modify the form details sent to the admin, you can also configure an email to be sent to the user who filled in the form. Another great aspect of the email integration is you can send the contacts directly to either Mailchimp, MailPoet or GetResponse.
The fourth tab in Form settings is Last Step:
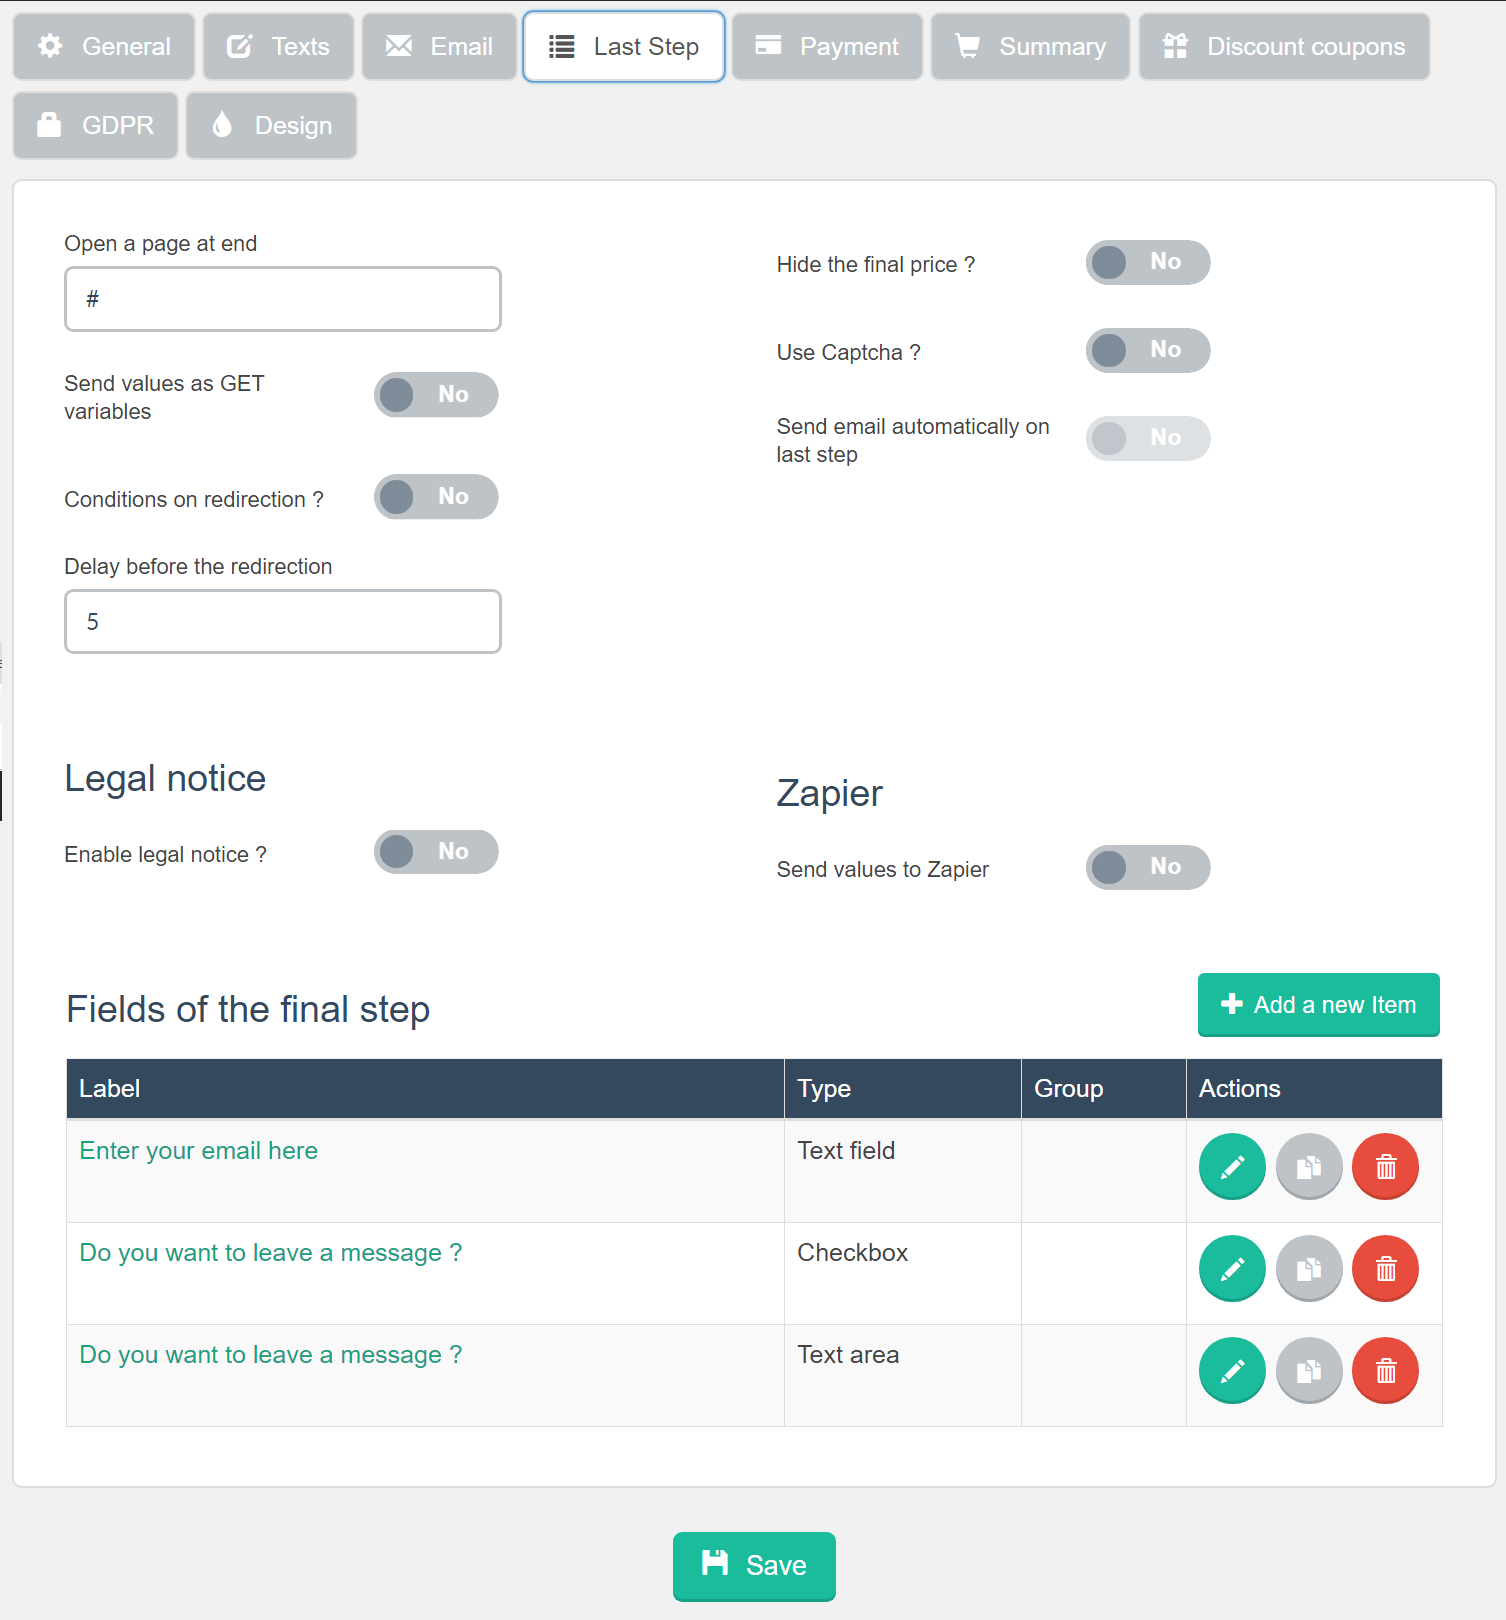
This tab contains options for the last step of your form, including calling custom URLs on close, showing summaries, displaying a legal notice/terms and conditions and selecting payment methods. One of the great features about Estimation and Payment forms is that you can use PayPal and Stripe, set any form creation as a subscription, and also it integrates directly with WooCommerce to connect any form to a WooCommerce product to add to cart.
The fifth tab in Form settings is Payment:
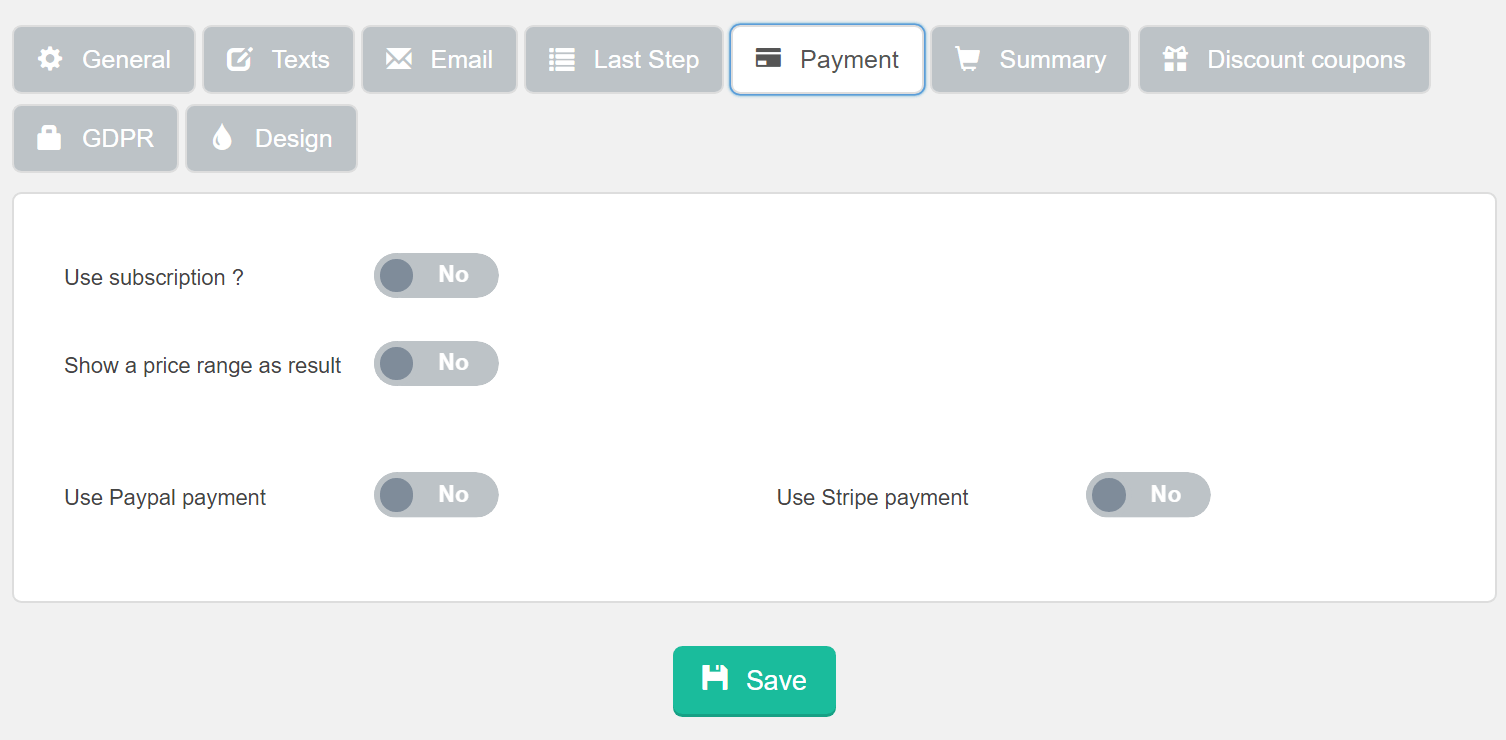
This tab is where you set payment options. If your process requires prospects to pay at the end of the steps, you can choose to activate the available payment methods. The available payment methods are Paypal and Stripe. Simply choose Yes and enter the necessary details to activate a payment method.
The sixth tab in Form settings is Summary:

In this tab, you'll be able to set whether to show a summary of the items ordered (or needs quoting) in the last step. On the screenshot above, you'll see an option that says Show a summary in the last step? If set to No, then the summary will not be displayed on the last step on the front-end. However, if set to Yes, it will display something like this:

The seventh tab in Form settings is Discount Coupons:
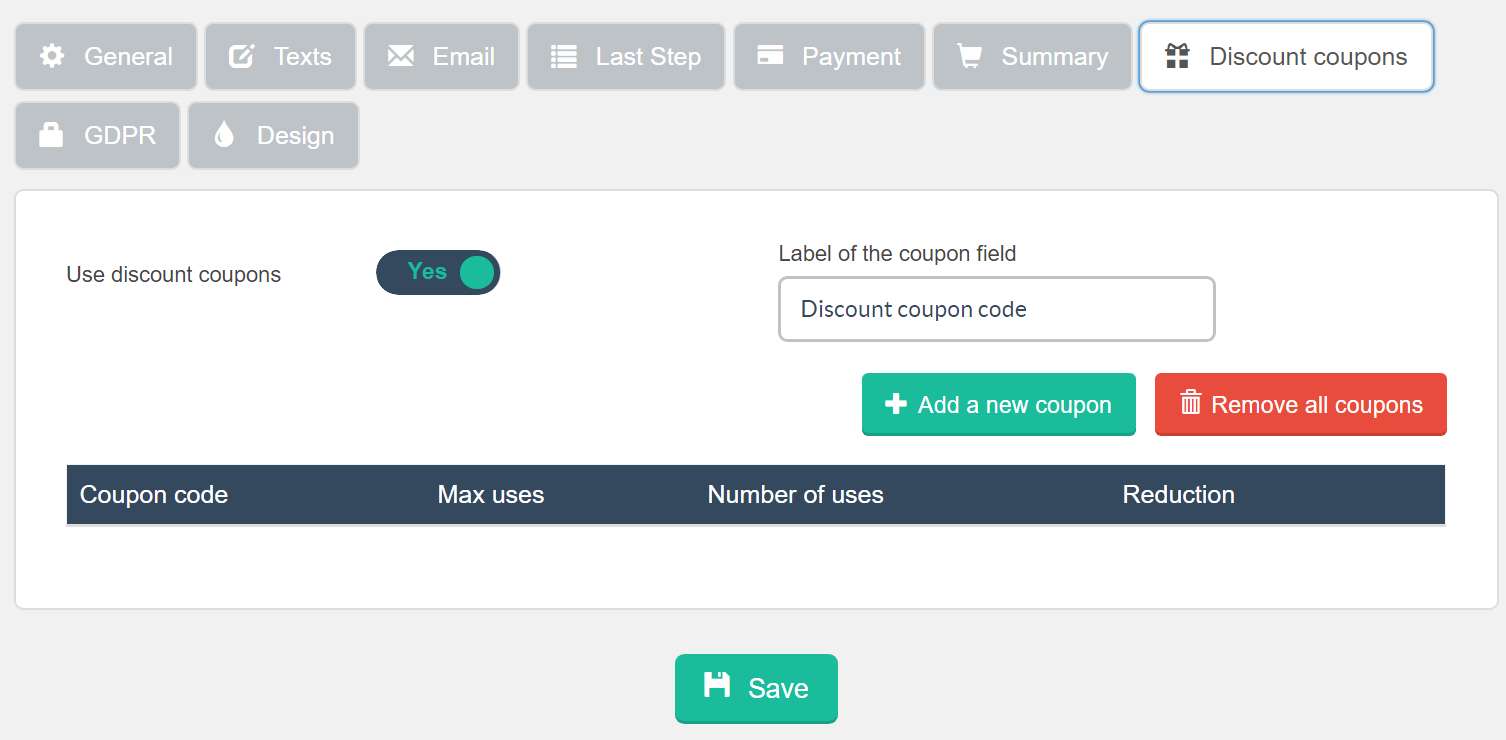
This tab contains options for setting discount codes on or off, if discount codes are set to On, you'll then see the discount code form like above where you can add your custom discount codes and set the percentage value off.
The eighth tab in Form settings is GDPR:
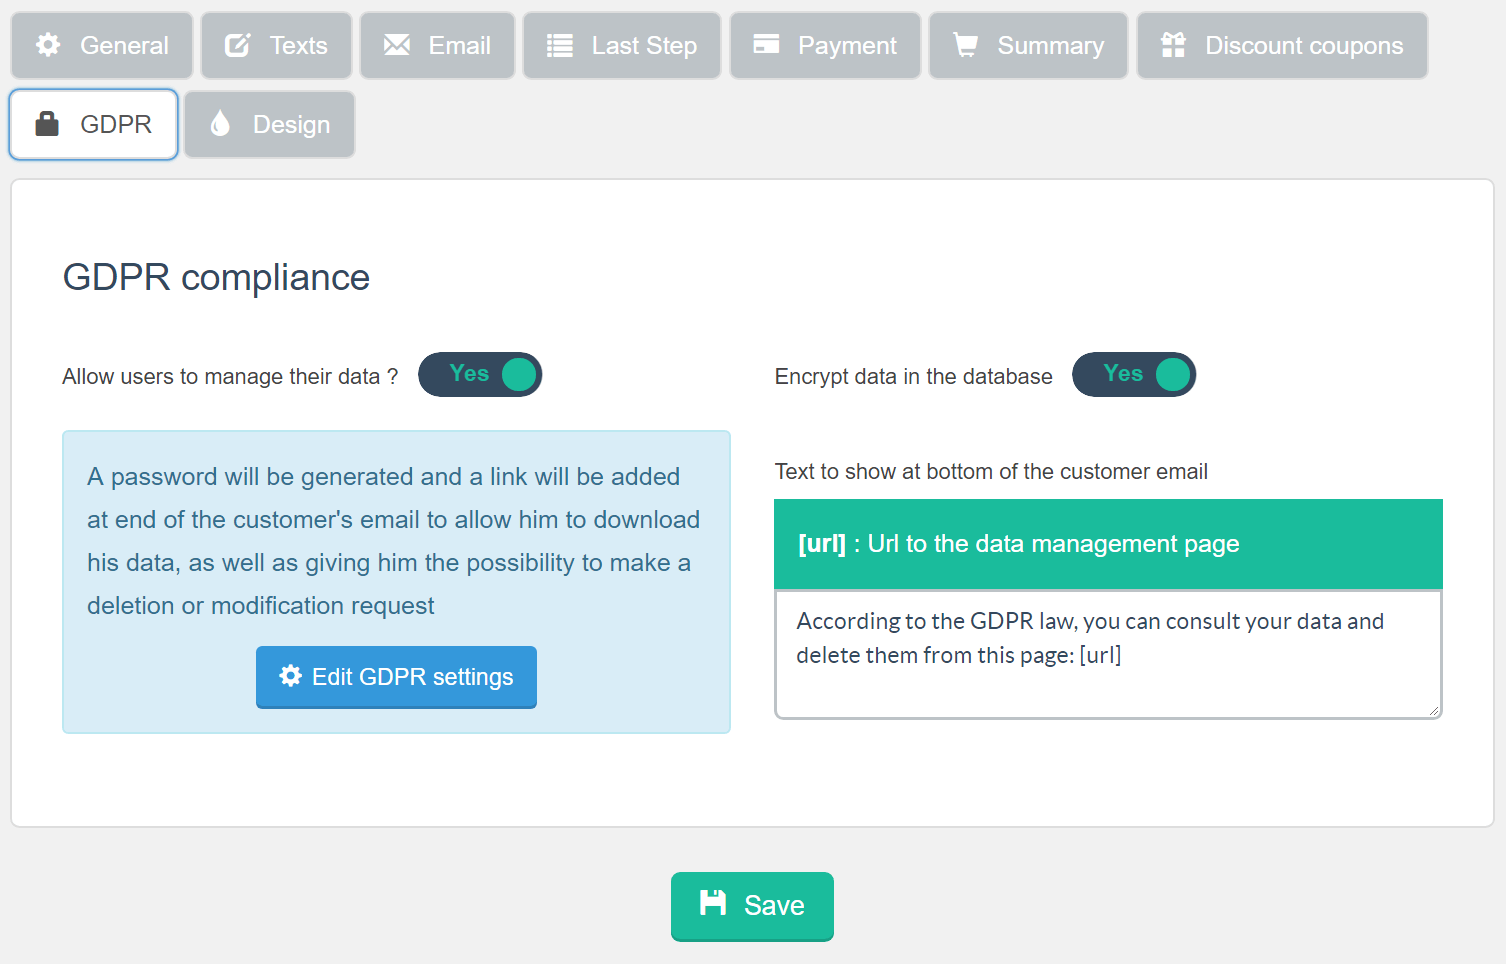
With this tab, you can allow your customers to manage their data. They can download their information and send requests to the admin for either modification or deletion of their data.
The ninth and final tab in Form settings is Design:
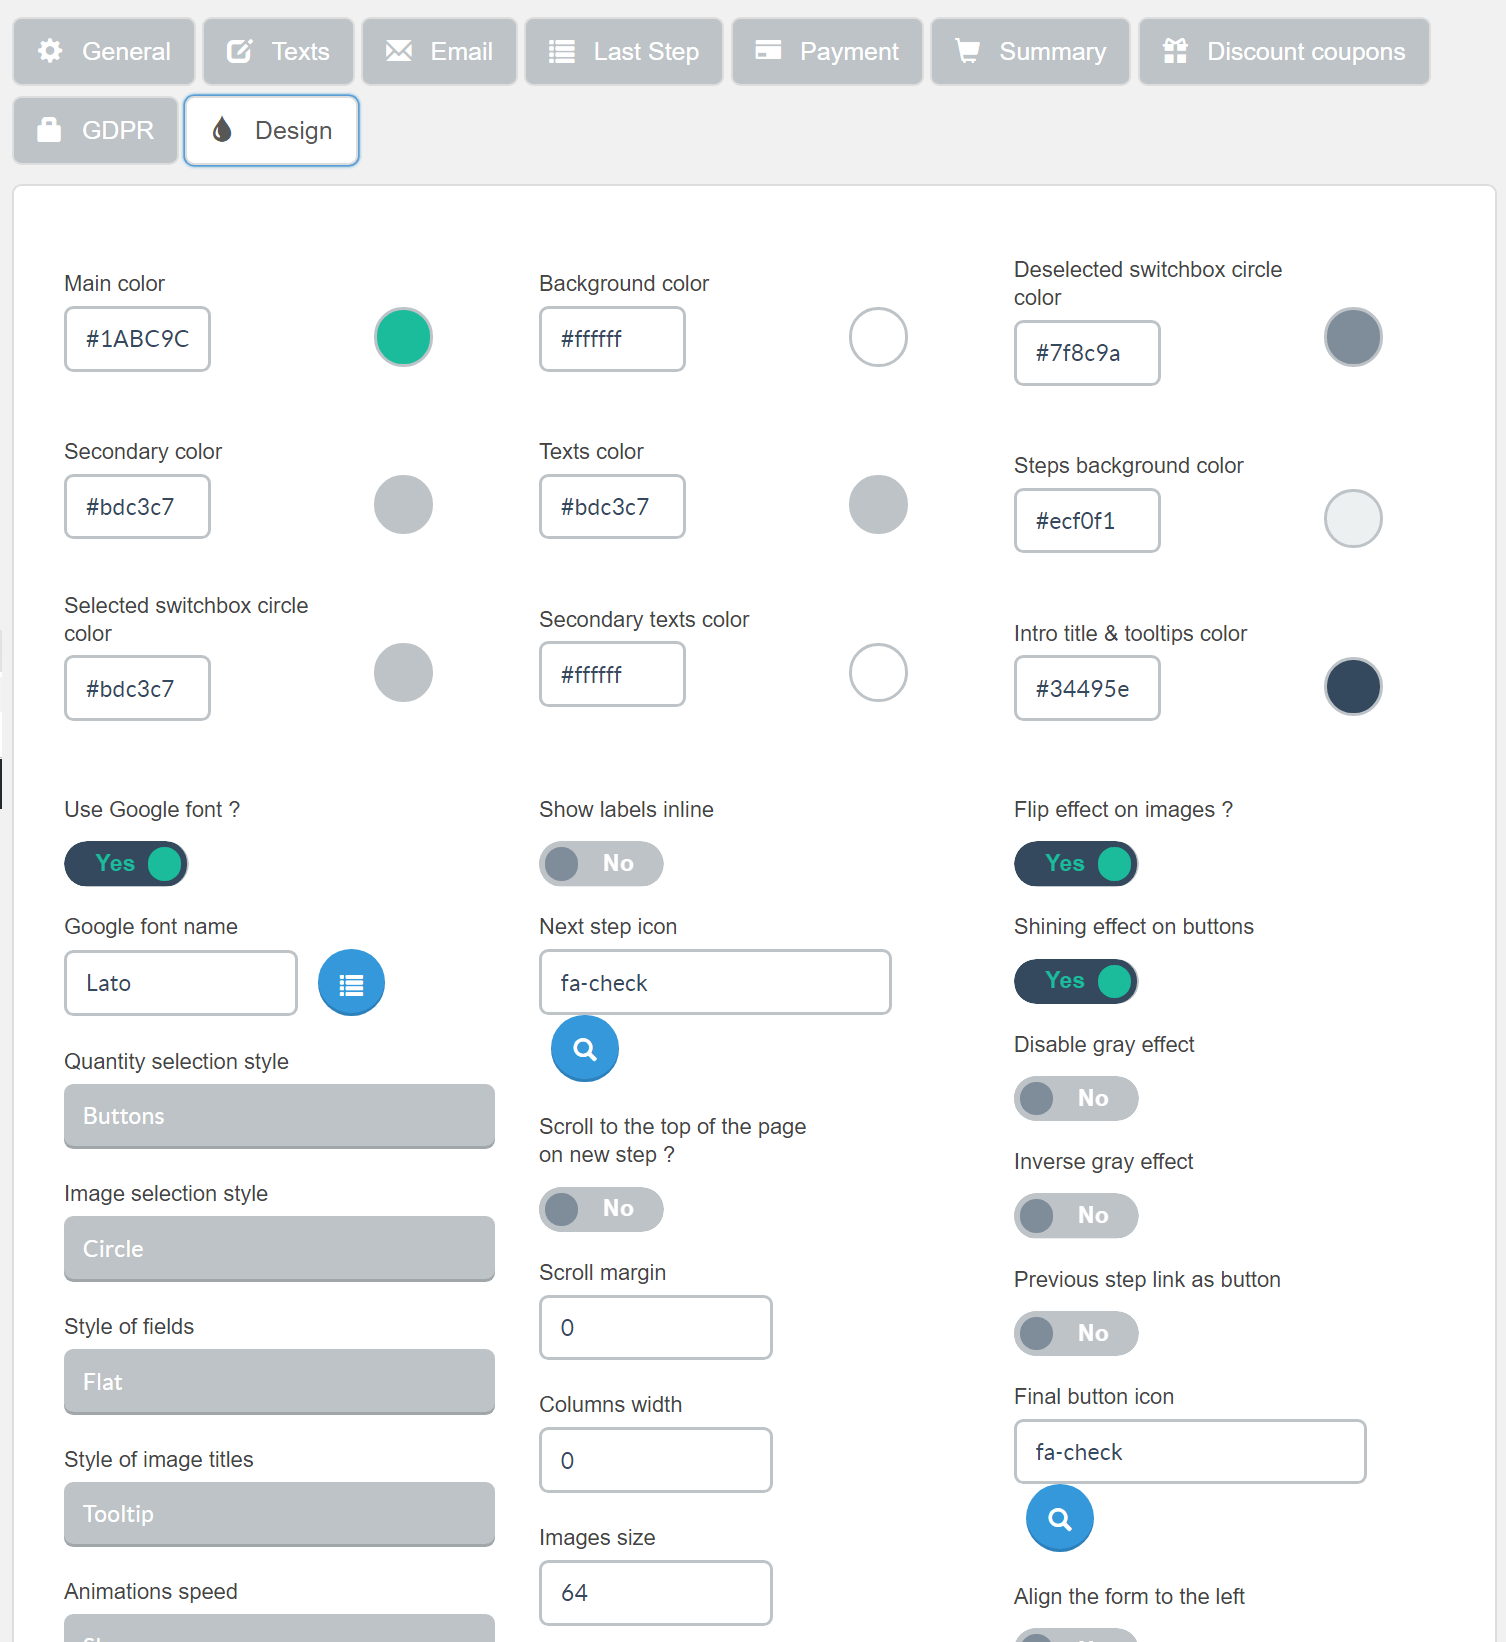
This tab contains all design options for your form including setting custom fonts and custom CSS rules along with setting custom colors which are used throughout your form.
Building Your Form
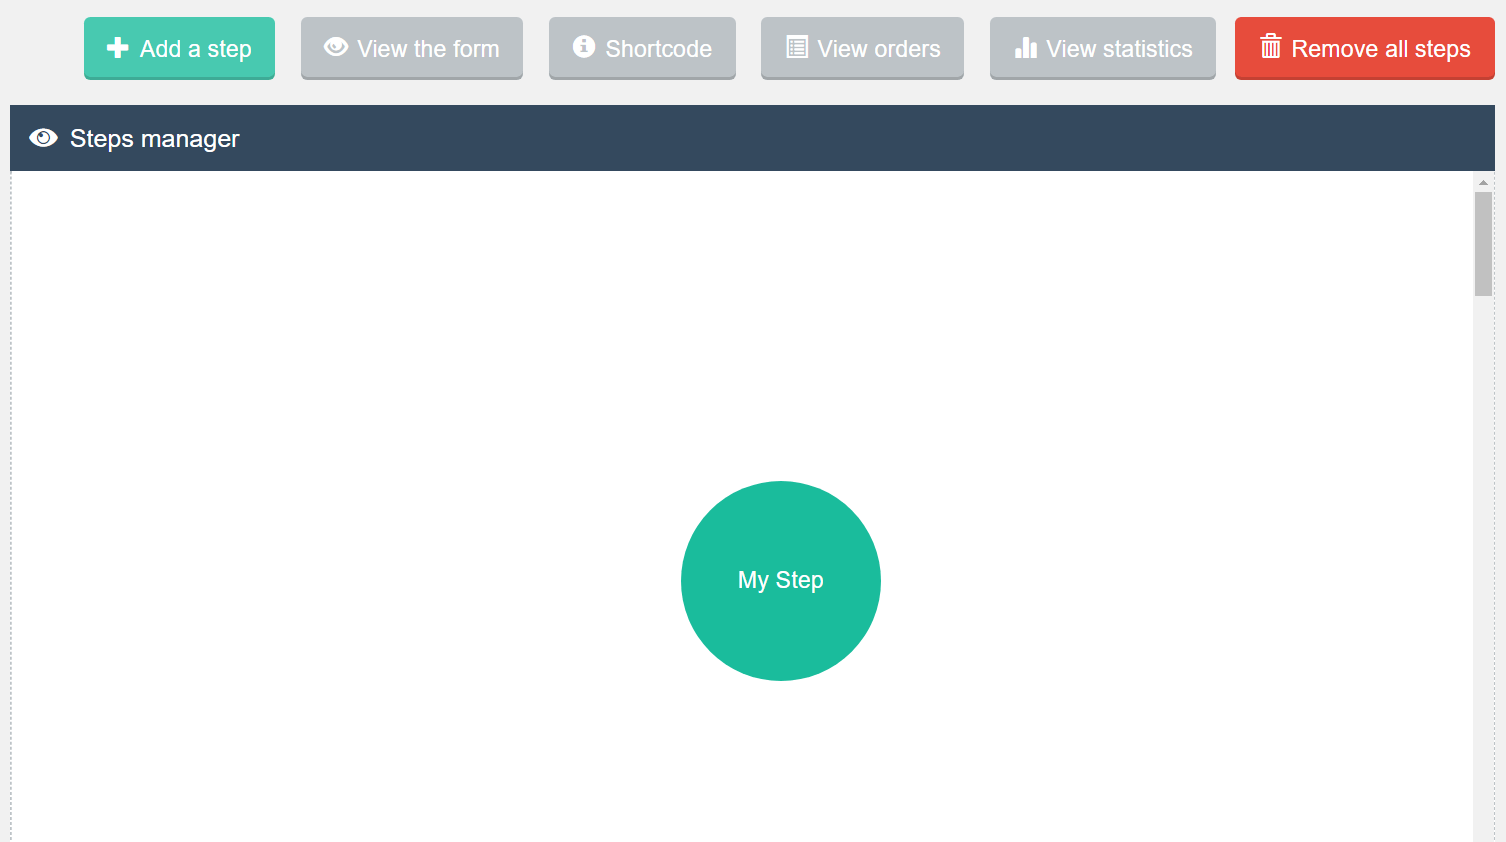
Scroll back up the page to the Steps Manager. Here is where you'll actually build your form and connect each step as required. To get started click on Add Step.

Once you've added the step, you'll see this in the steps manager area like so:
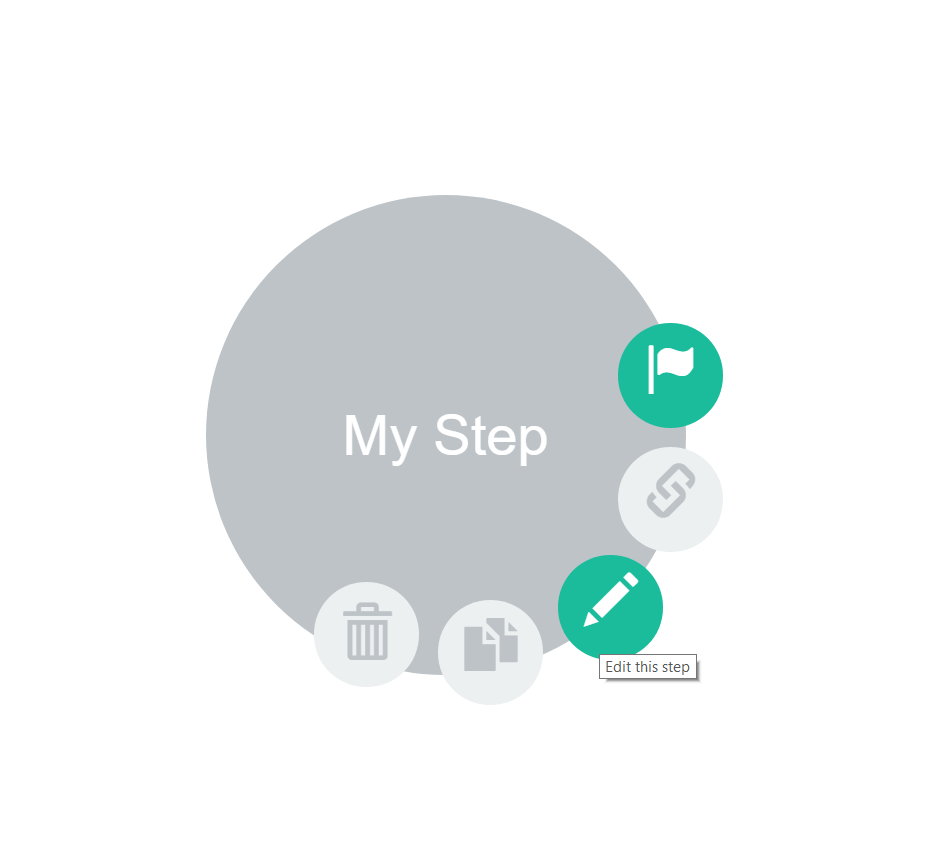
Hover over the step you've just added and you'll see the step options like this:

Clicking the Flag Icon sets that step as the first step in your form. When you first add a step, the step will be automatically selected as the first step in your form.
If you click on the Pencil Icon...
... you'll be taken the Step Options screen where you can edit the step you just created.
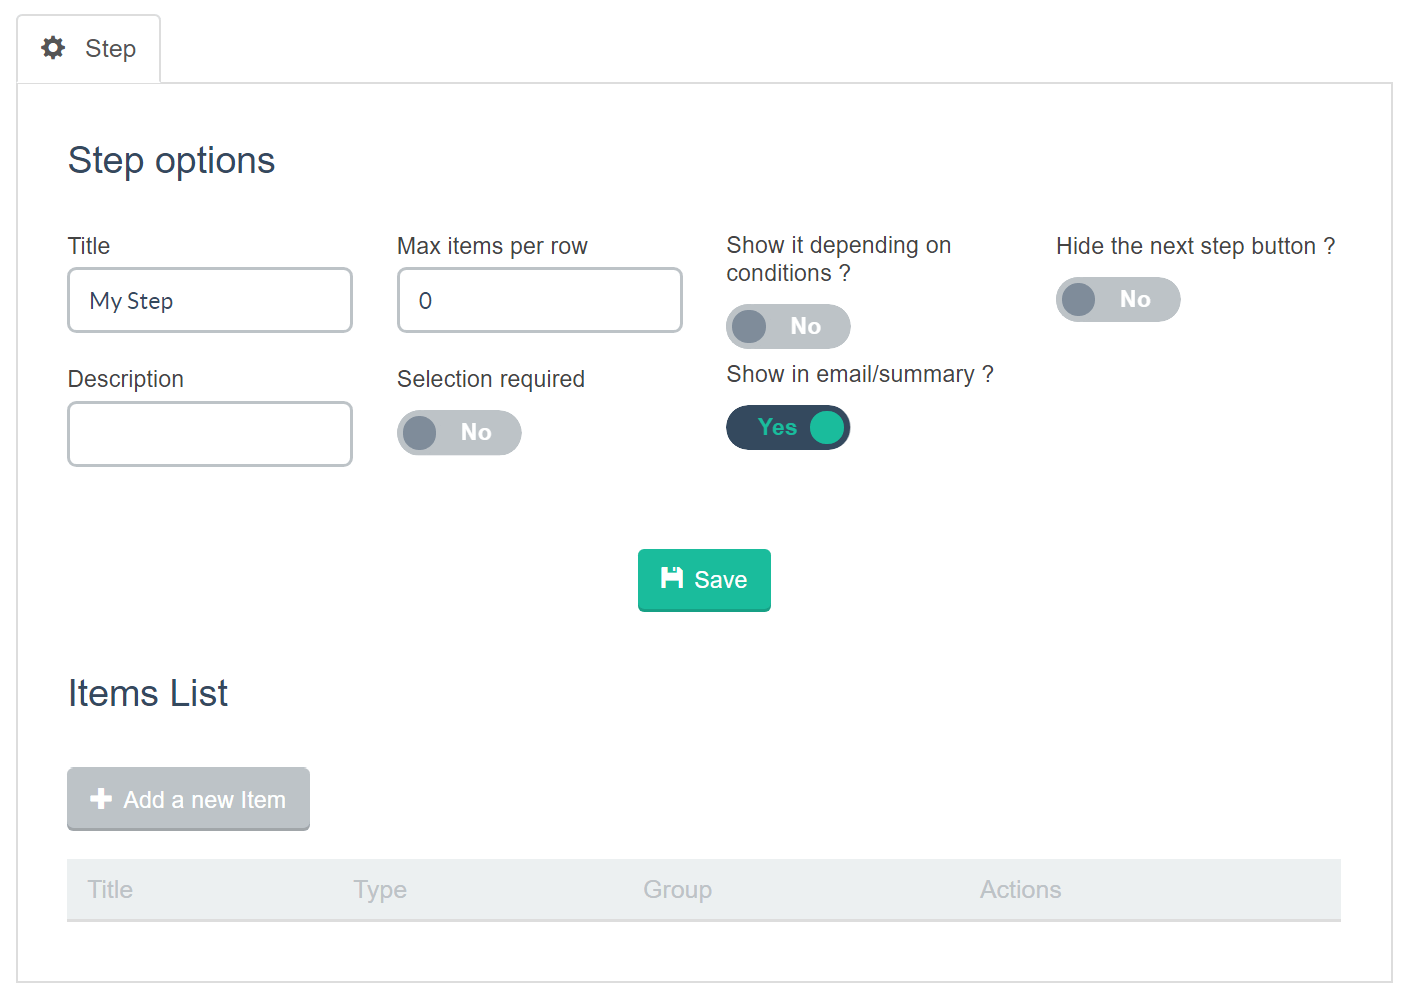
Click on Add a new item and you'll then be able to configure an item for that step. The exact options available depend on what field type you select under the Type option. Field types currently supported are:
- Button
- Checkbox
- Color picker
- Date picker
- File field
- Image
- Layered image
- Number field
- Rich Text
- Select field
- Separator
- Shortcode
- Slider
- Text area
- Text field
For example, if we were setting up a form for a website build, we want to ask someone what type of website they'd like. In which case we could add a select field with multiple options like this:
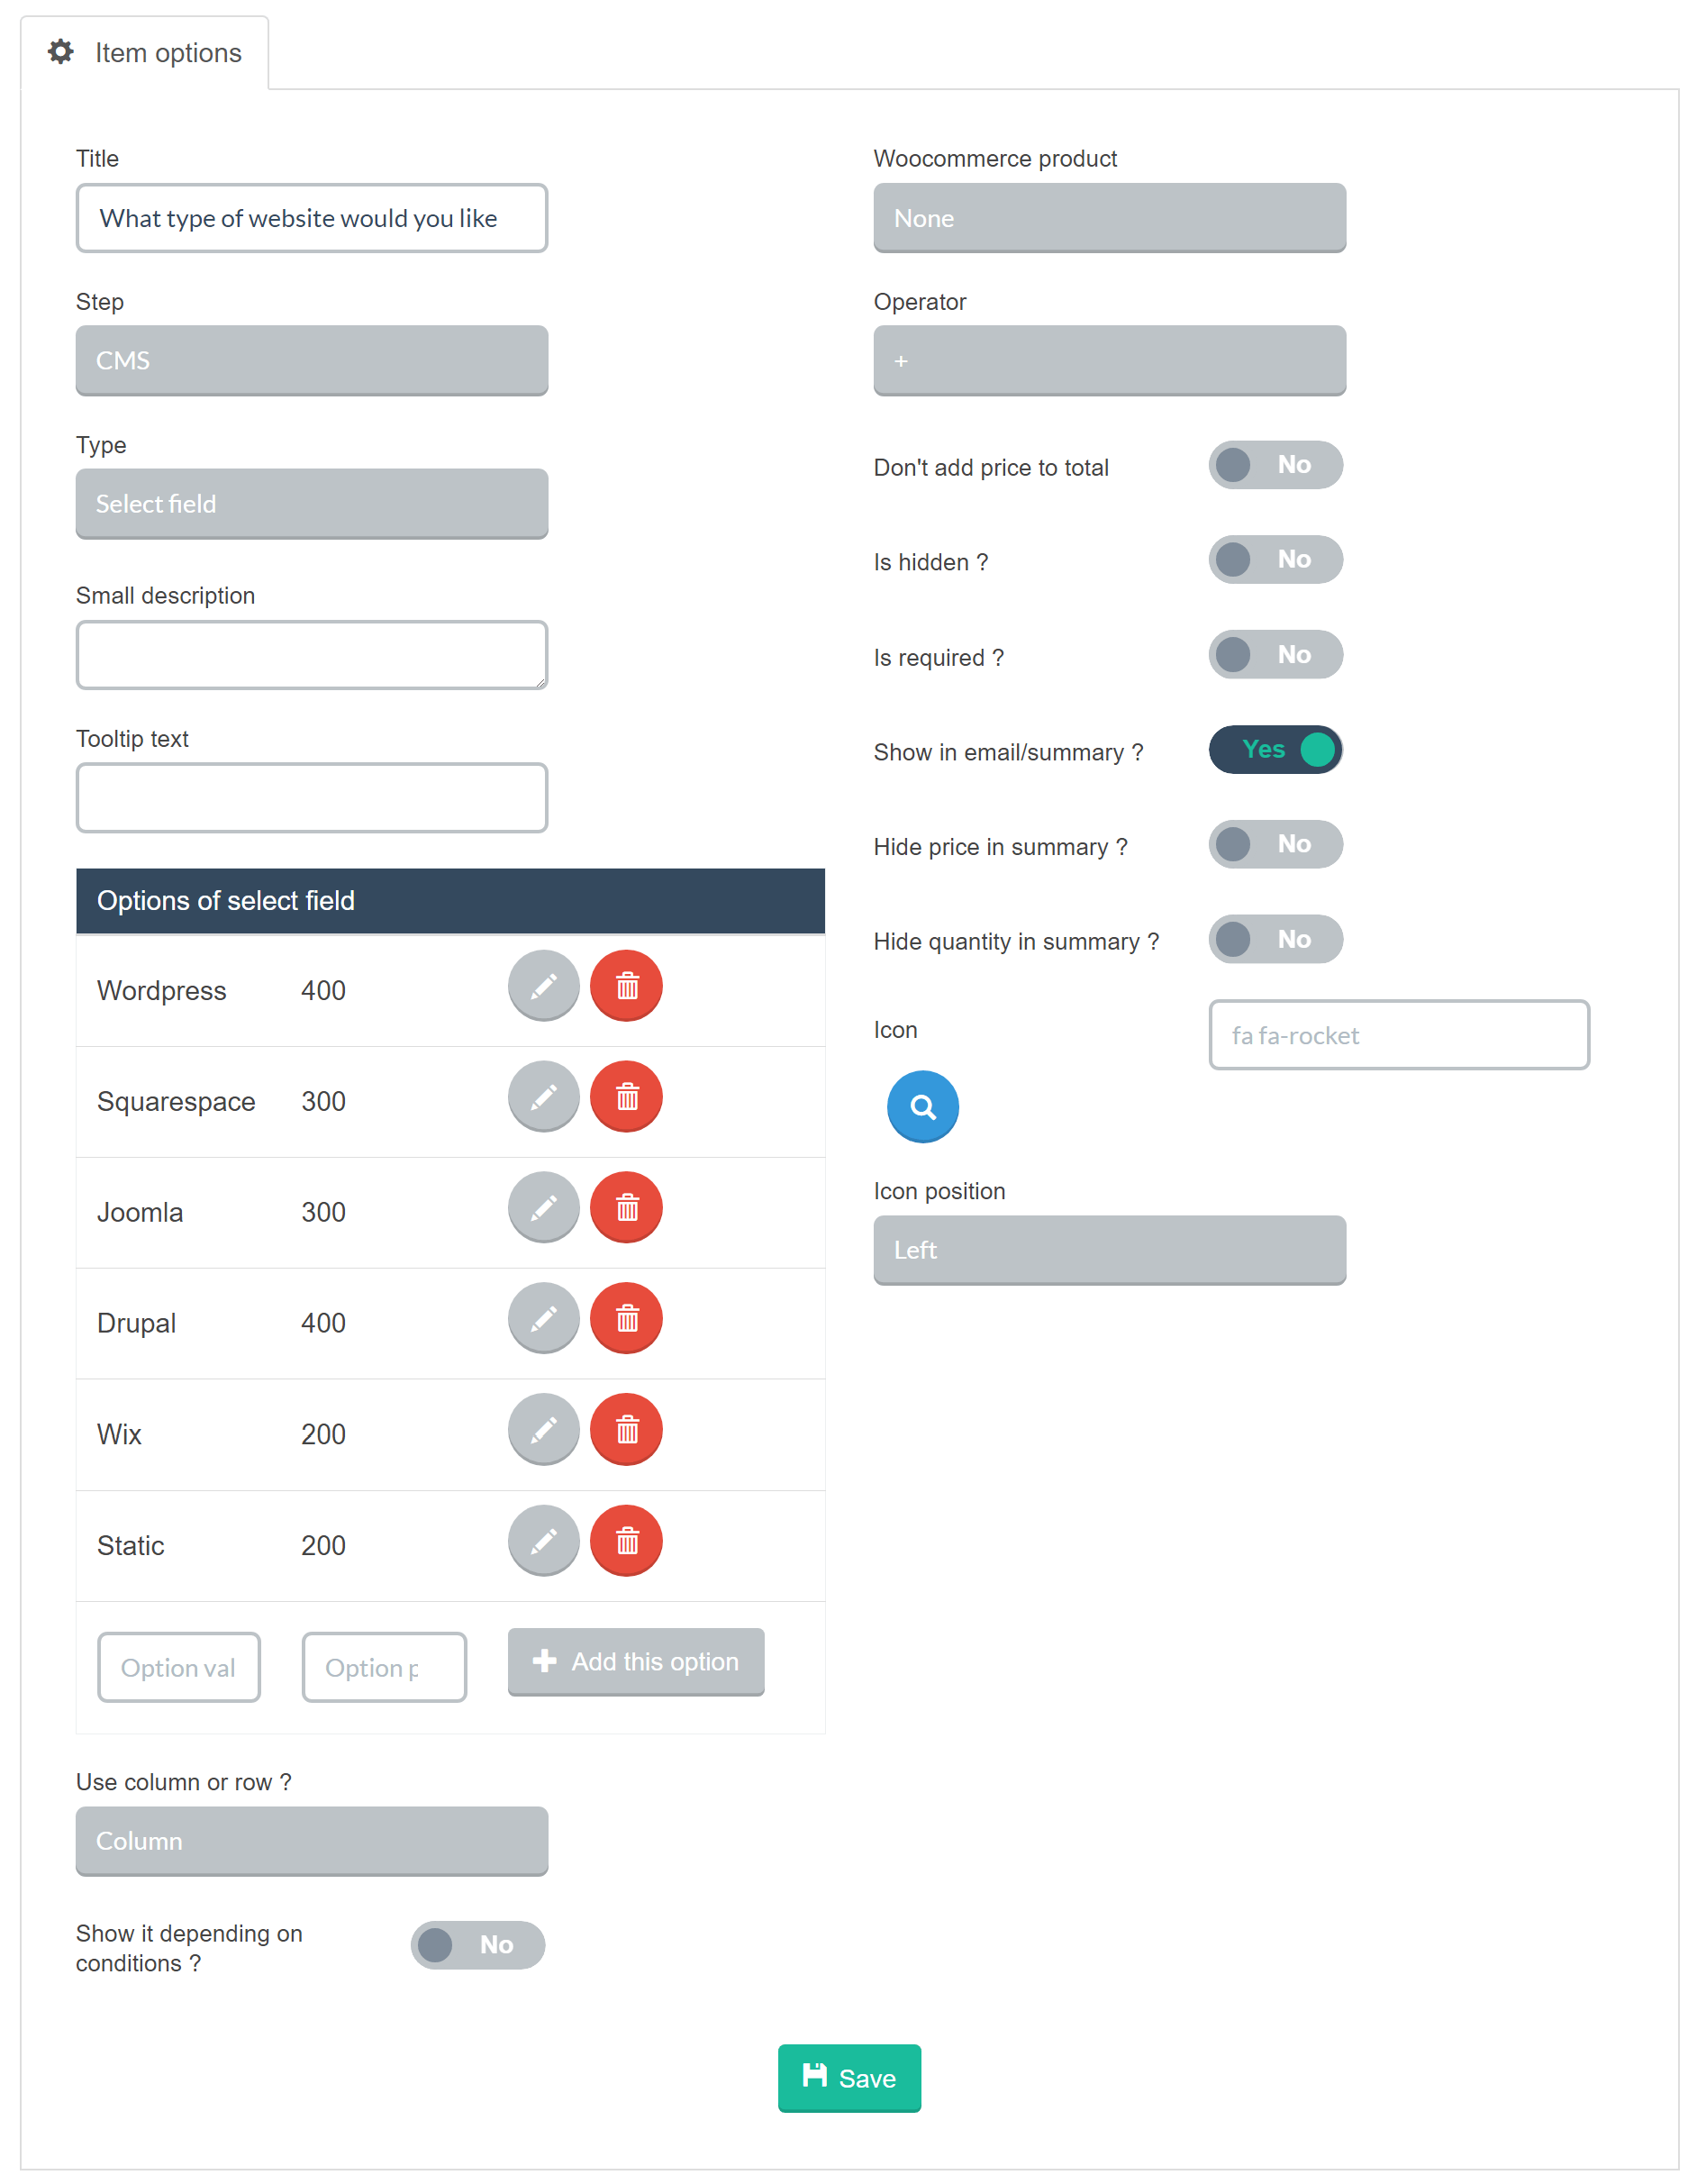
Once you're happy with that specific list item, click Save. You'll then be able to add another list option to that step if you'd like or create a new step.
To get back to the steps manager, click the X in the corner of the Step Options screen.
Add a second step and you'll then be able to create a link to the first step. To create a link hover over the new step you've just created and click on the Link icon.
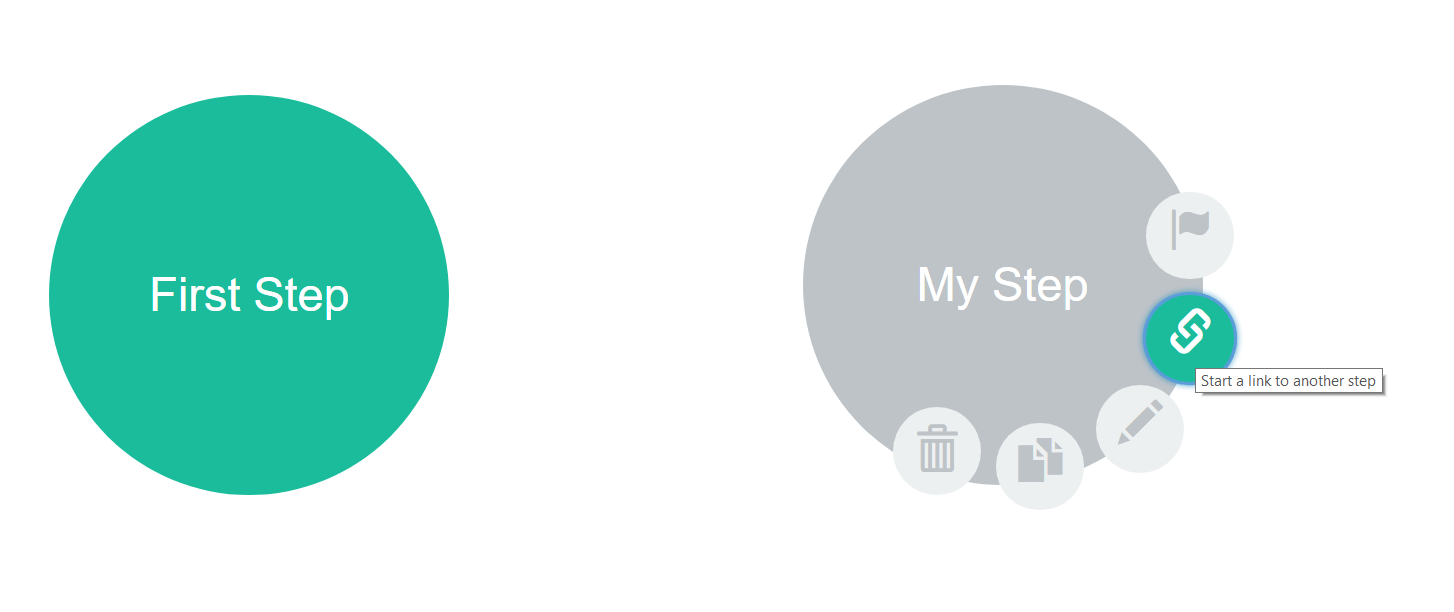
You can then link that second step to the first step when you click the link icon and then click on the first step which will link it to the second.
Add any other steps and items you want and then click save. Once you're happy with your form, go back to the main Estimation & Payments form admin screen, and you'll see a shortcode you can use like this:
Copy that shortcode and then add it to any post or page you'd like.
You'll notice there's a blue circled icon on the left of the shortcode as shown below:

If you click that icon, a popup will appear:
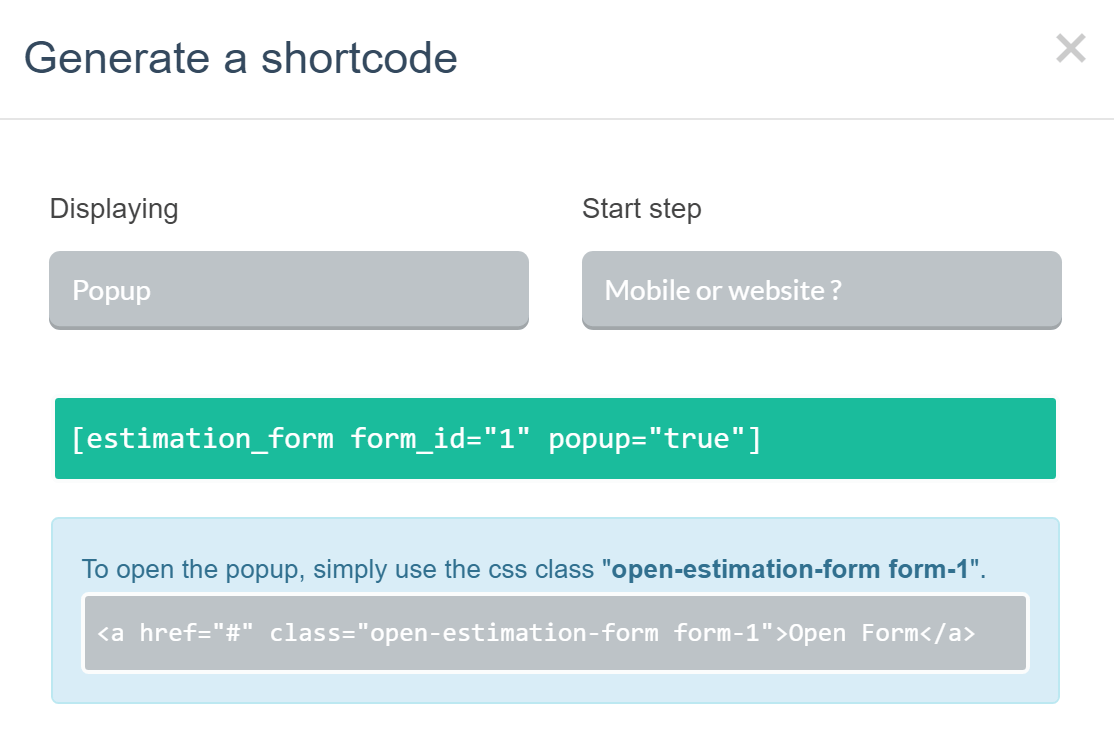
The popup shows shortcode options if you want to show the form in fullscreen or if you want it to display as a popup. The first shortcode is the simplest and most straightforward way of displaying the form.
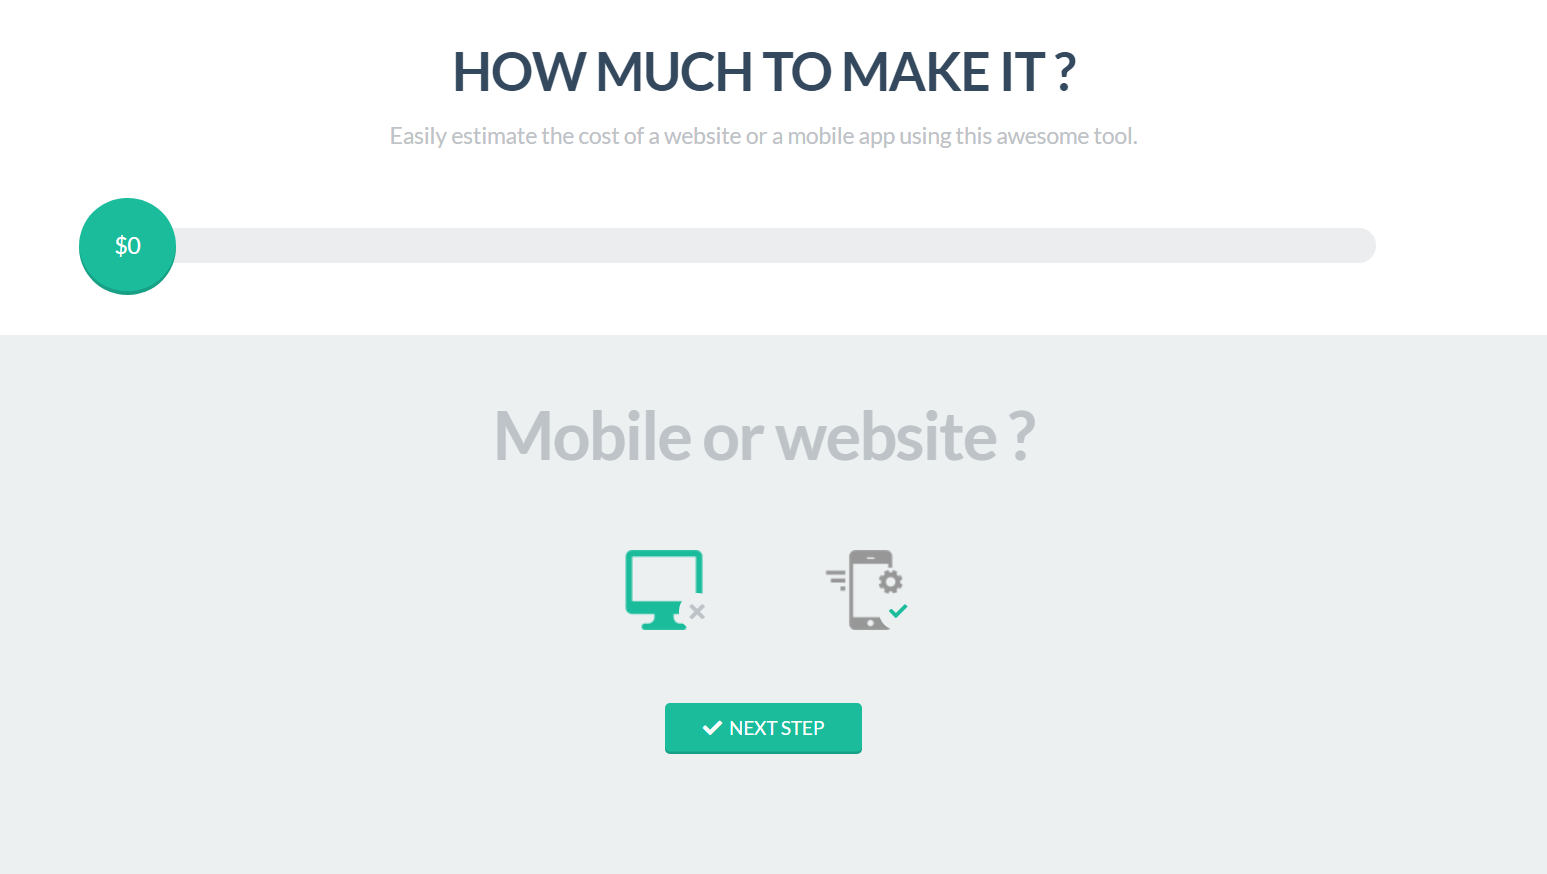
Once you've added the shortcode to your post or page. You should see your new form on that page like this:
Summary
Congrats you've now successfully set up your first form in the Estimation & Payments form plugin. To summarize, these are the things we've covered in this article:
- We briefly discussed how to install and activate the Estimation & Payments Form plugin which is bundled in your X or Pro licensed copy.
- We also discussed how to create a new form, how to add new steps and how to link the steps together.
- You've also learned the different Form Settings tabs and what they are used for.
- Lastly, we covered how to use the shortcodes to display the form on any page or post on your website.
Further Reading
This article covered only a small portion of what you can achieve with Estimation & Payment Forms. If you want to explore the full possibilities of this powerful tool, make sure you visit the plugin's official documentation.
See something inaccurate? Let us know