Standalone Cornerstone

In this article, we're going to explain how to install the Cornerstone plugin when you're using a third party theme, plus explain how it can be integrated directly with third party themes and plugins.

  1. Standalone Cornerstone Overview
  2. How to Integrate Cornerstone into a Third Party Theme
  3. How to Integrate Cornerstone into a Third Party Plugin
  4. Summary

Standalone Cornerstone Overview

Cornerstone is a powerful family of website builders. Pro users have access to all of Cornerstone's builders, and they are built into the theme. X users have access to the Page Builder, and it is managed as a separate plugin (included with your purchase). The standalone version of Cornerstone, explained in this article, is for use with other third party themes and builders.

How to Download the Cornerstone Plugin Installation File

To download the installation zip file of the Cornerstone plugin go to your Themeco Dashboard and look for the license on the left hand side. Then click on the Download button and the installation zip file of the Cornerstone plugin will be downloaded to your computer.

How to Install the Cornerstone Plugin

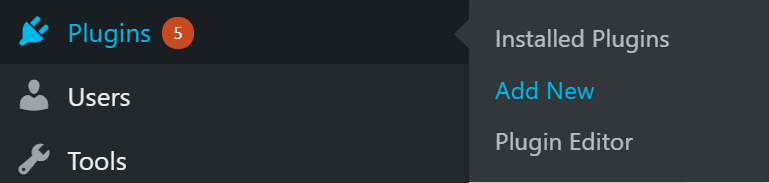
Now you've downloaded the Cornerstone plugin; we're ready to install it! In your WordPress dashboard, hover over Plugins on the left-hand side menu and then click on Add New menu item:

CS Plugin Add New

Install the plugin zip file by clicking on Upload Plugin followed by Choose file and locating the file from your computer. Once found, you can click Install Now:

CS Plugin Choose

Once installed, click Activate Plugin to activate the Cornerstone plugin on your WordPress installation:

CS Plugin Activate

Now that you've installed the Cornerstone plugin you will have the Cornerstone menu item available in the left sidebar of your WordPress Admin: Create your own plugins containing new Cornerstone elements (perhaps from your pre-existing shortcodes). Add your own styling to Cornerstone elements. You may even turn off native styling entirely.

CS Plugin Menu

How to Integrate Cornerstone into a Third Party Theme

If you are a theme developer and are interested in integrating the Cornerstone plugin into your theme, follow the steps below.

Do’s and Don’ts

Before the decision of the Cornerstone integration to a third party theme, consider the points below:

  • DO create your own plugins containing new Cornerstone elements (perhaps from your pre-existing shortcodes).
  • DO add your own styling to Cornerstone elements. You may even turn off native styling entirely.
  • DO NOT change the markup of our elements or shortcodes. This is important for data portability.
  • DO NOT alter the user interface in any way, including introducing new controls, or custom builder features.
  • DO NOT extend existing elements, including sections, rows, and columns, with new controls, although your custom theme styling could be used to change how they appear.

If you stick to our documented APIs, this won’t be a concern, but especially in WordPress, there are always workarounds, and we request that you avoid them.

We do understand this is more restrictive than what other builders allow, but we are committed to preserving the Cornerstone user experience - no matter what theme or combination of plugins is used. We’re also committed to preserving the portability of content created with Cornerstone. If Cornerstone is lacking a certain control or feature you need, feel free to reach out and let us know. We may be able to work with you on making it part of the core plugin.

Bundling Cornerstone in your theme

To bundle the Cornerstone to your theme follow the steps mentioned here.

Functions and Hooks for Theme Developers

We provide a series of functions and hooks that you can use in your theme to customize the Cornerstone usage experience which we list here:

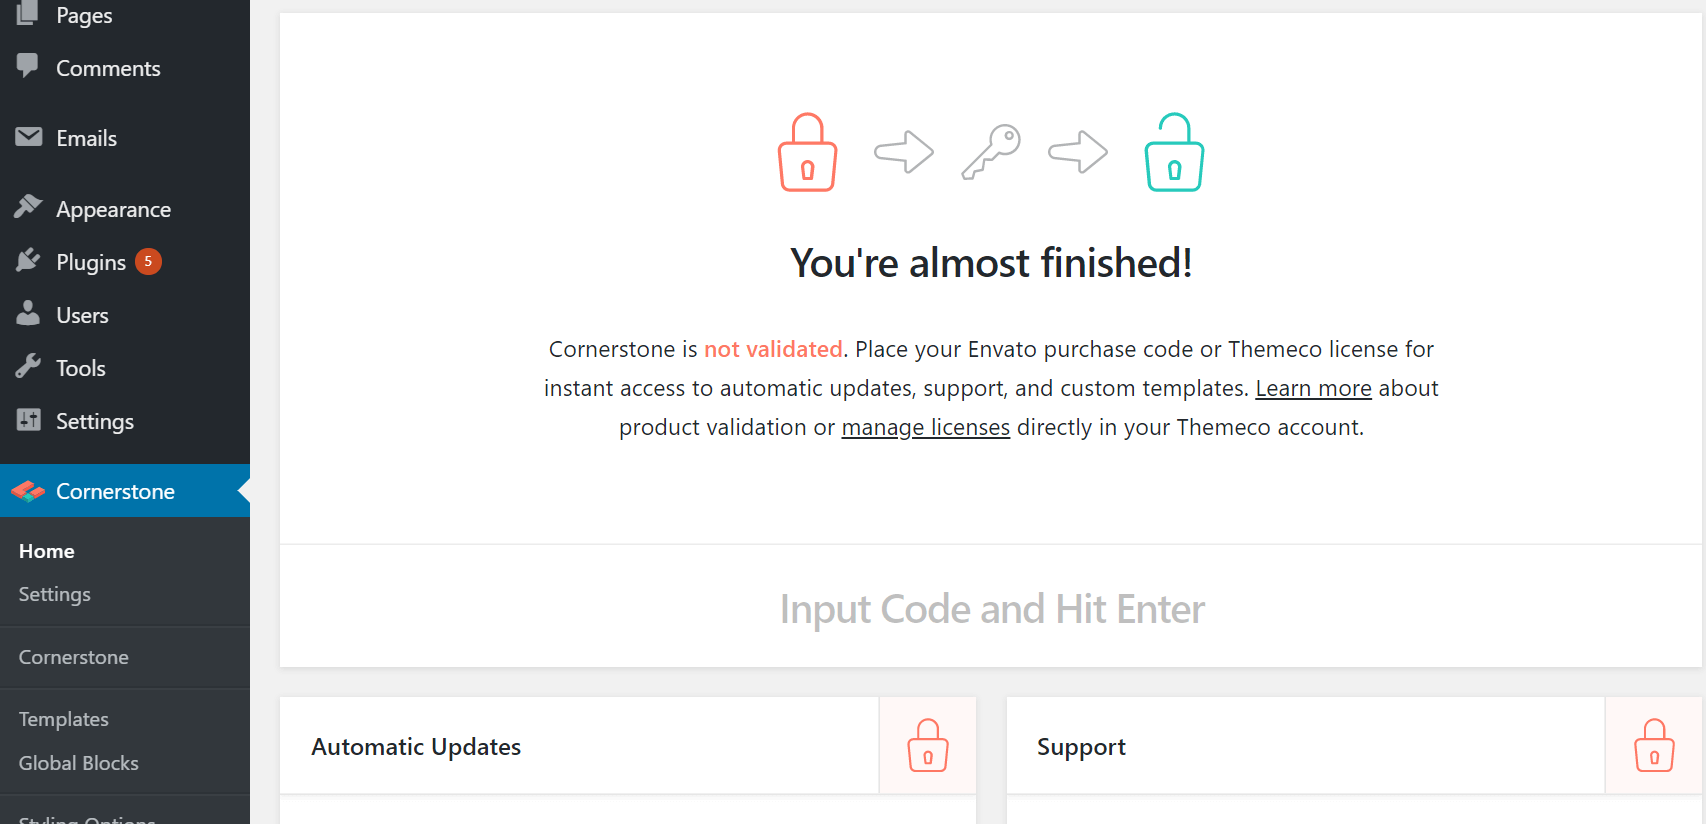
As mentioned above, there are still (and always will be) some connection between all Cornerstone users and Themeco. We offer automatic updates and custom templates to validated installs. We don’t offer a way to remove the validation screen of Manage Licenses link and would ask that you do not tamper with this as part of your theme integration.

That being said, we do understand that you may want to limit exposure to our branding in your own products. And we offer several flags that can be set via the cornerstone_theme_integration function to hide these. Here’s the list of things that can be removed:

  • Cornerstone’s global validation notice. We remind people with a dismissible notice to validate. But we understand you may not want them seeing this with each update.
  • Themeco Offers. Should we ever introduce something that would be considered promotion through Cornerstone, you can ensure it will be turned off in advance, avoiding conflict of interest.
  • Purchase link. On the Cornerstone home page, there is usually a link to purchase another license. This goes to our sales page, so we understand if you’d like to remove it.
  • Support box. The home page also has a box containing links to our knowledge base and support. While we are happy for your users to have the chance to read our articles, this is at your discretion.

To remove all of the above, you can use this code from within the after_theme_setup hook of WordPress:

cornerstone_theme_integration( array( 'remove_global_validation_notice' => true, 'remove_themeco_offers' => true, 'remove_purchase_link' => true, 'remove_support_box' => true ) );

Adding Default Post Types

By default, Cornerstone is enabled for Posts and Pages. Cornerstone offers the cornerstone_set_default_post_types function to redeclare what post types will use Cornerstone by default. additional post types, or if you want to turn off posts by default, you can use this function.

Example:

<?php // Remove "Posts" from what is enabled by default. function my_theme_set_cornerstone_default_post_types() { cornerstone_set_default_post_types( array( 'page' ) ); } add_action( 'cornerstone_integrations', 'my_theme_set_cornerstone_default_post_types' ); <?php // Add "My Theme Portfolio" post type. function my_theme_set_cornerstone_default_post_types() { cornerstone_set_default_post_types( array( 'post', 'page', 'my-theme-portfolio' ) ); } add_action( 'cornerstone_integrations', 'my_theme_set_cornerstone_default_post_types' )

Additional Consideration:

  • This does not prevent the user from re-enabling support themselves on the Cornerstone settings page.
  • This function should NOT be used in plugins. It should only be called once, as each call will overwrite the previous declaration.

Removing Cornerstone front-end styles

If you are going to be restyling Cornerstone elements in your own stylesheets, there is a quick and easy way to prevent Cornerstone from enqueuing the built-in styles on the front end.

add_filter( 'cornerstone_enqueue_styles', '__return_false' );

It’s also possible to disable Cornerstone’s generated styles and remove the integration settings we add to the customizer. We do this in the X theme to prevent overlap, but we wouldn’t recommend it in most cases, as it’s considerably deep integration.

These filters will turn off Cornerstone’s generated CSS in the head, and prevent the customizer settings from appearing.

add_filter( 'cornerstone_customizer_output', '__return_false' ); add_filter( 'cornerstone_use_customizer', '__return_false' );

Keep in mind that if you opt for this advanced route, you’ll need to add your own styles for base margin, and container widths.

Using an Integration Class

Integration classes are optional but offer a convenient way to organize your code. With all the changes you may be included, it may help to organize them into a class. It’s even possible for this class to exist in another plugin, but still, be assigned to your theme and only load when it is detected that your theme is active.

Creating the class

Create a PHP class including a constructor, and a static stylesheet method. This is what Cornerstone’s integration manager will look for. For example:

<?php class Cornerstone_Integration_My_Theme { /** * This integration will load if get_stylesheet() matches the value returned here. */ public static function stylesheet() { return 'my-theme'; } /** * Loads on the after_theme_setup hook */ public function __construct() { } }

Register the Integration

Integrations need to be registered quite early to allow access to other primary hooks during execution. They are loaded by passing a name and class into the cornerstone_register_integration function. The best place to setup Cornerstone integration is in functions.php of your theme, hooking into cornerstone_integrations. Here’s an example:

<?php function my_theme_register_cornerstone_integration() { // Load the file containing the class previously created require( 'path/to/class-my-theme-cornerstone-integration.php' ); // Register our class with Cornerstone cornerstone_register_integration( 'my-theme', 'Cornerstone_Integration_My_Theme' ); } add_action( 'cornerstone_integrations', 'my_theme_register_cornerstone_integration' );

Example:

<?php class Cornerstone_Integration_My_Theme { /** * This integration will load if get_stylesheet() matches the value returned here. */ public static function stylesheet() { return 'my-theme'; } /** * Loads on the after_theme_setup hook */ public function __construct() { // Set Default Post Types cornerstone_set_default_post_types( array( 'post', 'page', 'my-theme-portfolio' ) ); // Declare theme integration flags cornerstone_theme_integration( array( 'remove_global_validation_notice' => true, 'remove_themeco_offers' => true, 'remove_purchase_link' => true, 'remove_support_box' => true ) ); add_filter( 'cornerstone_enqueue_styles', '__return_false' ); } }

The element customization which we discussed is only for the Classic Elements. There is no API available for the V2 Elements at the moment.

How to Integrate Cornerstone into a Third Party Plugin

If you are a plugin developer and are interested in integrating the Cornerstone plugin into your own plugin, follow the steps below.

Do’s and Don’ts

Before the decision of the Cornerstone integration to a third party theme, consider the points below:

Do's:

  • Create brand new Cornerstone elements.
  • Create Cornerstone elements to wrap your shortcodes, allowing them to be used in the page builder

Don'ts:

  • Don’t change the markup of our elements or shortcodes. This is important for data portability.
  • Don’t alter the user interface in any way, including introducing new controls, or custom builder features.
  • Don’t extend existing elements with new controls, including sections, rows, and columns.

If you stick to our documented APIs, this won’t be a concern, but especially in WordPress, there are always workarounds, and we request that you avoid them.

We do understand this is more restrictive than what other builders allow, but we are committed to preserving the Cornerstone user experience - no matter what theme or combination of plugins is used. We’re also committed to preserving the portability of content created with Cornerstone. If Cornerstone is lacking a certain control or feature you need, feel free to reach out and let us know. We may be able to work with you on making it part of the core plugin.

Functions and Hooks for Plugin Developers

Most Cornerstone plugin development will be focused around elements. There is much to cover, so the details of element creation will be in a separate article. Here we will focus on registering elements for use in the page builder, and settings up custom icons.

Element API

We will discuss the Element API and the detailed functions available:

Registering Custom elements

Before an element will appear in the page builder, it will need to be registered. As covered in the element API article, you will need a unique folder, and a definition.php file containing a PHP class. Inside the cornerstone_register_elements hook, you will then call the cornerstone_register_element function to complete the registration. Here’s what that function expects:

cornerstone_register_element( $class_name, $name, $path )

Example:

function my_extension_register_elements() { cornerstone_register_element( 'My_First_Element', 'my-first-element', MY_EXTENSION_PATH . 'includes/my-first-element' ); cornerstone_register_element( 'My_Second_Element', 'my-second-element', MY_EXTENSION_PATH . 'includes/my-second-element' ); } add_action( 'cornerstone_register_elements', 'my_extension_register_elements' );

Registering Element Icons

It’s possible to include your own icons to show in the library, but there are some considerations. These icons must be in an SVG format and defined as symbols in an SVG file. Symbols allow a single file to hold any number of icons, and being a vector format, we can make better use of the icons within the page builder without requiring developers to include different states such as hover. It also helps enforce consistency, mentioned earlier as one of our goals.

First, you’ll need an SVG of the icon or logo you wish to use for the element. Next, convert it to use SVG <symbol> tags. For more information click here. Most often this is just replacing a wrapping <g></g> set, with <symbol></symbol> instead, including an ID attribute.

Example:

<strong><?xml version="1.0" encoding="UTF-8"?><!DOCTYPE svg PUBLIC "-//W3C//DTD SVG 1.1//EN" "http://www.w3.org/Graphics/SVG/1.1/DTD/svg11.dtd"><svg xmlns="http://www.w3.org/2000/svg"> <symbol id="my-custom-element" viewBox="-290 382 30 30"> <path d="M-262.1,403.9C-262.1,................."/> </symbol> <symbol id="another-custom-element" viewBox="-290 382 30 30"> <path d="M-262.1,403.9C-262.1,................."/> </symbol> </svg><br></strong>

Next, we want to make Cornerstone aware of this file. This involves using the cornerstone_icon_map filter to add a URL to the SVG you created containing your icon(s).

function my_extension_icon_map( $icon_map ) { $icon_map['my-extension'] = MY_EXTENSION_URL . '/assets/svg/icons.svg'; return $icon_map; } add_filter( 'cornerstone_icon_map', 'my_extension_icon_map' );

At this point, my-extension can now be assigned as an icon_group. Click here for more information.

Using an Integration Class

Integration classes are optional but offer a convenient way to organize your code. With all the changes you may be included, it may help to organize them into a class.

Creating the class

Create a basic PHP class including a constructor. Optionally, you may include a static should_load function.

Example:

<?php class Cornerstone_Integration_My_Plugin { /** * This function is optional. Return true/false to determine if the integration should load. */ public static function should_load() { return ( defined( 'MY_FEATURE') && MY_FEATURE ); } /** * Loads during the plugins_loaded hook */ public function __construct() { } }

Register the Integration

Integrations need to be registered quite early to allow access to other primary hooks during execution. They are loaded by passing a name and class into the cornerstone_register_integration function. The best place to setup Cornerstone integration is hooking into cornerstone_integrations somewhere during your plugin’s initialization.

<?php function my_plugin_register_cornerstone_integration() { // Load the file containing the class previously created require( 'path/to/class-my-plugin-cornerstone-integration.php' ); // Register our class with Cornerstone cornerstone_register_integration( 'my-plugin', 'Cornerstone_Integration_My_Plugin' ); } add_action( 'cornerstone_integrations', 'my_plugin_register_cornerstone_integration' );

Example: Here’s an example showing a class that registers some elements, and custom icons for your plugin.

<?php class Cornerstone_Integration_My_Plugin { /** * Loads on the plugins_loaded hook */ public function __construct() { // Register Custom Elements add_action( 'cornerstone_register_elements', array( $this, 'register_elements' ) ); // Add Custom Icons add_filter( 'cornerstone_icon_map', array( $this, 'icon_map' ) ); } public function register_elements() { cornerstone_register_element( 'My_First_Element', 'my-first-element', MY_EXTENSION_PATH . 'includes/my-first-element' ); cornerstone_register_element( 'My_Second_Element', 'my-second-element', MY_EXTENSION_PATH . 'includes/my-second-element' ); } public function icon_map( $icon_map ) { $icon_map['my-extension'] = MY_EXTENSION_URL . '/assets/svg/icons.svg'; return $icon_map; } }

The element customization which we discussed is only for the Classic Elements. There is no API available for the V2 Elements at the moment.

Summary

We've talked about the standalone version of the Cornerstone plugin and how to download and install it. Then, we've talked about the do's and don'ts you need to consider when integrating Cornerstone into a third party theme or plugin. We've also introduced the functions and hooks available to you for integration. Finally, we've talked about the class integrations for those advanced developers who want to take their integrations further.

See something inaccurate? Let us know