Work with Unlimited Sidebars
In this article, we're going to explain how to add sidebars to your website and use them to assign widgets.
What is a Sidebar
The sidebar essentially is a custom Widget Area that you can create using the settings given in the X and Pro themes and assign that widget area to whatever page, post, tag archive or category archive page that you want. After you added the sidebar, you can go to Appearance > Widgets to assign whatever widget you want to that sidebar.
Why You Need to Use a Sidebar
The WordPress widget areas are available for the whole website. That is why whatever widget area that the X and Pro theme have such as the Sidebar widget are which can be accessed by going to Appearance > Widgets will show to the whole website. But there are cases that you want to have a specific sidebar for a specific page or category. You can not assign widgets to the widget areas for a specific page. But with the unlimited sidebar feature of the X and Pro themes, you can add a custom widget area which we call it a sidebar and assign that widget area to a specific page. This will make sure that whatever widget that you assign to that sidebar will show only on the pages that you selected.
How to Add a Sidebar
Follow the steps below to add a sidebar to your website:
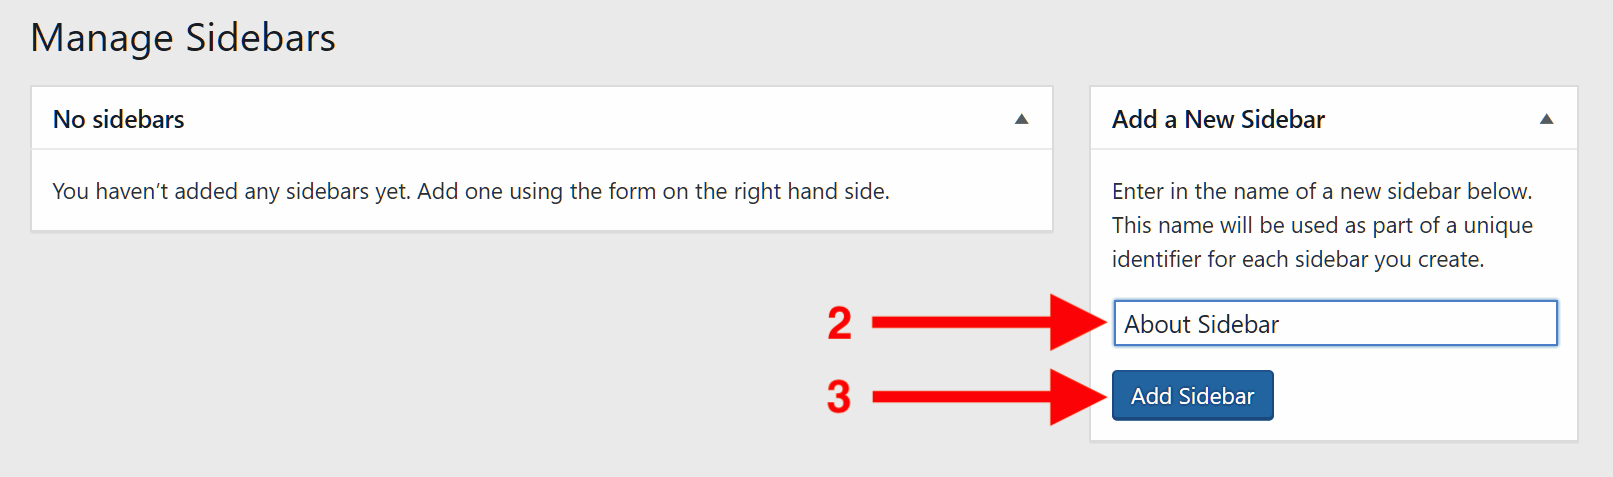
- Go to Appearance > Sidebars.
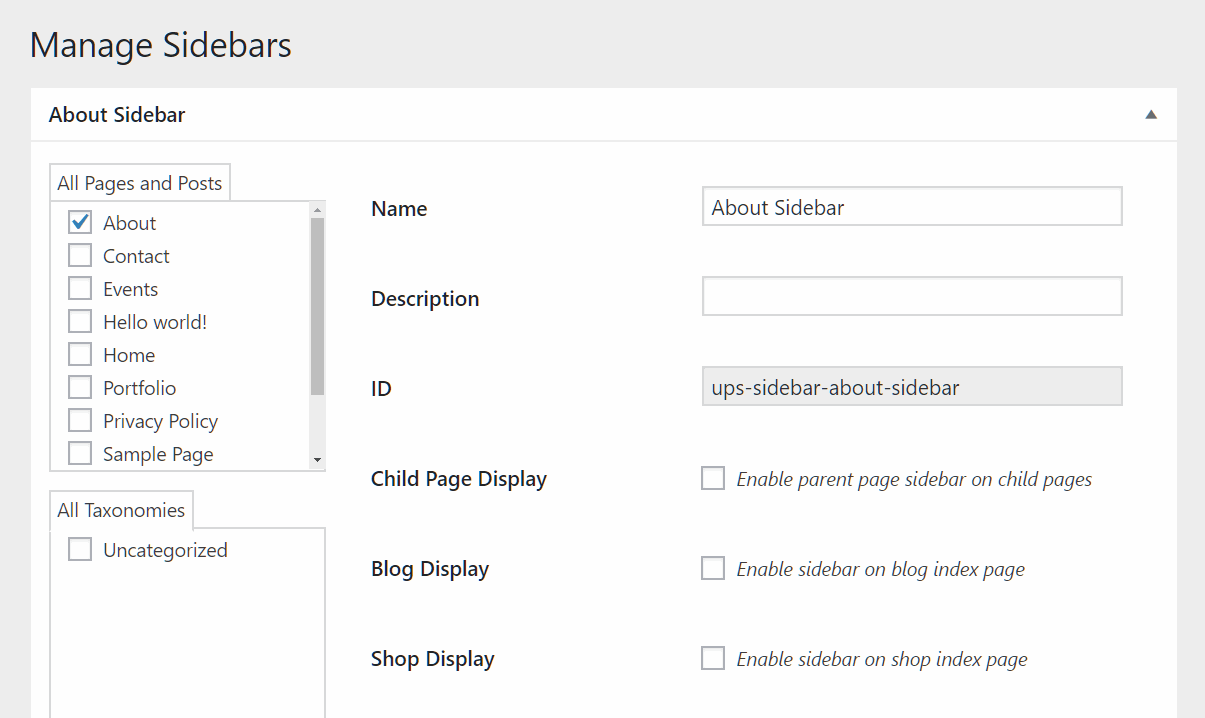
- Type a name for your sidebar. (About Sidebar in our case)
- Click Add Sidebar on the right corner of the page.
- Add a description for the sidebar.
- Decide if you want the sidebar available for the child pages or not. (Click here to learn more about Child Pages.)
- Decide if you want to have the sidebar on the blog index page.
- Decide if you want to have the sidebar on the shop main page. (If you have Woocommerce plugin installed)
- Select which pages or posts you want to have the sidebar available. (In our case, the About page.)
- Select which categories or tags (taxonomies) you want to have the sidebar available.

How to Assign Widgets to a Sidebar
Now that we created the sidebar, a new widget area will be available for us with the name of the sidebar that we've just created. So now, we can add whatever widget we want to that widget area.
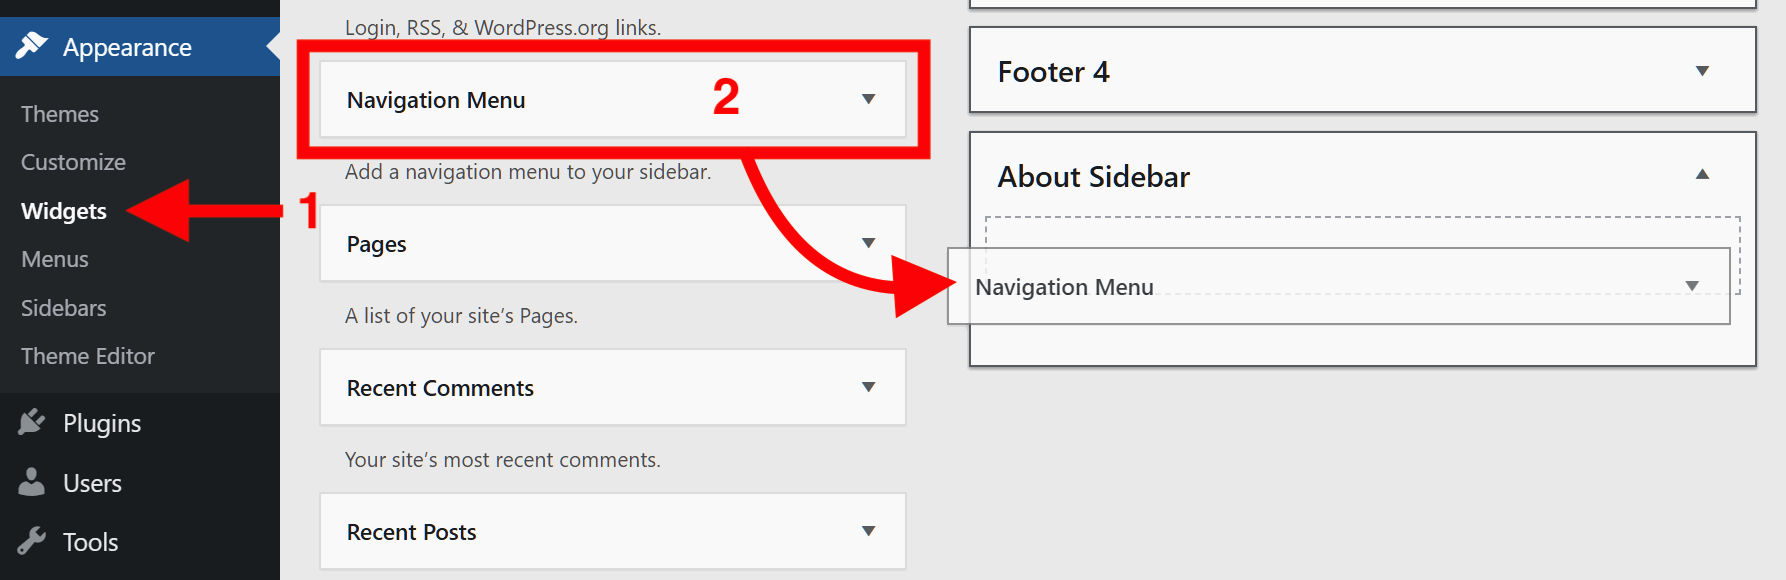
- Go to Appearance > Widgets.
- Drag the text widget to the sidebar you created. (In our case, About Sidebar.)
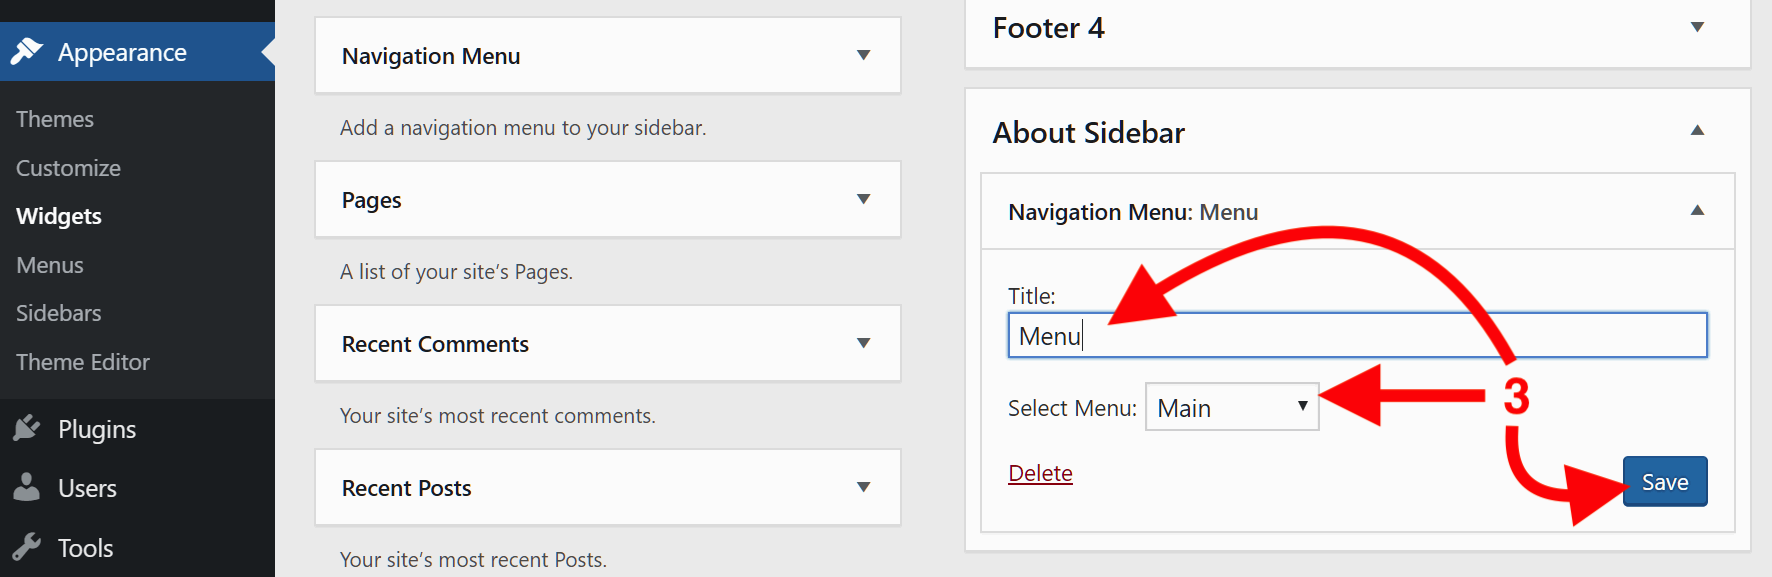
- Configure and save the widget.
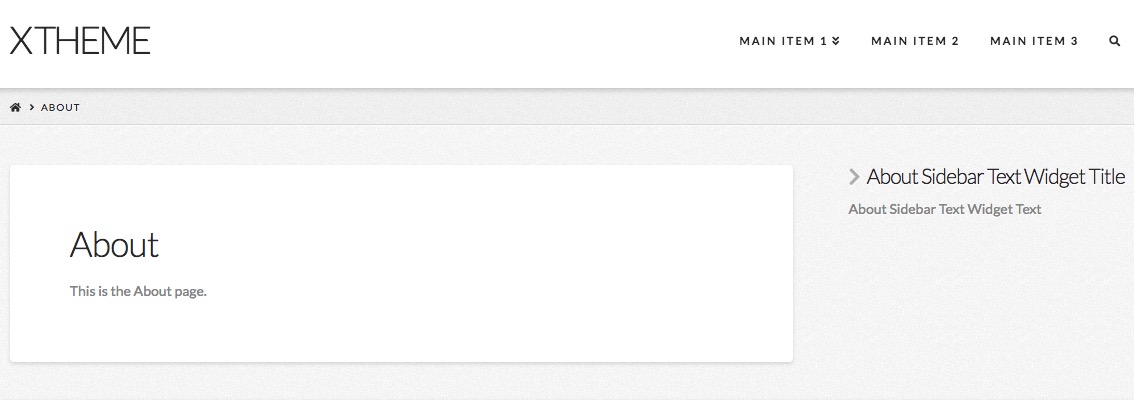
- Check the front end of the website. (In our case, About page.)
Assign a Sidebar to Non-Standard Places with Code
Using the unlimited sidebar feature of the X and Pro themes is a great way to add sidebars for the pages, posts, categories or tags that you want. But there are some cases that you need to add the sidebar to multiple pages, for example, all Woocommerce pages that are not available in the page selection section of the sidebar editing screen. In such cases, you need to install the child theme and add the sidebar via code.
We will assign the About Sidebar that we created previously to all Woocommerce related pages:
- Install the Pro or X Child Theme depending on which of them you installed for your WordPress instance.
- Go to Appearance > Sidebars and select the sidebar you want and copy the sidebar ID to use later in the code. (In our case, ups-sidebar-about-sidebar)
- Access the functions.php file of your Child Theme by going to Appearance > Editor and clicking on Theme Functions (
functions.php) or using the FTP connection to edit the file directly. - Add the PHP code below at the end of the
functions.phpfile. - Save the file.
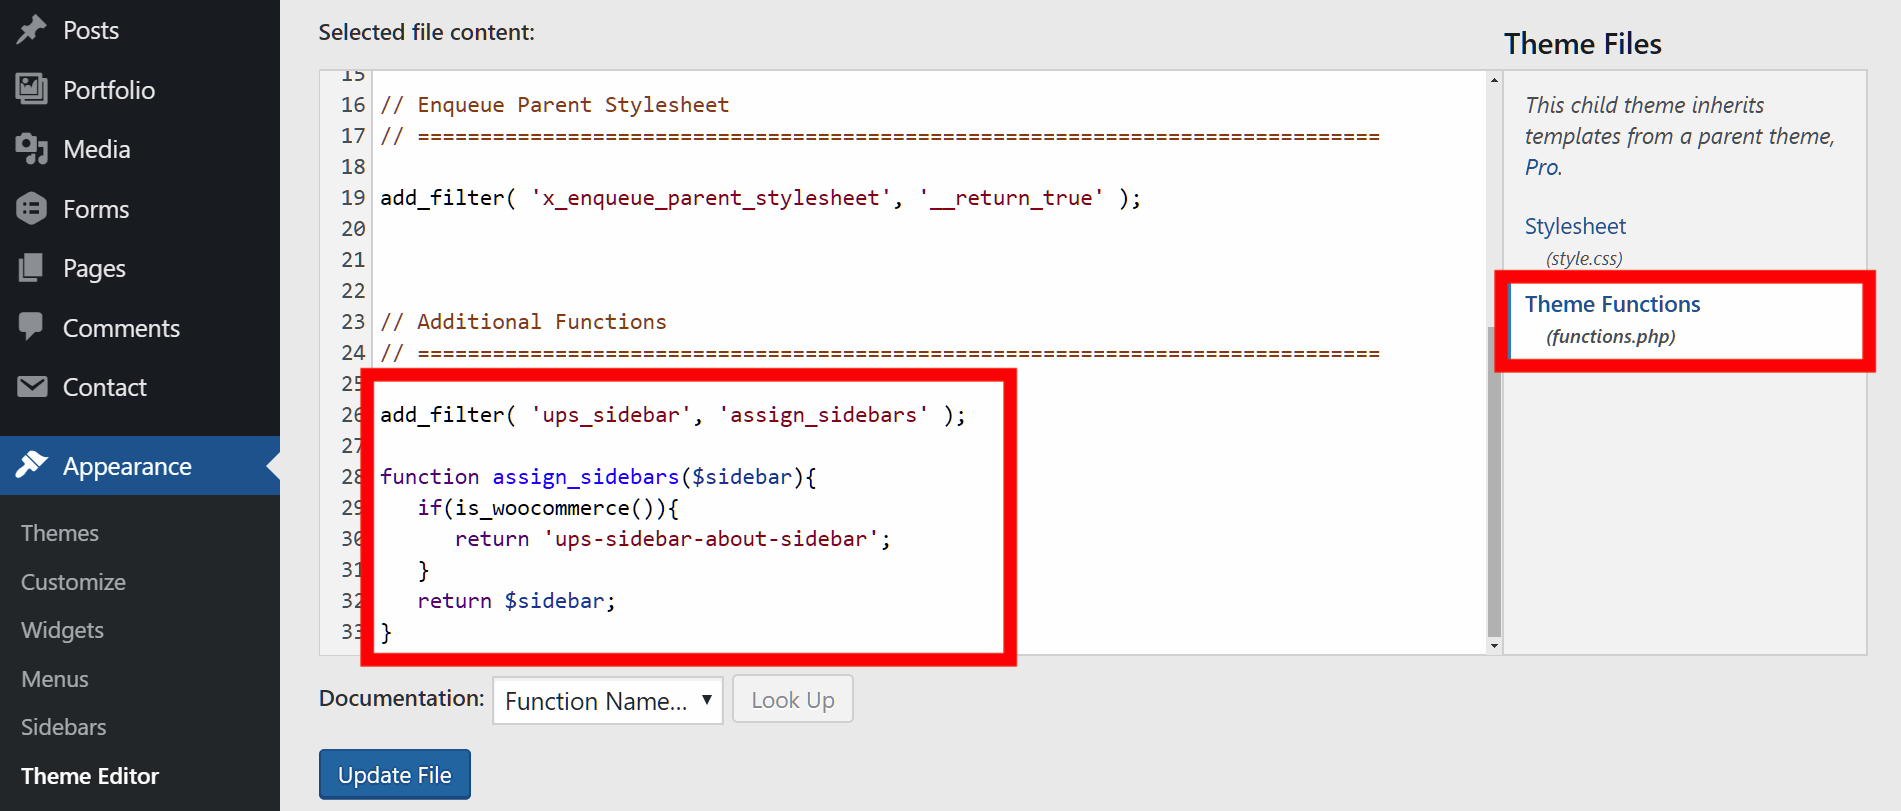
add_filter( 'ups_sidebar', 'assign_sidebars' );

function assign_sidebars($sidebar){
   if(is_woocommerce()){
      return 'ups-sidebar-about-sidebar';
   }
   return $sidebar;
}
The code above uses the Woocommerce related conditional tag called is_woocommerce to detect all the Woocommerce pages. Also, the ups-sidebar-about-sidebar portion of the code is the ID which we found in step 2 above.
Click here for more information about the Woocommer Conditional Tags and here for WordPress Conditional Tags.
Summary
We've learned about the Unlimited Sidebars available in the X and Pro themes and discussed the steps needed to configure the feature, and finally, we talked about the customization of the sidebar assignment for the professional users.
See something inaccurate? Let us know