External API Integration
Learn how to use Cornerstone's External REST API to connect 3rd party data sources directly into WordPress.
@since CS 7.4.0 on all products
Connecting and looping data from an external API can offer a huge amount of versatility to your site. Whether it's displaying a list or a singular object you can do this in CS with either Dynamic Content or through a Looper Provider. The External REST API offers many additional solutions and is built to be extendable for the dynamic nature of custom APIs.
Beta Feature
For the release of Pro 6.4+, CS 7.4+, and X 10.4+, the External API is considered to be a beta feature. There might issues or usability concerns which might make this hard to integrate or not possible (OAuth being an example that requires additional work outside of Cornerstone prior to using in Cornerstone). As a result, it is important to cache all results on a live server, not only to limit requests to another server, but to limit hang time for Documents in Cornerstone that use this feature. We would love to hear thoughts on this as we continue to push the boundaries of Looping technology.
Security
Due to the sensitive nature of API Keys, preventing your key from outputting to the page is of the utmost importance. Due to the dynamic nature of Cornerstone however, some caution and due deligence needs to be handled by you.
Donts
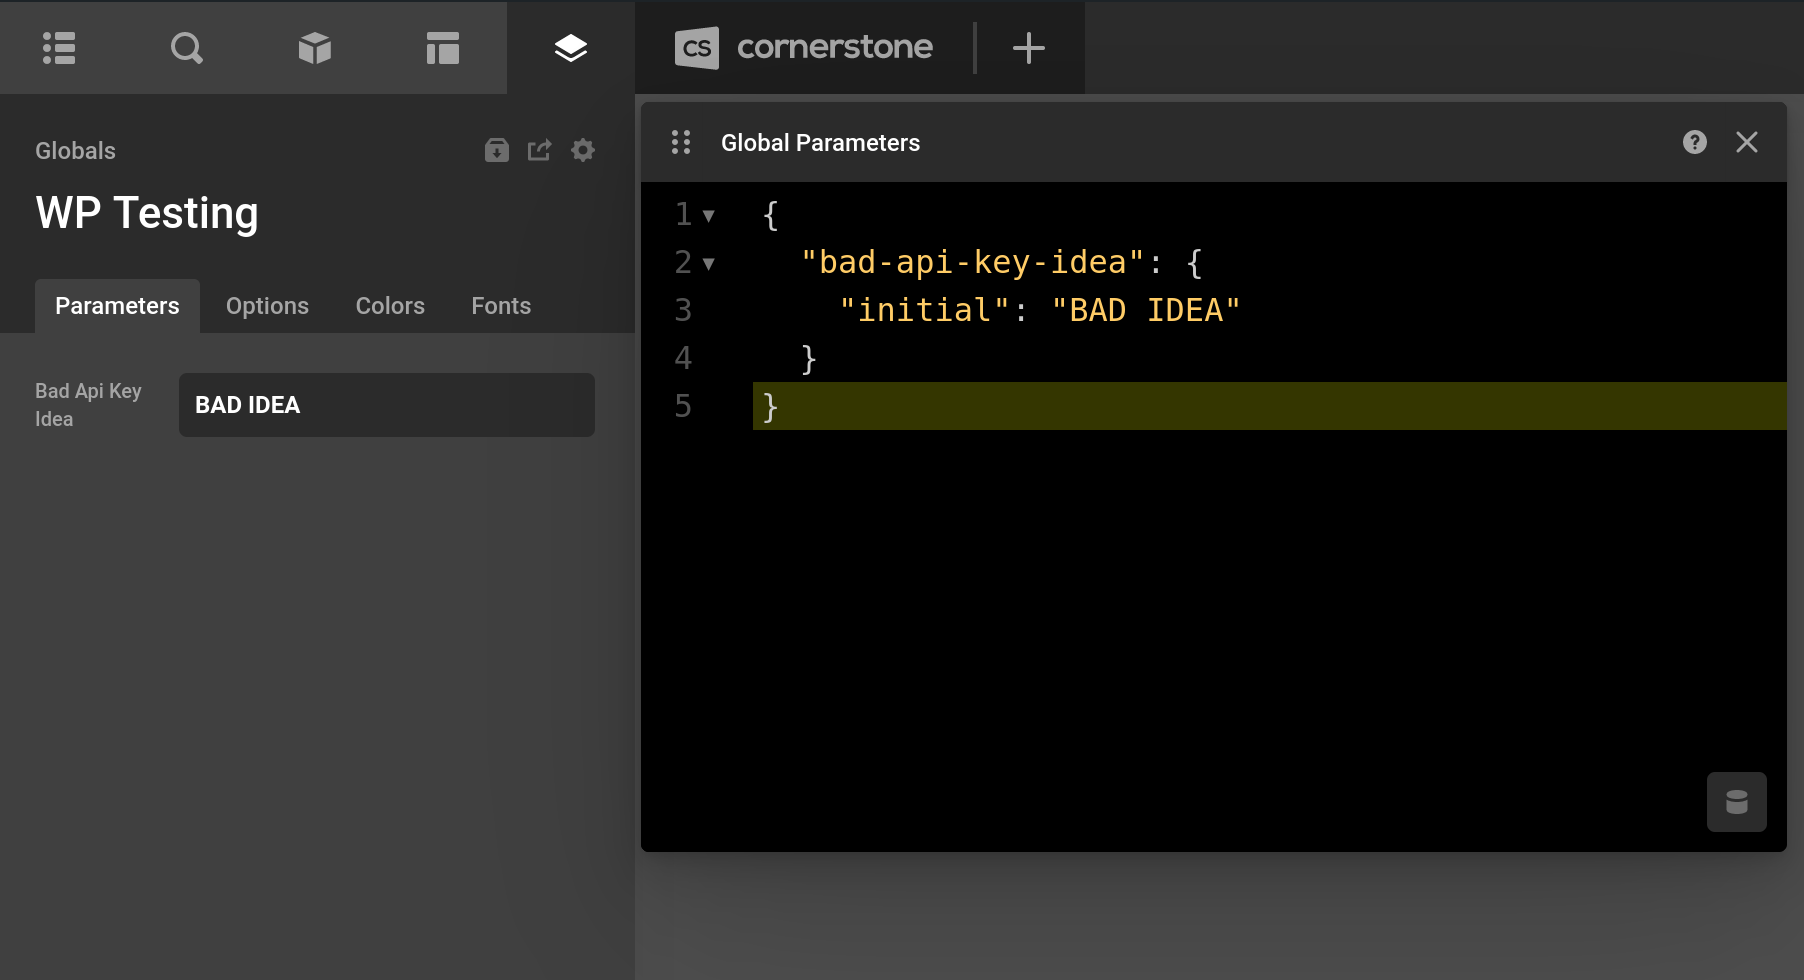
- Dont use Global Theme Parameters as a place to store API keys. These are the parameters in the Global Tab. These values are outputted to the page and usable via CSS variables.
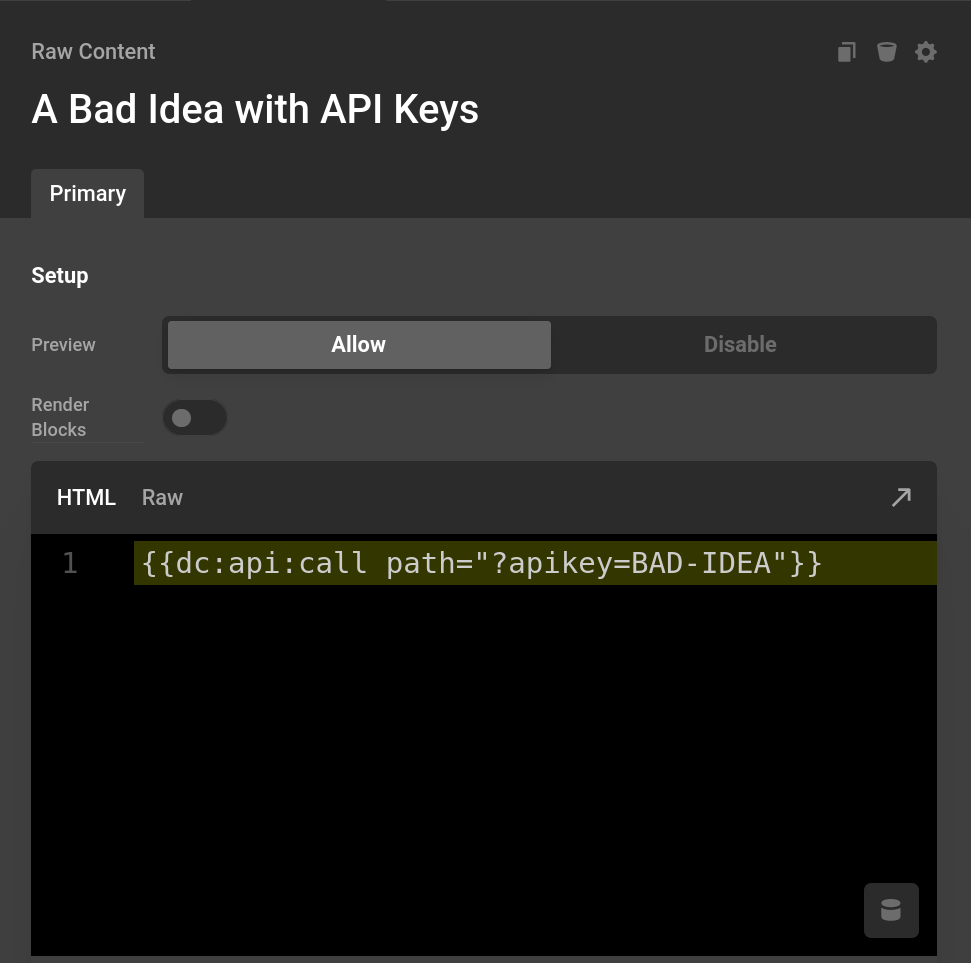
- Dont place API keys into an Element field that could be displayed to the page. Like "Content" in a Text element or directly in Raw Content. While this may work, if you accidentally delete one of the curly braces, your dynamic content will no longer be valid and your API key will be on the page. Use the Global Endpoints for requests that require authentication.
- Dont connect to the same page you are on and create an infinite loop.
Dos
- Do set your allow list to only contain servers you want to connect to.
- Do Use the global endpoints to store API keys.
- Do cache every response even if just for 10 seconds.
- Do use environment variables to store API keys.
- Do setup a Global Endpoint filter to manage APIs between your sites.
Allow List
If this is left empty, it will allow all domains. Enter new domains, including the protocol, on each new line.
Example, If you only want to connect to the PokeAPI.
https://pokeapi.co/api/v2/Example, If you want to connect to the PokeAPI and OpenAI
https://pokeapi.co/api/v2/
https://api.openai.com/
Example if you just wanted a certain paths in an API
https://pokeapi.co/api/v2/pokemon
https://pokeapi.co/api/v2/type
Enabling External API
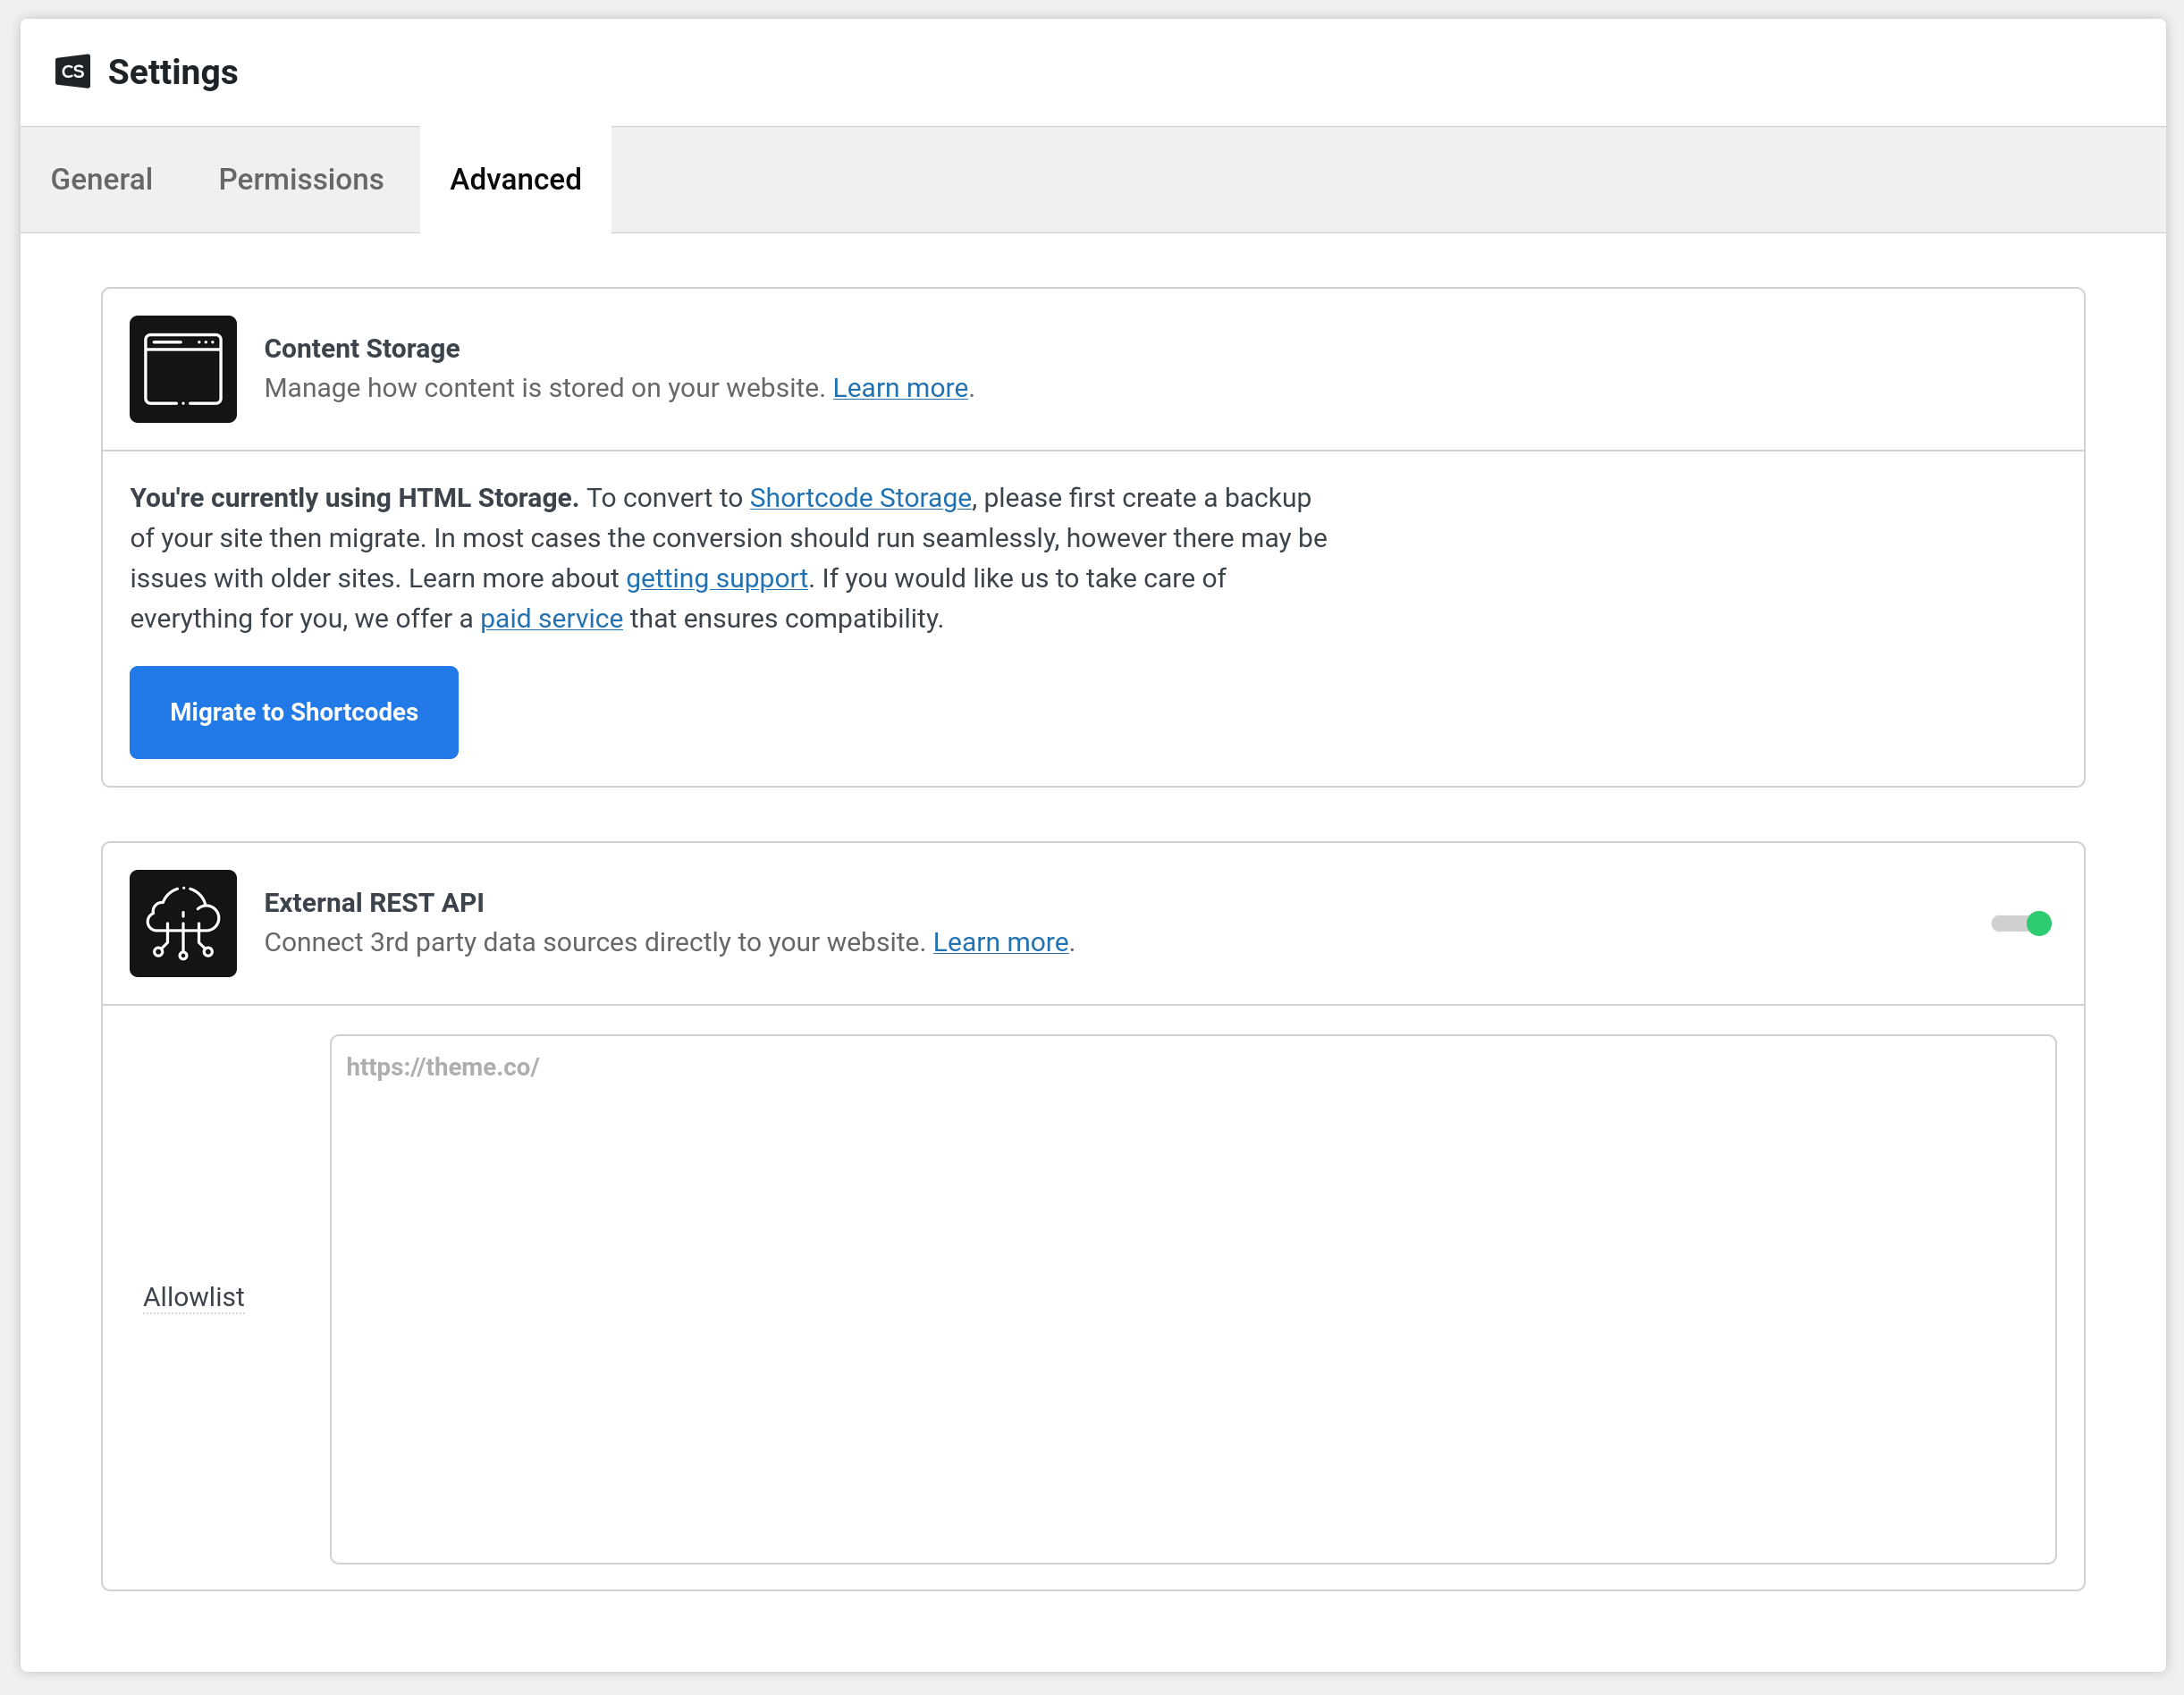
In the Cornerstone settings page. Navigate to the "Advanced" section. Click the "Power" button next to "External API". The text "configure" should now appear. When clicked this will show the controls to the Allow List.
Getting Started
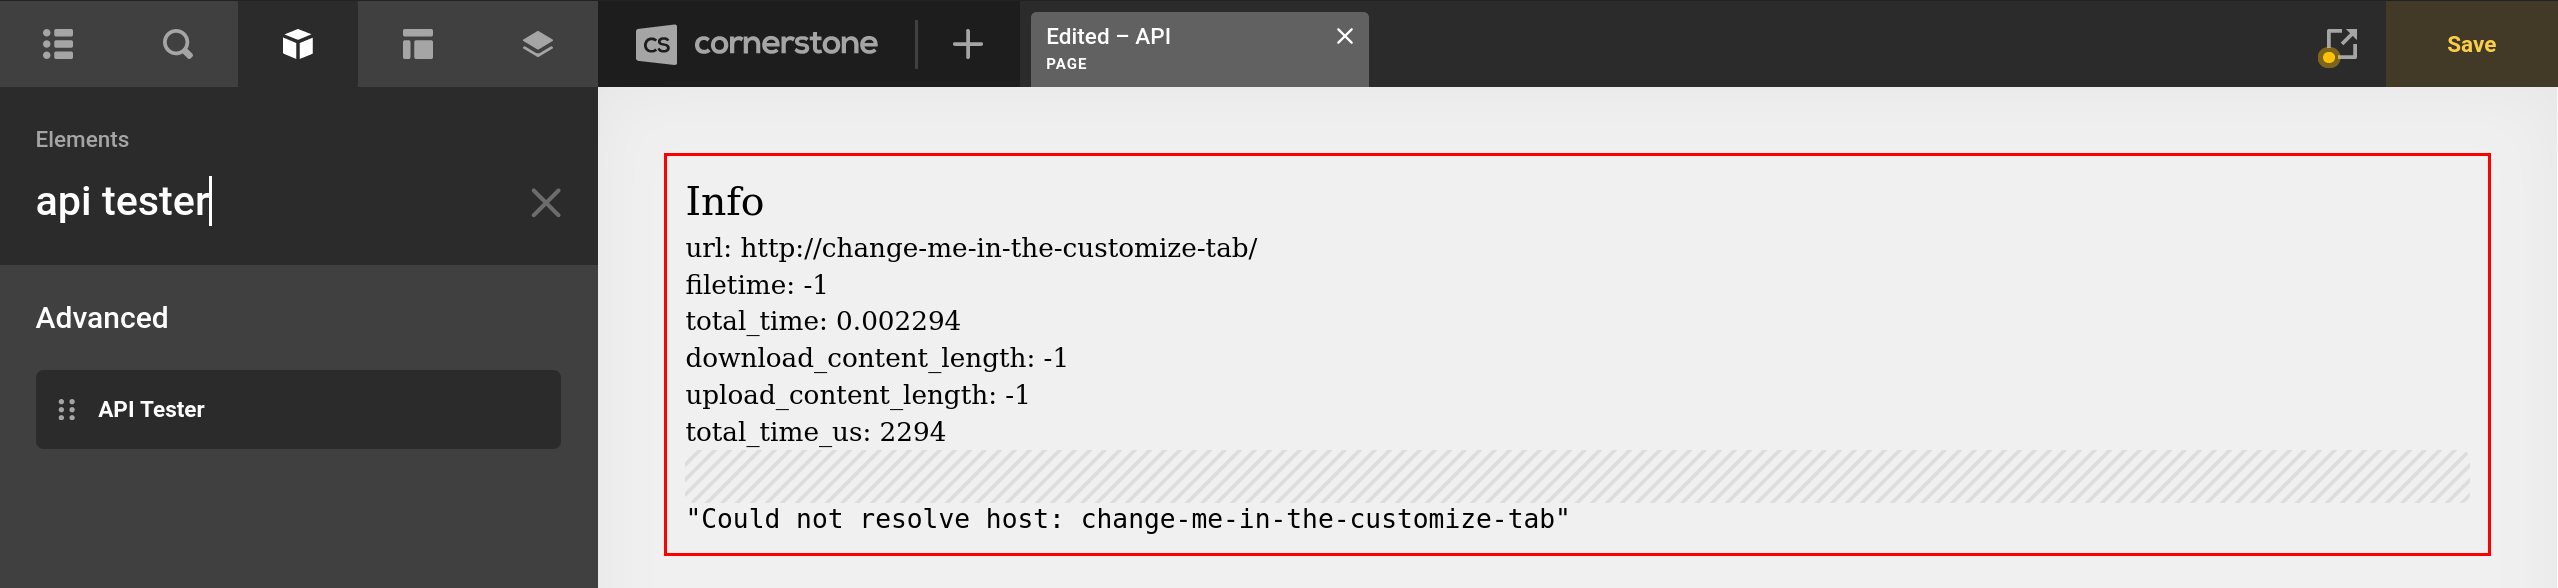
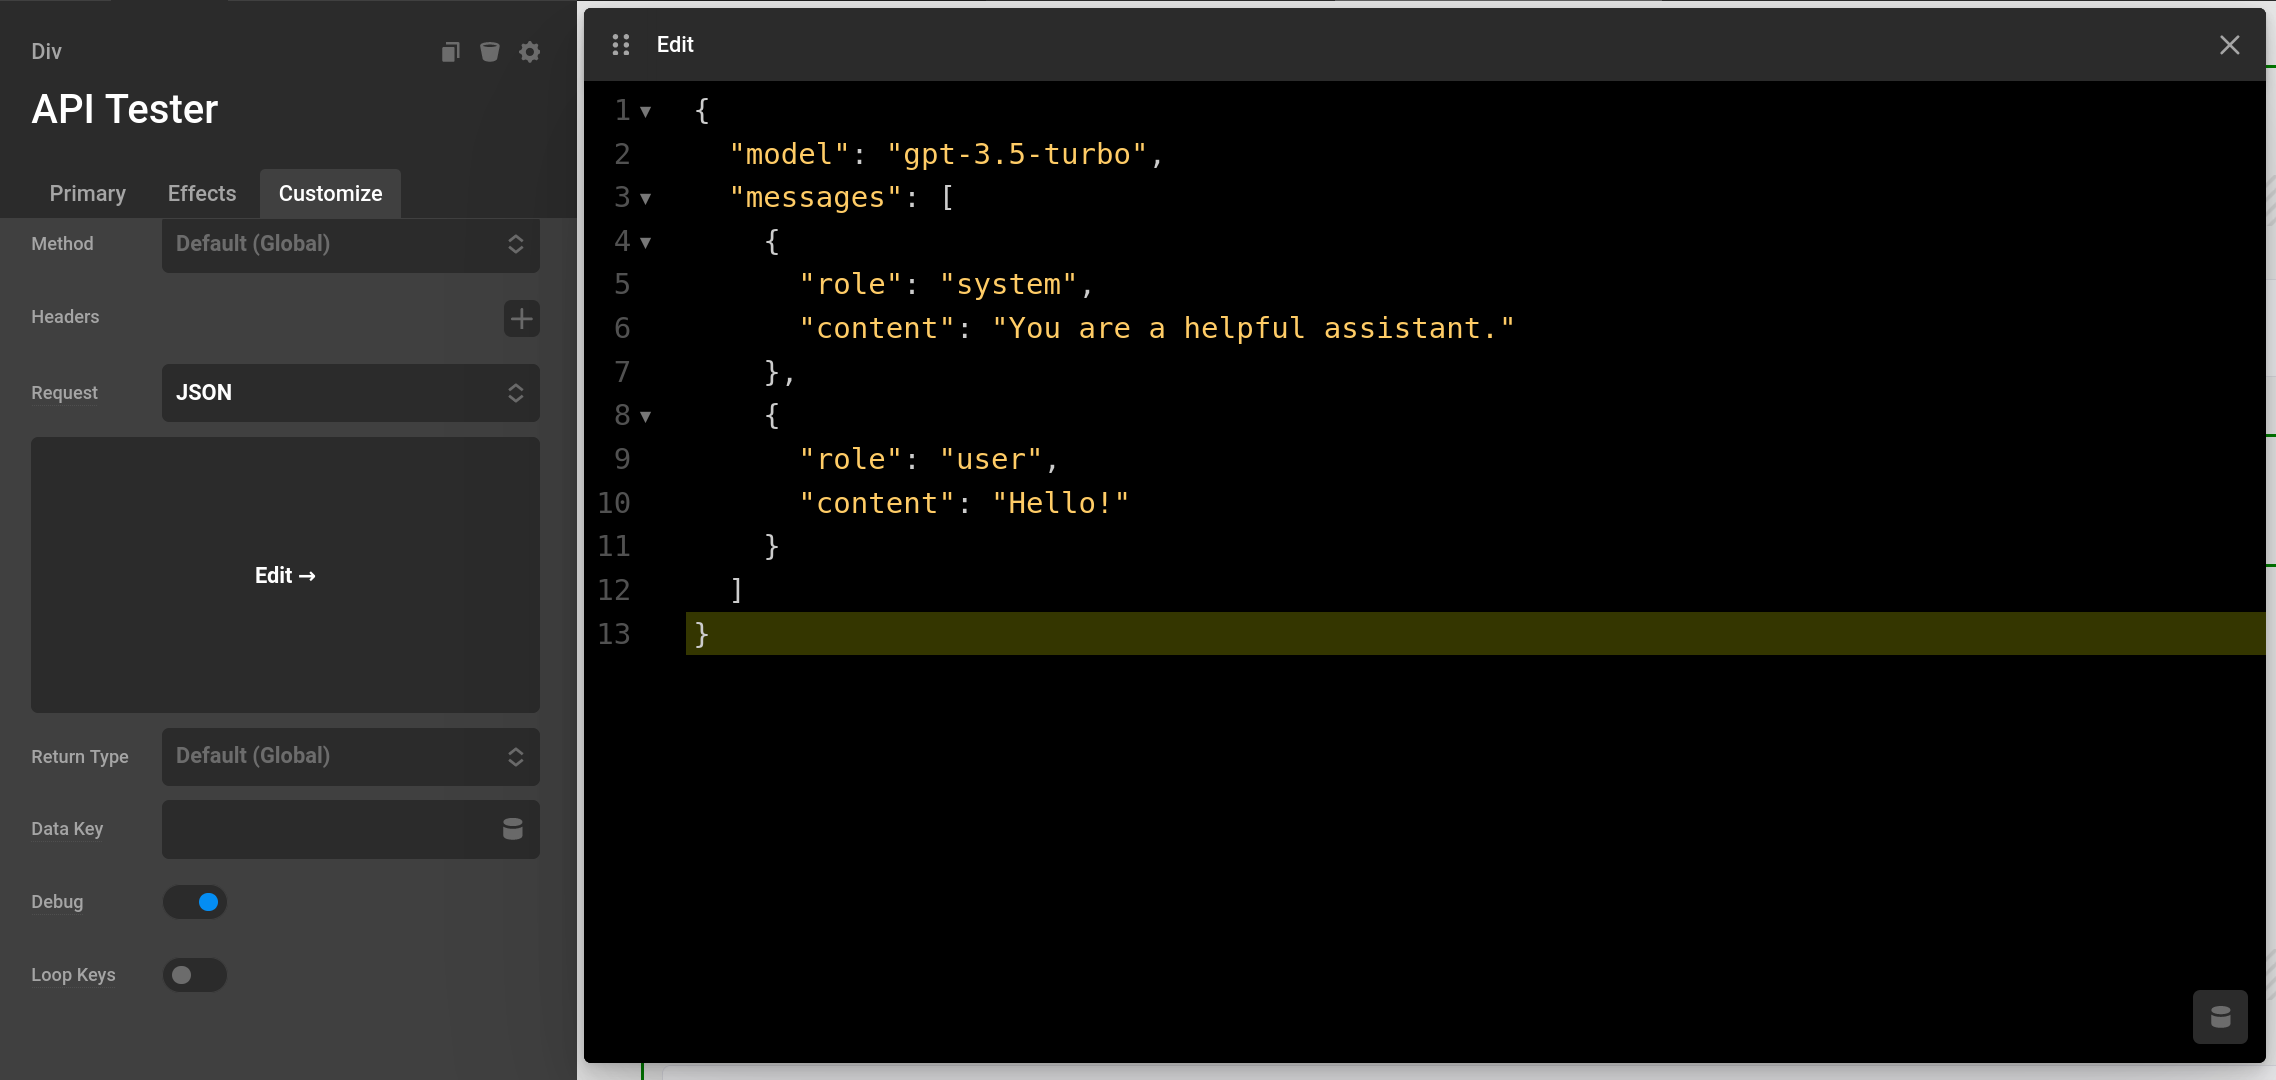
We recommend you start with the template API Tester in the element library under Advanced. This template is actually a tool to get started with an External API. Enter into the Customize Tab as instructed by the UI and start editing the Looper Provider. The point of starting here is to make sure you are getting valid data, and to get an understanding of the key or data you might looping through or using. This template also goes through error handling.
See the Controls Section later in this guide for more info.
Anatomy of an Endpoint
Let's take a look at two example Endpoints to get an idea of what we are trying to connect to as this might be new to you. If you already understand how External API's usually work you can probably skip this section.
This is example is grabbed from the OpenAI Docs. Usually when you are reading docs you will be given a number of different example types. In the Chat Completion endpoint, they use a basic curl example to demonstrate this.
At the time of writing it is 2023-09-28:
curl https://api.openai.com/v1/chat/completions \
  -H "Content-Type: application/json" \
  -H "Authorization: Bearer $OPENAI_API_KEY" \
  -d '{
    "model": "gpt-3.5-turbo",
    "messages": [
      {
        "role": "system",
        "content": "You are a helpful assistant."
      },
      {
        "role": "user",
        "content": "Hello!"
      }
    ]
  }'
A \ in a shell example at the end of a line, simply means a new line is valid for the command. With that in mind, let's break down each line of this and then relate this to Cornerstone
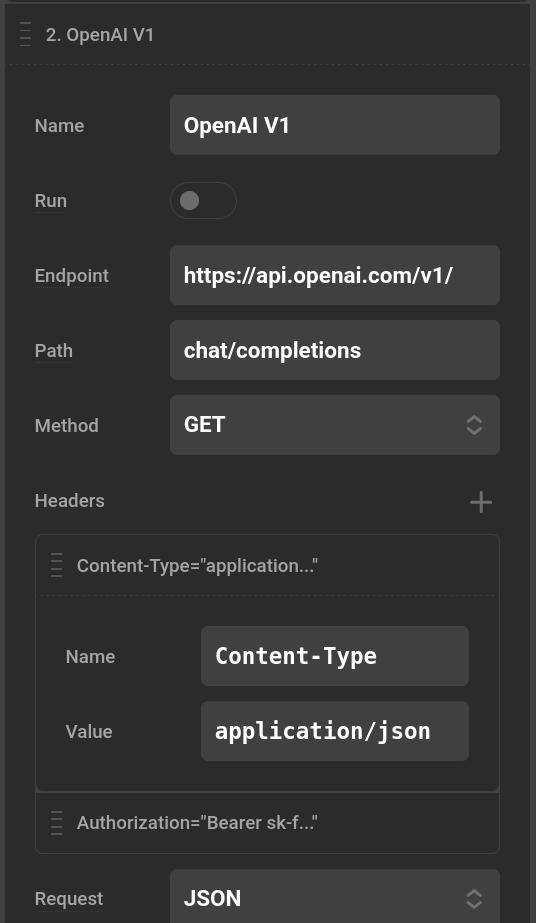
curl https://api.openai.com/v1/chat/completions, This is the endpoint-H "Content-Type: application/json", The-Hdenotes that this is aheader. A good queue that something is a header is that it has a key value pair delimited by a:. So in this case theContent-Typewould be thenameof the header andapplication/jsonwould be the value.-H "Authorization: Bearer $OPENAI_API_KEY", Same as line 2, remember the-Hand colons. In the docs they say that this is where you input your API key. Obtaining a key can vary between platform, but usage is fairly consistent with what you see here. In Cornerstone you would replace$OPENAI_API_KEYwith your key. Please read the Security section.-d '{, The-ddenotes it's the body data. A give away too, is that it's JSON. It does not explictitly state this uses thePOST, however if there is body data at all that is a clear sign it's not aGET. If you are reading data, you will almost never use anything butGETandPOST. Other External API documentations will make this more clear.
So with all that in mind, let's take this into Cornerstone. First off, the endpoint relates directly to Line 1. The two headers are each under the headers section. Then since this body data is expecting JSON, that's exactly what the request part is set to.
Let's do one more example. This time Listing Pinterest Pins. Right off the bat they tell the path and method. We have another curl example as well.
At the time of writing it is 2023-09-28:
curl --location --request GET 'https://api.pinterest.com/v5/pins' \
--header 'Authorization: Bearer <Add your token here>' \
--header 'Content-Type: application/json'
curl --location --request GET 'https://api.pinterest.com/v5/pins'The endpoint and path. Thiscurlexample request actually tells the method too.--header 'Authorization: Bearer <Add your token here>'--headeris the same as-H. As you have guessed it, this is a header. Please read the security section for info on tokens.--header 'Content-Type: application/jsonAnother header
Endpoint Parameters
Each example we just looked at had other parameters you could pass to the API. Here on some notes to help you out in understanding this.
GET Methods. These use ?name=value in the URL itself. You do not need to add this Endpoint or Path control. Instead when you use attributes as the request editor, these will be autoconverted and added to the URL. This will also help you reuse APIs as we will see in Global Endpoints.
NON GET METHODS. These use a variety of different ways to send the data. It does not add to the url in contrast to GET. Whenever you see JSON as body data, know that Request Attributes in the Controls auto converts to JSON.
Controls
These controls are shared between the Theme Options, Looper Provider, and Dynamic Content.
Endpoint and Path
Including the protocol the endpoint is the server you wish to connect to. The path can be left out entirely if you would like. Setting up a global endpoint can let you extend and just change the path making setup even easier for numerous request to the same External API.
Headers
These are stored as key value object and then converted to the HTTP header format later (EX "Content/Type: application/json")
Method
The HTTP method to use. All are selectable, however in Cornerstone you will probably only ever use POST and GET
Request
These are either the GET args or the body args for other method types. There are number of different request editors. These can be extended as we will go over in the extending guide
Return Type
Expected data type return of the API.
Data Key
If your API sent back an object, this is the key you wish to loop over.
Cache
Caches are stored in the wordpress temporary directory. They rely on file modified time. These are all deleted either through the Cornerstone Clear Cache button in settings, or through a server reset. The server reset can be bypassed by changing the cache directory from /tmp/ to a folder the server will not delete on restarting. Cache keys are created based on endpoint and request data. Meaning that using the same exact endpoint and request will only ever trigger once on a page, even if it is used multiple times. They all the work the same, minus the return type File Return which has additional caching for the public file it creates.
// Changing the cache directory
add_filter("cs_api_cache_directory", function() {
  return '/opt/cornerstone/';
});
HTTP Options
HTTP Connect, Connect, and Follow Redirect can all be controlled. Follow Redirect should only be used on domains you trust, as subsequent redirects will not check the allow list.
Global Endpoints
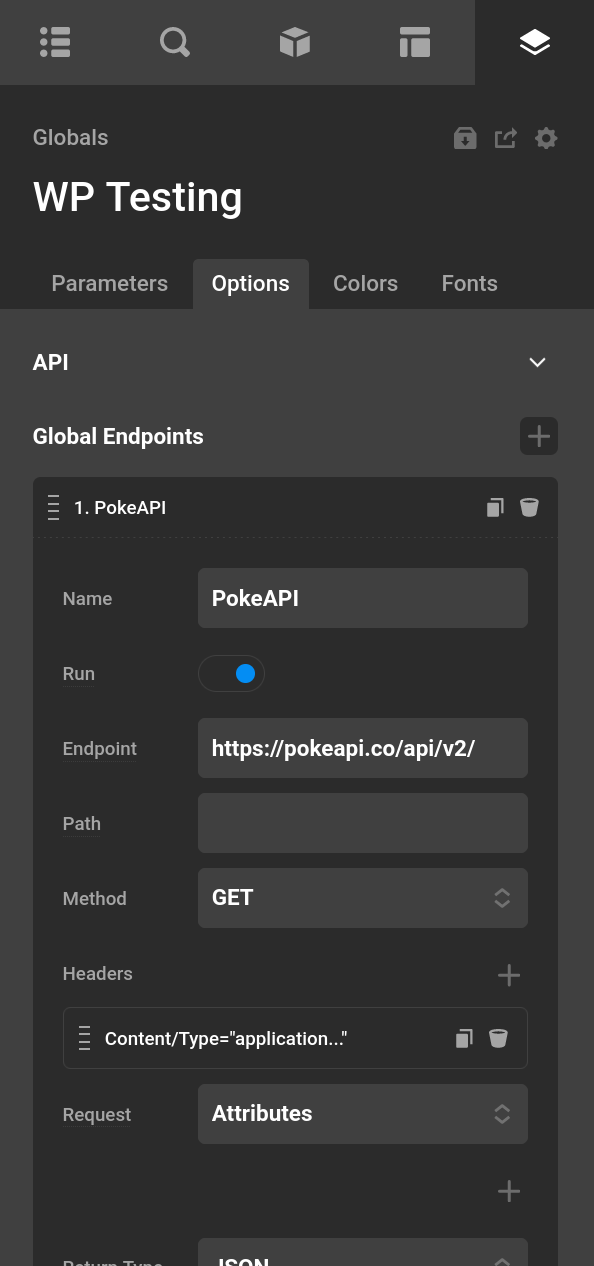
Found in the Theme Options when the External API is enabled, is the Global Endpoints editor. Add a number of different External APIs that you can either extend from or use directly in a Looper or Dynamic Content.
Creating a Global Endpoint
Identical to the Looper controls, each item in this list is a different endpoint. Pressing the "plus(+)" button will add a new one. You can also duplicate and delete once these have been created.
The different between the Looper and a Global Endpoint is that a Global Endpoint has a name field. You will refer to this name later when you use we begin using this global endpoint.
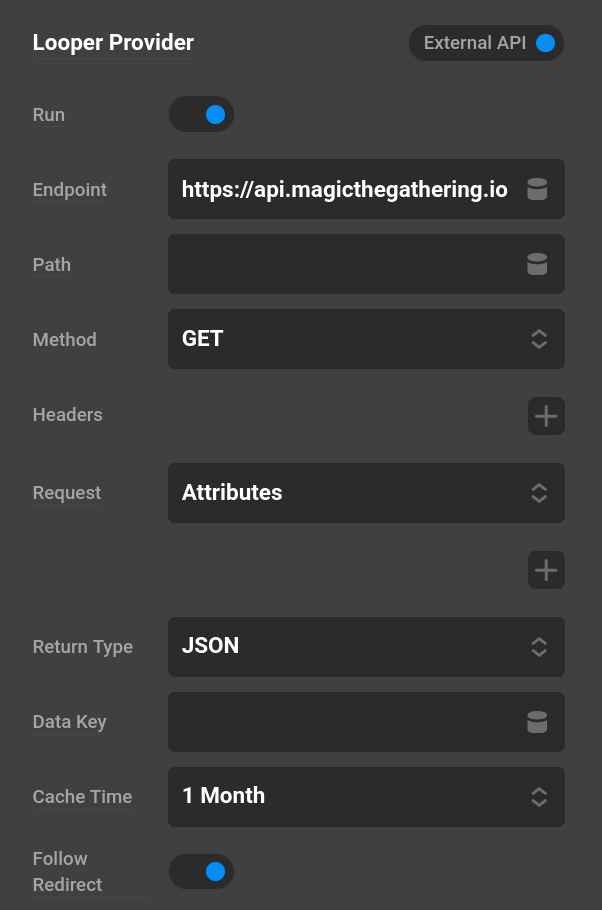
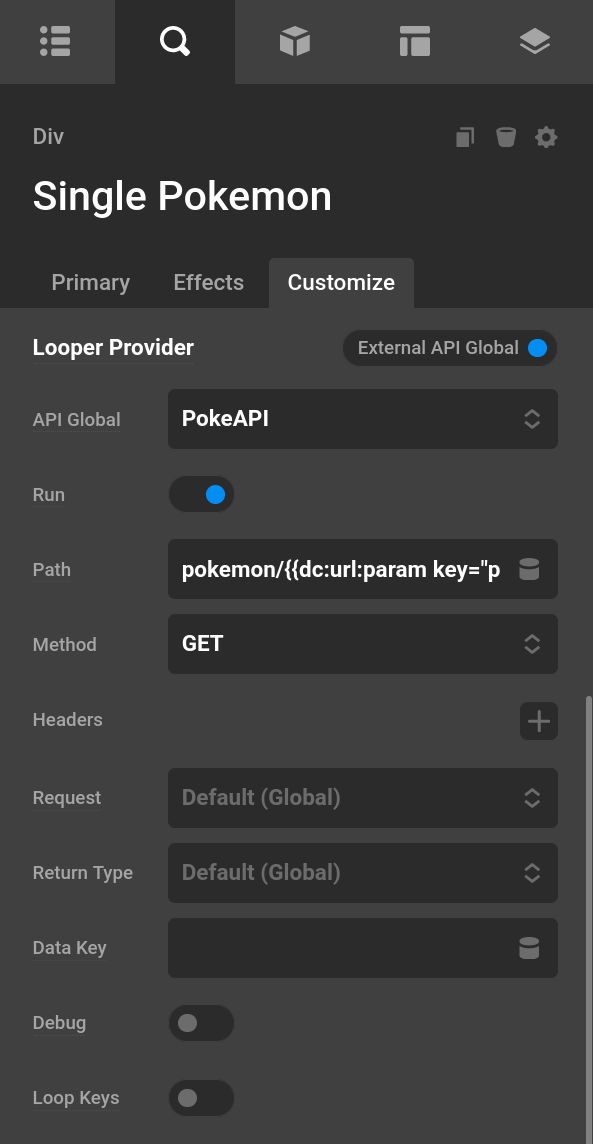
Using a Global Endpoint
Also avaible to you as a looper is the API Global. Select one of your global endpoints from the select box. Any value you use here will overwrite the Global Endpoint or if left blank will use the Global Endpoints value. Headers and Bodys merge eachother if applicable, in contrast to the other values. This is useful because you can share the same header values and endpoint, but change the path. Reusing a lot of data and speeding up your building process.
Request Types
There are a number of different request types built in and can also be extended using the . Requests will convert their data to JSON for non GET methods. Meaning that if a method is GET it will autoconvert the attributes into a query string. Example { "search": "test"} ends up getting converted to search=test and appended to your endpoint and path.
Attributes
Attributes let's you dynamically add new parameters by pressing the plus (+) button.
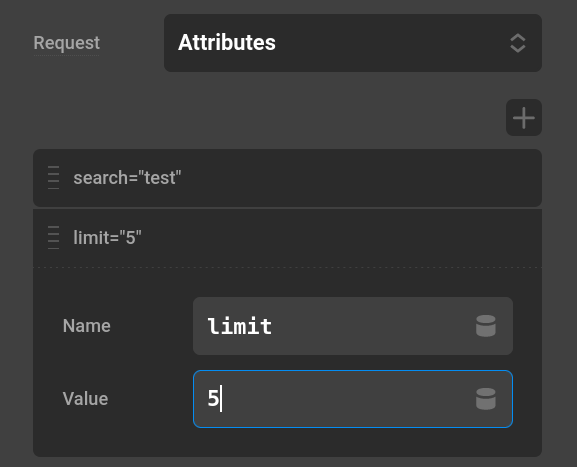
Will get converted to search=test on a GET request. On any other method it will auto convert to JSON.
JSON
Straightforward editor and useful for more complicated requests. Most API documentation will display a sample request as JSON. You can effectively paste in that same JSON here.
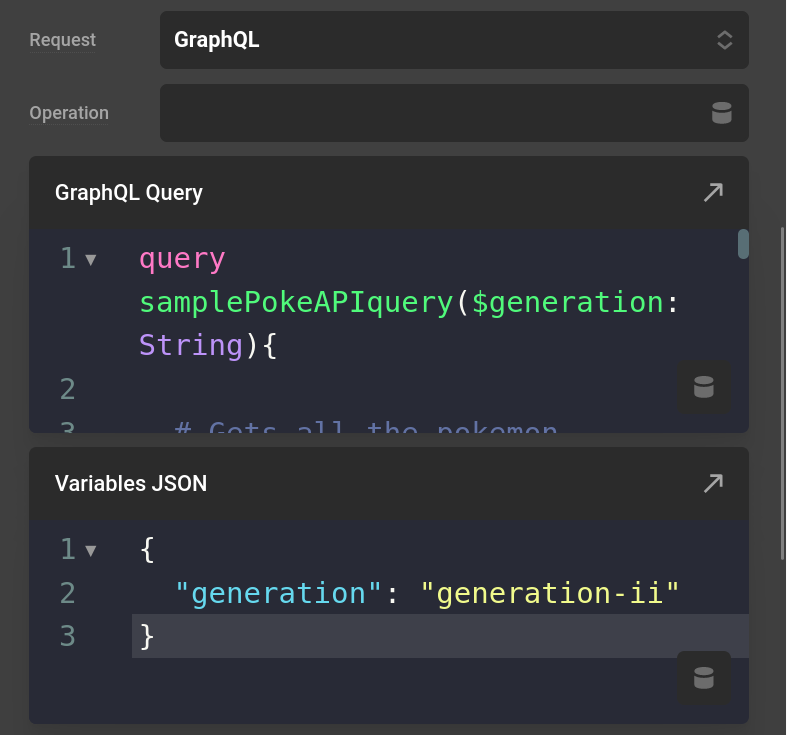
GraphQL
GraphQL is a query language for APIs. The query and variables JSON are both code editors available to you.
Raw
A code editor with no syntax highlighting. Useful if using a custom data format.
Return Types
JSON
The default and easily the most used by APIs. GraphQL endpoints almost always return this format.
XML
This requires php-xml or the functions xml_parser_create and xml_parser_set_option defined
XMLs don't share a 1-1 equivilant with a standard array. As a result the built in XML return type does some formatting to keep parity with what you might expect from another piece of Cornerstone data. Start with the API Tester template to get an idea of what the keys will look like. The following changes are made in the data format.
- XML attributes are keyed by
{TAG}_attr - Lists of elements like
itemin an RSS feed, use the keyitemand store all tags of this type as an array inside this key
So given the following XML
<note>
  <to href="https://example.com">Tove</to>

  <item>Item1</item>
  <item>Item2</item>
</note>
Assuming we are looping through other note tags
{{dc:looper:field key='item'}}would be an array of the tags that useitem{{dc:looper:field key='to_attr.href'}}would get an attribute of thetotag and also grab thehrefproperty
YAML
this requires php-yaml or the function yaml_parse defined
File Return
Certain APIs can return binary data such as an MP3. Use this return to then save that file, and return a public URL usable by say the Audio element. This is saved in the wordpress uploads directory. It is cleared through the same caching methods as other requests.
Working With Response Data
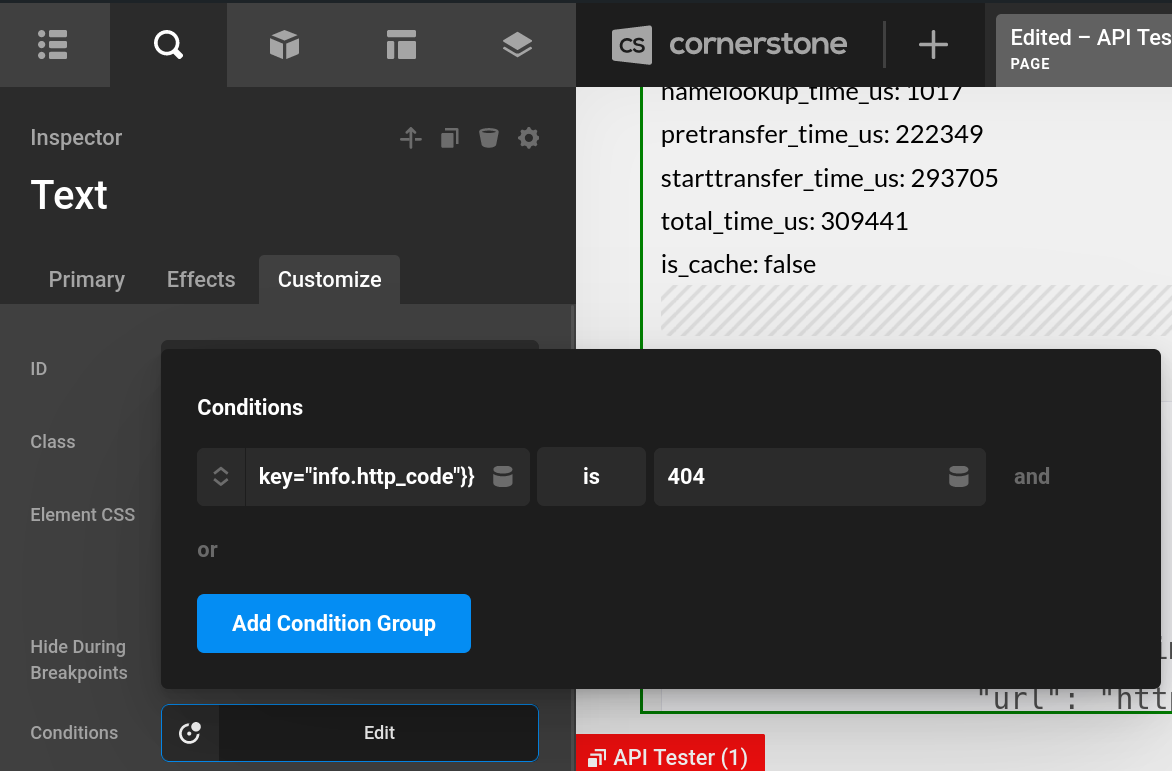
By default the results of the Endpoint will be sent directly as the looper data. When a request is running in Debug mode you will be sent an object with a key response which has your actual response data, errors which is API errors as well as Cornerstone errors like not in the allow list, and finally info which sends all request related info back to you for further use. The Info section of the API Tester is actually a list of the info data. Each left hand value is the key you would use. Example Dynamic content for the is_cache property would be {{dc:looper:field key="info.is_cache"}}
HTTP Status Codes
Stored as info.http_code when running in Debug mode. When used in a looper the Dynamic Content would be {{dc:looper:field key="info.http_code"}}. this can be used for display, conditions, or wherever else you can use Dynamic Content. See the picture below of using the status code 404 as a condition to display an element or not.
Status code follow 5 major groups as you can see here. If you were using a condition to detect "Server error response", you would use number condition that checks {{dc:looper:field key="info.http_code"}} >= 500 And also check {{dc:looper:field key="info.http_code"}} <= 599
Summary
The External API is a powerful feature that will allow you to connect with any 3rd party API and pipe that data directly into WordPress via Cornerstone. We have covered various options for how you can create those connections and shared best practices for using this advanced feature.
See Also
See something inaccurate? Let us know